The Expanding Frontier

Creating Sci-fi RPG Resources

  • Home
  • Order a Map
  • Order Miniatures
  • Supporters
  • About
  • Bio

Category Archives: Optional Rules

Void Jumping, Acceleration, and Other FTL Nuggets

This post is going to get a little bit math heavy toward the middle. Just warning you now.

The idea for this post stemmed from a recent discussion on the Star Frontiers: Alive and Well Facebook group talking about the accelerations involved in faster than light (FTL) travel in that game. I’ve written about this many times over the years on forum posts but since I can’t seem to find those posts (I think some of them at least are on the now defunct forums at starfrontiers.org), I’m going to do it one more time here on this blog as a permanent reference. But before I dig into the details of the math and physics, I’m going to share some links to other posts I’ve made that I do still have.

Other Posts

First up we have a post from 2010 on Void Jumping on my Star Frontiers Network site. I don’t think this article is linked from anywhere anymore so this will help to bring it back to life. This essay talks about some of the issues associated with making a Star Frontiers style void jump for FTL travel. This essay was the basis for the sci-fi novel, Discovery, that I published back in 2011 (has it really been that long!).

Next, in 2015, when I was still writing on the Arcane Game Lore blog, I did a series of posts on Void travel that expanded and refined those ideas a little more in the direction of a personal sci-fi game I work on off and on. The first two of these posts were actually part of the November 2015 RPG Blog carnival.

  • The first is an article on Void Travel Sickness. Not really relevant to this discussion but fun none-the-less and falls under the “nuggets” heading.
  • The second, Your Final Destination – Exiting a Void Jump, talks about variations in your arrival at your destination. The blog carnival topic that month was “Surprises” and both of these articles were things that could add surprises or randomness to your FTL travel. I actually recommend you read this one after the next one as it talks about things at the end of the journey but it can be read first.
  • The third (and final) article in that set was part of my “Designing out Loud” series of articles where I talked about game design decisions and ideas. This one was entitled “Designing Out Loud – Void Jumping” and expanded on the ideas in my 2010 article.

While you don’t necessarily need to read those article to follow along with the following, it definitely wouldn’t hurt.

Void Jumping

The concept of the Void Jump was introduced with the Knight Hawks supplement in Star Frontiers. In the original rules (renamed to Alpha Dawn when the Knight Hawks rules came out), there were no spaceship rules and it just said to treat interstellar travel at the rate of 1 light year per day.

So how does it work? According to the rules, you make a jump by leaving your starting point and accelerating until you reach 1% the speed of light. At that point you “jump” into the Void. To get out of the Void, you just have to slow down slightly. While you’re in the Void, you travel amazingly fast, on the order of 1 light year per second (The rules don’t actually so but imply something close to that so that’s the value I use). Once you jump into your destination system, you swing the ship around and start decelerating. Remember, there is no artificial gravity in Star Frontiers so this acceleration and deceleration is what provides gravity in the ships. Most ships make these trips accelerating at 1g.

So how long does this take? For these calculations, we’ll take 1 g to be equal to 10 meters per second squared (m/s/s) of acceleration. On Earth we define 1 g to be 9.82 m/s/s but rounding up to 10 just makes everything easier and its less than a 2% difference.

Okay, here comes the math.

If you start at rest, your velocity at any given time is just:

v(t) = at

where v is velocity (in m/s), a is acceleration (in m/s/s), and t is time (in seconds). Technically v and a are vectors but we’ll just worry about speed, not direction.

Now, the void jump occurs at 1% the speed of light. We’ll take the speed of light to be 300,000,000 m/s. It’s really 299,792,458 m/s but we’ll again round up to make the math easier. The difference is less than 0.07%. Good enough for this discussion. 1% of that is just 3,000,000 m/s. That’s our target velocity.

Since our acceleration is 10 m/s/s, dividing 3,000,000 m/s by 10 m/s/s gives us 300,000 s of acceleration needed to reach jump speed. That works out to 83 hours and 20 minutes of acceleration. Given that a standard day in Star Frontiers is 20 hours long, that is 4.17 days.

That’s the time to get up to jump speed. It takes that much time to slow down on the other side as well. Which means at a minimum, an interstellar jump takes 8 and 1/3 days, assuming everything lines up perfectly (see the Exiting the Void Jump article for things that might lengthen that).

That’s the time required. What about distances covered? The equation for position is just the integral of the velocity equation above. Again, for starting at rest, and assuming that you measure the distance from your starting point, your position at any given time is given by:

x(t) = \frac{1}{2}at^2

where x is your position in meters. We know what t is from the velocity equation above is 300,000 s. a is just 10 m/s/s. Plugging these in gives us a distance traveled of 450 billion meters or 450 million kilometers. (A lot of people forget that factor of a half and end up with the wrong number.) Now the distance from the Earth to the Sun, called an Astronomical Unit (AU), is 150 million kilometers (again I’m rounding, the actual value is 149,597,871 km so the rounding is less than 0.3%).

So in those 4.17 days of acceleration, you traveled 3 AU. If you started at Earth and headed straight out from the sun, you’d be 4 AU from the Sun. That’s most of the way from Earth’s orbit to Jupiter’s orbit (at a distance of 5.2 AU from the Sun). That distance puts you well beyond the main asteroid belt which ends at 3.3 AU.

Now, these numbers all change if you use a different acceleration. Doing those calculations is left as an exercise for the reader.

ADF and the Board Game Rules

The above all works just fine. The problem comes when you start looking at the rules for the spaceship combat board game and try to rationalize those rules with the math above.

From the board game, we have that one hex is 10,000 km and one turn in the game is 10 minutes of time. Added to that is the ship’s statistic, the Acceleration/Deceleration Factor (ADF) which is described as the number of hexes that a ship can speed up or slow down in a given turn. The fastest ships (fighters and assault scouts) have and ADF of 5.

Let’s look at some numbers. First, what is Void jump speed on the game map. Well, jump speed is 3,000,000 m/s or 3,000 km/s. Since a turn is 10 minutes or 600 seconds, that works out to 1,800,000 km/turn. Given that a hex is 10,000 km across, that works out to a speed of 180 hexes per turn. Since the game map is only 54 hexes wide, you’ll never get to that speed in the game.

The problem comes when people start looking at ADF as acceleration in gees, i.e. that 1 ADF = 1g of acceleration. If you make that assumption, then accelerating at 1 ADF per turn, it would take you 180 turns to get to jump speed from rest. 180 turns at 10 minutes per turn means that it would take just 1,800 minutes, or 30 hours, significantly faster than the 83.33 hours calculated above. Obviously 1 ADF cannot equal 1 g.

So let’s work that out. 1 ADF represents a change of velocity of 10,000 km per 10 minutes in 10 minutes (or 100 km/min/min). That’s an acceleration, just not in the normal units of m/s/s. So lets convert them:

\frac{10,000 km}{10 min * 10 min} = \frac{100 km}{min^2} = \frac{100,000 m}{60 s * 60 s} = 27.778 \frac{m}{s^2} = 2.78 g

So we see that 1 ADF is really 2.78 g of acceleration. You’re not going to sustain that for 30 hours and have anyone in any sort of condition to function unless severe precautions are taken. Heck, even sustaining that for 1 turn (10 minutes) is going to be rough. It’s doable, that amount of acceleration and duration is roughly equivalent of a launch to low Earth orbit with modern rockets, but you wouldn’t want to keep it up for a long time.

That also raises another issue. 5 ADF is actually 13.89 g of acceleration. And Star Frontiers doesn’t have any sort of artificial gravity tech. Pulling those kind of maneuvers is a little unrealistic. (There are discussions about using interia screen tech to help with this but that’s a different article.)

There are a couple of solutions to this. One, which is the one I use and which is probably the simplest, is a willing suspension of disbelief. The board game rules are just that, rules for a board game that simulates (sort of) spaceship combat. There are other issues with the board game physics besides this one, so I don’t expect it to represent “reality”. It’s a fun way to approximately simulate spaceship combat.

Another option, which immediately removes the 1 ADF not equaling 1 g issues, is to change the size of the hexes in the board game. Simply saying that they are 3,600 km in size instead of 10,000 km, makes 1 ADF = 1 g. If you keep the range of weapons the same (measured in hexes as they are described in the game rules, the only thing that really changes is that any planet counters you put on the map have to take up 7 hexes instead of just 1. And it might tweak the gravity rules a bit, but not significantly. This doesn’t solve some of the other problems, however. That’s a whole different post as well.

How I Apply This In Game

So how do I use this?

Basic Application

For most ships, I assume that they have two astrogators that can work in alternating shifts around the clock to do jump calculations. Since the rules say it takes 10 hours of calculation per light year traveled. And since it takes over 80 hours of travel time to get to jump speed. This means that any jump of 8 light years or less takes the same amount of time, namely 8.5 days, which I typically round up to 9 for maneuvering around the station and slight variations in arrival location (see my linked posts). And actually, since I round this up to 9 days, it play it that jumps of 9 light years or less all take 9 days, regardless of distance. Each light year beyond 9 adds a half of day of travel time to allow for the calculations. This is how I calculate the travel times for ships in my Detailed Frontier Timeline.

Again that assumes that they have two astrogators. If not, jumps take significantly longer, namely one day per light year traveled, plus 4.5 days to slow down at the destination, with a minimum of 9 days total travel. So in this case, jumps of five light years or less take 9 days, and each additionally light year adds a day on to the jump time.

Now I do allow the jump calculations to be started before the ship leaves it’s berth, assuming the crew knows when they plan to leave (to within a day or so). But because the planets and stars are always in motion, and the jump calculations have to be done for each specific jump, no more than half the calculations can be done in advance. The rest must be done “in flight.” For me this represents the tweaking and refining of the ship’s course in preparing for the jump that I discuss in the other articles I linked. But that means that even for a ship with a single astrogator, they can reduce the flight time if the astrogator gets started before they leave on the longer jumps.

Traversing multiple systems in a single trip

Another aspect of this is what I like to call the “high speed transit.” This occurs when the ship wants to traverse several star systems but doesn’t need to stop in each one. In this case, the first jump starts as usual, but once they traverse the Void the first time things change.

In each system after the first, until they reach the final system that they want to stop in, they don’t decelerate, at least not appreciably. But rather remain near jump speed, either drifting or, if they want gravity, decelerating for a few hours, flipping around and accelerating, and repeating until they are ready to jump. During this time the astrogators work on the jump and the engineers do any needed engine overhauls. The amount of time spent in system is just the longest of those two activities. Once that’s done, they nudge into the next system and repeat until they arrive at the destination system where it then takes 4.5 days to slow down.

Let’s look at an example: The UPFS Stiletto, an assault scout, is on patrol in Truane’s Star and has orders to get to Dramune as quickly as possible. This route has 4 jumps:

  • Truane’s Star to Dixon’s Star – 5 light years
  • Dixon’s Star to Prenglar – 5 light years
  • Prenglar to Cassidine – 7 light years
  • Cassidine to Dramune – 4 light years

Using normal jumps, these are all less than 9 light years so each jump would take 9 days for a total of 36 days.

Rather than do this, let’s look at what this takes using the high speed transit option. According to the rules, engine overhauls take 60 hours minus 1d10 hours for each engineer level. The rules also say that Spacefleet ships typically have level 4 engineers. That means that on average, it will take 38 hours to overhaul each engine. We’ll assume that there are 2 astrogators and 2 engineers onboard the Stiletto. This is what a high speed transit looks like in this scenario:

  • Accelerate out from Truane’s Star – 4.5 days – plenty of time to do the 50 hours astrogation calculations
  • Transit Dixon’s Star – astrogation calculations take 50 hours (2.5 days of round-the-clock work), engine overhauls only take 38 hours of work, but since there is only one engineer per engine, they have to sleep. So these are the slow part, taking 4 days – so after 4 days, they jump to Prenglar
  • Transit Prenglar – astrogation will take 70 hours (3.5 days of round-the-clock work). This one is closer but the 4 days of engine overhauls is still the limiting factor. After 4 days they jump to Cassidine.
  • Transit Cassidine – Here the astrogation calculations only take 40 hours (2 days of round-the-clock work) and the astrogators get a bit of a break while the engineers finish up. After 4 days, they make the jump to Dramune
  • Decelerate in Dramune – it takes 4.5 days to slow down and arrive at Inner Reach.

All told, this trip takes only 21 days instead of the baseline 36, saving 15 days of travel. The crew might be a little tired, but they made it without taking any risks.

If you only had 1 astrogator and two engineers, one level 3 and one level 2 (more likely on a merchant ship or PC ship), the transit looks like this:

  • Accelerate from Truane’s Star – 4.5 days, same as before. We assume the astrogator got started before they left.
  • Transit Dixon’s Star – Astrogation takes 5 days, engine overhauls take 43.5 for the level 3 engineer and 49 for the level 2 engineer. The level 3 engineer can help the other engineer once they are done so the total time to do the overhauls is five days – Time in system 5 days.
  • Transit Prenglar – In this case the limit is the astrogation which takes 7 days. Time in system, 7 days.
  • Transit Cassidine – This time the astrogators win and the jump is waiting on the engineers – Time in system, 5 days.
  • Decelerate in Dramune – 4.5 days.

Total time: 26 days. Takes a little longer but still faster than the base 36 hours. If there was only one engineer, it would actually take longer than 9 days per system as one engineer just can’t do engine overhauls on two engines in each system that fast (unless they are level 5 or 6). You might as well stop over in the station each time unless you have a reason not to go into a system.

Final Thoughts

That’s it for this post. There are other aspects of the travel that I could talk about such as vector movement, the process of lining up for a jump, what happens to your calculations and alignment when you have to maneuver for a combat or something else, and a discussion on how long those alignment efforts take anyway. Some of those ideas I touched on in the posts I linked. I might look at these again in a future post or two as well.

What are your thoughts? What questions do you have? Share them in the comment section below.
September 15, 2020 Tom 1 Comment

Starship Construction in the Frontier

Way back in issue 10 of the Frontier Explorer (has it really been over 5 years?!?) I wrote an article entitled “How Many Ships Are There?” (p.27) where I examined the number of starships that could be supported in the Frontier given the stated number of starship construction centers and the ship construction and maintenance rules.  The answer came out to be around 1500 ships, not a lot to spread around the 17 systems and Spacefleet.

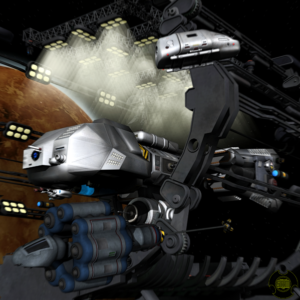
Starship construction image by Scott Mulder

In that article I talked about some of the implications of that small number and some of the ways you could increase the number of ships flying around.  If you haven’t already read that article, I recommend you do so as I’ll be building on some of the work there. Although it’s not necessary to follow along.

While I’m very much in favor of small ship numbers, I think that even this is too small for the setting and in this post I’m going to examine the numbers and methods of ship production and maintenance and see what impacts that has on ship numbers.

At least part of the desire to look at these numbers stems from some campaign background work I’m doing related to the Second Sathar War and how the Frontier would respond to the new Sathar incursion.  So let’s get started.

The Baseline

To start with, we need to have an idea of what the base production and maintenance rate in the Frontier is so we can see how changes we make affect that.

When I wrote the article for the Frontier Explorer, I created a Python program that would simulate the starship construction centers, their waiting queues, and handle all the book keeping. That is how I generated the numbers for that article. So the first step was to dust that off and get familiar with the code again. If you’re interested, it is in this GitHub repository. There is no documentation and it’s really rough but you’re free to play around with it.

There are actually two different programs in there. One is the simulation I used for this post and the Frontier Explorer article and the other is one I’m using to keep track and generate the sathar starship construction efforts for the Detailed Frontier Timeline project. Both are really rough (although I do have some unit tests). Caveat emptor.

Since we’re just going to be looking at variations, I’m not trying to reproduce the exact numbers from the Frontier Explorer article. In fact, I’m going to use a very different distribution that gives me more ships as a baseline than the number from that article.

For this article, the distribution I’m going to use is one that has roughly equal numbers of ships hull size 1 to 10 (~6.6% each) and then falling off beyond 10 so that there is only about a .5% chance of building a HS 20 ship. This weighs the distribution toward smaller ships. As I pointed out in the original article, the smaller the average hull size of the ships flying around the Frontier, the more ships the canonical starship construction centers (SCCs) can support. The average hull size of ship produced is 6.5.

I’m also making a few other assumptions. First, I’m treating these all as civilian ships, so any ship can be built at any SCC as long as it is less than that SCC’s maximum hull size limit. Also, I’m not factoring the hull availability rules into the simulation. I’m assuming any size hull is always available. Finally, I’m ignoring the “only system ships” restriction on the smaller Class III construction centers. I’m only interested in counts, not types.

The other “feature” of the simulation is that it doesn’t really handle the queuing of hulls waiting to be built in the best manner. It simply looks at the available space and finds the next ship in the list that will fit. What this means is that larger ships tend to get passed over as there is never any room for them. This also tends to skew the ships sizes toward the smaller hull sizes over time.

Image by Scott Mulder

With this ship distribution and those assumptions, the SSCs listed on page 9 of the Knight Hawks Campaign book can support about 2300 ships. Which is already a significant improvement over the 1500 ships from the original article. If you’re curious, reversing the distribution (ramping up to HS 11 and flat thereafter, only allows the system to support about 1250 ships).

Supporting More Ships

Now with that baseline, let’s look at increasing the number of ships we can support. There are several factors that go into the final number: total capacity, ship size distribution, construction time, and maintenance time.

I’m not going to play with construction time. That actually would have little effect on the total number as the steady state is purely based on the other factors, which are somewhat related to each other. Let’s look at some options.

Double the Number of SCCs

Image by Scott Mulder

The canonical set of SCCs has a total capacity of 510 point of hull size across the nine lists construction centers that can be under construction or in maintenance. Let’s start by just doubling that number. Let’s add 9 more SCCs across the Frontier that are clones of the existing nine. We’ll keep the other parameters the same and start up a new simulation.

Running the simulation with the increased number of SCCs results in the Frontier being able to support about 4100 ships, and increase of 1800 ships of about 80%. It doesn’t double as the increased capacity allows a few more larger ships to get built right at the beginning and the average hull size of ships produced jumps from 6.5 to 7. Since the average HS is larger, the total number is less than 2x based on the 2x capacity.

Planetary Small Ship SCCs

What if we try increasing capacity in another way. Instead of just cloning the existing SCCs, let’s give each planet a small SCC that can only build ships up to HS 5 and can handle 20 hull size points of ships at a time. This represents each planet being able to build and maintain it’s own fleet of shuttlecraft and small system ships separate from the main SCC.

If you drop those 22 SCCs (I didn’t give one to Volturnus) into the Frontier, that adds in another 440 hull size points of capacity. Since we should skew to smaller hull sizes being built, we would expect to get a good increase in the number of ships, possibly more than double. Unfortunately, that isn’t what happens. since we didn’t change the distribution of ships we’re drawing from, these small SCCs get underutilized. The total only goes up to about 2400.

I think a bit of this is a queueing problem so let’s just run a simulation with only those new SCCs, but using the same input distribution. I this case we get the system sustaining an additional 300 ships with an average hull size of 3. Still not exactly what I was expecting.

But that distribution doesn’t really make sense. And I think there is still some sort of bug in my code that isn’t doing the queuing properly. So let’s give these smaller SCCs their own queue and distribution. We’ll only pick ships from HS 1-5 for them to build and just make it a flat 20% chance of each hull size. Running that simulation give us that the smaller SCCs can support ~7000 additional ships with an average hull size 2.9. Dividing that between the 22 planets gives us an additional ~320 ships per planet.

Image by Scott Mulder (this was used in my Star Clash card game.

That definitely points to something strange happening with the queue when using all the SCCs in a single run. It’s supposed to be dropping the larger ships that are getting passed over after a while but that doesn’t seem to be happening. Or at least not fast enough to fill the smaller SCCs. I’m definitely going to have to look into the queue system I’m using and this may impact the baseline numbers as well (increasing them).

But that means that adding in these small SCCs at each planet increases then number of ships that we can have flying around from 2300 to nearly 9300, an increase of 400%. They are mostly small ships but that may be what you need for all the transport to and from the surface of the planet and within a star system.

Reducing Maintenance

The previous 2 variations just looked at increasing SCC capacity. What if we look at simply reducing the amount of maintenance that a ship needs in a SCC. If ships have to spend less time in the SCC for repairs, then that space is available for new ship construction.

The KH rules say a ship needs to come in every year for 1d10+HS days of repair. And every year they don’t adds a 5% chance of failure of a critical system on a jump and when they do finally get in adds 1d10 days of repair per year missed.

Let’s reduce that. For this try, we’re going to say that they only have to come in once every five years, and that it is still only 1d10+HS days of work to get the maintenance done. Maybe routine maintenance by the crew is enough. Maybe there are dedicated “repair yards” that can handle the work the other years. Whatever the reason is, we are not tying up the limited SCC space with ships undergoing maintenance. We’re going to jump straight to five year so we can see if this is a large effect or not.

Going back to our baseline configuration with just the canonical SCCs and the original ship distribution, this new maintenance requirement results in a new ship count of 6500 ships with an average hull size of 7.0. That’s an increase of ~280%. So we’re getting more and slightly bigger ships. I knew going in that the maintenance was the true bottleneck. I didn’t get quite as many more ships as I was expecting but it’s a significant increase.

However, the simulations I’ve been running only simulate 100 standard years. That’s usually more than enough time to reach a steady state and longer than the history of the UPF at the time of the Second Sathar War. Interestingly, in this simulation, it never really reached that steady state, the numbers of ships were still going up at the end of the simulation. So for fun, I rand both the baseline and the low maintenance option again for a 200 year simulation.

In that case, we did reach a steady state of the number of ships in the low maintenance simulation of 8500 ships with an average HS of 7.1. The baseline sim only went up to 2850 ships with an average HS of 6.25. We got more ships but on average they are smaller. So the low maintenance option represents an increase of 300% over that new baseline. But it’s going to take the Frontier some time to get to that level.

Conclusions

As expected, increasing the number of SCCs increases the number of ships that can be supported. The simulations have given some number to those increases. What I wasn’t expecting was the impact the queuing system I was using would have on the outcome. Obviously a queue that generates ships of the appropriate size for a given SCC distribution can have an effect on the final numbers.

What we found was that just doubling the number of SCCs with the same capacity profile basically doubled the number of ships. That’s probably a good rule of thumb. But if we increase the capacity and limit the ships to smaller hull sizes, we get a huge increase in the number of ships. Limiting the ships to HS 5 or less and with only an 86% increase in production capacity, resulted in a 400% increase in the number of ships.

The other unsurprising bit was that reducing the amount of maintenance required resulted in more ships being supported, I was expecting a nearly linear increase but that wasn’t the case. At least partially because we ended up with more of the larger ships which reduces the total capacity. What was surprising was in the low maintenance model, 100 years of simulation wasn’t enough to reach a steady state on the number of ships.

The truth is, you can have as many ships flying around as you want. If you have more, you can add flavor to your game to describe the extra ship construction capacity any way you want. Then just take the rules as written as the resources available to the PCs. There is more capacity out there, they just can’t access it.

What’s Next?

There are still more things to explore on this topic. Probably the most obvious is looking more closely as the algorithm I’m using to queue up the ships. That apparently has a bigger impact that I was realizing. It was supposed to model the process described in the rules for getting a ship into an SCC but maybe it’s not doing that well enough.

The other aspect might just be the ship distribution I’m generating. Another area to explore is looking more closely at the number and types of ships that are out there flying around and building up a “realistic” distribution based on that. I have looked at that issue in the past and maybe will do a post about it. It produces a different distribution than the one I used here but I’m not sure I really captured everything.

Another thing to consider is the distribution of SCCs. I did some fairly arbitrary changes for this article just to look at gross effects. A more nuanced look at increased capacity might be interesting.

What ideas do you have? Are there specific things you’d like me to explore? Let me know in the comments below.


April 28, 2020 Tom 4 Comments

A New Starship Construction System – part 5 – Engines Revisited

This post is a result of me thinking about the smaller ships: shuttles, fighters, even assault scouts. But especially the tiny hull size one and two ships. We’re going to look at an expansion of the engine size chart presented in part 2, adding in some new sizes and more data on the existing engines.

The first thing I was contemplating, and that I’ve know for a while, is that the Class A engines were way overpowered for the very small craft. If you took the stats for a fighter, it comes out to a total mass of about 263 tons. The thrust for a Class A Atomic or Chemical drive is 6250 and an Ion drive has a thrust of 3000. That mean the maximum potential ADF is 23.7 for the atomic and chemical drives and 11.4 for the ion drive. Well over the 6 ADF maximum and the 5 ADF specified for the ships. These smaller ships could easily get by with much smaller engines and still have the same performance. It had always been my intention to add in the smaller engine sizes.

The other issue that has been nagging at me lately is docking, specifically in bays inside a larger vessel. The system takes this into account and allocates bay sizes based on the size of the ship and includes the mass of the docked ships in the ADF calculation. Except the final sizes of the ships don’t include size or mass of the engines! I had originally hand-waved that away saying that the engines were rated to propel themselves plus provide X amount of thrust depending on the size and type of engine. For the larger ships, that’s fine. The engines are external to the ship and it’s really not going to dock inside anything else. But for the little ships, this is an issue and I need mass and volume values to make it all work out.

So that’s the task for today: Calculate the data for some smaller engines for the little ships, and come up with mass and volume values for all the engine types.

And then we can properly build and design assault carriers to hold our fighters (and maybe our assault scouts) and any ship that has one or more shuttles it houses internally. So let’s get started.

Smaller Engines


Gemini and Apollo rocket engines from Wikipedia

This is actually the easy part. I intended to make two additional sizes of engines, one about half the performance of the Class A engine, and a second one at half the performance of that.

The hardest bit for me was coming up with a nomenclature. Do I go with the engine size labels from model rocketry (1/2A, 1/4A) to match the A, B, and C sizes of model rockets? Or do I go the battery route and call them AA, and AAA engines. In the end, I decided to go the battery route. So the Class AA engine has about half the performance of the Class A engine, and the Class AAA engine about 1/4 the performance.

The only real constraint I had was that I wanted at Class AAA engine to still provide and ADF of 5 to the standard UPF fighter. Since that fighter has a mass of 274 tons (when configure, it has to provide a thrust of at least 1370.

The thrust ratios between the Class A, B, & C engines are on the order of 3-4. If I maintained that same ratio, then our AA engine at best would only have a thrust rating of 6250/9 = 694, about 700 which is too small. Of course 2 of them would give us the required thrust but all the depictions of the smaller ships are single-engined and I wanted to go with that.

So instead of going down by thirds, decided to go down by halves. Actually a little more in the case of the step from Class A to Class AA with the atomic and chemical drives. With that decision made, it was time to work out the values. That gives us the following table.

Engine Performance Table
Class AClass AAClass AAA
Engine TypeThrustCost (cr)ThrustCost (cr)ThrustCost (cr)
Chemical6,25050,0003,00028,0001,50015,000
Ion3,000100,0001,50055,00075030,000
Atomic6,250250,0003,000130,0001,50070,000

The values for the Class A engines are simply taken from the original post and provided for comparison. Additionally, we need the cost of fuel for each of these new engines types.

Fuel Cost Table
Engine TypeClass AClass AAClass AAA
Chemical30015075
Ion532
Atomic10,0006,0003,000

As with the larger engines, the atomic engines require the atomic fuel pellet at the prices listed plus a load of Chemical fuel as well.

Unlike the larger atomic engines, which can hold more than a single fuel load, the AA and AAA atomic engines can only hold a single load. Additionally, the smaller ion engines can only hold 5,000 fuel units instead of 10,000 like their full-sized siblings.

Volumes and Masses

Now for the harder part. Generating volumes and masses for these various engines.

Engine Volume

There really isn’t much go to on here. I could look at the miniatures, but they were created more for style than with any eye for consistency between the ships. There are also a few drawing in the game books that might be used as a reference. In the end, I did the following.

I started with my 3D model of the assault scout which is based on the drawings of the ship all through the books. I then assumed that this plus the wing of the assault scout represented the volume of the engine plus the fuel tanks needed to hold the three units of fuel for the engine. This gave me a volume, based on my models of 657 cubic meters. We’ll round that down to 600 cubic meters and call it good. That’s the volume of a Class A atomic engine and its associated fuel tanks.

Now, anyone who looks at real rockets will immediately realize that that isn’t a lot of volume for fuel. For example, the space shuttle’s external tank had a volume of just over 2000 cubic meters. And that’s enough to make one trip up, not one and back, let alone three trips. So we’re dealing with some amazing rocket propellant here (and really cheap too). But that’s okay, I’m willing to have handwavium as a fuel additive in our rockets.

The next thing we need is a scaling relation for the larger (and smaller) engines. It has to account for the larger fuel load in the larger engines, And remembering that for the atomic engines, we can hold additional loads over the three in the Class A engines. At the very least, it has to scale up as the thrust scales. But I want to add a little more on top of that.

At one point in the past, I had made 3D models of Class A, B, & C atomic engines. At some point when I created them, I had some rationale for why they were the size they were. I don’t remember that rationale now (and it may have been purely aesthetic), but I figured I could at least look at them and see what the relationships were.

In the end I decided that the scaling for the volumes would be 1.45 times the scaling in the thrust. That would provide a baseline and then I’d adjust the numbers slightly to get nice “round” numbers (i.e. 2800 instead of 2782.5). On the smaller engines, I adjusted things up bit making the engines slightly larger to account for “minimum” sizes for some of the components and fuel tanks. I also made some adjustments to the various types of engines to account for the type and amount of fuel they carry.

Engine Mass

This one was much easier as it was to be based off of the volume. In this case I just assumed an “average” density for each type of engine and its fuel. The question was what to pick.

Modern rocket fuels are actually very light, on the order of 0.7-1.0 tons per cubic meter, less dense than water. And liquid hydrogen, the primary fuel in ion engines, is amazing light at only 0.07 tons per cubic meter. On the other hand, the actual engine parts are going to be much more dense to withstand the forces and pressures being exerted.

So in the end I compromised. Chemical engines would have an average density of 2 tons/cubic meter, ion engines would be 1.5 to reflect their much lighter fuel, and atomic engines would be 2.5 to represent the additional components that give them their special properties.

Engine Data

With all of those items figured out we can now build the full data table on each of the engine types.

Chemical Engines

SizeThrustCost (cr)Fuel Cost (cr)Volume (m3)Mass (tons)
AAA1,50015,00075100200
AA3,00028,000150200400
A6,25050,000300400800
B20,000175,0001,0002,0004,000
C80,000770,0004,20012,00024,000

Ion Engines

SizeThrustCost (cr)Fuel Cost (cr)Volume (m3)Mass (tons)
AAA75030,0002100150
AA1,50055,0003200300
A3,000100,0005500750
B10,000400,000172,5003,750
C40,000200,0007015,00022,500

Atomic Engines

SizeThrustCost (cr)Fuel Cost (cr)Volume (m3)Mass (tons)
AAA1,50070,0003,000100250
AA3,000130,0006,000200500
A6,250250,00010,0006001500
B20,000400,00032,0002,8007,000
C80,0006,000,000125,00016,00040,000

Impacts

So how does this impact our smaller ships? Most importantly, I want to see what it does for fighters and digger shuttles, the two small ships that are explicitly included inside larger vessels.

Using this system before the changes to the engines, we had the following characteristics for the two ships:

  • Fighter – mass: 274 tons, volume: 136 m3, 1 Class A Atomic engine, Max loaded ADF: 22.8
  • Digger shuttle – mass: 1330 tons, volume: 641 m3, 1 Class A Chemical engine, Max loaded ADF: 4.7

If we were to just update these vessels with the data for the original engines, the volume of the fighter would jump to 736 m3 with a mass of 1774 tons, an increase of 441% and 547% respectively. The digger shuttle isn’t quite as bad as it was bigger to begin with but it would increase to 1041 m3 and 2130 tons, increases of 62% and 60%.

However, these ships don’t need this large of an engine. If its occupants could handle it, the Class A engines on the fighter give it a maximum possible ADF of 22.8. Since it is only supposed to have an ADF of 5, we can swap out the Class A engine for a Class AAA engine. It will still have a maximum ADF of 5.5. With that change, the the fighter now has a volume of 236 m3 (a 74% increase) and a mass of 524 tons (a 91% increase). Still larger, but much more reasonable and easier to pack into our assault carriers. It also reduces the cost of the fighter by 180,000 credits. Since the original cost was 528,151 cr., reducing that by 180,000 is a savings of 34%. And that makes the bean counters at Spacefleet happy.

The default Class A chemical engine on the digger shuttle gives it a maximum ADF of 4.7, well within the species limit of 5. However, it only really needs an ADF of at least 2 to get on and off planets, so here we can get away with a Class AA chemical engine. This still leaves the shuttle with a max ADF of 2.3, reduces the cost of the shuttle by 22,000 cr., and put the final volume and mass at 841 m3 and 1730 tons (increases of 32% and 30% over the original), making them easier to store in the mining ships. Since the digger shuttle was original 140,320 cr., the 22,000 cr. reduction saves nearly 16% off the cost of the shuttle.

And for the curious, the Assault Scout has a volume and mass of 3455 m3 and 2458 tons. Adding in its two Class A atomic engines brings its total volume up to 4655 m3 and total mass up to 5558 tons (increases of 35% and 126%). That makes it 20x larger and 11x more massive than a fighter. So it’s not unreasonable that special carriers might be designed to transport the larger ships.

Final Thoughts

I definitely like the direction of this change. The size of the fuel storage is probably unreasonably small, but that’s just going to be part of the fiction of our science fiction. The exact values might change as this sees a bit more play but I think it serves as a solid baseline to build on.

What are your thoughts and ideas on this update to the engines? Let me know in the comments below.

March 26, 2019 Tom 1 Comment

A New Star Ship Construction System – part 4 – Hull Types, Armor, and Sensor Systems

This is a continuation of the excerpts from the starship construction system. I had originally planned to have the how to draw a star system map post ready for today but I didn’t quite finish it. So I’m posting this one in its place and will have that one up next week.

This article will be about the various type of hulls that you can make you ship out of and the effects they have on the hull points and mass of the ship. In the new system I expand on the basic hull from the original rules to four different types that have different characteristics and costs.

While not related, I’m also including the section on the radar and energy sensors as that is another deviation from the standard system

Hull Type

There are four different hull types. Each type has a mass and cost associated with it depending on the hull type selected. Different hulls provide different amount of hull points for a given ship size.

Hull Type Cost multiplier Mass Multiplier Hull Point Multiplier
Light 35 cr * total volume 0.15 tons * total volume 0.6
Standard 50 cr * total volume 0.25 tons * total volume 1
Armored 100 cr * total volume 0.50 tons * total volume 1.4
Military 200 cr * total volume 0.40 tons * total volume 2

Light Hull – This is a light duty hull.  It costs and weighs less than a standard hull but only provides sixty percent of the hull points of a standard hull.

Standard Hull – This is the standard type of ship hull and provides the standard number of hull points.  This is the typical hull used on most civilian vessels

Armored Hull – This is the highest grade hull available to civilians.  It is twice as massive and twice as expensive as a standard hull and provides a forty percent increase in hull points over a standard hull.

Military Hull – Combining specialized materials and designs, the military grade hull is not available for civilian ships.  It is more expensive than even the armored hull although it doesn’t contain as much mass and provides double the number of hull points of a standard hull.

Example:  Obar Enterprises is designing a new mid-sized freighter that has 100 cargo units of space.  After selecting all the ship’s, the total volume of the ship is 18,453.2 cubic meters.  Selecting a standard hull gives a cost of 18,453.2 x 50 = 922,660 credits and a mass of 18,453.2 x 0.25 = 4613.3 tons.  This hull would have the standard number of hull points.

If the cost or mass were a concern, they could go with a light hull, which would have a cost of only 18,453.2 x 35 = 645,862 cr (saving nearly 300,000 cr) and have a mass of only 18,453.2 x 0.15 = 2767.98 tons saving nearly 2000 tons.  However, this hull would have a hull point multiplier of 0.6 or only 60% of the standard hull points.

Additional Armor

Sometimes even the strongest hull just isn’t enough and you want to add more armor to the ship. Once you have your base hull, you can add additional layers of protection to the ship as desired. This will greatly increase the cost and mass of your ship but won’t affect the volume.

You can add armor on to the ship to increase its hull points by up to 25% in 1% increments.  The cost of additional armor is 8 cr. per cubic meter of volume per percentage increase.  Thus to get a 5% HP increase it would cost you 40 cr. per cubic meter of the ship, nearly doubling the cost of a standard hull.  The armor adds an additional 0.016 tons of mass per cubic meter of volume per percentage increase.  Thus that 5% increase above would also add 0.08 tons per cubic meter of the volume of the ship.

The armor modifier for calculating the ships final hull points is just 1+(armor bonus/100).  So if my armor bonus is 20% the modifier is 1+(20/100) = 1.2.  This will be multiplied by the ship’s base hull points to determine the actual number of hull points the ship has.

Long Range Detectors

Radar

Radar systems are combination active/passive systems.  In active mode they send out pulses of radio waves and detect the reflected pulses.  In passive mode, they scan space for emissions from other ships.  The range of the radar system depends on its rating.  The higher the rating the more distant an object it can detect due to stronger emitters and more sensitive receivers.  It takes a lot of power and large transmitters to get returns from objects in the larger areas covered by the higher rated systems.  The listed range is the range for the active system.  In passive mode, the ranges are at least 10 times larger but can only detect targets that are radiating at radio frequencies.

Rating Range (km) Multiplier
1 300,000 1
2 600,000 8
3 900,000 27
4 1,200,000 64
5 1,500,000 125

Cost: 10,000 cr x Multiplier, mass: 15 tons x Multiplier, volume: 5 cu m x multiplier (7 cu m if aerodynamically streamlined)

Energy Sensors

These are broad spectrum radiation detectors that look at multiple wavelengths to detect radiation from ship systems.  They scan radio, optical, infrared, x-ray, and microwave wavelengths and have gamma-ray detectors to look for signatures from ships’ engines and power plants.  These are completely passive systems and like radar come in different ratings that have increased sensitivity.  The ranges listed are for detecting shielded, ship-sized energy sources against the cosmic background.  If an object is putting out energy emissions that are stronger than typical radiation leaked from ship systems, the detection range could be much larger.  For example, even a type 1 energy sensor suite will still be able to detect the system’s star at ranges of billions of kilometers.  Exact details are left up to the referee.

Rating Range (km) Multiplier
1 500,000 1
2 1,000,000 8
3 1,500,000 27
4 2,000,000 64
5 2,500,000 125

Cost: 200,000 cr x Multiplier, mass: 50 tons x Multiplier, volume: 20 cu m x multiplier

Thoughts

That’s it for the hull types, armor, and long range detectors. It’s a fairly simple change but allows for a wide range of ships with various characteristics and costs. Obviously the heavier hulls, armor, and larger sensors are going to require bigger, more expensive engines or suffer a performance penalty but sometimes you just need more hull points or a larger sensor range.

Share your thoughts, suggestions, and questions in the comment section below.

February 19, 2019 Tom 2 Comments

A New Starship Construction System – part 3 – Life Support

My previous posts about my new starship construction system generated a bunch of interest and several people expressed a desire to see more. So I thought I’d post up bits and pieces of this over a series of posts. I’ll start by posting the things that are new relative to the starship construction system in the Star Frontiers Knight Hawks Campaign Book.

I already posted the introduction the the “A New Starship Construction System” post back in early November. Although it wasn’t labeled as such, the “Starship Engines” post that came shortly after the first one was part 2 as that was taken from the new system as well.

The timing of these posts will be probably be fairly sporadic as I’m using them as filler between posts on other topics and when I’m working on things that I’m not ready to post about.

I’ve already posted about the engines. The next major change is the life support system which is the topic of this post. With each of these posts going forward, I’ll try to include some of the rationale and thinking behind the choices I made and the way I designed it. So let’s get going.

Design Considerations

One of the things that I found problematic with the life support system as described in the standard rules was that it always felt way too small. For example say you had a ship that could support 9 people. According the the standard rules, all of the life support equipment for the entire ship, including all the food, oxygen, and water for 200 days of operation would weigh only 9 kg (20 lbs)!

That 9 kg is split half and half between the equipment and the consumables so there is 4.5 kg (10 pounds) of equipment to get all that food, water, and air throughout the ship and then 4.5 kg of the food and water itself. Now I don’t know about you, but there is no way I can feed my family of 9 for a week, let alone 200 days on 10 lbs of food. Maybe if it was all just a nutrient pill that you took once a day that had all your calories, vitamins, and minerals. But I think even that is stretching it and definitely not very satisfying.

One could argue for transmutation/replicator technology ala Star Trek but that just doesn’t jive with the feel of Star Frontiers for me and I don’t want that in my game. Beside the rules state that the life support systems “include food storage and preparation, and water, atmosphere and wast processing and disposal.” (KHCB p 14) That sounds like it should include a bunch of machinery and storage space.

So looking at the life support systems I saw two things that needed to address. One was food storage and preparation, and the other was water, air, and waste circulation and processing. All of that was going to take up space. I needed to make sure the system had enough mass and volume associated with it to include all the various bits of machinery and storage and pipes and duct work needed to get the various bits around the ship as needed.

Another aspect was that I wanted it to be completely configurable by the ship designer. The default rules were for a 200 day supply in the system. Since I knew this new system was going to be bulkier, I wanted to give the option to go for a smaller system if you knew that was all your needed. For example, a shuttle, that just goes up and down from the ground to orbit probably doesn’t need a life support system that can go 200 days without recharging. It probably only needs a few days at most and so can have a much lighter system.

Related to that I wanted to have different types of system for shuttles, system ships, standard interstellar ships, and first class accommodations. Each of those have different requirements and therefore should have different costs, volumes, and masses.

Taking all of that into account results in the following system. The excerpt of the rules that follows assumes that you’ve determined the crew size and number of the various passenger cabins you will have on the ship before to select the life support system.

Life Support Equipment

Now that you know the number of crew and passengers, you can select the amount of life support equipment the ship needs. It is recommended that you have at least one backup life support system in case there are problems with (or damage to) the primary system.  The life support system includes a variety of systems such as air filtering and circulation, food preparation, sanitation facilities, and waste management.  Life support on starships are mostly a closed system, almost everything gets recycled.  However there are some consumables that do need to be replaced (mainly foodstuffs) every so often.

Your life support system needs to be at least large enough to support the crew and passengers.  Typically, ships are designed with a little extra capacity as a safety margin or for emergencies.  There are four basic levels of life support available for ships, depending on the ship’s needs:

Rudimentary – This is an air supply system only.  It doesn’t handle food or waste materials and just provides an air supply and air circulation system with filtering.  This is the life support system you find on launches, workpods, fighter craft, and other ships that are not designed to be occupied for a long time.

Basic – This level of life support adds basic food storage and preparation, sanitation facilities, and waste management to the air supply system of the rudimentary life support level.  Supplies are stored and consumed and waste material has to be removed regularly.  There is little to no recycling of materials except for air and water.  This level of life support is typical of shuttles and some short distance system ships that typically operate for only short periods of time between calling on bases where their life support can be resupplied and waste material removed.  It may also be found on some lifeboats.  While you could equip a starship with this type of life support system, making it large enough to support long missions uses up valuable space in the ship and tends to be more expensive in the long run.

Standard – This is the typical system for any starship.  It consists of complete air and water recycling, as well as recycling of waste material.  It typically includes some sort of hydroponics system for both growing fresh food and recycling carbon dioxide back into oxygen.  There are full food preparation facilities as well as complete sanitation facilities.  This level of life support is required for Journey class passenger accommodations.

Deluxe – This is a more advanced version of the Standard system.  It provides better recycling, larger food preparation facilities, more variety in the fresh foodstuffs, and better (nicer) sanitation and waste management facilities.  This level of life support is required for any First Class passenger accommodations.

A ship can have different life support levels for different parts of the ship.  This is quite common on passenger liners.  For example, if a passenger liner has 20 First Class cabins and 100 Journey class cabins.  It is not very likely that the owners will invest in Deluxe life support for the entire ship (although if they did, it would figure prominently in their advertising).  Rather they would invest in a Deluxe life support system to cover the First Class cabins and a standard system to cover the Journey Class cabins and the crew.

The volume listed for the life support system includes both the machinery and hardware for processing the air, water, food, and waste material as well as storage space for raw materials and duct work to move material around the ship.

Every life support system has two ratings.  The first is the maximum number of beings the system can support.  This determines the amount of mass and volume allocated for the life support machinery (pumps, filters, ducts, pipes, etc.).  The second is the maximum number of days that the system can support those beings without being refilled/recharged.  This determines the amount of volume committed to storage of life support supplies.

Base hardware costs and volumes per being supported

All values except base system volume are multiplied by the maximum number of beings the system can support at one time.

Type Cost Mass Base system volume Volume
Rudimentary 500 cr 0.2 tons 1 cu m 0.1 cu m *
Basic 1500 cr 2 tons 6 cu m 5 cu m
Standard 3000 cr 4 tons 15 cu. m 8 cu m
Deluxe 5,000 cr 6 tons 30 cu. m 10 cu m.

* This volume assumes you are equipping a small one or two room craft with this system like a fighter or launch.  If you try to put this into a larger ship the volume goes up by a factor of 10 for the ducting and pipes needed.

For example, our passenger liner has 20 First Class cabins and 100 Journey class cabins for crew and passengers.  It would need two life support systems.  The Deluxe system would support 20 beings.  It would cost 20 x 5000 = 100,000 cr, have a mass of 20 x 6 = 120 tons, and take up 30 (base volume) + 20 x 10 (volume per being) = 230 cubic meters.  The Standard system for the Journey class cabins would cost 100 x 3000 = 300,000 cr, have a mass of 100 x 4 = 400 tons and take up 15 + 100 x 8 = 815 cubic meters.  Thus the Standard system while being just a little more than 3x the size of the Deluxe system, supports 5x as many beings.

Supply cost per being per day

In addition to the base machinery costs, there is the cost of the food, air, and water needed for the beings on board.  Multiply each value times the maximum number of beings the system can support and then by the number of days you want to be able to support those beings without a reload/refill of the system.

Type Cost Mass Volume
Rudimentary 10 cr 0.05 tons .1 cu m
Basic 15 cr 0.15 tons .4 cu m
Standard 25 cr 0.1 tons .15 cu m
Deluxe 40 cr 0.15 tons .25 cu m

So if our passenger liner wanted to support its full complement of crew and passengers for 200 days without a resupply, the cost of the supplies and storage areas would be as follows:  For the Deluxe system the cost is 40cr x 20 beings x 200 days = 160,000 cr, the mass would be 0.15 tons x 20 x 200 = 600 tons, and the volume would be 0.25 cu m x 20 x 200 = 1000 cubic meters.  The standard system supplies would cost 25 cr x 100 beings x 200 days = 500,000 cr, the mass would be 0.1 tons x 100 x 200 = 2000 tons, and the volume would be 0.15 cu m x 100 x200 = 3000 cubic meters.

Thoughts and Comments

That’s the life support system rules in the the new system. Let me know what questions or thoughts you have in the comments below.

January 29, 2019 Tom Leave a comment

A New Starship Construction System – part 2 – Starship Engines

I was going to post another ship next but realized that I should probably talk a little bit about the way I redesigned the engines in my new starship construction system.  Otherwise, some of the bits of information about the ships won’t make sense.  I’ve published some of this on-line before but I don’t remember exactly where so I’m repeating it here for completeness.  Here is the section on engines from the starship construction system document.

Engines

Now that we know the mass of our ship, it’s finally time to determine its propulsion. Each type and size of engine is rated to have a specific thrust and fuel capacity. Your ship’s hull size determines the maximum number of engines it can support. You don’t have to have to fill all your engine slots if that number of engines is not needed to achieve the performance you desire.  And regardless of hull size and engine type, the maximum acceleration of any ship is 6g.

Hull Size Max Engines
1 1
2-4 2
5-8 4
9-12 6
12+ 8

(Note:  I didn’t even follow my own rules when I created the PGC C-10 Fast Courier as I gave it 4 engines at HS 4.  This is something I’m still thinking about/working on.)

Engine thrust is given as an arbitrary thrust rating that has been scaled to work with the mass of the ship as given in tons. To determine the maximum acceleration of your ship, add up the thrust ratings of all your engines and divide that by the total mass of your ship in tons. The resulting number is the maximum acceleration of your ship in multiples of one standard gravity (10 m/s/s). Round all fractions down to the nearest tenth of a g.

Chemical Engines

These engines use a high efficiency chemical fuel that burns and is expelled out the engine nozzle to provide thrust.  These engines are relatively cheap and easy to produce.  While very powerful, because of the large volume of fuel needed, these engines have limited capability in regards to how long the engines can operate on a single fuel load.  These engines are typically used for ground-to-space shuttles and system ships.

Ion Engines

Ion engines work by ionizing hydrogen and accelerating the resulting protons and electrons to high velocity and expelling them out the back of the engine to provide thrust.  Each engine contains a small nuclear reactor to provide the power needed to ionize the hydrogen and accelerate the particles to the relativistic speeds needed to generate thrust.  This reactor uses the same atomic fuel pellet as an atomic engine but only needs to be replaced once every 10 years.  The initial fuel pellet is included in the cost of the engine.

While not as powerful as chemical or atomic engines, Ion engine fuel is relatively cheap and if a ship is properly equipped, can be harvested from any gas giant for free. 

Because of the nature of the engine, ships with ion engines cannot land on or take off from planets.

Atomic Engines

An Atomic engine is a supercharged version of the chemical engine and uses the same fuel.  The engine works by generating a quantum field that temporarily increases the momentum of particles by a factor of hundreds. These temporarily super-massive particles are ejected out of the back of the engine to generate thrust for the ship.  Because each particle is effectively much more massive, less fuel is needed to achieve the same thrust and instead of a single fuel load lasting for only few minutes of thrust, it can last for days and allow the ship to accelerate to Void jump speeds.

However, generating this field requires a huge amount of energy (which is transferred to the particles) during operation.  To provide this power, each engine contains its own nuclear reactor, similar in design to the reactor in the ion engine.  However, the large power requirement of the atomic engine means that it consumes one atomic fuel pellet after only 10,000 minutes of full thrust operations (about 8.5 days) instead of the 10 year life span for the atomic fuel pellet in an ion engine.

In addition, atomic engines require an overhaul every few jumps, again depending on the size of the engines.  This overhaul is necessary to make sure that the quantum field generators are properly aligned and positioned to only affect the fuel and not the body of the engine itself.  The number of trips that a ship can go between overhauls depends on the size of the engine and is given in the table with the fuel costs below.

Engine Costs

The following table gives the cost and thrust values for each of the different types and sizes of engines.  Determine the number, size, and type of engines your ship will use and then record the engines chosen for your ship.

  Class A   Class B   Class C  
Engine Type Thrust Cost Thrust Cost Thrust Cost
Chemical 6,250 50,000 20,000 175,000 80,000 770,000
Ion 3,000 100,000 10,000 400,000 40,000 2,000,000
Atomic 6,250 250,000 20,000 1,100,000 80,000 6,000,000

Fuel

Next you need to provide fuel for your engines and determine how much acceleration each fuel load will provide for your ship.  Each engine uses different types of fuel and has different storage capabilities and requirements.

Chemical Engines

Each fuel load allows a chemical engine to operate at maximum thrust for 60 minutes.  This is typically enough to allow the ship to make one round trip between the ground and orbit or limited acceleration and maneuvering in space.  Each engine can only hold a single fuel load and must be refueled after each load is expended.  The cost of a fuel load depends on the size of the engine and is given in the following table.

Engine Class Cost of a fuel load
Class A 300 cr
Class B 1000 cr
Class C 4200 cr

Ion engines

Although not as powerful as chemical or atomic engines, these engines are reliable and can hold more fuel.  While they can technically run off any material, the fuel of choice is hydrogen.  Using any other fuel source decreases the thrust provided by the engines by a factor of two.  Each engine can hold 10,000 fuel units and each unit provides 10 minutes of operation at maximum thrust (A fully fueled ion engine can operate continuously for over 80 days without refueling).  A fuel unit costs 5, 17, or 70 cr per unit for Class A, B, or C engines respectively.

Once every 10 years, the atomic fuel pellet in the ion engine’s reactor needs to be replaced, the cost for this fuel pellet is the same as that for a similarly sized atomic engine.

Atomic engines

Like the other engines, Atomic engines store all their fuel internally.  The fuel for these engines consists of two parts.  The first is a load of fuel like the chemical rockets, the second consists an atomic fuel pellet (typically uranium) to power the reactor. The amount of fuel that can be stored depends on the size of the engine and is given in the table below.

Each atomic fuel pellet and load of chemical fuel provides enough fuel for 10,000 minutes (about 8.3 days) of operation at maximum thrust.  The cost of a fuel pellet depends on the size of the engine, given in the table below.  The cost of the chemical fuel is identical to that of the chemical engines of the same size.

Consult the table below to determine the number of fuel loads & pellets held and time between each overhaul for each engine size.

Engine Class Trips between overhauls Maximum Fuel Loads & Pellets loaded Cost per pellet (cr)
Class A 1 3 10,000
Class B 3 6 32,000
Class C 10 12 125,000

Compute total acceleration per fuel load

Acceleration is measured in ADF.  One ADF is defined as 10 minutes of acceleration at 1g. (For you Star Frontiers grognards out there, I’ve redefined the boardgame hex scale to 3600 km so that 1 ADF does equal 1g acceleration for 10 minutes, and 1 g is defined as 10 m/s/s not 9.8.)

If you want to keep it simple, you can simply assume the following:

  • a load of fuel in a chemical rocket provides just enough thrust to make one round trip between the ground and orbit around a planet or can provide a total of 8 ADF in space. 
  • Ion engines use one fuel unit per engine per ADF and a total of 1000 fuel units per engine for a single interstellar jump
  • Atomic engines use one chemical fuel load and one atomic fuel pellet for a single interstellar jump or the same fuel provides enough thrust for a total of 1000 ADF if operating solely in-system.

If you want to be a bit more exact and track the exact fuel usage you can do the following to compute the total number of ADF that a load of fuel will provide for your ship.  This will depend on the type of engine you have.  It requires more bookkeeping but actually results in less fuel being needed in the long run, sometimes significantly if the ship has a high maximum ADF.

  • Chemical Engines – Take the maximum acceleration you calculated for the ship earlier and multiply it by 6.  This is the total number of ADF your ship gets from using one load of fuel in each engine.
  • Ion Engines – The maximum acceleration calculated above is the number of ADF provided by expending a single ion fuel unit in each engine.
  • Atomic Engines – Take the maximum acceleration calculated earlier and multiply by 1000. This is the total ADF provided by using one unit of chemical fuel and one atomic fuel pellet in each of your engines.

Round all fractions down.  Assume that that small difference is used up in minor station keeping and maneuvering

Examples
Chemical Engine

Fully loaded a Digger Shuttle (HS 2) has one Class A chemical engine and a maximum acceleration of 4.7g.  Since it has chemical engines, the total ADF provided by the single load of fuel in its engine is 4.7 x 6 = 28.2 or 28 ADF.   

Ion Engine

A small (HS 7) freighter is equipped with four Class B ion engines.  Fully loaded, its maximum acceleration is 1.1g.  Thus by using up one fuel unit in each of its four engines, it has 1.1 ADF available.  If each engine carries it’s maximum fuel load (10,000 units each), the total ADF available to the ship is 11,000 ADF.  Since each interstellar jump typically takes 1000 ADF to complete, the ship can make 11 trips without refueling if it needed to.

Atomic Engine

The newly designed Swift class assault scout has a total mass of 2470.83 tons and two Class A atomic engines for a total thrust of 12500.  This gives a maximum acceleration of 5.059g which rounds to 5.0.  The total ADF available to the assault scout from one load of fuel in each engine is therefore 5×1000 = 5000 ADF.  After expending this much thrust, the assault scout will have used two loads of chemical fuel and two atomic fuel pellets, one in each engine.

November 9, 2018 Tom 1 Comment

A New Starship Construction System

I was going to start posting the designs for some new starships for Star Frontiers.  However, since I’m building them with my custom starship construction system, I realized that some of the bits of information won’t make sense for those that are familiar with the standard system.

I’ve been working on this system off and on for years but it’s finally at a point where it is usable.  While it’s possible to generate all the ships from the standard Star Frontier system, this system is a bit more flexible and allows for a wider range of ship designs.  And the ships created can be dropped directly into the existing game alongside existing ships.  At least in terms of boardgame statistics.  The sizes of the ships are somewhat different.

So before I start posting the new ships, I thought I should at least provide an introduction to this new system.  And I’ll do that by simply posting the Introduction section from the new rule system.  I’m working on polishing this up and will be releasing it sometime in the future.

Knight Hawks Starship Construction 2.0

This is an alternate ship construction system for the Star Frontiers RPG.  While all the components are the same as in the standard Knight Hawks rules, this system takes a more realistic approach to the construction of the starships that is based on the volume and mass of the ship’s components.  While the original Knight Hawks system is based on picking a hull size and then limiting what the ship could do based on that, in this system you pick the components of the ship based on what you want it to do and the capabilities and performance you want it to have.  The hull size is then just a function of the ship’s systems. 

From the perspective of both the Knight Hawks board game and general role playing, the resulting ships are nearly identical to those generated with the original Knight Hawks system.  The differences are mainly in size and cost.

The main differences are as follows:

  • Life support systems have more variety, are more detailed, cost more, and are bulkier than in the Knight Hawks rules.  They also scale more realistically as you increase the number of beings supported.
  • Hulls have more variety and are more expensive.  In addition to the standard hull, we introduce three additional hull grades that have varying cost, mass, and hull points.  Instead of the cost of the hull scaling linearly with the hull size of the ship, it now scales with the volume of the ship. 
  • Engines are more appropriately scaled.  Each engine type and size now has a thrust rating.  This, combined with the mass of your ship, gives you the acceleration that the ship can achieve.  The engine classes are scaled appropriately to provide proper amounts of thrust to move the bigger ships.  The costs are also scaled appropriately to the thrust provided by the engines.  Fuel costs also scale with engine size.
  • These ships are more expensive.  This is primarily due to the changes in the cost of hull, engines, and life support.  All three of these systems are more (and in some cases much more) expensive than the same systems in the Knight Hawks rules.  This was done for a variety of reasons but primarily to make the costs scale realistically with the size and capability of the systems as they grow larger.
  • Hull size is computed a little differently.  While it still scales exponentially with the volume of the ship, it has now been modified so that the hull size and volume are mathematically related instead of being arbitrarily scaled.  This has the result of making the smaller hull sizes larger than the corresponding hull size from Knight Hawks while the larger ships from this system are actually smaller than a ship of the corresponding hull size from the original rules.  For example, an average HS 1 ship in the new system is 64 cubic meters in volume which is double the size of a HS 1 ship in the original rules.  And HS 1 in this system goes up to 216 cubic meters which is nearly half the size of a HS 2 ship from the original.  On the other end, an average HS 20 ship in the new system has a volume of 512,000 cubic meters which falls between HS 11 and 12 in the original Knight Hawks system.  [Note:  This is something I’m not completely happy with and am still working on.]  Additionally, there is no upper limit on hull size.  You can build your ship as big as you have the budget for.
  • One final difference is that the definition of a cargo unit has been standardized to a specific volume.  This is more realistic than the Knight Hawks system of one cargo unit per HS since in that system you could increase the HS by 2 and double the volume but only increase the cargo capacity by 2 not doubling it even though the ship was vastly larger.  This change eliminates that discrepancy.  It also means that ships will have tens to hundreds to even thousands of cargo units of hauling capacity.  A future work will redefine the cargo tables to give prices and volumes to work with this new system.

Unless otherwise described, assume that all systems are identical to the systems described in the original Knight Hawks rules.

So what will I notice in the new listings

All of the old bits of information about the ships are still there.  What has been added are a few new descriptors related to mass, volume, and fuel consumption.

Now instead of just listing the hull size, the actual total volume of the ship is provided.  There are two parts to this.  One is the overall volume including the cargo areas if any, and the other is the “inhabited” volume, or the part of the ship where the crew lives and works that doesn’t include the cargo hold.  For vessels that are not primarily freighters these numbers are nearly identical.

In addition to the total volume, the mass of the ship, in tons, is provided.  Again this has two values, one for the ship with the cargo areas empty, and another for the ship with a full hull (which assumes 2 tons per cubic meter of cargo).  The ship’s ADF value is computed based on this full-loaded mass volume.  For most ships there isn’t a different between that and the unloaded value.  This isn’t true for freighters as unloaded, their engines can move the ship at much higher accelerations.

Finally, each listing provides a values labeled “ADF per fuel load”.  This value represents the total number of ADF that can be achieved by fully burning through a load of fuel in all of the ship’s engines and is related to the fully loaded ADF value.  These ships are actually more fuel efficient than in the original rules.  It takes 1000 ADF to make an interstellar jump (and stop at your destination).  Since most ships can run at an ADF of 2 or more, they only need a fraction of their fuel to reach jump speed and thus can make multiple jumps on a single load of fuel as long as they don’t run into trouble along the way and have to do a lot of maneuvering.

Playtesting

These rules are definitely a work in progress.  I’m starting up a play-by-post game that will involve a lot of ships and traveling so I plan on testing these rules out extensively during that game.

That’s the basics.  For my next few posts I’ll be sharing some ships that the PCs will have the option to buy as their starting vessel in that play-by-post campaign that are designed using this new system.

November 5, 2018 Tom 2 Comments

Void Sickness

Traveling through hyperspace ain’t like dusting crops, boy!

  • Han Solo, Star Wars

While a little out of context (Han was actually referring to astrogation calculations), the quote still applies – faster than light (FTL) travel is not just a walk in the park.

In this post, I want to look at a mechanic for FTL induced illness, which I’ll be calling Void Sickness.  The name comes because I created this mechanic for my Star Frontiers games where FTL travel is accomplished by traveling through “The Void” or “Void Jumping”.  In that game, you accelerate up to speed (1% the speed of light) and then make a nearly instantaneous transition into and out of the Void to cross many light years.  The rules are a little vague on the actual duration but I’ve always used 1 second per light year.  When you re-emerge you are in a new star system (hopefully your destination if you got the astrogation correct).

But what happens physiologically when you make the transition?  You are entering, even if it is briefly, a dimension your body wasn’t designed for.  It’s natural that your body may have an adverse reaction to the transition.

During the Jump

First there is the physical manifestations during the brief time in the Void.  I always describe this as a confusion of the senses.  You can feel colors, hear tastes, see sound, etc.  And it could be different for different species or even individuals within a species.  I often use this picture to describe the visual sensations.

Negative image of a ship cockpit with colors and gradients shifted to produce an unnatural color palette.But what I want to talk about today is what happens after you exit the Void.

Aftereffects

Many games don’t worry about this.  They just assume that the PCs and others can experience FTL travel with no worries or side effects.  And that is absolutely fine.  If having potentially negative consequences of FTL travel is not something you want in your game, then you don’t have to have it.  But if you do, this is a possible mechanic you can use.

In my case, I wanted to add a potential downside to FTL travel that starts out fairly benign and uncommon but becomes worse the more and more you travel.  Until it possibly reaches a point that you simply don’t want to make any more interstellar trips unless you absolutely have to.  Here’s what I came up with.

Void Sickness

Void Sickness is not an uncommon effect of FTL travel and some people are more susceptible to it than others.  But even if you are susceptible to it, it doesn’t affect you on every trip.  It is also a condition that worsens, with both increased susceptibility and symptoms, the more times you engage in FTL travel.

I’ll present this as a percentage based system (since that is what Star Frontiers, which I originally developed it for, uses) but you can easily convert this to a d20 or other system if you want.

Original Version

This is the original version of Void Sickness I developed.  It’s actually pretty harsh, I’ll present a much milder version below.

To see if you are susceptible to Void Sickness you need to make a check against your Stamina (or CON or the equivalent from your system).  Since STA in Star Frontiers typically ranges from 30-70, you make a STA+20 check the first time you make a Void Jump.  If you make the roll, you do not suffer from Void Sickness on this trip and your base chance to avoid Void Sickness on all other jumps starts at 95% (i.e. if you roll a 95 or lower on d100 you are not sick).

If you fail this roll, you are susceptible to Void Sickness.  You suffer from the sickness on this trip and your base chance to avoid it on future trips is equal to your STA score.  Thus you are much more likely to succumb to it in the future.

On all future FTL trips, you make a roll against your resistance score.  If you succeed, you do not suffer from Void Sickness for that trip.  If you fail, you do suffer and your resistance score is reduced by one.

The impact of the Void Sickness is determined by the amount you failed your roll.  The difference between your roll and your resistance score determines both the strength of the effect and its duration.  This value becomes the penalty you suffer on all skill and ability checks and it lasts for that many hours.

For example: Drod, a dralasite, has a STA of 50 and is making his first interstellar trip.  He checks for his susceptibility to Void sickness by rolling a d100 and rolls an 76 which is 6 points higher than this initial check (50+20 = 70).  He is susceptible to Void Sickness and going forward his resistance score is only 50.  For this trip he suffers a relatively mild case and only has a -6 modifier to his skills and abilities for the next 6 hours.  If on a future trip,if  he were to fail the resistance roll again, his resistance would drop to 49.

A Milder Form

In its original form, the Void Sickness is something that everyone will succumb to eventually if they take enough interstellar trips and if you have a string of bad luck, you could succumb to it fairly quickly.  If you want the effect to be fairly rare, and slower acting when someone does have it, you can use the following variation.  With this form, it is probably something the PCs will never have to deal with but you could have Void Sickness in your campaign as setting material to use on NPCs.

In this form, the base chance the first time you make a jump is a flat 95% on a d100.  If you roll less than that you don’t have the sickness and never will.  You never have to roll again.  If you do fail the roll, you have a mild case this time (you are not going to fail by more than 5 points) and your resistance roll going forward is equal to whatever you rolled this time. (i.e. if you rolled a 98, your resistance chance for all future trips starts at 98). The effects and increase in susceptibility are as before.

Mitigations

If the occurrence of this illness is common, there will probably be a number of ways to deal with it from drugs that boost your immunity to other drugs that mitigate the effects.  If the occurrence is more rare, there may only be drugs to mitigate symptoms and there may not be anything specifically for Void Sickness but only the use of regular drugs to treat the symptoms.  Here are some that I use in my game.  All these are required to be administered by someone with the Medic skill.

VoidBoost

Cost: 25 credits

VoidBoost is designed to improve a being’s immunity and resistance to Void Sickness.  If administered prior to the Void Jump, VoidBoost raises the recipient’s resistance to Void Sickness by 20 to a maximum of 95%.  Only a single dose of VoidBoost can be administered for any given trip.  Additional doses have no effect.

Most starliners stock this medication for their passengers.  It is either provided for free as part of the passage fare or at a discounted cost.

VoidBlock

Cost: 40 credits

VoidBlock is a broad spectrum medicine designed to reduce the effects of the symptoms of Void Sickness.  It has no effect on the duration.  It works by reducing the penalty to ability and skill checks due to Void Sickness.  VoidBlock reduces the negative modifier associated with Void Sickness by 1d10+10 for 20 hours.  No more than one dose can be taken in a 20 hour period.  Any doses taken beyond the first in that time automatically have no effect.  VoidBlock cannot be taken in conjunction with VoidReduce.  If it is, neither drug has any effect.

Most starliners stock this medication for their passengers.  It is either provided for free as part of the passage fare or at a discounted cost.

VoidReduce

Cost: 35 Credits

Void Reduce is designed to reduce the duration of the effects of Void Sickness.  It has no effect on they actual impact of the symptoms.  A dose of VoidReduce decreases the duration of Void Sickness by 1d10+10 hours.  Only one dose of VoidReduce can be taken for any given occurrence of Void Sickness.  Any additional doses automatically have no effect.  VoidReduce cannot be take in conjunction with VoidBlock.  If it is, neither drug has any effect.

Most starliners stock this medication for their passengers.  It is either provided for free as part of the passage fare or at a discounted cost.

Other Medications

Depending on your game system there may be other medications already in the game that can mitigate some of the effects of Void Sickness.  You can make a judgement based on the effects of the drugs in your game.  For Star Frontiers, I allow the following:

  • Biocort – one dose of Biocort reduces the duration of Void Sickness by 1d5+5 hours. Only one dose of Biocort can be applied for a given occurrence of Void Sickness.  If administered with VoidBlock or VoidReduce, Biocort has no effect.
  • Stimdose – one dose of Stimdose reduces the effects of Void sickness by 1d5+5 for 10 hours.  Only one dose of Stimdose can be administered in a 20 hour period as per the standard rules.  If administered with VoidBlock or VoidReduce, Stimdose has no effect.
  • Neutrad (from Zeb’s Guide) – one dose of Neutrad reduces the effects of Void Sickness by 1d5 points and its duration by 1d5 hours.  Only one dose of Neutrad can be administered for any given case of Void Sickness.  However, if administered with any other medication, none of the other medications have any effect.

Side note:  Due to the way Neutrad affects Void Sickness, scientists believe that Void Sickness is some form of temporary radiation poisoning but the exact form of radiation is unknown and not reproducible outside of a Void jump.  Many companies contract with ships to carry small micro experiments that run during the Void jump in an attempt to understand the cause of this illness.

Converting to Other Systems

Adapting this to another system is fairly straightforward.

If you want to use this in a d20 or 3d6 based system, You could simply multiply the relevant ability score by 3, 4, or 5 to get the initial base percentage for Void Sickness resistance if you wanted to keep with the d100 percentage system outlined.  The multiplier would depend on how likely you want the occurrence to be but by default I’d use 4 as that maps the closest to the ability score range that I designed against.  In any other system just use a suitable modifier.

If you don’t want to use the percentage based system but use the core mechanic from your system, simply reduce the percentage by the appropriate multiplier.  e.g. for a d20 based system simply divide the resistance chance by five (and subtract that from 20 for a roll-over success system like D&D to get the target number.)  Penalties can still be just the difference between the roll and the target and the duration becomes the difference times the modifier used.  If you are using a 3d6 system the percentages don’t map as closely but it still works.  The net effect would be for a slower initial deterioration followed by a very rapid final decline.  If you are using a game with a dice pool system, a little more work would be required to convert the mechanic.

The hardest part to adapt would be the slow deterioration of the resistance chance.  Instead of a reduction on every failure, you could implement a reduction after every N failures, where N is probably the multiplier used elsewhere.  Or you could require a CON (or equivalent) check each time they suffer from Void Sickness.  If they fail, their resistance weakens.  If they succeed, their resistance doesn’t change.

Final Thoughts

I created this illness primarily as background flavor for my setting.  It’s not something I ever expect the PCs to suffer from.  Unless they want to.  If the PC’s background is such that they would have taken interstellar trips before the game starts, I give them the option to automatically select susceptibility if they want or to just roll.  It was more designed as something that NPCs could suffer from and that the PCs would have to deal with in that manner.  I also intended to use in some of the stories I was writing at the time (and that I may someday get back to).

Have you ever done anything similar in your games?  Does this sound like something you might use in the future?  Share your ideas, suggestions, and thoughts in the comments below.

June 12, 2018 Tom Leave a comment

Designing Out Loud – Void Jumping

This post originally appeared on the now-defunct Arcane Game Lore blog.

This post is running a little behind as I’ve been swamped with end of semester projects. One down, two to go.  Next week’s post might get impacted as well.

My last two articles (one, two), part of the November RPG blog carnival, talked about the unexpected in Void Jump travel. In this article I want to discuss some more details about Void travel in my game and the mechanics that will be used.  Or at least what I am considering for a first pass.

Some Constraints

Gravity Wells

In my universe, Void travel cannot start or stop anywhere.  If you are too close to a large mass, the gravitational field of that object prevents void jumping.  This was somewhat inspired by Larry Niven’s hyperspace.  I liked the idea of having to worry about the large masses that you are traveling by.  Unlike Niven’s hyperspace, getting too close doesn’t cause anything bad to happen, it just bounces you back into real space or prevents you from initiating a Void jump at all. Of course if the object is close, directly ahead, and you’re moving fast, things could get scary.

This has a couple of implications for FTL travel.  First, you have to get away from everything.  I have an exact forumulation for it but for a solar sized star, you need to get about 4 AU away from the star before you can jump.  Starting at a planet about 1 AU away, it takes abut 84 hours of acceleration at 1g to get out that far.  This means that at a minimum, if everything is aligned properly and everything works, a single insterstellar jump will take about seven days (assuming a 24 hour day).

Next, it means you only have to be accurate in your direction vector enough to hit that sphere around your target star where Void travel doesn’t work.  As long as you’re lined up well enough, you’ll drop out of the Void when you hit that gravity well.  This places an upper limit on how accurate you need to be.  Now, the question is, can you get out of the Void on your own or do you have to hit one of these gravity wells to come out of the Void?  I’m leaning toward the following combination.  You can get out on your own, but it’s much harder than being pulled out naturally by hitting a gravity well.  In this scenario, you want to try to hit the target gravity well when you can.

This also means that locations close to the mass source (star or large planet) are “shielded” by the “no jump zone”.  Any arriving ship or fleet has to arrive outside that zone so there will be advanced warning before they get to their destination (at least if anyone is looking).

Everything is Moving

Another constraint is that nothing is ever in the same place twice.  Planets orbit their stars which are orbiting the galactic center and moving relative to each other.  This means that no two jumps are ever exactly the same.  A jump from one planet to another, repeated just a few weeks later, means that both the start point and the destination as moved.  It won’t be by much, but if you remember from my last article, even a little bit of error can result in a huge wrong location.

So every jump needs its direction vector recalculated before you can start.  The good news is that this actually isn’t a very hard calculation.  Or rather it is a hard calculation but a good computer can do it relatively quickly.  There is a lot of data that goes into it but for game purposes, I’ve decided that the calculation can be done in under an hour.  All you need is your start time, your start location, and a good astronomical database that has the information about your departure and destination system.  However …

Getting Lined Up is Hard

Figuring out where you need to go is easy,  determining if you are actually going there is another story.  The problem is the same as the one above, everything is moving.  There is not really an absolute reference frame.  The problem is that you don’t just need to know your position relative to the star your leaving but relative to all the stars in the sector.  And it’s not really the position that matters but rather your velocity vector.  How are you moving relative to all of these objects? And how do you determine this direction down to arcsecond (or sub arcsecond) accuracy?

This can be overcome by the fact that you are moving quite a bit to get out of the gravity well.  As you move along your path, nearby stars will appear to move relative to more distant ones.  This is called parallax.  By measuring how much each of the stars move, and which direction they move, you can determine your vector in space relative to your departure and destination star.

There are some things to remember when trying to measure parallax.  First, you have to move quite a ways to measure any shift at all in stars; they are really far away.  Second, when you first start out, you’re not moving very fast so you don’t move very much between measurements.  This means that the more accurate of a measurement you need, the longer it is going to take as you need to have larger and larger baselines to measure small parallax angles.  You get these longer baselines by waiting longer and by accelerating so you’re moving faster and covering these distances faster.

What is the Jump Process?

Given all of this, what does a typical Void jump look like in game.

First, the astrogator computes the jump vector.  For this he needs to know the time of departure.  Plus or minus a few hours doesn’t make much difference.  This takes about an hour of time on the ship’s computer or could be requested from a central astrogation computer on the system’s data network if it exists.

Next the ship points in the general direction of the target system and begins accelerating.  Images are taken of the stars being measured for parallax.  As the ship continues to accelerate and covers more distance, new pictures are taken and the parallax measurements are made.  From this the course can be adjusted to make it more accurate.  This is repeated until the course is accurate enough.

Once the ship is lined up and the minimum jump distance is reached, the ship can engage whatever technology enables the jump and shifts to the Void, makes the trip, and emerges in the destination system.

At this point more standard navigation techniques can be used to decelerate and travel to the destination system.

How to Trigger a Jump

You may have noticed that I kind of glossed over actually making the jump.  That is going to depend on the setting.  Star Frontiers does it by hitting 1% the speed of light (of course that begs the question, 1% of c relative to what?).

For my world/game, the ability to enter the Void is controlled by a “Jump Field Generator”.  When you want to enter the Void, you turn this device on and it envelops the ship in a field that allows the ship to shift into the Void and make the jump.  Turning it off takes you out of the Void.

How Long Does it Take?

This really depends on the setting.  How fast can the ships accelerate?  What is the minimum jump distance? How long does it take to line up the ship?

If you want to use this idea, you’ll have to answer that for your own setting.  I’ll give you my answers.

How fast can ships accelerate?

For my setting, there is no artificial gravity.  Thus to get simulated gravity on a ship it has to accelerate.  But you also can’t accelerate too quickly or everyone gets squished.  By default, ships tend to travel by accelerating and decelerating at one standard gravity which in my setting is defined as 10 m/s/s for simplicity.  This means that accelerations are relatively low and it takes time to get from place to place.

What is the minimum jump distance?

For my setting, I’ve decided that the local gravitational acceleration (from everything smaller than the galaxy itself) has to be less than some specific value which I don’t remember off the top of my head as I’m writing this.  For a star like the sun, this distance works out to something like 4.05 AU.  At one standard gravity of acceleration, it takes about 84 hours to go from a planet at 1 AU out to the jump distance.  This sets a minimum time for a jump.

How long does it take to line up the ship?

I’ve thought a bit about this but I’m going to invoke a bit of handwavium here toward the end for the fine details.  There are several factors that go into it.

The first question is how accurate of a parallax angle can you measure. Modern systems dedicated to this can measure parallaxes of 10 micro arcseconds with lots of data on a 2 AU baseline (diameter of the Earth’s orbit) over five years.  So it is reasonable that the ships should be able to achieve 10 mili-arcsecond accuracy (1000x worse) on the same baseline. After all, they should have at least equivalent sized telescopes and detectors.  They just lack the time frame.  So we should be able to measure o.o1 arcsecond parallaxes on a 2AU baseline or 0.1 arcsec parallaxes on a 0.2AU baseline.

The next question is how big of a target are we trying to hit.  Assuming you have to hit the “no jump zone” around a solar sized star, that target is a direct function of the distance.  For a star 5 light years away, that 4 AU radius target corresponds to a direction accuracy of 2.6 arc seconds.  So if we can measure 0.1 arcseconds in 0.2 AU of travel, let’s assume that we should be able to get our course vector accurate to 2.6 arcseconds in about 0.4 AU (0.2 AU to get the first vector, adjust, and 0.2 AU to verify).

So how long does it take to travel 0.4 AU assuming 1g acceleration and starting at rest? 30.43 hours

Now a 10 ly jump requires an accuracy of 1.3 arcseconds.  The question is, how long should this take to dial in the desired accuracy?  I’m fond of inverse square laws so I’d say that double the accuracy requires 4 times the distance.  That means you have to travel 1.6 AU to get enough measurements and course corrections to achieve the desired accuracy.  Traveling 1.6 AU from rest requires about 60 hours.

Here’s where I will apply the handwavium quite liberally.  I could easily pick some numbers and justify the accuracy needed to achieve a jump and compute the travel time exactly needed to achieve that accuracy for a given distance.  And I could even provide the forumulas.  But it would be kind of messy.  However, I want something quick and simple.  I could present the data in a table to look up.  And I might do that as a later optional rule for those that want more realistic values.

But what I really want is something quick and simple that is easy to remember. And I want a 10 light year jump to take longer to line up than it takes to get out to the minimum jump distance.  I also want it to become unpractical to make really, really long jumps.  So let’s set the time required to line up the ship to the distance to be traveled, in light years squared in hours or 10 hours whichever is longer.  Or for those that like formulas:

Time = (d in ly)^2 hours

So a jump of one to three light years would take 10 hours to line up.  A five light year jump would take 25 hours, and a 10 light year jump would take 100 hours.

Putting it all together

That was a very long winded explanation for what in the end is actually a simple result.

If you want to make a Void Jump for distance of 9 light years or less, it takes 80 hours (notice I rounded it down to 80 hours from the 84 I was quoting above) to get out to the minimum jump distance at which point you are lined up and can make the jump.

If your want to make a Void Jump for a distance of greater than 9 light years, it takes the number of light years squared in hours to get the ship lined up accurately enough.  At which point you can safely make the jump.

Variations

Obviously that “simple” solution is based on starting at rest at a planet 1AU from the star and needing to get out to 4 AU before you can jump.  There are lots of variations on this scenario that you can imagine that will vary the time.  Possibilities include:

  • You’re starting further out in the system, maybe already beyond the minimum jump distance.
  • Instead of heading straight outward from the star, your destination is actually on the opposite side of the star and so instead of having to travel 3 AU to get to the minimum jump distance you have to travel up to 5 AU (if starting at 1 AU) or maybe even 8 AU if you’re on the other edge and have to go all the way across
  • A combination of both of the above.  You’re outside the gravity well but the jump vector crosses it so you have to move to get a different line to your destination
  • You get attacked or encounter something and have to maneuver while getting lined up.  Now you’re all messed up and you have to start over.
  • What if you accelerate at a higher (or lower) rate?
  • What if you don’t spend enough time lining up?

Are there any other variations that come to mind?  Are there any concepts that I should have explained better?  Is there something I overlooked?  Let me know in the comments below?

December 2, 2015 Tom 1 Comment

Your Final Destination – Exiting a Void Jump – November Blog Carnival – part 2

This post originally appeared on the now-defunct Arcane Game Lore blog.

RPG Blog Carnival Logo

My last post on Void Sickness along with reading Mike Bourke’s second portal article (I’m still a week behind but I’m catching up!), got me thinking about another aspect of Void travel that I like to use but which I don’t see talked that much about: where you come out on the other end.  And since I’m approaching it as something you can’t completely control, the exact location is somewhat unpredictable and can have unexpected results.  So this will be another entry into the November RPG Blog Carnival.  Enjoy.

Never the Same Place Twice

Last time I played with the Disruption parameter.  This time I want to talk about Repeatability.  When I was defining void travel in the previous post, I stated that the repeatability was “vague” which was defined as “A new Portal from the same origin may be directable to some point near where the old one was” in the original portal article that sparked my first post.  In his second article, he added, “but the exact same destination is unreachable” to the end of that when he summarized the detailed definitions.  In that second post I liked the definition he gave for “unpredictable” which was “A new Portal from the same origin will connect with another point completely at random, uncontrollably, within the destination plane of existence, perhaps restricted to a significant region.”

My idea of void travel falls somewhere between those two.  It’s not that reaching the exact same location is impossible, it’s just very unlikely.  You’ll always end up close (on a cosmic scale) unless you make a major mistake but probably not in the same location.  And in truth the chances of actually starting in the same place are slim to none as well depending on your definitions of location and the scale of what constitutes the “same origin” (Are you measuring in meters, kilometers, or AU?).  Given the two summarized definitions I’m actually leaning a little more toward unpredictable but both work.  The point is, the place you come out is always going to be different.  Let’s look at that and what it may mean for your game.

Non-repeatability

So why is it not possible to come out in the same spot?  From my perspective this comes down to two factors that related to how I treat void travel.  In my interpretation of how void travel works, whatever vector you have in the real universe when you enter the void is the vector you maintain in the void.  You can’t change your direction and you move in a “straight” line.  Which means you need to be lined up exactly right or you’re going to go way off course.

Stay on Target

Just how exactly do you need to be lined up?  Let’s look at a couple of examples.  Take a piece of paper.  Draw a small dot on it no larger than half a millimeter.  Now hold that up at arm’s length.  See how big that dot is?  Depending on the size of your dot and the length of your arm, that dot covers an angle of about 2-3 arc minutes.  If your direction vector were off by that much, how far off would you be at your destination?

I’m going to be generous and assume you drew a small dot and have a long arm and go with the 2 arc minute number.  Assuming you make a small void jump, say 4.3 light years, the distance to the nearest solar type star, Alpha Centauri, you’d be off target by only 5.5 billion kilometers.  Space is big, that’s not too bad, right?  Well, that’s about 36.7 Astronomical Units (the distance between the Earth and the Sun).  Which means if you were shooting for Earth, you’d be out by Pluto.  Depending on how fast your ship is, that may take a while to compensate for.

But an error of 2 arc minutes is pretty big.  We can do better than that.  Let’s say we can get our error down to the size of an arc second (1 degree = 60 arc minutes = 3600 arc seconds).  That’s equivalent to putting your dot about 24 feet (7.2m) away.  If we do that and make the same jump to Alpha Centauri, we’d still be off by about 46 million kilometers or 0.3 AU, roughly the distance between the Earth and Venus at closest approach.  (By the way, an error of 1 arc second means your ship moved laterally 4.8 mm after traveling 1 kilometer).  And if you make a jump twice as far, the error will be twice as large as it is really just the direction error (in radians) multiplied by the distance traveled.  Double the distance, double the offset.

Just based on that, you can see that you’re probably not going to come out at the same place at your destination no matter how hard you try.  Getting your vector to that accuracy is going to take some effort.  But there is another effect, the time spent in the void.

How Good is Your Clock?

The other aspect of determining your position is how long you spend in the void and how far you travel in a given amount of time.  If there are errors in your time keeping, this will translate into errors in the distance traveled.

Let’s use the example I gave in my earlier post: void travel occurs at the rate of one light year per second.  Now, a light year is 9.4607×10¹² km.  That means that an error of a millisecond equal a distance of 9.4607×10⁹ km (63 AU, roughly twice the distance to Neptune).  A microsecond error reduced that by a factor of 1000 and an error of only a nanosecond reduces that by another factor of 1000 or down to an error of only 9460.7 km, less than the diameter of the Earth.

Modern computers can get to about a 10 nanosecond resolution which means an accuracy of about 95,000 km roughly 1/4 the distance to the moon.  Depending on the technology you allow in your setting (and what you allow to work in the void), the accuracy could be better or worse than this.  But even with a microsecond error, the distance you’ll be off is only 0.063 AU.

So while there is an effect, and you probably won’t end up in the same spot, it is much less than the effect you can expect from an error in the velocity vector.  Depending on the story you’re trying to tell, that may or may not be negligible.

Impact on Your Game

We’ve seen what the scale of the effect is, what impact does that have on your game?  While the details will depend on you exact setting, here are three ideas off the top of my head.

Travel times

Given the natural variation in arrival locations, you are typically going to be off target which means the actual travel time to the destination is going to vary.  It will no longer be “three days” but “three to four days”.  You can’t really plan on exact time tables.

To put some numbers to that, assume you were off by the 0.3AU distance from earlier.  Assuming your ship is traveling at 1% the speed of light (3,000 km/s, just under 11 million km per hour), it will take you about 4.25 hours to cover that extra distance.  If you’re off by more or going slower, it will take even longer (and that’s ignoring a bunch of real world physics about changing direction and such which will only add to the time).

This means that you have to plan for and account for the extra time and it may add tension to a situation.  We only have 100 hours to reach the destination and stop the “big event”.  The jump and associated travel time takes 80+2d10 hours to just get to the location where the big event will happen.  Do the characters arrive with hours to spare or are they landing with only minutes until they have to spring into action?  What impacts will this have on their preparations? Will it limit what they can do or bring to bear in the situation?

Space Piracy

Again ignoring real world physics of matching velocities in space, the result of non-repeatability of void jumps means you’re probably not going to have space pirates lurking in the outer system for ships to appear and then pounce on them.  Even if you had hundreds of ships entering a system every day, the odds of one appearing near where a pirate vessel was lurking is really, really small.  The pirate ship could sit out there for years and never have an encounter.  This means that piracy, if it occurs, will happen near the population centers, at remote, fixed outposts, or on the outbound leg of a journey before the void jump when the routes are much more predictable.

Arriving in Formation

Remember this scene from Return of the Jedi? (0:43-1:04 is the relevant part if you don’t want to watch the whole thing).

That just isn’t going to happen with void jumping.  Even assuming that you can get the velocity vector the same for all the ships, which might be hard but could be possible (although not with everyone dodging in and out among each other like the fighters in the beginning of that clip) the timing variations between the ship computers will scatter everyone across tens of thousands of kilometers of space.  You will need time to regroup.  Which means you probably want to appear further out in the system to allow yourself that time which in turns means longer travel to your destination and a greater chance for discovery.

Or if you do allow for piracy to occur in the outer reaches of the system,  merchants and their escorts may be separated on arrival.  The convoy scattered across space.  Can the escorts get back to their charges before the pirates attack or do they only arrive in time to extract revenge for damage done?

Void Travel is Unpredictable

From the above thoughts, it’s fairly obvious that this method of FTL travel has the potential to add some randomness and unpredictability into your game.  Whether to add tension or just flavor, there is no real reason that void travel should be routine.  Are there other ideas for impacts that come to mind because of the unpredictability?  Let us know in the comments below.


Comments

Mike Bourke – November 24, 2015 at 11:28 am

There’s an obvious solution: the very short void jump. You arrive and find yourself 30 AU away from where you want to be? Jump for long enough to travel 29 AU. This distance is short enough that the final error will be relatively small.

Now, I happen to think that this tactic, while eminently sensible, is not as desirable as the additional flavor that the randomness gives. That leads me to suggesting that in order to make a jump, a ship has to utilize a minimum amount of power or more, which in turn means that there is a minimum jump distance.

This wouldn’t completely eliminate the viability of the tactic; it would mean that the most practical approach is to aim for a point half your anticipated error away from whatever the minimum jump distance is. For convenience, let’s say that your maximum error is 10AU per light year, and you are jumping 20 light-years, and that the minimum jump is 150 AU:

10 AU x 20 light years is 200 AU maximum error. Half that is 100 AU, so that’s the mean error that you will experience. But that leaves you too close to make the minimum jump, so you move that destination point out by the minimum, and aim to arrive 250 AU away. That means that your range of arrival points is 250±100 AU – so even if you get as close to your ultimate destination as possible, you are still a minimum jump away, and might be as much as 350AU.

The thing is that picking just any point that far away is not good enough; you would need some standard navigational reference points from which to get your precise distance for the second jump. Observations would take time, and without standard references, you might have to wait for weeks, months, or years for the objects you are measuring (presumably outer planets) to have moved enough to permit navigation.

And standard reference points for a jump means that your arrival point is a much smaller volume of space – making piracy possible after all. Not easy, but not entirely out of the question, either.

Mike Bourke – November 24, 2015 at 6:58 pm

Alternately, maybe a ship develops some sort of energy “charge” that simply delays making another jump for a period of time. That would prevent the “stop short and recalibrate” dodge – if there’s a deadline involved.

Tom – November 24, 2015 at 9:26 pm

Yes, both of those are possible implications as well. I like the minimum power required idea. I didn’t include it here but I also utilize limit on gravity wells. Kind of like Larry Niven’s hyperspace. You can’t get too close to a large mass and still have your void jump system work. This actually counter acts some of the implications depending on how you implement it. I think that will be another void jumping article at some point.

November 24, 2015 Tom 2 Comments

Posts navigation

1 2 Next →
Become a Patron!

Recent Posts

  • Detailed Frontier Timeline – FY62.069 to FY62.99
  • State of the Frontier – August 2022
  • Battle of Hargut (Gruna Garu) – FY62.098
  • Archived Arcane Game Lore Posts – May 2013 to Dec 2014
  • A Look at Yachts and Privateers
  • Homeworld Bound – A Campaign Concept
  • Second Battle of Fromeltar (Terledrom) – FY62.083
  • Sample Star System Data
  • Detailed Frontier Timeline – FY62.038 to FY62.068
  • State of the Frontier – July 2022

Categories

  • 3D Models
  • Adventures
  • Background
  • Creatures/Races
  • Deck Plans
  • Equipment
  • Game Design
  • General
  • Locations
  • Maps
  • NPCs
  • Optional Rules
  • Patreon-only
  • Project Overviews
  • Reviews
  • Setting Material
  • Starships
  • System Brief
  • Vehicles
  • Writing

Recent Comments

  • Loguar on Detailed Frontier Timeline – FY62.069 to FY62.99
  • Loguar on Detailed Frontier Timeline – FY62.069 to FY62.99
  • Tom on Detailed Frontier Timeline – FY62.069 to FY62.99
  • Rook on Maps and Counters
  • Loguar on Detailed Frontier Timeline – FY62.069 to FY62.99
  • Tom on Detailed Frontier Timeline – FY62.069 to FY62.99
  • Tom on Second Battle of Fromeltar (Terledrom) – FY62.083
  • Loguar on Detailed Frontier Timeline – FY62.069 to FY62.99
  • Loguar on Second Battle of Fromeltar (Terledrom) – FY62.083
  • Aemon Aylward on Sample Star System Data

Archives

  • September 2022 (1)
  • August 2022 (9)
  • July 2022 (3)
  • June 2022 (3)
  • May 2022 (3)
  • June 2021 (1)
  • April 2021 (1)
  • February 2021 (4)
  • January 2021 (6)
  • December 2020 (5)
  • November 2020 (11)
  • October 2020 (4)
  • September 2020 (5)
  • August 2020 (4)
  • July 2020 (6)
  • June 2020 (5)
  • May 2020 (8)
  • April 2020 (5)
  • March 2020 (5)
  • February 2020 (5)
  • January 2020 (5)
  • December 2019 (7)
  • November 2019 (4)
  • October 2019 (6)
  • September 2019 (5)
  • August 2019 (6)
  • July 2019 (7)
  • June 2019 (5)
  • May 2019 (6)
  • April 2019 (7)
  • March 2019 (4)
  • February 2019 (5)
  • January 2019 (7)
  • December 2018 (5)
  • November 2018 (10)
  • October 2018 (4)
  • September 2018 (4)
  • August 2018 (5)
  • July 2018 (4)
  • June 2018 (4)
  • May 2018 (12)
  • December 2015 (1)
  • November 2015 (2)
  • December 2014 (4)
  • November 2014 (3)
  • June 2014 (1)
  • January 2014 (1)
  • July 2013 (1)
  • June 2013 (2)
  • May 2013 (3)

Meta

  • Log in
  • Entries feed
  • Comments feed
  • WordPress.org
Powered by WordPress | theme Layout Builder