The Expanding Frontier

Creating Sci-fi RPG Resources

  • Home
  • Order Eclipse Glasses
  • Order a Map
  • Order Miniatures
  • Supporters
  • About
  • Bio

Category Archives: Reviews

A Look at Yachts and Privateers

I was starting to work on the Battle of Hargut (Gruna Garu) that is coming up in the Detailed Frontier Timeline in a few days and had to put together the Yazira Squadron. From the timeline I had created the following details:

Date (FY)Events
61.299A small group of 8 civilian privateer vessels, hailing from the yazirian worlds of the Frontier and calling themselves the Yazira Squadron, arrive in orbit around Morgaine’s World (Prenglar) and request permission to assist Starfleet in the fight against the sathar.
61.301Worried that since the sathar have a route into Prenglar they may also have one to Gruna Garu, Spacefleet sends the Yazira Squadron back to Gruna Garu to bolster the defenses there.
61.310Yazira Squadron arrives back in the Gruna Garu system where they join up with the local militia to coordinate the defense of that system.

So there are eight civilian privateer vessels and they were sent to Gruna Garu to bolster the defenses there. I did this even before I conceived of the sathar actually trying to chart a route to Gruna Garu. It was just a concern on Spacefleet’s job. But it turned out to be a good idea because if they weren’t there. The incoming sathar ships (1 destroyer, 2 light cruisers, and a heavy cruiser) would probably completely overwhelm the 2 militia assault scouts and Frontier Fighter Corps squadron in the system.

The question is what should the ships be. I figured I’d just pull up the old Dragon article “Fast and Deadly” (p. 78, Dragon June, 1984) that provided stats for some yachts and privateers and use those.

Then I actually looked at the ship stats in the article.

Given the starship construction rules, even allowing for a little “fudging” in the rules for upgraded military technology in some of the ships, they just didn’t make sense to me. The yachts weren’t too bad but most of the privateer vessels were just so far out there that they seemed way overpowered. So I thought I’d work through each of these ships and see if they made sense or not and if my intuition about the ships was correct.

So here we go.

Yachts

We’ll look at the yachts first as there seem to be fewer problems with these ones. I find it interesting that of all the stats for the ships that could be included, the article included the number of lifeboats on these ships.

Belvedere Class

Original Stats

HS: 9, HP: 45, ADF: 2, MR: 3, DCR: 47, Weapons: LB, LC, Defenses: reflective hull, Lifeboats: 1

Comments

This one actually checks out just fine with the ship design rules. The minimum hull size (MHS) for all the weapons and defenses are equal to the hull size of the ship which means that it has to loose 1 ADF or MR and it sacrifices the ADF.

Astro-Blaster III Class

Original Stats

HS: 6, HP: 30, ADF: 1, MR: 2, DCR: 38, Weapons: EB, Defenses: RH, ICM, Lifeboats: 0

Comments

It says it has an ICM launcher but not how many salvos, we’ll assume 4 (Note: after looking at the later ships, I think it meant that it had a single ICM salvo. I’d still leave it at four though). The MHS for all of the Astro-Blaster III’s weapons and defenses comes to 12 (EB=6, RH=1, ICM=5). This means that it should be losing a total of 3 ADF or MR. Since a HS 6 ships starts with ADF/MR of 3, again this one checks out. They sacrificed 2 ADF and 1 MR.

Imp Class

Original Stats

HS: 4, HP: 20, ADF: 4, MR: 3, DCR: 32, Weapons: LB, Defenses: RH, Lifeboats: 0

Comments

This one checks out as well. The MHS sum is 4, so it sacrifices one of its MR as the weapon penalty.

Nova Class

Original Stats

HS: 5, HP: 25, ADF: 2, MR: 2, DCR: 25, Weapons: LB, ARx3, Defenses: RH, Lifeboats: 0

Comments

Here we run into the first problem. The MHS for the weapons and defenses add up to 5 (LB = 3, AR = 1, RH =1) and so this hull size 5 ship should lose one ADF or MR. Unless you assess a MHS penalty for each assault rocket in which case it would be 2 lost. However, the rules give the MHS requirement on the launcher not the rockets so I don’t think that should be the case. The designers here assigned a loss of both an MR and an ADF point so the ship has ADF & MR of two instead of the default 3. Personally, I think they assessed too much of a penalty.

But that’s not really the problem. The problem is that this ship cannot fire assault rockets. On Page 18 of the Knight Hawks Campaign Book (KHCB), right under the table where the minimum hull size values are listed, it says “Assault rockets cannot be used by any ship that has an MR less than 4.” The idea being that you need to be maneuverable to line these weapons up as they are not self steering. By default, a HS 5 ship, which has a base MR of 3, cannot fire assault rockets. That doesn’t mean we can’t make it work but there needs to be some changes. Let’s look at two variants on this:

Nova-AR Class Stats

HS: 5, HP: 20, ADF: 2, MR: 4, DCR: 25, Weapons: LB, ARx3, Defenses: RH, Lifeboats: 0

For this -AR variant we kept the assault rockets. And I only assessed the single point of ADF loss bringing the ship down to ADF:2/MR:3. We gain the extra MR point by sacrificing hull points. One of the variations on ship design, found in the “Modifying Spaceships” section under “Movement” on page 22 of the KHCB says “Any ship can gain one ADF or MR point by removing 20% of its hull points.” Applying that gives us the stats above. We sacrifice 5 HP for 1 MR.

This variant is basically a slightly larger and half as fast assault scout. It has a few more HP, only 3 AR instead of 4 (although you could bump that up without penalty in my opinion) but only has 2 ADF instead of 5.

Nova-L Class Stats

HS: 5, HP: 25, ADF: 2, MR: 3, DCR: 25, Weapons: LB, Defenses: RH, Lifeboats: 0

The the -L variant, we drop the assault rockets. Now the MHS total is only 4 and we definitely only need to lose one ADF or MR point which I chose to take off the ADF. I would have put two LB on the ship and taken the two points of ADF/MR penalty like the original variant, but the rules say that you have to be double the MHS for a weapon to have two of them. Since the MHS for a laser battery is 3, the ship would need to be hull size 6 to have two. I considered replacing the assault rockets with a rocket battery but the MHS for that is 5 and we would have had to take 3 points of ADF/MR penalty instead of 2. So this variant is a moderate HP laser platform, basically a bigger version of the Imp class with a few more HP.

Rim-Song Class

Original Stats

HS: 3, HP: 15, ADF: 4, MR: 3, DCR: 29, Weapons: LB, ARx1, Defenses: RH, Lifeboats: 0

Comments

Again we’ve run into the problem on assault rockets on a ship with an MR less than four. Additionally, while they assessed a 1-point penalty to the ADF/MR for all the weapons and defenses, that is too low. The total MHS score for the weapons and defenses is 5. Half the hull size is 1.5 and 5/1.5 = 3.333. The rules explicitly say to round that fraction up before subtracting 1 so there should be a 3 point penalty, not a one point penalty. Now if you round the fraction for the hull size up to 2 before doing the division you only get a 2 point penalty. The rules aren’t explicit on that step so you could go either way, although given the wording of the rules, I’d lean in the rounding the division of the HS up before doing the second division. I’m going to be generous and say it should only be a 2 point deduction. But we still have the problem of the MR being less than four so we need to reallocate the deduction.

Rim-Song II stats

HS: 3, HP: 15, ADF: 2, MR: 4, DCR: 29, Weapons: LB, ARx2, Defenses: RH, Lifeboats: 0

This variant reallocates the full deduction to the ADF so that the MR remains at 4 and it is valid to have the assault rockets. I also bumped up the assault rocket count to two instead of one. If you think each individual assault rocket should have the MHS applied, this keeps us at a penalty of 2. If you subscribe the MHS applies only to the launcher, I wouldn’t have an issue bumping that up to 3. This ship is effectively a slow assault scout.

Rim-Song-L stats

HS: 3, HP: 15, ADF: 4, MR: 3, DCR: 29, Weapons: LB, Defenses: RH, Lifeboats: 0

If you don’t like moving player only (MPO) limited weapons on your ship, the Rim-Song-L class drops the assault rockets and keeps the laser battery. Now the MHS total is 4 and we only have the 1 point deduction on ADF/MR (assuming we round up the fraction dividing the HS by 2) which I assessed to MR like the original stats. So now we have a fast maneuverable laser platform.

Nebula Class

Original Stats

HS: 7, HP: 35, ADF: 2, MR: 2, DCR: 41, Weapons: LB, ARx2, RBx4, Defenses: RH, MSx1, Lifeboats: 1

Comments

The original stats just listed rocket batteries, not the number of shots so I assumed four like the frigate and destroyer have. I assume that if your ship is big enough to hold the launcher, you can have 4 salvos. The original also said “masking screen” so I assumed that meant one charge although per the rules this ship could hold two.

For this ship, the default ADF and MR are 3 so they’ve assessed a 2-point penalty. Let’s see if that makes sense. The MHS total for the weapons and defenses is 14 (LB = 3, AR = 1, RB = 5, RH = 1, MS = 4). Whether we round the HS divided by two up or not, that’s a three point deduction, not two. Plus we again have the problem that you can’t put assault rockets on a ship that has an MR less than 4. And in this case, with all these weapons, there is no way to get the MR up to four. With a three point deduction and sacrificing 20% of the hull points for a +1 MR, we’d have an ADF of 0. Which doesn’t work. The
assault rockets have to to.

Nebula II stats

HS: 7, HP: 35, ADF: 1, MR: 2, DCR: 41, Weapons: LB, RBx4, Defenses: RH, MSx2, Lifeboats: 1

This version keeps all the weapons except the assault rockets and bumps the masking screens to two charges. That drops the MHS total to 13 and we still have the 3 point penalty to ADF/MR. We apply the deduction knocking the ADF to 1. It’s an armed pleasure yacht so it would never normally be accelerating that much anyway.

Nebula-L stats

HS: 7, HP: 35, ADF: 2, MR: 2, DCR: 41, Weapons: LB, LB, Defenses: RH, MSx2, Lifeboats: 1

Again, if you want a purely laser weapon system, this ship is large enough to have two laser batteries so we drop the rocket battery in favor of a second laser battery. Now the MHS total is only 11 and our ADF/MR penalty drops to two instead of three so our ADF goes back to 2 like in the original.

Privateers

Some of the yachts were fine and the others were close but still needed some adjustments to fit within the rules. I’m pretty sure the Privateers are going to need some serious adjustments. The description of the privateers say that some of them are refitted military vessels. So for these ships, I’m going to allow a few more weapons on them than on the civilian hulls that the yachts were created from. This will be represented by not dividing the hull size in half before dividing the MHS total for the ship but rather multiplying it by two instead, effectively making them capable of carrying four times as much armament. That still isn’t as strong as the military vessels in the game. We’ll see how this goes.

If you want to look at a good system that actually allows you to recreate almost all the existing military ships in the game, you should check out the Military Ship Design articles in Star Frontiersman issue 11, page 5. The variation I’m using doesn’t quite let the ships match the capability of the system in that article but is significantly better than the standard design system for arming ships. I actually think it is still a bit much but I don’t want to tweak the ships too much from the original article describing the privateer ships.

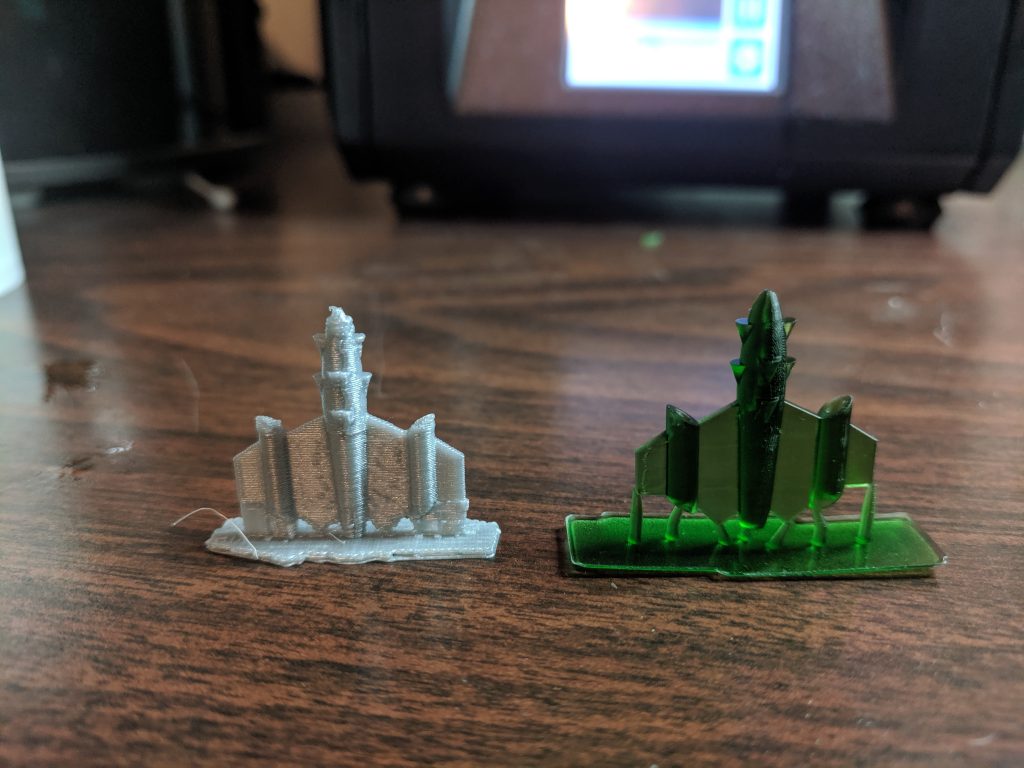
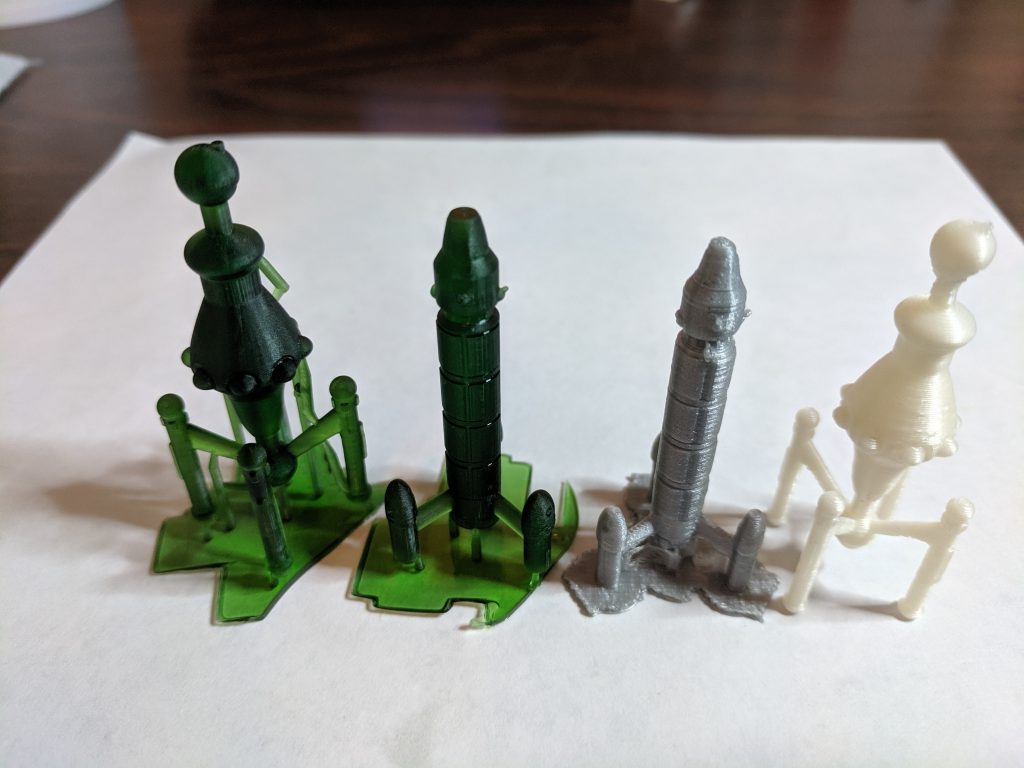
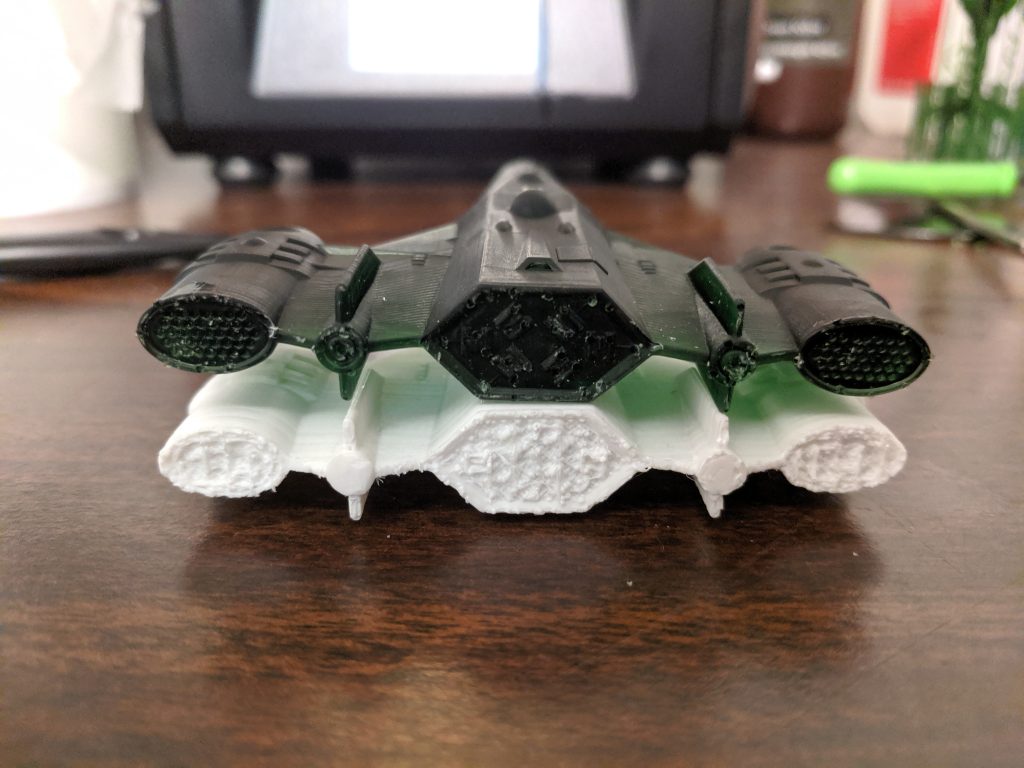
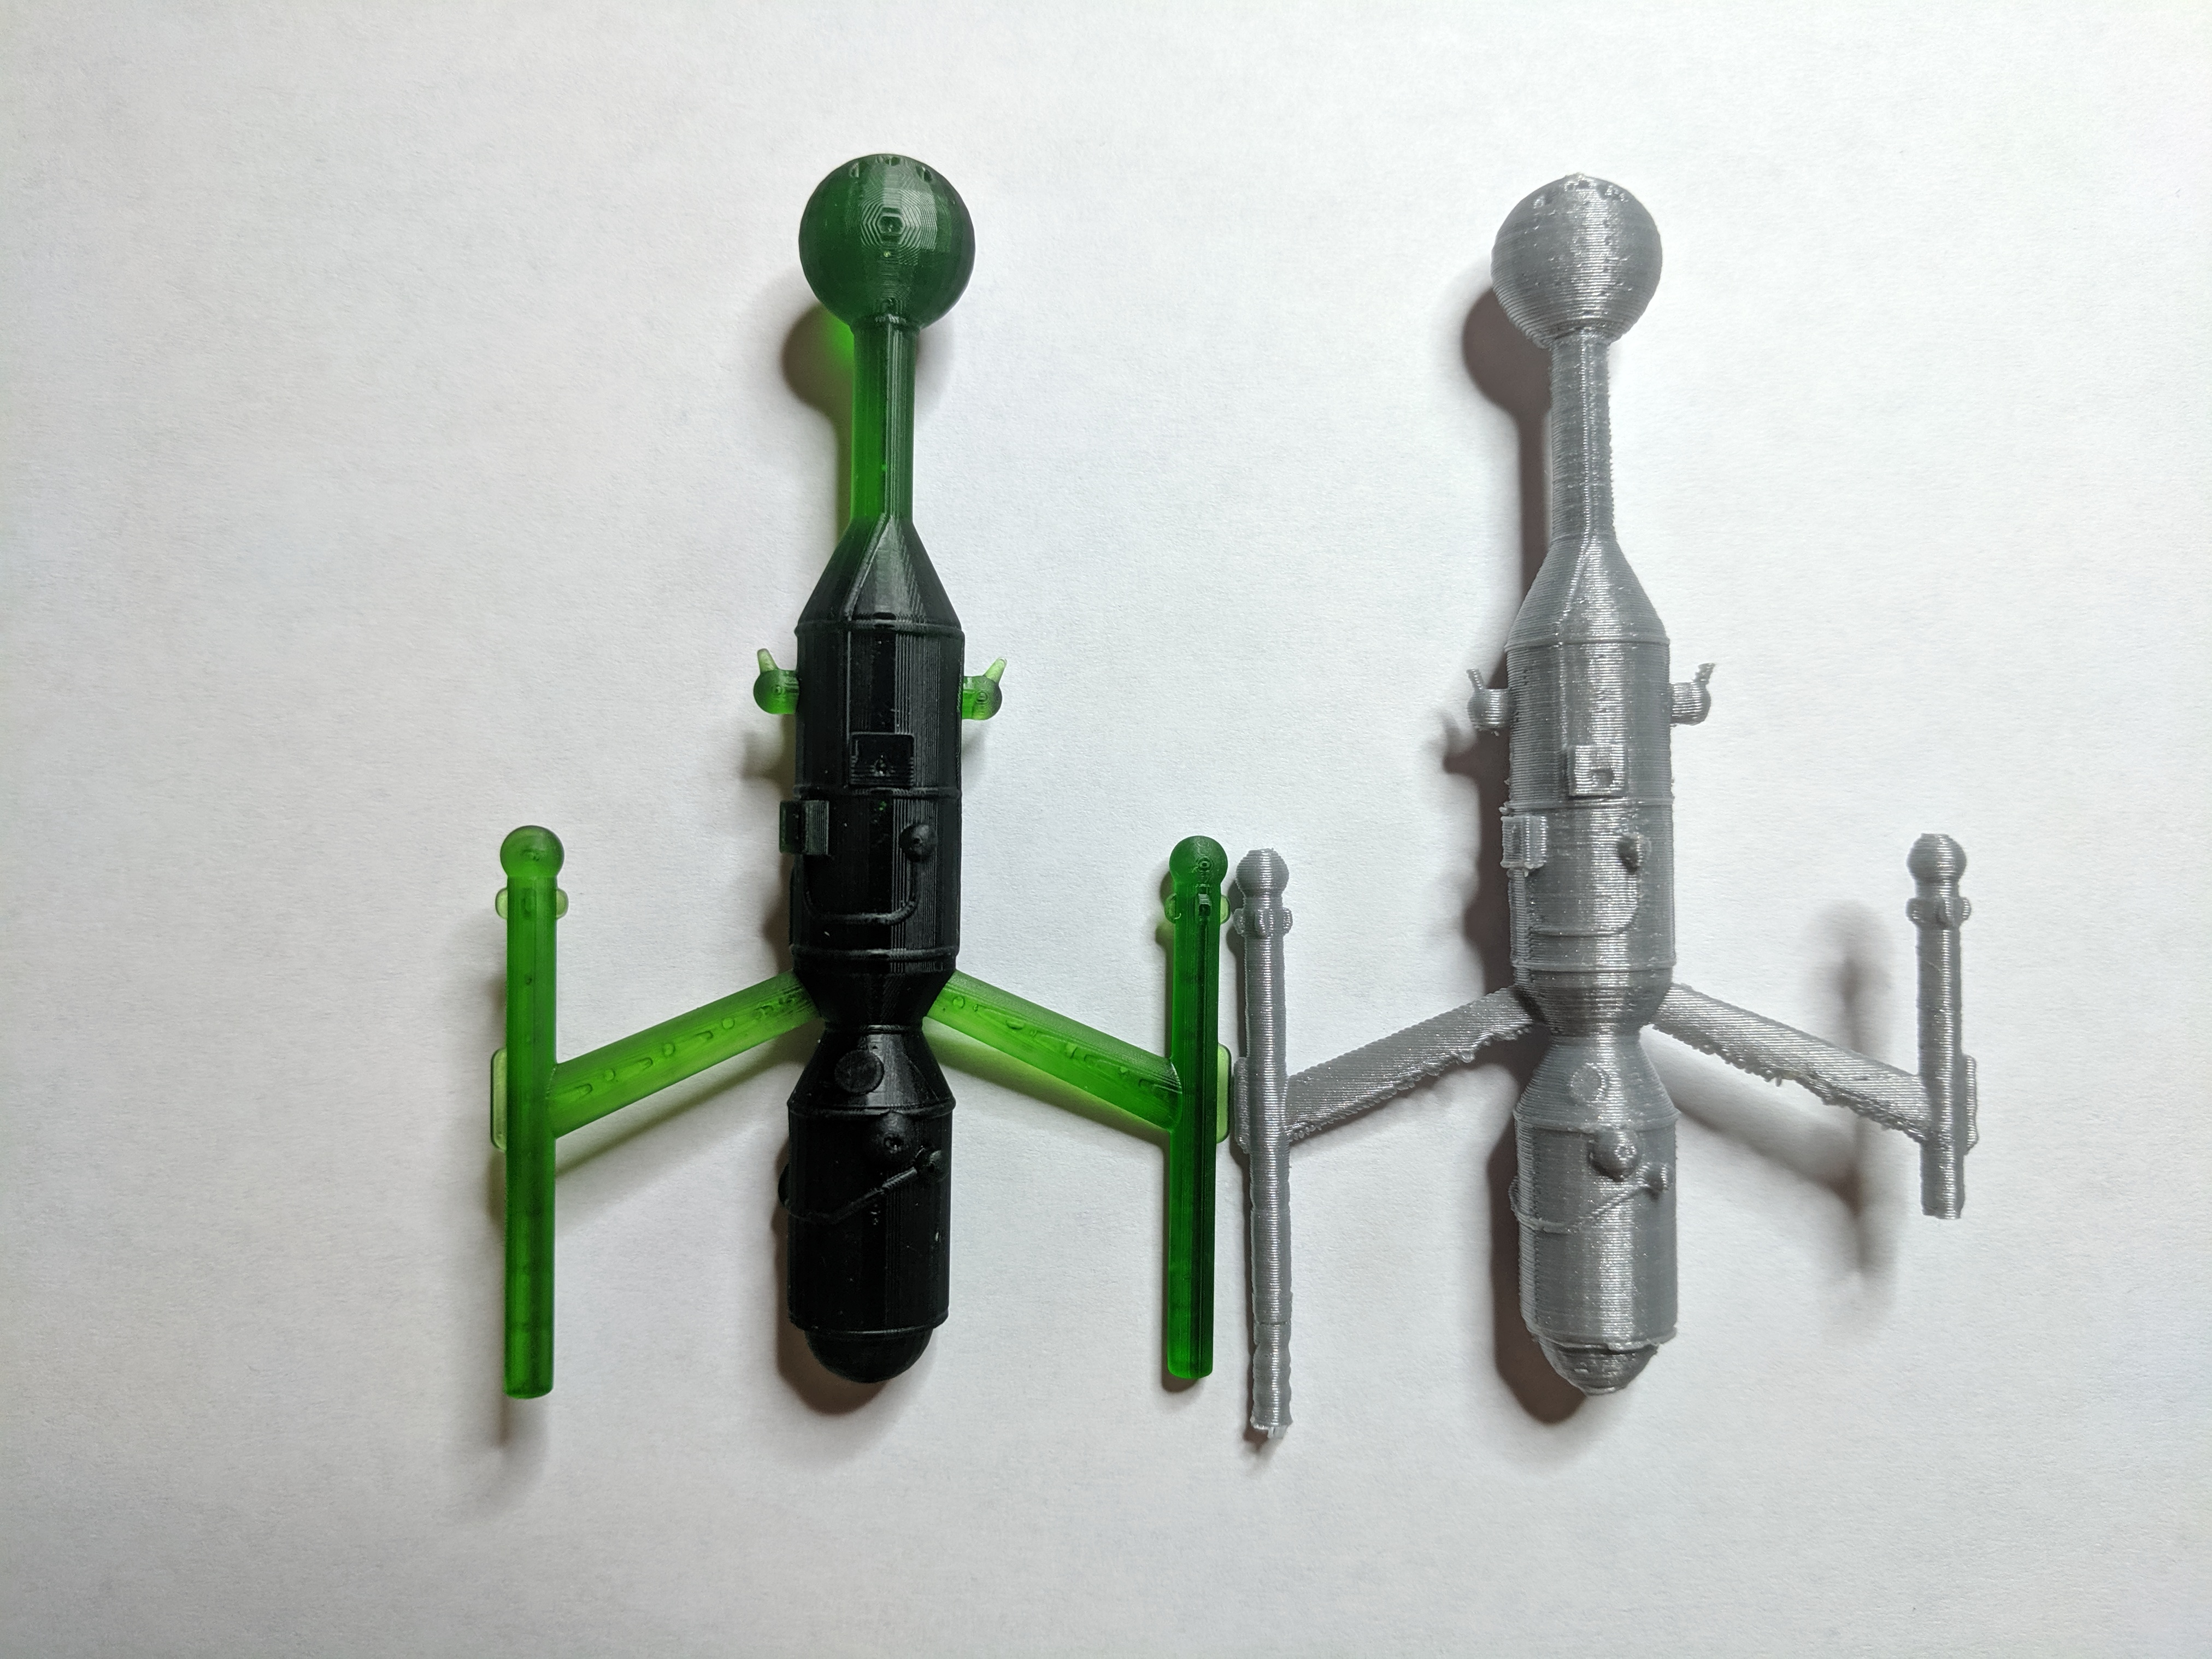
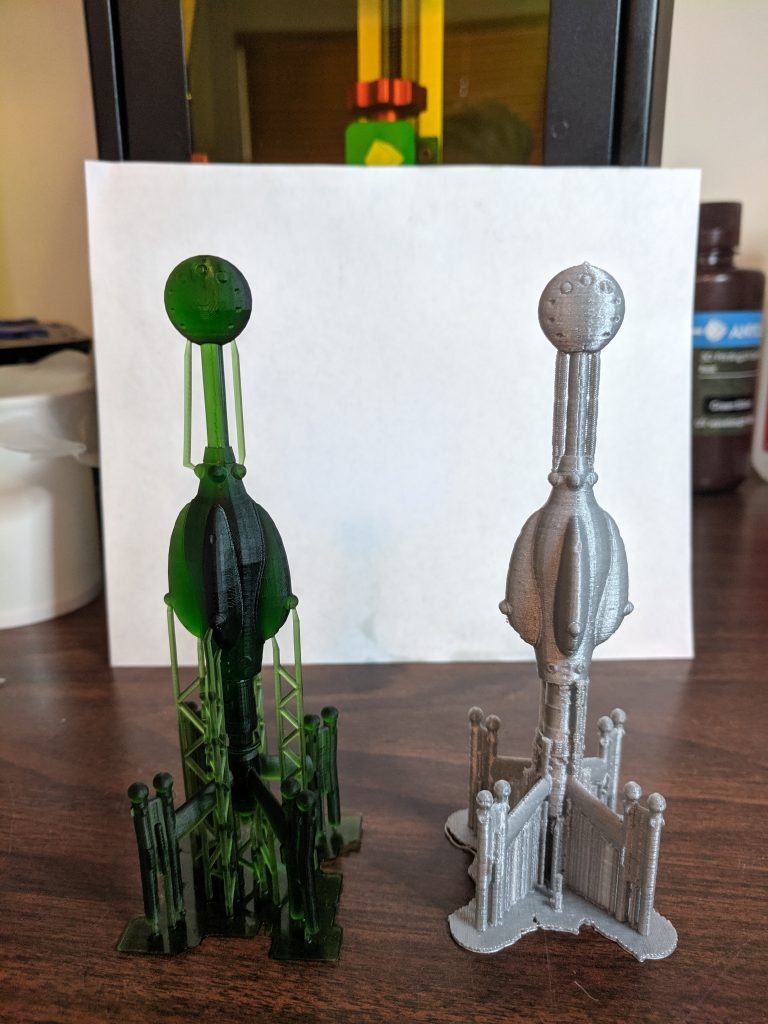
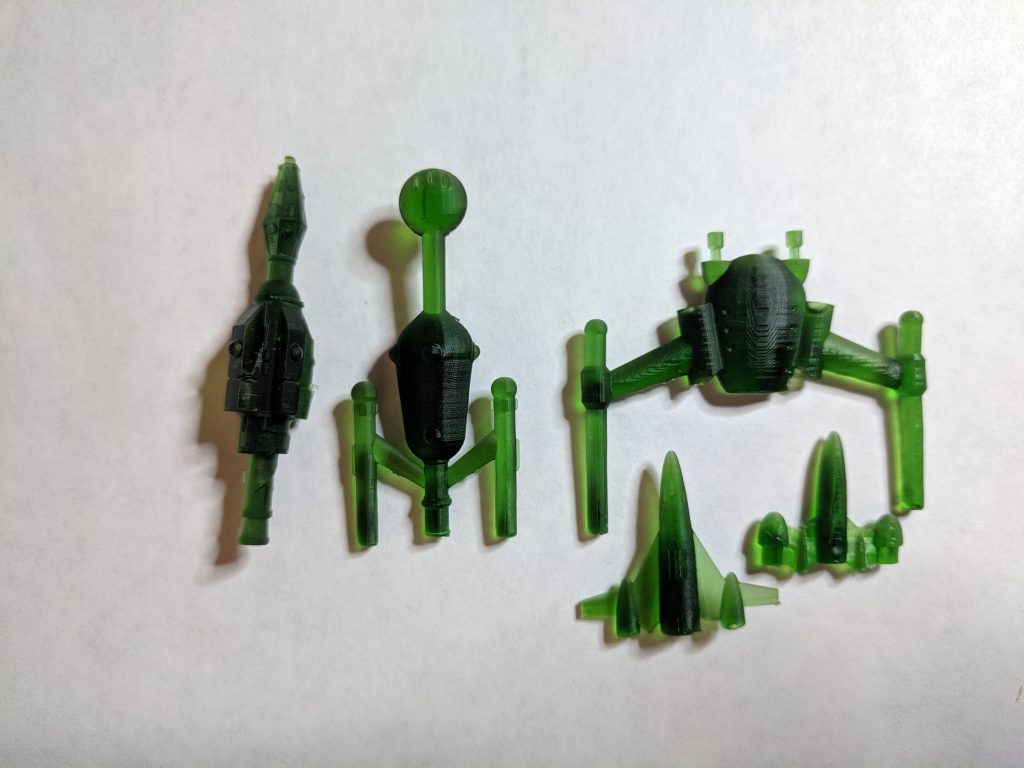
The ships here in the Privateer section are the names of the ships given for each of the miniatures in the Privateers box of ship minis produced by TSR back in the day. I’ve included pictures of each of the minis with these ships.

Rollo’s Revenge

Original stats

HS: 10, HP: 50, ADF: 3, MR: 2, DCR: 50, Weapons: LB, PB, EB, EB, Tx4, Defenses: RH, MSx1, ICMx3, Lifeboats: 1

Comments

Okay, the MHS total for this ship is 40. If this was a civilian ship it would have a 9 point ADF/MR penalty and would not be possible. Going with the paramilitary option I described above, it only has a 1 point penalty which was applied to the MR. So we can leave this one as is.

Condor Class

Original Stats

HS: 13, HP: 65, ADF: 3, MR:3, DCR: 59, Weapons: DC, LB, LB, PB, EB, Tx3, Defenses: RH, ES, PS, MSx1, ICMx2, Lifeboats: 1

Comments

The one is loaded with weapons and defenses. The MHS total for this ship adds up to 71, the largest we’ve seen yet. It’s also the largest ship at hull size 13. Dividing the MHS total by twice the hull size and dropping one gives us a movement penalty of 2 points. There were no penalties assigned to the original ship as it retained its full ADF and MR of 3. We’re going to have to change something.

Condor II Class stats

HS: 13, HP: 65, ADF: 3, MR:2, DCR: 59, Weapons: DC, LB, LB, PB, EB, Tx4, Defenses: RH, MSx2, ICMx4, Lifeboats: 1

The goal here was to get the MHS total down to 52 so we only take one point of performance penalty. That was actually pretty easy. I just dropped the electron and proton screens (a total of 22 MHS points) and that dropped us down to 49. So I tossed in another torpedo, another masking screen charge, and two more ICMs. The truth is, in all my playing of KH battles, I can’t remember a time I’ve ever activated any screen other than a masking screen so I (personally at least) don’t feel like this is any loss. I applied the one-point penalty to the MR.

Moonbright Stinger Class

Original miniature along with the recreated model

Original Stats

HS: 9, HP: 45, ADF: 3, MR:2, DCR: 45, Weapons: LC, SMx2, EB, Tx2, Defenses: RH, MSx1, ICMx1, Lifeboats: 1

Comments

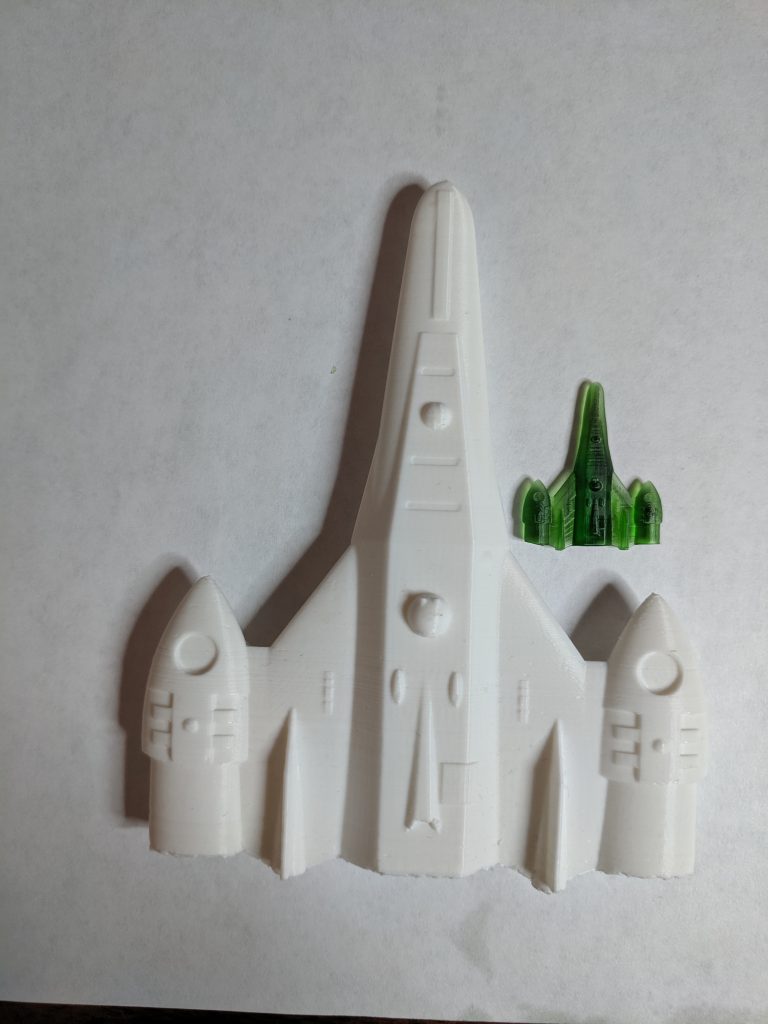
Okay, this is a fun one. If you look at the image of the miniature for this ship, it is the same hull design that they use for the hull size 6 Gullwind from the Dramune Run module although this ship is listed as hull size 9.

That aside, let’s look at the design. First off, this is a missile boat. I probably wouldn’t put seeker missiles (SM) on a privateer but I didn’t design it. The MHS for the weapons and defenses on this ship add up to 33 for this ship. Dividing that by double the hull size gives us a one-point penalty which was applied to the MR for the ship. I’d probably bump the masking screen up to 2 charges and the ICMs to four salvos but we can leave this one alone.

Thruster Class

Original stats

HS: 2, HP: 10, ADF: 4, MR: 4, DCR: 26, Weapons: LC, ARx2, RBx1, Defenses: RH, Lifeboats: 0

Comments

This one is just painful. First up, the MHS total for the listed weapons and defenses is 12. Which doesn’t seem to bad but the ship is only hull size 2, smaller than an assault scout. Using our formula, it should have a 2 point penalty but none was applied. In addition, both the laser cannon and rocket battery have MHS of 5, which means that they can’t be installed on a ship this small. The canon rules bent that a bit putting a laser canon on the Streel Corvette Class, a HS 4 ship but putting it on a HS 2 ship is just too much.

Thruster II Class stats

HS: 2, HP: 10, ADF: 4, MR: 4, DCR: 26, Weapons: PL, ARx3, Defenses: RH, Lifeboats: 0

We’ll fix this one by making it a heavy fighter. We will drop the rocket battery but give it another assault rocket and replace the laser cannon with a Laser Pod, a weapon introduced in the article “The Laser Pod” in Polyhedron #19. The game stats for the pod laser are:

Pod Laser: MHS: 1, Type: FF, RD, Range: 5, Damage: 1d10, Attack: 50% against RH, 10% against MS

It’s basically a mini laser cannon that can fit on a fighter.

Now the MHS for the redesigned ship is 3 and there is no penalty to ADF or MR.

Lightspeed Lady Class

Original Stats

HS: 4, HP: 20, ADF: 4, MR: 4, DCR: 32, Weapons: LB, ARx3, Defenses: RH, MSx1, Lifeboats: 0

Comments

This is just a civilian assault scout again but a little bigger. The MHS total for this ship’s weapons and defenses is 9 which is one over the 8 limit we have with the system we’re using for the privateers so we have a one-point performance penalty that needs to be applied. We’ll penalize the MR.

Lightspeed Lady II Class stats

HS: 4, HP: 20, ADF: 3, MR: 4, DCR: 32, Weapons: LB, ARx3, Defenses: RH, MSx1, Lifeboats: 0

This is basically the same but with the one-point penalty applied to the ADF of the ship.

Golden Vanity Class

Original Stats

HS: 4, HP: 20, ADF: 3, MR: 4, DCR: 32, Weapons: LB, LB, LB, ARx2, Defenses: RH, MSx1, Lifeboats: 0

Comments

The MHS total for this ship is 15, which gives us a one point penalty which was applied to the ADF so that’s good. The problem is that we have three laser batteries on a ship that should only have one because it would need to be HS 9 to hold three but is only HS 4. If we’re willing to let that slide, this ship is fine. If not we need to do something. But dropping it down to a single laser battery just makes it a Lightspeed Lady class ship so I’m going to let it slide even though even the standard ships don’t violate this rule.

Final Thoughts

Most of these ships are a bit overpowered. And I think the privateers are really overpowered for what I feel should be available to civilian ships but they are not as overpowered as the actual military ships so I’m willing to put them into a “paramilitary” class and let them slide with only a few changes.

The one thing that the original “Fast and Deadly” article didn’t include is prices for these ships. I think it was mainly introducing them for the miniatures game so wasn’t too concerned about that. Plus I don’t think they actually looked at the ship design rules provided with the game to work out the total cost of the systems for each ship. That could be an interesting exercise for a future article or series of articles. But at the very least, I would expect the privateers to be significantly more expensive due to their upgraded weapon capability even though the extra weapons don’t add much to the cost of the ships per the costs in the rules (I feel the weapons costs are way low in the ship design rules.)

All of these ships are buildable with the alternate ship construction rules I’m working on and have posted parts of. The hull sizes might be different and the role-playing details of the ships might vary a bit but it would be easy to design each of these ships and work out their costs, crew sizes, engines, etc. And they probably wouldn’t match the miniatures very well but their Knight Hawks stats would be dead on.

Now that I’ve looked closer at these ships, it’s time to pick some of them to be the ships of the Yazira squadron and get to the Battle of Hagurt coming up in a few days.

Do you agree with the changes I made? Would you do it differently? How would you handle the privateers? Share your thoughts in the comments below.

August 23, 2022 Tom 7 Comments

AnyCubic Photon – A 3D printer review

As you know, I like to build models and 3D print them. I’ve had Rostock Max v3 printer for a couple of years now that I’ve been very happy with. With it’s ~11″ diameter bed and ~16″ maximum height, it has allowed me to do some really large prints like my 12″ Assault Scout and my dice towers. I’ve also used it to print parts to repair things around my house or other useful gadgets.

Types of Printing

As a fused deposition modeling (FDM) printer with a 0.5mm nozzle, one thing the Rostock doesn’t do is super fine detail on small scales. It’s good enough for the spaceship models I’ve been making, especially since I designed the ships with the capabilities of the printer in mind. However, some of the models that I made to recreate old metal miniatures are right on the edge of what the printer could do. And while they print fine, they could be better. It definitely doesn’t do well enough to print small 28mm scale miniature figures with all their detail.

So earlier this month I purchased a new printer to compliment the Rostock on the small scale: an Anycubic Photon. Unlike the FDM printer that uses filament to lay down layers of material to create the print, the Photon is a Stereolithography (SLA) printer. It uses a UV sensitive resin and shines a UV light on the resin, hardening it for each layer. Early (and more high end) SLA printers use lasers as the light source. The Photon uses a UV LED screen. So instead of having to move back and forth across the print area to put down filament, it exposes the entire print surface at once.

Resolution & Build Volume

My Rostock has a cylindrical build volume 280mm in diameter and 405mm tall. Vertically, it can theoretically do 0.06mm layers but in practice, anything less than 0.1 mm doesn’t work but at that thickness and higher it works just fine. So I would use 0.1mm for high detail prints and 0.2mm as the default for large prints. That’s the vertical direction, in the horizontal direction, the positional accuracy was on the order of 0.05 mm but with the 0.5mm nozzle, you get actual resolution more on the order of 0.2mm.

Rostock on the left, Photon on the right. The Rostok is 3 feet tall.

The Photon is much much smaller. The picture at right shows them side by side. The print volume on the Photon is rectangular, 121mm wide, 68mm deep, and 150mm tall. However, that 121×68 mm print bed is imaged by a screen that is 2560×1440 pixels in size. That works out to a resolution in the x and y directions of 0.0475mm, 4 times better than what I can achieve with the Rostock. In the vertical direction, the default layer height is 0.05mm and it can go as low as 0.02mm, although I haven’t tried that yet as the 0.05mm height is amazing. It can go as thick as 0.1mm. So the default vertical resolution is already 2 times better than the best the Rostock can do and it has the capability to go even finer. The cost is print time and build volume.

Some Prints

Before I talk about the printing process, it’s time for some pictures. I’m still testing things out, but the default settings produce some amazing prints.

The images below shows a pair of miniatures that I printed for my daughter’s friends. I had tried printing them on the Rostock and it just couldn’t do it. The discoloration on the print of the sorceress is due to an alternate curing method I was trying out (more on that later). You can see the folds in their clothes and hair, and details in their armor.

The printer came with the green resin and that’s what I’ve been using. I’ve ordered some white, black, and grey resin but I’m waiting for it to arrive. Next up we have the pirate corvette. The silver one was printed on my Rostock and the green of course is the new Photon. You can see the difference immediately. The resin print is much smoother and doesn’t have the banding from the print layers that the FDM print has. That wasn’t actually the best print from my Rostock so it’s not a completely fair comparison but the new one is just that much better.

This image shows my sathar destroyer and hull 6 freighter models printed with both printers. The main thing visible in this set of prints is that the physical dimensions of the prints are more accurate with the resin printer. For example the bulb at the head of the destroyer is a bit distorted in the FDM print. Another thing that’s not as easily visible in this picture (as I wasn’t thinking about it when I took the picture) is that there are some fine details of bay doors and airlocks on both models that are just barely there on the FDM print but easily visible on the resin print. The other thing that stands out is that the barrels on my laser batteries (on the freighter) show up just fine in the resin print.

This next print I did to test out the resolution. The two prints are the exact same model file. The white one was printed with 0.1mm resolution on the Rostock and is 4″ tall. That was the scale (1/500th) that I designed the model to print at. I’ve also printed it at 1/333th, 6mm, and 10mm scales (6″, ~8″, and ~12″ tall. If you want one, you can order them here). The small one was printed just 1″ tall (1/2000th scale). It’s hard to see it in the picture, but every detail you can see on the large model, is also on the little one.

In addition, because of the very high resolution of the resin printer, details on the bottom of the model (back of the engines and fuselage), which didn’t print very well on the FDM version, are hinted at on that 1″ print but completely visible on a full-sized 4″ print as seen in the image below.

Next we have a comparison of the sathar light cruiser model. The FDM printed one has suffered some battle damage from my little boys playing with it. This is their favorite model of the bunch for some reason. Now the FDM version is pretty good but suffers on the underside of the engine struts. Otherwise it looks pretty good. But what blew me away when I got this print finished was the surface detail on the resin print. If you look closely at the head of the ship and the upper fuselage, you can see that the surface is faceted by a bunch of flat surfaces. That is the actual shape of the model file, not a printing artifact. It is washed out by the lower resolution of the FDM printer but the resolution is so high on the resin printer that the fact that I only used 50 faces to model circles is evident in the print. Those are the individual hull plates used to build the ship. At least that’s the story I’m sticking to.

The image below is the tallest print I’ve done, the sathar heavy cruiser. This one is about at the limit of the printer standing 142mm tall. In this case, I haven’t removed the support material from either of the prints so you can see what that looks like before it is all cleaned off. Not much more to add with these ones.

Finally, we have a collection of the smaller ships. These are all models, like the two above, that duplicate the original metal miniatures as exactly as I could (which turned out to be pretty close). We have the UPF and sathar frigates, the sathar cutter (which is the silhouette used on the UPF minelayer chit, but called the sathar cutter on the blister pack), and the pirate and UPF assault scout.

The Printing Process

The Photon’s SLA printing process comes with a different set of experiences, constraints, and challenges as compared with a FDM printer. The most obvious one is that everything is printed upside down.

The sathar heavy cruiser about 3/4 done

Build Plate Adhesion

The layer being printed is at the bottom of the pool of resin. The UV light shines there to cure the resin, then the build plate slowly lifts to separate it from the teflon panel at the bottom of the reservoir, lifts it up and then puts it back down to work on the next layer. Because of that, one of the biggest challenges is making sure that your first few layers stick very strongly to the build plate. I’d say this has been my biggest challenge so far and I’ve had plenty of failed prints where it just hasn’t stuck and I’ve ended up with at layer of hardened resin stuck to the teflon at the bottom.

To achieve a good binding, there are two major factors that go into it. First, you simply expose the resin to the UV light for a lot longer on the first 5-10 layers. Typical expose time for a regular layer is 8-12 seconds. On the first layers you expose it for 40-80 seconds. This makes these first layers strong and well hardened and helps them bind to the build plate. The other part is to make sure that the build plate is as level as you can get it.

On the Photon, the build plate is connected to the mechanism that moves it up and down by a ball joint (that you can just see at the top of the picture above) which allows you to adjust the position of the plate. I’ve found that I need to realign this after every few prints. I think I’m applying too much force when trying to remove models from the plate, or not tightening the screw enough that holds it tight. I’m still working on making this more stable.

Layer Print Speed

Another difference is that it takes the same amount of time to print a layer whether there is only a small bit of the model on that layer or you’re filling the entire build plate. On an FDM printer, the nozzle has to travel over every bit of the layer where you want plastic to be laid down. Which means that the time spent on a layer depend on the amount of material to be placed. In fact, in the slicing software for FDM printers, there is an option you can set that is minimum layer time. This is because the plastic is still warm and if you print over the layers to quickly, you get smearing like you can see at the top of the corvette model in the earlier pictures.

On the SLA printer, it exposes the entire layer at once. Which means each layer takes exactly the same amount of time regardless of the amount of material being printed. However, because of the smaller layer sizes, you have to do more layers.

For single models, the FDM printer is faster. For example, the freighter print, and the frigates and sathar destroyer for that matter, all take about 4-5 hours on the Photon to print since they are all the same height and print time is just a function of the height of the model. The heavy cruiser took about 11 hours (I ran it overnight). On the FDM printer, those smaller models only took about 30 minutes to 1.5 hours depending on the layer height settings. So you’re getting the increased quality in exchange for increased time.

However, because the SLA printing is independent of the amount of material being printed, you can print a bunch of models all at once if they fit on the build plate. I printed the eight smaller ships (destroyer, 2 frigates, freighter, cutter, and 3 assault scouts) all at once. It took five hours and only filled about half the build plate area, if that (I could have packed them closer together). On the Rostock, that same set would have taken nearly 6 hours to print (at 0.1mm height resolution compared to the 0.05mm of the Photon) and the scaled down assault scout model would not have printed successfully at all as the details are too fine on that model. And that 11 hour print on the heavy cruiser? It takes 6.75 hours on the Rostock. And I can print 5 at a time on the Photon in that same 11 hours which would take just over a day on the Rostock. So while individual prints are slower, you can print many models at once and actually achieve a faster print speed with higher resolution. As long as it fits in the build volume.

Materials, Post-processing, and Clean-up

With the FDM printer, I just use PLA plastic which comes in 1kg spools that cost about US$22-25 depending on the color and transparent plastic costs a bit more. You can see one of the spools and its box in the very first picture sitting on top of the Rostock. For the SLA printer, you use a liquid resin that hardens when exposed to UV light at 405nm. You can buy it in 500ml and 1 liter bottles that cost about US$25 for the half liter bottles and US$40 for the liter bottles, again price varying slightly by the color and transparency. So the material on the SLA printer is a bit more expensive.

Additionally, you use more material for any given print. You always have to have a base plate (raft) that uses up material, plus the resin prints tend to be more solid than the FDM prints. There are techniques for reducing this that I’m still learning, but my resin prints are definitely heftier than the prints from the Rostock. Additionally there is a bit of resin lost in the clean-up process each time (although the amount is fairly small). All told, it probably costs about 2-3 times as much to print with the SLA printer than the Rostock.

There is also a bit more work involved on finishing a print with the SLA printer. With the FDM printer, once the print is done, you just have to let it cool, remove it from the build plate, remove the printing supports, and you’re done. Paint or use. It’s a bit more involved with the SLA printer.

First, the print is literally dripping wet. The last bit of just came out of the resin bath and you might have bits of liquid resin hiding in pockets higher up depending on the shape of your model. So you have to have to make sure that gets cleaned up.

Second, there is typically a thin film of uncured resin sticking to the surface all over the print. This needs to be rinsed off to get the highest surface detail. This is done by washing the material in a bath of high concentration rubbing alcohol (I use 91% isopropyl). The alcohol dilutes and washes away the uncured resin. This keeps it from binding to the model in the next step.

Finally, you need to finish the curing process. While the model is solid, it is not completely cured and you want to make sure it is. This can be accomplished in a number of ways. One is to buy a UV lamp that emits at 405nm and put the model under that for a while to finish curing at least the surface (which is really what you need, the interior will finish over time). The other option, which I typically use, is to take advantage of the big UV lamp in the sky and set the model out in the sun for 10-15 minutes. Of course that latter option only works during the day. At night I actually have a full spectrum lamp from an old fish tank that I use. It’s not super efficient as I don’t think it actually emits a lot of UV but it does work if I let it run overnight.

Since you’re working with a liquid, you get drops of resin falling across your work surfaces and printer as you’re working with the finished model, plus resin sticking to the tools you are using, so you have to make sure to clean it up as you go.

Finally, you have to deal with failed prints. On the FDM printer, you just pull the bad print off, make sure the nozzle is clean, and try again. There is a little more work with the SLA printer.

First, when a print fails, that usually means that it has come off the build plate and therefore is stuck to the bottom of the resin vat. Although I did have one failed print (of the heavy cruiser) where parts were just missing because they didn’t stick at first and then later layers worked. The printer comes with a plastic scraper for removing prints from the build plate and the resin vat when they get stuck there. However, you have to be very careful. The bottom of the resin vat is actually a thin sheet of clear teflon film. Clear so the UV light can get through, and teflon to help the resin not stick. This film has to be flat and intact for the printer to work. If you gouge it, it has to be replaced.

Which of course I did on the second day of printing. I was having a lot of failed prints and I accidentally caught the film with the corner of the scraper and gouged it pretty good making it no longer flat. Luckily the printer comes with two replacement films so I got to experience that right away. I haven’t had a problem since. (And I’ve ordered more film in case I do and for when the film just wears out from use.)

The other thing you have to deal with on failed prints, and even regularly after good ones, is little bits of cured resin in the vat. These have to be cleared out because if they get between the build plate and the bottom of the vat, the build plate doesn’t get into the correct position and the layer doesn’t cure properly which can cause it to not stick and the print to fail. This is done by removing the resin vat from the printer and pouring out the resin through through a very fine filter (that came with the printer) into a container. The little bits are removed from the resin and then you can replace the vat (after wiping it out) and refill it with the resin. The picture to the right shows the filter I’m currently using and all the little bits that have been filtered out. The filters that came with my printer are paper and eventually soak up a bunch of resin and have to be discarded. The printer came with 10 so I’ll eventually need to get some more.

Other Thoughts

Just a couple other thoughts before we wrap up. First is the smell. The PLA plastic that I use for the Rostock actually smells pretty nice. It’s not like air freshener nice but it is not a bad odor. The resin isn’t nearly as pleasant. And while it’s not too bad, you can definitely smell it when the printer is running. It’s best to run the printer in a well ventilated area. Also, there is a distinct odor from the rubbing alcohol as well. While I wouldn’t consider them to be really unpleasant, the extra odors from this printer are not as nice as the FDM printer. Of course, I’m not that sensitive to the smells so it might be worse for you.

Another topic is the slicing software that you use to make the print files. The printer comes with the software bundled on a USB stick and as far as it goes, the software works just fine. However, it is very limited in its functionality. It also has a bug in the rotation functionality that makes it a bit hard to position pieces if you want to rotate them. Namely, the x & y rotation work on the original model axes, no matter the model rotation, while the z rotation works on the printer z axis.

Additionally, it would be really nice if the slicing software would tell you how much resin was being used in a print. It gives estimated print times (which tend to be underestimates, I don’t think it takes the motion of the build plate into account) but doesn’t give you the volume of resin used. It also doesn’t do hollowing or drilling holes (an advanced topic I’m just getting to to reduce resin use) but that can be done in other software. I’ll admit that I haven’t checked the company’s website yet to see if there is a newer version of the software.

Others have recommend ChiTuBox which is what the bundled software is based on (an older version) as it does have all those features and fixes the rotation bug. But for some reason, I have yet to get a print to work using a file generated from that program. They always fall off the build plate despite having all the settings the same in the two programs (at least as much as I can. ChiTuBox has many more options). I’m still trying to figure that out. Right now I use ChiTuBox to position and hollow out the model and then use the bundled software to add supports and slice.

Finally, the touch screen is a little small. The icons and images are fine, but the print is really tiny. It’s a pretty high resolution screen crammed into a 2.7″ space so the words are small. I typically have to either use my magnifying glass lamp or put on reading glasses (even with my uncorrected closeup vision) to read the remaining time on a print.

Conclusions

The bottom line is that I really like this printer. Like any 3D printer, it has its quirks and there is a bit of a learning curve to get the best performance, but it is fairly turnkey and once I got the build plate leveling worked out, it pretty much just works. There is a bit more work involved in finishing the prints, and the materials cost a bit more, but it’s well worth it for the increased resolution.

I haven’t mentioned prices. My Rostock was a kit that I had to assemble and cost $900 (on sale from the regular $1000 price). The current model (the v4) is the same price as a kit and about $1400 assembled. You’re really paying for the large print volume with that printer. Getting a small FDM printer with a 6″x6″x6″ print volume will only cost you about $300-400 dollars. I got my AnyCubic Photon on sale for $300. The regular price is $539 but the sale price is still available (as I’m writing this) on Amazon. Here’s a link to the product page if you want to check it out.

So in summary:

Pros

  • Low printer price
  • Excellent resolution
  • Can print multiple models in the same amount of time
  • Easy to set up and use

Cons

  • Slight smell
  • Higher materials cost
  • More post processing work
  • Software somewhat limited and buggy
  • Relatively small print volume

I’m really enjoying this printer and you can expect to see more prints from it in future posts. If you have any questions, comments, or suggestions, let me know in the comment area below.

August 27, 2019 Tom 4 Comments

Variation on a trap

This post originally appeared on the now-defunct Arcane Game Lore blog.

I was playing Star Frontiers with my kids last night and they dreamed up a trap far worse than what was actually there.  They are in the last section of the SF-1: Volturnus, Planet of Mystery module (PDF).

Warning: spoilers for the adventure.  If you’re a player in this module stop reading now!

Trap corridors from the module

In this part of the module, the characters have to assault a Sathar artifact.  The module is designed such that the characters can easily find a false entrance that opens up into a small closed set of interconnected tunnels that were circular in cross section (see area labeled 4 in the image at right).  The trap here being that once the characters pass a certain distance in either direction (the dashed lines in the image to the right) the entire tunnel complex flips 180 degrees tossing them about for some damage.  That’s all this area does, continuously.  There is absolutely nothing else here, just empty halls that flip over every time you cross one of those lines.

My kids were smart and were looking for traps but the technician looking barely made his skill roll, so I declared that he saw something at the positions of the dashed lines that looked like a triggering mechanism but didn’t know what it was.  He carefully moved over and made another skill roll to try to figure it out, again barely making it.  He was informed that it seemed that the tunnel system could pivot around a central axis but couldn’t figure out anything else.

At this point they all began speculating wildly about what could happen.  Not being able to see the entire structure (it was dark, they only had flashlights, and couldn’t see around the corners), they came to the conclusion that the corridors were balanced and that if they went too far in any one direction, it would tip over, dropping them to the bottom.  And if that wasn’t bad enough, they were also convinced that there were large 2 meter balls in the hidden portions of the tunnels that would roll down and squish them.

They immediately started looking at the weights of the different races (2 Dralasites, a Yazirian, a Vrusk, and 2 combat robots) and trying to send equally weighted characters in opposite directions.  This obviously didn’t work and they got flipped over and there were (luckily) no balls to go rolling through the halls.  After a couple of flips they decided this wasn’t working and found the correct (secret) entrance.

I’ll have to admit though, that the trap they dreamed up was much more interesting (and deadly) than the actual one.  I may just have to use it in a future adventure.


Comments

neoproxy – July 8, 2014 at 12:22 pm

Nice, that is ingenious on their part and far more believable (IMO). Their trap required no actual power source as the character’s own weight powers the trap. Their logic to counter that trap is admirable. I like it better as the current trap is doesn’t appear to have a way for them to overcome the trap other than just leaving.

June 5, 2014 Tom Leave a comment

Game Review – Arkham Horror, Fantasy Flight Games edition

This post originally appeared on the now-defunct Arcane Game Lore blog.

(Warning, this is a little long.  TL;DR version – Great game go play it, even if you’re a fan of the first edition as I am.)

Okay, so I’m a couple years behind the curve on this one but I’m going to do it anyway. I’ve actually owned the game for a couple of years; my wife got it for me for Christmas in 2011. But until Christmas Eve 2013, it was still in it’s original shrink wrap. You see, the very existence of this game represents a bit of a personal disappointment/frustration in my life (If you want that story, it’s at the end of this post). Plus, I’m a big fan of the original Arkham Horror game Chaosium published decades ago.  I’ve been playing it with my kids for years. So the new game didn’t hold a lot of draw for me. This review will definitely be tempered by my decades of playing the original game.

Physical Components

Let me start by saying that the physical components of the game are absolutely wonderful. The pieces are thick and sturdy and the artwork is beautiful. I was a little put off at first at the sheer number of components but once we started playing it wasn’t bad at all.

As I was punching out the components, I thought it odd that there were little chits for the money instead of paper money but in the end, I think this was a good idea as well and they worked well.

Compared to the old game, this one is much larger physically. Everything is bigger. The player cards are larger, the monster markers are bigger, the board is much larger. In a pinch you could play the old game on a folding card table if you only had 4 players. I’m not sure the game components of this game would even fit on a table that small. This one took about three quarters of our large 8 person kitchen table to play with the four of us playing.

The components were well designed and worked well with the game. My only real complaint was the sheer number and variety. It takes a bit of work to get everything sorted to get the game started.

Rules and Game Play

One of the things we loved about the original game was that it was a collaborative game with the players trying to defeat the game and not each other. I was glad to see that this hadn’t changed in the new version.

The basic premise of the game hasn’t really changed. You still move around Arkham, fighting monsters, closing gates, and having encounters in the various city locations. The details of all those things, however, are completely different. In fact, there really aren’t many mechanics that are the same. The game has received a complete overhaul. I’m not going to go into all of them, just the ones that stood out in our initial game.

Movement

The two maps, to scale

This was very different from the original game. In the old game, there was one big map that the locations were set off of and the monsters would wander around the streets, moving on every turn. In the new version, the monsters are still on the streets but there are only 7 street squares instead of about 6 dozen. So while the board is physically larger, it is logically smaller, the largest distance between any two points being only about 7-8 spaces. Of course you don’t move 2d6 spaces a turn anymore but rather a relatively low “fixed” (see Character Skills below) number of spaces each turn.

Plus the mechanic for moving the monsters has changed and not every monster moves on every turn. This proved to be a frustration for us in our game as several monsters just sat still for several turns blocking the road before we were able to gear up enough to go kill them. It took a little getting used to as we were used to having monsters move on after every round. In the old game, they might be blocking you now but wait a turn and your path will probably clear up. That’s not the case any more.

Character Skills

Skill groups in the new game

The original game gave each character 4 skills that were relatively fixed (in both versions you can get skill cards that increase these). The new game removes the Fast Talk skill, makes movement a skill and adds in Luck and Will. These skills are grouped into three pairs and you are allowed to shift them somewhat at the beginning of each turn. Changing them allows you to sacrifice ability in one area to get a gain in another. For example, Speed and Sneak are paired up. You have the choice of moving quickly but not being able to sneak past monsters or dangers that appear or increasing your ability to move unseen but not being able to move very quickly. I found that I really liked this new twist on the skills and being able to adapt your abilities based on the situation definitely came in handy at times.

Encounter Resolution

The original game had the “Arkham Gazette”, a 4 page booklet of tables that you would roll on to determine what would happen. In the new game, the various locations are divided into neighborhoods and there is a small 7 card deck for each neighborhood, each card having a unique event for each location in the neighborhood. I’ll admit this was a refreshing variation. We used to play the old game so much that we knew about half of the encounters without even consulting the “Gazette” just based on the die roll (e.g. a 6 is always a Gate and Monster in locations that can have gates :-) ) The random shuffling of the mini deck always make for an unknown encounter.

I also liked the expanded deck of cards for the Other World location encounters. This deck of 49 cards had events for one or more of the 8 Other World locations plus and generic “Other” category to use if the specific world you were in wasn’t listed. This greatly expanded the possibilities and variety of encounters you can have over the single d6 table in the original game.

Gate Appearance Location and Monster Surges

Again, in the new game, this is determined by a drawn card instead of a dice roll. Since there are 67 such cards, the statistical probability of the various locations is bound to be different than in the original game that relied on a 2d6 roll and table to pick the location.

In the old game, you knew exactly where to put your 4 possible elder signs. You put them on the 4 gate locations that were in the middle of the table and had the highest probability of being rolled (Founder’s Rock, the Graveyard, the Silver Twilight Lodge, and either the Woods or Devil’s Beach). In the new game, where you can have more than just the elder signs from the item cards, you put them wherever you can.

In the original game, you only got a monster surge (one new monster on every open gate) if you rolled a 7 for the gate location (Founder’s Rock). Statistically, this happened about 1 in every 6 rolls. In the new game, you get a monster surge whenever you pull that a gate should open in a location you already have an open gate. Plus in the new game, you get more monsters, one for every player or one for every open gate, whichever is higher. This was a problem for us in our first game as we kept pulling the same gate location very often (although this was probably due to poor shuffling on my part of the card deck :-) ).

Skill Resolution System

This aspect of the new game was completely different and took a little getting used to the first few rounds (and we definitely made several mistakes until we got the hang of it). In the old version of the game, you rolled d6, possibly adding your skill and any bonus for items and compared it to a target number. If you exceeded the target you succeeded. If not you failed. In the new game, your skills and item bonuses determine the number of d6 you roll with each 5 or 6 rolled being a “success”. Each challenge had a number of “successes” (typically 1 or 2) that you needed to roll to complete the task. The jury’s still out on whether I like the new system better but it is interesting and definitely different.

Other Thoughts

I like the variety of “enemies” that you get to fight in the new game in the form of the various “Ancient Ones” that you have to fight. It provides some variety to the game play (each one has different special rules). I also liked the larger number of potential characters you could play (24 instead of 8) that come with the new game. Again, adding variety to the game experience.

Overall, there wasn’t anything that stood out as a strong negative to the game. There was lots of new things that we’re still getting used to but there were a lot of things I liked about the new game. A lot of those having to do with adding greater variety to the game play. Overall, I’d recommend this game to anyone. We’ll still play the old version occasionally, but I think the new Arkham Horror will become the go to game when we need some Lovecraft gaming (unless of course we’re playing Munchkin Cthulhu).

Game Report

Now that I’ve talked about my impressions of the game, how did our first game go? Well, let’s just say that the monsters didn’t have a chance. Although there were some points where we were a little worried, and I personally had a dismal game (I didn’t kill a single monster or close a single gate :-( and kept going insane!). Of course it didn’t hurt us any that we were an experienced group of monster hunters that have been playing the old game for over 20 years in my case and as long as they’ve been able to read in the case of my kids. The strategies that work in the old version still work in the new one, just some of the tactics have changed a little. The players were myself, my 17 year old daughter and my two 14 year old twin sons.

This was our first game so we make a few mistakes (usually in the monster’s favor) the first few rounds but quickly sorted out those issues. All started well. I had a retainer and headed to the Curiosity Shoppe to start collecting magical items for the team while the others set about exploring Arkham. One of my boys pick up a second gun quickly and jumped right into the first gate.

The one worry we had was that we kept pulling the same gate locations over and over (probably due to poor shuffling of the deck) and were constantly getting monster surges. So the doom level wasn’t going up but the monster count was. We weren’t killing any monsters to start off so this kept pushing up the terror level (a new mechanic I didn’t talk about above) and actually closed off the general store early in the game and the Curiosity Shoppe somewhat later. And then of course, just as we started to get the monster situation under control, we started pulling new gate locations and the doom level started to rise.

My daughter had a rough time. She started out with no weapons and couldn’t for the life of her get one anywhere. She did manage to amass quite the army, however. By the end of the game she had 6 allies that boosted her skills all over the place. She finally managed to team up with one of her brothers for a round and he gave her some of his extra weapons and then she was off to the races closing gates. Her brother that gave her the weapons managed to close one more than she did but he had a big head start.

My other son had a decent game as well. He had a run of bad luck on one of his gates, however. He got a good encounter in the other world that sent him back early so he got out quickly, but then couldn’t for the life of him close the gate on the other side. It took him 4 or 5 round to finally close it.

My game on the other hand was terrible. I started well with my retainer and starting monies allowing me to purchase several magical weapons at the Curiosity Shoppe. It all went downhill from there, however. When I left the Curiosity Shoppe to try to deliver some of the items to the other players, I ran afoul of a nasty group of monsters going insane (and losing half of my items in the process). Then we made a rules mistake and allowed two Hounds of Tindelos to enter the Arkham Asylum (monsters aren’t allowed to go there or to the hospital) while I was still there and I went insane again losing more items, leaving me only with an Elder Sign. One of my boys went insane at the same time and so I passed the Elder Sign off to him while we were in the asylum together. Later tried going through a gate and ended up getting lost in the gate and randomly coming back to Arkham and not being able to close it. I was pretty useless.

Overall, we did quite well, the doom track only ever got as high as 7 and was only on 6 when we won the game. Part of this was due I’m sure to poor shuffling on my part of the game cards as we got a lot of repeat gate locations and managed to get 3 Elder Sign items early in the game. However, a good part of it, I believe, was due to the fact that we were experienced players. By mid-game we had reached our stride and were closing gates as fast as they were appearing. I think better shuffling would have resulted in a higher doom track value but I don’t think we would have reached the 12 necessary to summon Hastur, the King in Yellow, our opponent for the game.

As is typically the case, the last round was spent waiting for one of the boys to come of the last open gate (my daughter had closed the other open gate the round previous) and close it while desperately hoping that the next gate opening location was either where the last gate was or where one of our 4 elder signs were located. Luckily we pulled a location with an elder sign and the universe was saved. Fun was had all around and we’ll definitely be playing again.

The Tragic Backstory

If you’ve been wondering why the existence of this version of the game is a bit of a disappointment or frustration to me and why it took two years to actually open and play the game, read on. Otherwise, you can stop here. Also, I’ll be dropping names that may or may not mean anything to you depending on your connections to early gaming history.

Original Arkham Horror game box

Dial the clock back to the late 80′s, early 90′s. I was in high school and played in a gaming group GM’d by John Scott Clegg, who went by Scott and is about 20 years older than me. Scott grew up and went to high school with Tracy Hickman (yes, that Tracy Hickman of Dragonlance fame) and Sandy Peterson (yes, the Sandy Peterson that wrote the original Call of Cthulhu RPG). In fact, Scott is the one that introduced Sandy and Tracy to role-playing in the first place, even before D&D came out. We played a heavily customized version of RuneQuest set in a world Scott had been developing since they were in junior high. Occasionally, if we didn’t have enough players, we’d play Arkham Horror (the original version of course) instead of RuneQuest.

Scott actually helped Sandy write the original version of the Call of Cthulhu RPG (his name appeared in the credits at least up through the 4th edition, the last one I saw) and wrote freelance for Chaosium creating adventures for CoC. He also wrote, with his wife, the Earth Dreamlands supplement that won the Origins Best Role-playing Supplement of the Year award in 1985. So he had some background with the game industry and Chaosium’s Cthulhu games specifically.  According to Scott, the scene on the original game cover (above) is a depiction of a scene from one of the RPG sessions that Sandy ran.  In the session, the mythos monsters destroyed an entire wing of the hospital trying to kill Scott’s character (in the blue coat in the foreground).  He managed to escape with the other character who was visiting him in the hospital at the time.

In the late 80′s we decided that we’d take a stab at writing a sequel to Arkham Horror. Scott knew that Chaosium had intended to do expansions for Arkham Horror but had never gotten to it and figured that if we could present them with a ready made game, they might snatch it up. So we set to work. The game was called Chaos in Kingsport. It had a new map, new locations, new encounters, a new monster mix, and some slight rule variations that made it a bit more difficult than the original Arkham Horror. It was designed to be played stand alone or in conjunction with the original game and had rules for allowing the characters to travel between the two cities.

Once all the design was done, we built a prototype and sent it off to Chaosium for review. We had the beginnings of two more expansion games plus expansion packs for each of the four games in the works (we actually finished the expansion packs for Arkham Horror and Chaos in Kingsport). We figured if they liked this one, we could do quite a bit more to expand their line. Then after we sent off the game, the bombshell it. Chaoium pulled Arkham Horror and declared it ‘Out of Print’. At the same time Dragon Magazine ran a very positive review of the game that ended with this gem: “The game is now out of print. So if you can find a copy, buy it. Period.”

Needless to say this didn’t bode well for our endeavor. Although we had a little hope that if they had some viable supplements, Chaosium might bring the game back. In the meantime we took the advice of the Dragon Magazine article and paid a visit to our local game shop (which I’m glad to say is still in business 25 years later and has grown from 1 to 3 locations). Scott talked with the owner/manager and told him to get as many copies of Arkham Horror as he could and we’d buy them. He managed to get three copies and that’s how I got mine, probably one of the last ones sold at MSRP.

Well, in the end we got our prototype back with a rejection letter. With Arkham Horror out of print, they weren’t interested. They had loved the game, however, and played it to death. The pieces were in shambles, the map had mug stains all over it (why they had been putting mugs on the map, I’m not sure) and the review they sent back was glowing. Our timing had just been bad. If this had happened today, we probably could have gotten permission to do a Kickstarter and produced the game ourselves but at the time, we had no money (that was one of the reasons we did the game in the first place) and no real way to raise any (except for Scott, most of us were still in high school).

In the end, we consoled ourselves with producing a copy of the game and the two expansion packs for each of us. I think my copy is number 14 of 20, I’d have to go find the map and pull it out to be sure. Had things been different, I may have broken into the field of game design much sooner in my life and been doing it at least semi-professionally for years now. So that’s why it took two years for me to even open the game. I’ve always had a soft spot for the original game and didn’t really want to see what had replaced it.

January 1, 2014 Tom Leave a comment
Become a Patron!

Recent Posts

  • State of the Frontier – January 2024
  • Detailed Frontier Timeline – FY62.069 to FY62.99
  • State of the Frontier – August 2022
  • Battle of Hargut (Gruna Garu) – FY62.098
  • Archived Arcane Game Lore Posts – May 2013 to Dec 2014
  • A Look at Yachts and Privateers
  • Homeworld Bound – A Campaign Concept
  • Second Battle of Fromeltar (Terledrom) – FY62.083
  • Sample Star System Data
  • Detailed Frontier Timeline – FY62.038 to FY62.068

Categories

  • 3D Models
  • Adventures
  • Background
  • Creatures/Races
  • Deck Plans
  • Equipment
  • Game Design
  • General
  • Locations
  • Maps
  • NPCs
  • Optional Rules
  • Patreon-only
  • Project Overviews
  • Reviews
  • Setting Material
  • Starships
  • System Brief
  • Vehicles
  • Writing

Recent Comments

  • Tom on State of the Frontier – January 2024
  • Tom on State of the Frontier – January 2024
  • Tom on Star Map Generator – GUI Edition
  • David on Star Map Generator – GUI Edition
  • DM_Shroud on Star Map Generator – GUI Edition
  • Tom on Fighter Miniatures
  • Rlaybeast on Fighter Miniatures
  • Loguar on Detailed Frontier Timeline – FY62.069 to FY62.99
  • Loguar on Detailed Frontier Timeline – FY62.069 to FY62.99
  • Tom on Detailed Frontier Timeline – FY62.069 to FY62.99

Archives

  • January 2024 (1)
  • September 2022 (1)
  • August 2022 (9)
  • July 2022 (3)
  • June 2022 (3)
  • May 2022 (3)
  • June 2021 (1)
  • April 2021 (1)
  • February 2021 (4)
  • January 2021 (6)
  • December 2020 (5)
  • November 2020 (11)
  • October 2020 (4)
  • September 2020 (5)
  • August 2020 (4)
  • July 2020 (6)
  • June 2020 (5)
  • May 2020 (8)
  • April 2020 (5)
  • March 2020 (5)
  • February 2020 (5)
  • January 2020 (5)
  • December 2019 (7)
  • November 2019 (4)
  • October 2019 (6)
  • September 2019 (5)
  • August 2019 (6)
  • July 2019 (7)
  • June 2019 (5)
  • May 2019 (6)
  • April 2019 (7)
  • March 2019 (4)
  • February 2019 (5)
  • January 2019 (7)
  • December 2018 (5)
  • November 2018 (10)
  • October 2018 (4)
  • September 2018 (4)
  • August 2018 (5)
  • July 2018 (4)
  • June 2018 (4)
  • May 2018 (12)
  • December 2015 (1)
  • November 2015 (2)
  • December 2014 (4)
  • November 2014 (3)
  • June 2014 (1)
  • January 2014 (1)
  • July 2013 (1)
  • June 2013 (2)
  • May 2013 (3)

Meta

  • Log in
  • Entries feed
  • Comments feed
  • WordPress.org

Recent Posts

  • State of the Frontier – January 2024
  • Detailed Frontier Timeline – FY62.069 to FY62.99
  • State of the Frontier – August 2022
  • Battle of Hargut (Gruna Garu) – FY62.098
  • Archived Arcane Game Lore Posts – May 2013 to Dec 2014

Recent Comments

  • Tom on State of the Frontier – January 2024
  • Tom on State of the Frontier – January 2024
  • Tom on Star Map Generator – GUI Edition
  • David on Star Map Generator – GUI Edition
  • DM_Shroud on Star Map Generator – GUI Edition

Archives

  • January 2024 (1)
  • September 2022 (1)
  • August 2022 (9)
  • July 2022 (3)
  • June 2022 (3)
  • May 2022 (3)
  • June 2021 (1)
  • April 2021 (1)
  • February 2021 (4)
  • January 2021 (6)
  • December 2020 (5)
  • November 2020 (11)
  • October 2020 (4)
  • September 2020 (5)
  • August 2020 (4)
  • July 2020 (6)
  • June 2020 (5)
  • May 2020 (8)
  • April 2020 (5)
  • March 2020 (5)
  • February 2020 (5)
  • January 2020 (5)
  • December 2019 (7)
  • November 2019 (4)
  • October 2019 (6)
  • September 2019 (5)
  • August 2019 (6)
  • July 2019 (7)
  • June 2019 (5)
  • May 2019 (6)
  • April 2019 (7)
  • March 2019 (4)
  • February 2019 (5)
  • January 2019 (7)
  • December 2018 (5)
  • November 2018 (10)
  • October 2018 (4)
  • September 2018 (4)
  • August 2018 (5)
  • July 2018 (4)
  • June 2018 (4)
  • May 2018 (12)
  • December 2015 (1)
  • November 2015 (2)
  • December 2014 (4)
  • November 2014 (3)
  • June 2014 (1)
  • January 2014 (1)
  • July 2013 (1)
  • June 2013 (2)
  • May 2013 (3)

Categories

  • 3D Models
  • Adventures
  • Background
  • Creatures/Races
  • Deck Plans
  • Equipment
  • Game Design
  • General
  • Locations
  • Maps
  • NPCs
  • Optional Rules
  • Patreon-only
  • Project Overviews
  • Reviews
  • Setting Material
  • Starships
  • System Brief
  • Vehicles
  • Writing

Meta

  • Log in
  • Entries feed
  • Comments feed
  • WordPress.org
Powered by WordPress | theme Layout Builder