Now that the basic deck plans are done, I want to make a 3D model of the ship. I’m going to be posting this as a series of small articles as I work on the model so you can see the bits and pieces as they happen. Let’s get started.
I’m going to be trying something new for this model. Well, new for me at least. I’m going to attempt to create the model in Blender. I’ve used Blender a bit in the past but only to add materials and textures to an existing model that I created somewhere else. Never to completely create the model from scratch. In the past I’ve done all my models in another program called OpenSCAD. It has some features that I really like (as described in this post on the Arcane Game Lore Blog). But it also is fairly simple and I’d like to have the extra control an options available in Blender. If you want to see some of the other things I’ve created, check out the 3D Models category here on the Expanding Frontier. That includes several posts I’ve made on the subject.
So we’ll see how this goes. I’ve been working through a Blender fundamentals tutorial on Pluralsight and feel comfortable with the basics that I think I’ll need to create this model. If all else fails, I can fall back on OpenSCAD. In truth I’ll be using both of those tools in this project since I can export objects from OpenSCAD into Blender. So for parts and pieces that make more sense to create in OpenSCAD, I’ll be using that.
The Skeleton
For this ship, the first step was to lay out all the interior pieces in their proper size and position. This is what I’m calling the skeleton of the ship. Once that is done, I can build the hull around the interior structure so that it is all properly contained.
This is one of those cases where OpenSCAD is just going to be so much easier to use then Blender. Since we’re talking about adding in basic geometric shapes in very specific, defined positions, the programming interface to OpenSCAD that allows me to specify the position and dimensions of basic shapes like cubes, cylinders, and spheres is exactly what I need.
I work on these models at 1/1000 scale. The default units in OpenSCAD are millimeters so I just use the sizes of the rooms in meters as my values in the functions. This naturally gives me that scale. I can always scale it up (or down) later as needed. For tabletop minis to be used in a tactical game, I typically create the model at 1/3000 scale so I just have to scale the final model by 1/3. For display models, I can scale it to anything I want.
Deck 1
To begin, I just pulled up the deck plan for deck 1 (the lower deck, see this post) to use as a reference. OpenSCAD needs an origin so I selected the center of the grid to be (0,0) in the horizontal directions and the bottom of the deck to be 0 in the vertical direction. I could just have easily selected the lower left of the deck plan but thinking ahead, I knew I would want the origin on the center-line when I got into Blender so I chose appropriately. I then just started adding in boxes to represent the various rooms in the ship.
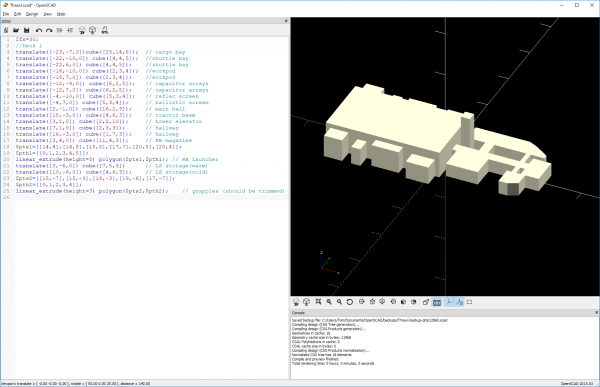
The cargo bay is 6 meters tall. The little side rooms off of it are not quite as tall ranging from 3-5 meters in height. The forward section of this deck has 3 meter tall rooms. And the elevator shaft connecting this deck to the upper one can be extended 10 meters up to intersect the middle deck. Here’s what things look like after adding in this first deck.
 On the left is the OpenSCAD code. On the right is the actual render of the code as a 3D model. The large block sticking up high in the middle is the elevator shaft to the next level up.
Deck 2
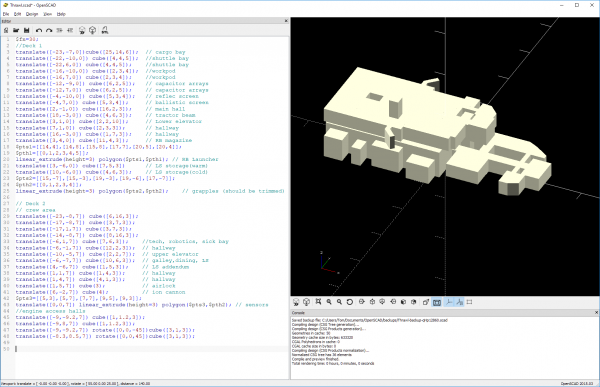
On the first level, I added in each room individually. On the middle level, there are a lot of rooms that are adjacent forming large blocks. These areas I just added as single large bits as there was no need to make them all individual. This model I’m creating is just really a sort of wire-frame and will not be part of the final model. It’s more of a guide. The room for the Ion Cannon machinery is 4m tall instead of the standard 3m and is so represented in the model. Here’s the model after this deck has been added.
 Those little bits sticking out on the sides are the access tunnels to the engines. Those might very well change as I start modeling but for now, I’m just reproducing what’s on the sketches I drew. Somewhere out there will be engines. Again the bit sticking up is the elevator shaft to the next level.
Deck 3
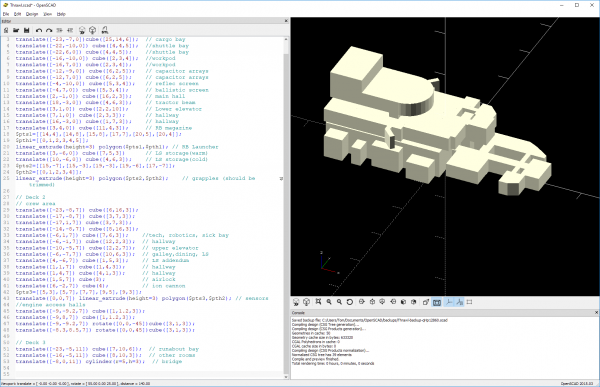
Finally we need to add in the upper deck. This one has the 6m high runabout bay aft with all the other decks being 3m in height including the round bridge area. Again this deck has a bunch of adjacent rooms that form large blocks. In fact, it only took three shapes to model this: the large block for the runabout bay, a cylinder for the bridge, and an block connecting the two to represent the other rooms. Here’s the model with deck 3 added.
 Nothing really exciting here. Although now you can see how the ship sort of tapers toward the middle and the back as you go up to the higher levels.
Weapons
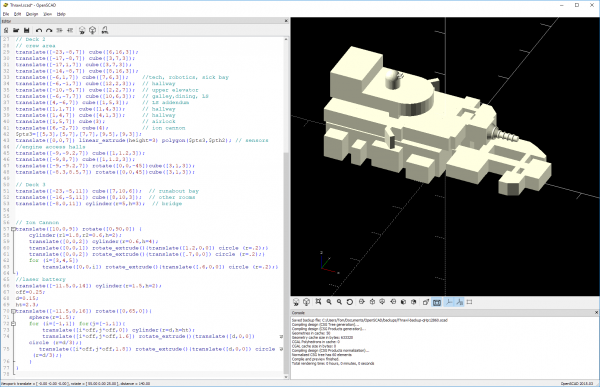
Finally, I wanted to add in the exterior weapons: the Ion Cannon and the Laser Battery. So I went in and modeled those to scale and put them on the ship. Having these exterior elements will help me to get the hull placed properly. With the weapons added, I now have a completed model of the interior of the ship as well as some of the exterior features I need to account for. Here’s the final model.
 Making the weapons was kind of fun. I may just export those out to use in Blender. It depends on how hard it is to make the tori around the barrels.
And Done (for now)
Now that the model is done, I can create an actual 3D object and export it for use in Blender. That’s it for this segment of the modelling process. Next time I’ll pull this skeleton model into Blender and start shaping the actual hull around it.
Let me know if you have any questions, comments, or suggestions in the comment section below.


