The Expanding Frontier

Creating Sci-fi RPG Resources

  • Home
  • Order Eclipse Glasses
  • Order a Map
  • Order Miniatures
  • Supporters
  • About
  • Bio
  • Home
  • Order Eclipse Glasses
  • Order a Map
  • Order Miniatures
  • Supporters
  • About
  • Bio

Category Archives: Adventures

A Module Based Campaign – part 4

Okay, I didn’t get nearly as much done on my trip as I hoped. I should know by now (after doing these for over 15 years) that attending a conference sucks way more energy out of me than I expect. That and I had something come up that took up a bunch of my free time. I did get to play cricket for the first time though. That was fun and the Australians got a good laugh at us Americans messing up all the time.

I had hoped to get the map done and posted this week and while I made some progress on it. Working on it in the airports and on the plane was not as efficient as I had hoped. So this week we’re going to continue with the module based campaign series. We’ll finish the Alpha Dawn adventures and when we’re finished the PCs will have their starting starship skills and be ready for the Knight Hawks adventures.

Where are we at?

I have two goals for this part of the campaign. The first is to get the PCs to level on spaceship skills. The second is to start building them a nest egg of cash that they can use when the get a ship as running and maintaining a ship can be expensive.

When we left off in the last post, the PCs had just foiled Jack Legrange’s plan to kill all the Vrusk on Kraatar and had been given a free ticket to either the Theseus or White Light system. This is where we pick up.

Upon arrival, the PCs will be at loose ends and looking for employment or some other form of adventure. While the last adventure was XP heavy, it didn’t come with a lot of cash since their original employer was killed early on. After they’ve had a day or two to bum around the station, they are approached by representatives of the Cassidine Development Corporation.

They have heard about the PCs exploits on Kraatar and looking into their background their accomplishment in some of the other adventures as well. The offer from CDC will depend on the PC’s experience level. If the PCs need a bit more XP to get to the point that they have all the prerequisite skills they need to acquire spaceship skills, the pitch will be to work as troubleshooters for CDC helping them solve problems in often remote parts of the Frontier.

If, on the other hand, the PCs already have all the prerequisite levels for starship skills, the Referee could go right into the pitch for SF4: Mission to Alcazzar explaining that they had lost contact with their base on Alcazzar and want to hire the PCs to go find out what is going on.

Laying the Groundwork

Let’s assume the PCs aren’t quite there yet, they need a few more XP to round out their skills and make the jump into the life of a spacer. The exact adventures are up to the referee but I’d use two design principles in setting them up.

First, they should be relatively remote. Or at least on sparsely populated worlds, New Pale instead of Pale, Morgaine’s World instead of Gran Quivera, Groth, Lossend, or either planet in the Scree Fron system. Remember that CDC works in developing new areas and tends to be on the edge of civilization.

This has some advantages for the PCs. One is that the travel times involved can be long. That means that they are bringing in a paycheck without having to do much work. The other is that since they are operating on the edges of civilization, there isn’t as much oversight or direct control. They are on their own to use their own discretion. Of course the downside is that they are potentially far from backup and resupply.

Second, they should come into direct conflict with agents of Streel and have heartaches and headaches because of it. I want to set them up do be ready to go after Streel in both Mission to Alcazzar and in the following Warriors of White Light adventures.

The Intermediate Adventures

Given the state of our PCs in this thread, they are basically ready to start getting their starship skills but I want to give them one more adventure before Mission to Alcazzar.

To that end I might have CDC discover something unique and valuable on Histran in the Scree Fron System. Maybe it’s something similar to items found on Volturnus, or maybe some manifestation of the matrix virus from Bugs in the System. Or it could just be that it’s another adventure with the Jurak Hangna Foundation and CDC is leveraging the PCs’ existing relationship. What it is, it should be something that leverages the PCs background and warrants shipping them all the way across the Frontier. Or if you don’t want to stretch that far, make it something on Lossend in the Timeon system. They are right in that neck of the woods so it’s not that far a trip.

Either way, they should be in a race against teams from other rival mega-corps, especially Streel, for whatever the prize is. They are not in the Truane’s Star system so Streel probably won’t be playing nice. The point is to make the conflict between Streel and CDC personal for the PCs.

For our PC’s I’d make this about a 15 XP adventure, whatever it ends up being. If your PCs need more XP, you can make it a bigger adventure or a series of smaller ones to get them where you want them.

Mission to Alcazzar

I would have this come to the PCs either right as they are finishing some assignment, or if they have been doing several assignments for CDC, I’d have them get pulled off a project they are currently working on. If possible, I prefer the latter as it emphasizes the importance of this assignment to the Company.

Regardless, they are bundled up and shipped off. Depending on where they are at with their other adventures, they will be headed to Prenglar or White Light to make the jump to Alcazzar. Along the way they will be briefed and allowed to provision for the adventure.

Run the adventure as written. The beginning might be a little different if the PCs have been working for CDC but if they are picked up directly to solve the problem on Alcazzar, you can play it directly out of the module. Regardless, they are on a double pay rate so this will help to earn them some extra cash.

This module doesn’t give an expected amount of XP to be earned (or if it does, I missed it in skimming back over it). However, based on the encounters, I’d award up to 6 XP at the CDC compound, 3XP for the journey to the Streel compound, up to 6 XP for successful interactions with the Lokkuku, and 3 XP for taking out the Streel compound successfully. That gives up to 18 XP, similar to other modules. We just need to get them enough to by the Knight Hawks skills.

Aftermath

The PCs should definitely be given the stock option offer. If they don’t choose to buy their spaceship skills with the XP earned, you could run them on more adventures for CDC to get them a bit more XP. If you take this option, I’d heavily weight the adventures to events involving starships to get the PCs thinking in that direction. Possibly even have their CDC contact recommend they get those skills. Once they do have the spaceship skills, however, I’d have whatever adventure they finish deposit them in White Light.

The Characters

From this portion of the campaign the PCs have netted 33 more XP. They’ve used them to lean all the necessary prerequisites and have each learned their first level 1 starship skill. Here is where they now stand.

Name: Yanni

Race: Yazirian, F

STR/STA: 40/40

DEX/RS: 55/55

INT/LOG: 55/55

PER/LDR: 45/45

Racial Abilities: Battle Rage 5%

XP: 164/175

PSA – Technological

Skills: Technician 4, Robotics 5, Computer 2, Beam 3, Melee 2, Engineer 1

Notes:

Born on Hentz, Araks. Yanni likes to tinker with gadgets and vehicles.  She’d love to be able to tinker on starships as well.


Name: Mekar

Race: Yazirian, M

STR/STA: 45/45

DEX/RS: 70/70

INT/LOG: 55/55

PER/LDR: 55/55

Racial Abilities: Battle Rage 5%

XP: 154/172

PSA – Bio-social

Skills: Medic 4, Environmental 3, Projectile 4, Psycho-social 2, Melee 1, Gyrojet 2, Rocket Weapons 1

Notes:

Born on Pale, Truane’s Star.  As Mekar will tell anyone who asks, his job is to understand the local critters and keep everyone else in one piece. [Mekar will eventually have a Rocket Weapons spaceship skill but getting a bio-social PSA character there takes a bit of work.]


Name: Dolnab

Race: Dralasite

STR/STA: 55/55

DEX/RS: 65/65

INT/LOG: 70/70

PER/LDR: 50/50

Racial Abilities: Lie Detection 5%

XP: 160/175

PSA – Techological

Skills: Technician 6, Computer 2, Robotics 1, Projectile 3, Melee 2, Demolitions 1, Pilot 1

Notes:

Born on Inner Reach, Dramune.  Dolnab loves to tinker with computers and also play flight simulator games. 


Name:  Michaella

Race: Human, F

STR/STA: 55/55

DEX/RS: 64/61

INT/LOG: 50/50

PER/LDR: 40/40

XP: 156/175

PSA – Military

Skills: Beam 6, Melee 4, Environmental 1, Thrown 3, Martial Arts 2, Medic 1, Projectile 3, Energy Weapons 1

Notes:

Born on Minotaur, Theseus. Michaella grew up as the youngest of seven with six older brothers.  She learned to shoot and hold her own with her brothers’ rough-housing at a young age.


Name: K’sta’n

Race: Vrusk, F

STR/STA: 50/50

DEX/RS: 75/75

INT/LOG: 50/50

PER/LDR: 35/35

Racial Abilities: Comprehension 15%

XP: 135/142

PSA – Military

Skills: Gyrojet 5, Martial Arts 4, Projectile 4, Technician 2, Melee 3, Thrown 3, Rocket Weapons 1

Notes:

Born on Terldrom, Fromeltar.  K’sta’n has always had an interest in weapons, but also in the forms of the various martial arts.


Name: T’vor

Race: Vrusk, M

STR/STA: 40/40

DEX/RS: 55/55

INT/LOG: 65/65

PER/LDR: 40/40

Racial Abilities: Comprehension 15%

XP: 142/142

PSA – Technological

Skills: Computer 6, Robotics 3, Beam 3, Melee 2, Technician 1, Astrogation 1

Notes:

Born on Gran Quivera, Prenglar.  T’vor used to hang aout at the University of Prenglar as a kid and chat up the tech professors.  He loves to hack computers and robots and can usually get anything working, eventually.  He also has a deep interest in astronomy.

August 13, 2019 Tom Leave a comment

A Module Based Campaign – part 3

We’re back to the campaign outline. I can’t believe it’s been over two months since I posted about this but the map project did suck up most of my time. This post will cover the two UK produced modules, SFAD5: Bugs in the System, and SFAD6: Dark Side of the Moon. If you need to catch up, you can read part one and part two by following the links.

These two modules, unlike the first four, have the AD designation as they were published after the release of the Knight Hawks expansion and related modules that carried the KH designation. The AD specification let us know you didn’t need Knight Hawks skill to play the module which is good, as our intrepid adventurers don’t have any yet.

We’ve skipped over SF4: Mission to Alcazzar as I like to do that one last. I’ll cover that one in part four of this series and explain why. It’s really a toss up between doing SF4 or SFAD6 last, and in some ways might make sense to run SFAD6 as the final Alpha Dawn module but I think Mission to Alcazzar makes for an easier transition to the Knight Hawks modules. In any case, let’s look at the next steps of the campaign.

Getting Started

Just like it took a little bit of work to get the PCs in position for Sundown on Starmist, the same is true for Bugs in the System. At least if you keep the Belnafaer system in the position indicated by the module itself. You are always welcome to move it where ever you want in your game.

Here’s where Zeb’s Guide and the module puts the system. And I just realized I misspelled the system name on my Extended Frontier Map. Now I need to go fix that.

The module says to put Belnafaer in one of the single star systems between Scree Fron, Truane’s Star, and Athor. I had originally put it in the system labeled FS22 but the Zeb’s Guide map put it straight out from Scree Fron and there wasn’t really any reason not to use that location so that’s where I put it on my final map.

The problem is that, just like before Sundown on Starmist, the PCs are all the way on the other side of the Frontier from where the adventure is supposed to take place. It might actually be easier to put this module before Sundown on Starmist. That way, they are at least in Truane’s Star. You still have to come with a reason for them to be headed to Scree Fron and back so as to take this route but the distance isn’t as great. Then you only have to get them over to the right side of the map once as the rest of the adventures take place in that part of the map.

Running this today, I’d use the Jurak Hangna Foundation, a character and institution created by Eric Winsor for the Frontier Explorer. Jurak runs an botanical and zoological preserve on Hosakar in the Scree Fron system. Whether they are leaving Volturnus or Starmist, I’d have them contacted by the Foundation requesting them to either transport some fauna from that world to the preserve, or maybe the Foundation had already acquired some and wanted their expert advice about it. In either case, the would have reason to travel to and from Scree Fron and layover in the Belnafaer system thus kicking off the adventure. I would have the adventure occur as they are returning from Scree Fron. Their time in the Scree Fron system should be a short adventure netting them an additional 3XP for their time.

Running Bugs in the System

I just want to say that I love the way the computer systems were set up in this module. It something I want to emulate in adventures I put together in the future and something I need to look more closely at as I haven’t actually read the module all the way through in a couple of decades.

Running the module is fairly straightforward. The PCs receive the job offer and go off to investigate the cause of the problems and effect the repairs needed. Over the course of their time on the Jetsom platform, and their return to the Moneyspider, they discover and hopefully defeat the virus that is causing the problems.

According to the module, the PCs should receive between 15 and 27 XP for the adventure with 21 being average. I’m going to award them 24XP for succeeding in solving the mystery and preventing the virus from leaving the system.

The Dark Side of the Moon

Once again we need to get the PCs across the Frontier as Kraatar is over on the right side of the map and Zeb’s Guide gives it a jump route from Theseus. This can be partially alleviated is you just have them take a longer trip on the spacecraft. While the module makes it sound like the trip is fairly short, you could have the PCs recruited in Prenglar, an appropriate place for the award to be presented, and the trip to Kraatar could take several weeks. Or you could come up with some middle small adventure to get them in the general vicinity of Theseus. And if you ran Bugs in the System before Sundown on Starmist, they are either in White Light or K’sta-Kar and are fairly close by. At some point, they need to be recruited and on their way to Kraatar.

Otherwise, this module can just play out as presented. It definitely presents a darker side to the Frontier than the other modules but is a great adventure with lots of intrigue and action.

By the time the characters get to the climax on the moon, hopefully one of them has reached level 6 in their Technician skill so that they can fly the shuttle. If they are laser focused, it is possible by this point to have even achieved a level 1 skill in Piloting but that isn’t necessary. The AD rules specifically say that level 6 Technicians can fly shuttles.

This is a pretty long adventure with a lot of possible XP. The module itself explicitly lists 39XP available if they do everything exactly right. I’m going to award my characters 32 XP (Legrange manages to slip away and they weren’t perfectly successful in all the parts of the adventure). Also as part of the ending, they get a free ride to Theseus or White Light (their choice) as that is where I want them to be for the next stage of the adventure.

The Characters

So from these two adventures and the little side adventure along the way, the PCs have managed to pick up 59 more XP. That, plus the 13 from Sundown, gives them 72 XP that they’ve been spending along the way to increase their skills. Now seasoned adventurers, their skills stand as follows:

Name: Yanni

Race: Yazirian, F

STR/STA: 40/40

DEX/RS: 55/55

INT/LOG: 55/55

PER/LDR: 45/45

Racial Abilities: Battle Rage 5%

XP: 136/142

PSA – Technological

Skills: Technician 4, Robotics 4, Computer 2, Beam 3, Melee 2

Notes:

Born on Hentz, Araks. Yanni likes to tinker with gadgets and vehicles.  She’d love to be able to tinker on starships as well.


Name: Mekar

Race: Yazirian, M

STR/STA: 45/45

DEX/RS: 70/70

INT/LOG: 55/55

PER/LDR: 55/55

Racial Abilities: Battle Rage 5%

XP: 130/142

PSA – Bio-social

Skills: Medic 4, Environmental 3, Projectile 3, Psycho-social 2, Melee 1, Gyrojet 2

Notes:

Born on Pale, Truane’s Star.  As Mekar will tell anyone who asks, his job is to understand the local critters and keep everyone else in one piece. [Mekar will eventually have a Rocket Weapons spaceship skill but getting a bio-social PSA character there takes a bit of work.]


Name: Dolnab

Race: Dralasite

STR/STA: 55/55

DEX/RS: 65/65

INT/LOG: 70/70

PER/LDR: 50/50

Racial Abilities: Lie Detection 5%

XP: 138/142

PSA – Techological

Skills: Technician 6, Computer 2, Robotics 1, Projectile 3, Melee 1, Demolitions 1

Notes:

Born on Inner Reach, Dramune.  Dolnab loves to tinker with computers and also play flight simulator games. 


Name:  Michaella

Race: Human, F

STR/STA: 55/55

DEX/RS: 64/61

INT/LOG: 50/50

PER/LDR: 40/40

XP: 137/142

PSA – Military

Skills: Beam 6, Melee 4, Environmental 1, Thrown 3, Martial Arts 2, Medic 1, Projectile 1

Notes:

Born on Minotaur, Theseus. Michaella grew up as the youngest of seven with six older brothers.  She learned to shoot and hold her own with her brothers’ rough-housing at a young age.


Name: K’sta’n

Race: Vrusk, F

STR/STA: 50/50

DEX/RS: 75/75

INT/LOG: 50/50

PER/LDR: 35/35

Racial Abilities: Comprehension 15%

XP: 135/142

PSA – Military

Skills: Gyrojet 5, Martial Arts 4, Projectile 4, Technician 2, Melee 2, Thrown 1

Notes:

Born on Terldrom, Fromeltar.  K’sta’n has always had an interest in weapons, but also in the forms of the various martial arts.


Name: T’vor

Race: Vrusk, M

STR/STA: 40/40

DEX/RS: 55/55

INT/LOG: 65/65

PER/LDR: 40/40

Racial Abilities: Comprehension 15%

XP: 142/142

PSA – Technological

Skills: Computer 6, Robotics 3, Beam 3, Melee 1

Notes:

Born on Gran Quivera, Prenglar.  T’vor used to hang aout at the University of Prenglar as a kid and chat up the tech professors.  He loves to hack computers and robots and can usually get anything working, eventually.  He also has a deep interest in astronomy.

The PCs are now right on the cusp of getting their Knight Hawks skills. While it’s possible that they might have gotten them already, I chose to spread the XP out a bit more. They will definitely pick them up after the next adventure.

In the next part we’ll finish up the Alpha Dawn modules and the PCs will be ready to start their careers as spacers.

July 30, 2019 Tom 1 Comment

A Module Based Campaign – characters

As part of the “Module-based Campaign” posts, I thought it would be a good idea to have a set of characters to go along with the series to demonstrate the skill progression as they go through the adventures. It would also help me gauge the amount of additional XP needed between the modules to prepare them for the next ones.

To that end, I’m presenting a party of six PCs that will travel along on the adventures with us through this campaign. In this post I’ll present their starting stats and the updated ones after the Volturnus series, with XP added for Starmist but not spent. Going forward, I’ll post updates to the characters at the end of each installment in this series of posts.

Guidelines for skill increases

Each of these characters is progressing towards getting a spaceship skill per the standard Knight Hawks skill rules. They’ll need those skills to play in the modules starting with SFKH0: Warriors of White Light. As such, I’ll be developing the prerequisite skills needed.

In addition, I assume that the characters are not laser focused on that goal and will add branching skills to diversify their skill sets. They may not be as good as one of the other players in this other skills but if separated and in a bind, they might be able to pull something off. It’s been my experience that players will typically drive hard on their main skill but also pick up a variety of others along the way and I’ll represent that in the skill lists of these PCs.

Finally, in the standard rules, ability scores don’t really play into the skill chances except with military skills. As such, for Technological and Bio-social skills, there is little to no incentive to increase ability scores to get skill improvements. In the military skills, since the skill computation is one half the ability score plus 10x the skill level, and ability scores are increased at one point per XP, it doesn’t really make sense to start increasing DEX or STR until it costs more than 20 XP to increase the skill. Which means level 6 (the max) for military PSA characters and level 3 for non military characters.

Now this dynamic changes a bit if you have a lot of weapon skills as each point into a characteristic increase all your skills so you might shift a little sooner if you’re a military PSA character. Regardless, I’m going to focus more on the skill levels than the characteristics while improving these PCs. You might do it differently but that’s the fun of the game.

With the preliminaries out of the way, let’s meet our band of heros.

Starting Characters

These are our starting characters as initially rolled up (and yes, I did roll them up randomly).

Name: Yanni

Race: Yazirian, F

STR/STA: 40/40

DEX/RS: 55/55

INT/LOG: 55/55

PER/LDR: 45/45

Racial Abilities: Battle Rage 5%

XP: 0

PSA – Technological

Skills: Technician 1, Beam 1

Notes:

Born on Hentz, Araks. Yanni likes to tinker with gadgets and vehicles.  She’d love to be able to tinker on starships as well.


Name: Mekar

Race: Yazirian, M

STR/STA: 45/45

DEX/RS: 70/70

INT/LOG: 55/55

PER/LDR: 55/55

Racial Abilities: Battle Rage 5%

XP: 0

PSA – Bio-social

Skills: Medic 1, Environmental 1

Notes:

Born on Pale, Truane’s Star.  As Mekar will tell anyone who asks, his job is to understand the local critters and keep everyone else in one piece. [Mekar will eventually have a Rocket Weapons spaceship skill but getting a bio-social PSA character there takes a bit of work.]


Name: Dolnab

Race: Dralasite

STR/STA: 55/55

DEX/RS: 65/65

INT/LOG: 70/70

PER/LDR: 50/50

Racial Abilities: Lie Detection 5%

XP: 0

PSA -Techological

Skills: Computer 1, Projectile 1

Notes:

Born on Inner Reach, Dramune.  Dolnab loves to tinker with computers and also play flight simulator games. 


Name:  Michaella

Race: Human, F

STR/STA: 55/55

DEX/RS: 64/61

INT/LOG: 50/50

PER/LDR: 40/40

XP: 0 

PSA – Military

Skills: Beam 1, Melee 1

Notes:

Born on Minotaur, Theseus. Michaella grew up as the youngest of seven with six older brothers.  She learned to shoot and hold her own with her brothers’ rough-housing at a young age.


Name: K’sta’n

Race: Vrusk, F

STR/STA: 50/50

DEX/RS: 75/75

INT/LOG: 50/50

PER/LDR: 35/35

Racial Abilities: Comprehension 15%

XP: 0

PSA – Military

Skills: Gyrojet 1, Martial Arts 1

Notes:

Born on Terldrom, Fromeltar.  K’sta’n has always had an interest in weapons, but also in the forms of the various martial arts.


Name: T’vor

Race: Vrusk, M

STR/STA: 40/40

DEX/RS: 55/55

INT/LOG: 65/65

PER/LDR: 40/40

Racial Abilities: Comprehension 15%

XP: 0

PSA – Technological

Skills: Computer 1, Robotics 1

Notes:

Born on Gran Quivera, Prenglar.  T’vor used to hang aout at the University of Prenglar as a kid and chat up the tech professors.  He loves to hack computers and robots and can usually get anything working, eventually.  He also has a deep interest in astronomy.

So that’s our team – two yazirians, two vrusk, a dralasite, and a human. They somehow all ended up on Pale and were recuited to go on the Second Voltrunus Expedition.

After Volturnus

They all managed to survive the adventure (I said I was a nice Referee) and made it back to the Frontier with a sizable chunk of change and a bunch of XP points (I awarded them 70 for that bit of adventure). Spending their XP along the way, learning new skills from each other and out of necessity and practice, they have all increased their skills as follows.

Note that on the XP line I’m recording it as NN/MM where NN is the XP spent and MM is the total XP earned. The total earned includes the 13 XP for the Sundown on Starmist module.

Name: Yanni

Race: Yazirian, F

STR/STA: 40/40

DEX/RS: 55/55

INT/LOG: 55/55

PER/LDR: 45/45

Racial Abilities: Battle Rage 5%

XP: 70/83

PSA – Technological

Skills: Technician 4, Robotics 2, Computer 1, Beam 2, Melee 1

Notes:

Born on Hentz, Araks. Yanni likes to tinker with gadgets and vehicles.  She’d love to be able to tinker on starships as well.


Name: Mekar

Race: Yazirian, M

STR/STA: 45/45

DEX/RS: 70/70

INT/LOG: 55/55

PER/LDR: 55/55

Racial Abilities: Battle Rage 5%

XP: 70/83

PSA – Bio-social

Skills: Medic 3, Environmental 3, Projectile 2, Psycho-social 1, Melee 1, Gyrojet 1

Notes:

Born on Pale, Truane’s Star.  As Mekar will tell anyone who asks, his job is to understand the local critters and keep everyone else in one piece. [Mekar will eventually have a Rocket Weapons spaceship skill but getting a bio-social PSA character there takes a bit of work.]


Name: Dolnab

Race: Dralasite

STR/STA: 55/55

DEX/RS: 65/65

INT/LOG: 70/70

PER/LDR: 50/50

Racial Abilities: Lie Detection 5%

XP: 60/83

PSA – Techological

Skills: Technician 3, Computer 2, Robotics 1, Projectile 2, Melee 1, Demolitions 1

Notes:

Born on Inner Reach, Dramune.  Dolnab loves to tinker with computers and also play flight simulator games. 


Name:  Michaella

Race: Human, F

STR/STA: 55/55

DEX/RS: 64/61

INT/LOG: 50/50

PER/LDR: 40/40

XP: 68/83

PSA – Military

Skills: Beam 4, Melee 3, Environmental 1, Thrown 1, Martial Arts 1, Medic 1

Notes:

Born on Minotaur, Theseus. Michaella grew up as the youngest of seven with six older brothers.  She learned to shoot and hold her own with her brothers’ rough-housing at a young age.


Name: K’sta’n

Race: Vrusk, F

STR/STA: 50/50

DEX/RS: 75/75

INT/LOG: 50/50

PER/LDR: 35/35

Racial Abilities: Comprehension 15%

XP: 68/83

PSA – Military

Skills: Gyrojet 4, Martial Arts 3, Projectile 3, Technician 1

Notes:

Born on Terldrom, Fromeltar.  K’sta’n has always had an interest in weapons, but also in the forms of the various martial arts.


Name: T’vor

Race: Vrusk, M

STR/STA: 40/40

DEX/RS: 55/55

INT/LOG: 65/65

PER/LDR: 40/40

Racial Abilities: Comprehension 15%

XP: 68/83

PSA – Technological

Skills: Computer 4, Robotics 2, Beam 2, Melee 1

Notes:

Born on Gran Quivera, Prenglar.  T’vor used to hang aout at the University of Prenglar as a kid and chat up the tech professors.  He loves to hack computers and robots and can usually get anything working, eventually.  He also has a deep interest in astronomy.
Whether they had them before or not, the team picked up some weapons skills just to survive on Volturnus. They also diversified their skill areas a bit and significantly improved their primary skill.

Going Forward

Now that we’ve met the team. I’ll update their stats and skills at the end of each of module campaign posts in the future.

Do you have thoughts on how you’d develop the skills differently? How have your players advanced their skills across a long campaign? Have they been laser focused on a single skill or broadly diversified? Let me know in the comments.

May 23, 2019 Tom 1 Comment

A Module Based Campaign – part 2

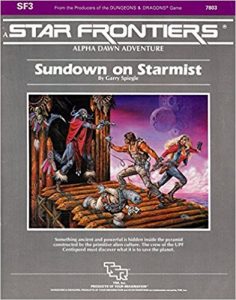
Having survived Volturnus, it’s time for the PCs to attempt first contact with the Heliopes on Starmist. Originally, I had planned to cover the remaining 3 Alpha Dawn modules in this post but in reviewing Sundown on Starmist, I realized I had a lot to say about this module alone. So it gets its own post.

Issues

I started to write up this module like the Volturnus ones, but the more I looked at this module, the more concerns I had with it.  Playing it in the 80’s as a teenager when it first came out, I didn’t think much about it.  You need to rescue your employer who had been kidnapped, you found a cool super tank, and you got to blow things up.  It’s no fun to lose the tank in the end but I understand that for play balance reasons.  Give the PCs a fun toy to allow them to take on harder challenges but take it away so it doesn’t unbalance the game.

But looking at it with older eyes, you see the other side of the adventure.  As part of the adventure, the PCs transgress the social structure of a primitive society, violate and destroy their temple, and eventually completely destroy an artifact central to the religion of that culture.  Granted, the other option is complete annihilation of the species (and the PCs) but it’s still not the best story-line for success.  Especially after just leaving Volturnus where they actually worked to build up and sustain the native cultures.

Now if you’re players don’t care about those issues, you can play it as written.  Or if you want to give them a morally hard situation and choice, maybe it is still okay.  But if you want to avoid that kind of situation in your campaign, you might consider skipping it.  Looking at the pregenerated characters, the PCs are going to be a bit overpowered coming into this adventure if they just finished the Volturnus series.  So skipping it won’t hurt them for future adventures.  And their higher levels might give them some options for other paths through the adventure that don’t require the tank.

In any case, we’ll proceed assuming you do want to include the adventure, so let’s get to looking at it in a bit of detail.

Sundown on Starmist

Location, Location, Location

First of all, we need to figure out where this planet and system is located.  If you look at the beautiful map in the Zebulon’s Guide to Frontier Space, the artist placed Sundown way on the left side of the map by Araks and Scree Fron.  Based on the information in the module itself, this location doesn’t really make any sense to me and since Zeb’s Guide has other issues, I’m going to not use this location for the system.

Now, I thought that the module itself gave an approximate location for the system, but it turns out that if it does, I can’t seem to find it any more.  All the other modules do give locations for their systems, so that’s probably why I thought this one did as well.  In any case, there are clues as to the location of the system in the text of the module that we’ll look at to divine its location.

The module says that Sundown was discovered when a ship that Maximillian was serving on was forced to make an emergency landing on the planet Starmist.  That doesn’t exactly jive with the Knight Hawks rules (And since the module specifically references the Knight Hawks rules, we know they were out when it was published.) but if we take it to mean that the ship misjumped into the system, then we know that it is somewhere near where that ship was traveling.

Looking at Maximillian’s background, he was born in a vrusk enclave in Valentia City, which is on Clarion in the White Light system.  And he went to school on Ken’zah Kit in the K’aken-Kar system.  His ship, the VSS Last Legs, is registered in that same system and he purchased and refitted the ship right after returning from Sundown the first time.  Since he grew up and worked in this part of the Frontier, near the vrusk inhabited worlds, and was in this sector when he returned from the Sundown system.  It makes sense that the system is somewhere nearby.

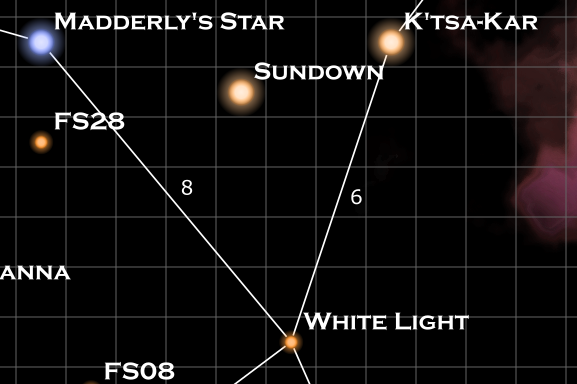
Astute readers will recognize this map as a cutout of the one I’ve been making in my Expanded Frontier Map series. Even more astute readers will notice that there is a nebula on it. This is a sneak peak of a portion of a map I’ll presenting next week.

To that end, I’ve chosen Sundown to be the star in the triangular region formed by Madderly’s Star, K’sta-Kar, and White Light.  You can see this location represented on the Expanded Frontier Map.

Starting the Adventure

Getting the PCs on this adventure is a bit of a trick.  They are either in Truane’s Star, or if you had them go testify at the Council of Worlds, they are in the Prenglar system.  Neither of which is over in the part of the Frontier where you really want them.

Prenglar is easier.  In that case you could just declare that Maximillian was having his ship refit in the starship construction center there and is looking for a crew.  He can recruit them at some point after their testimony.

If they are in the Truane’s Star system still, you need to come up with a reason to get them to the other side of the Frontier.  Maybe they are invited to talk about their experiences on Volturnus at the University of Clarion, all expenses paid. Or maybe the Pale government gives them a lead and offers transport to chase down someone who works with he Star Devil that skipped town.  Or some other small adventure that appeals to the players’ interests that get them across the Frontier.  Once they are on Prenglar or Clarion, they can be approached by Maximillian.

Regardless of where he approaches them, he’s heard of their exploits and is seeking them out specifically because of their experience working with native primitive cultures and he wants assistance dealing with the Heliopes.

Running the Adventure

Once they have signed on, they are off to Starmist.  The trip there should be fairly boring so it can pass by as quickly as you’d like.  It’s a chance to get to know their employer and decided what equipment they might need/want for the trip.  They should have quite a bit a cash from the Volturnus adventure so let them spend it.

The adventure itself is fairly straightforward: Head to the village, poke around to try to find the sources of the metal, learning along the way some of the history and seeing the strange artifacts, rescuing Maximillian, fighting off the sathar robots, discovering the tank, and assaulting the sathar base.

Skimming through the adventure, a few things stood out to me.

  1. Maximillian has plot armor, at least until the tank is discovered.  I thought it was funny how in the very first encounter, the module tells the referee to adjust die rolls as needed to keep him alive.
  2. The adventure is always pushing the PCs to find and explore the tank.  As I said before, this is a possibly morally questionable action and the players may not be comfortable with it.  I’d say if the players want to pursue that, let them but if they don’t show interest in the tank, don’t push it as hard as the module is written.  More on this below.
  3. Getting into the bunker is somewhat of a railroad.  The text says that the only way in is through the elevator and specifically tries to shut down alternate ways in.
  4. There are some inconsistencies in the times specified for the various self-destruct sequences in the bunker.  But there is also a lot of flexibility depending on what you want to do with the approaching sathar ship (if anything) so you can really do whatever seems best as you’re playing

Not using the Tank

I’ve already talked a bit about the issues with uncovering and taking the tank from the village.  That said, it’s not really needed to finish the adventure.  The PC’s already have an explorer that they can use to follow the sathar robots.  And approaching the sathar base on foot actually gives them a better chance of getting in undetected.  So in the end, the tank is cool, but doesn’t seem to be as necessary as the module writers seem to be implying by pushing the PCs toward it.  If they don’t want to take it, they can still successfully complete the adventure.  Especially since they will probably be at a bit higher levels than the pre-gens for the adventure.

Experience Points

Interestingly, this module gives no guidance on awarding experience points.  They don’t seem to be mentioned anywhere, even in the introduction.  I’d award XP at the following points:

  • Making it to the village on friendly terms – 3 XP
  • Rescuing Maximillian with minimal loss of Heliope life – 3 XP
  • Driving off both waves of sathar robots with minimal loss of Heliope life – 3 XP
  • Clearing the bunker – 3 XP
  • If they make it to the bunker without losing a vehicle (war tank or explorer) – 1 bonus XP
  • Not taking the War Tank – 1 bonus XP

Beyond the Module

Extra adventures

The module gives the option of the PCs dealing with the incoming sathar heavy cruiser and using the rocket launcher at the base to damage or destroy it.  It also gives the suggestion of the ship sending down landing parties that the PCs have to deal with.  Personally, I’d probably omit this aspect, especially since I have a different view of the construct of the sathar ships.  At most, I’d make it a destroyer.  That still gives over 500 sathar ground troops that they’d have to deal with and that’s a bit much for a single PC party.

However, if you do want to use those optional adventures, I’d award 3-6 more XP for the subsequent adventures.

There are few other things you could do on Starmist but they would require convincing Maximillian that they should stay on the planet longer.

The background says that Heliopes are spread out in 200 tribes over 5 different rifts.  If you wanted to extend the adventure further, you could develop these other tribes, and allow the PCs to seek them out and interact with them.  Remember that the village Heliopes are the most culturally developed.

Another option is to collect sathar bio-constructs.  These would be of great interest to the UPF and to various private corporations.  There are a lot of them here on Starmist and the PCs could go on a hunt to try to collect various live specimens.  This should definitely be worth a financial reward (shared with Maximillian) and possibly an XP reward as well.

Aftermath

Depending on the way they handled themselves, the PCs may or may not be on friendly terms with the Heliopes.  If the village was seriously destroyed and the war tank stolen, they might not be welcome at all and be run off by a mob and have to flee to their ship.  Or they might be welcomed warmly if they helped to save the village and didn’t disturb the tank.

There might also be repercussions back in the Frontier.  The UPF will eventually send a delegation to the planet and will discover how the PCs interacted with the natives.  This could either enhance or detract from their reputation and if they treated the Heliopes poorly, they might be called before a UPF tribunal for their conduct. 

Moving on

Next up is SFAD5: Bugs in the System.  We’ll look at that and the following modules in the next installment.  What are your thoughts on Sundown on Starmist?

May 21, 2019 Tom 2 Comments

A Module Based Campaign – part 1

As I’ve been creating and tweeting the #SFTimeline on the @StarFrontiers Twitter account, I’ve been thinking more and more about how to string all of the published Star Frontiers modules into a comprehensive campaign. 

As I was writing up this post, I was reminded that the topic for the RPG Blog Carnival this month was “The Art of Customization”. This series of articles falls directly into that topic as I’m customizing the published modules to form a comprehensive campaign and story from the disjointed publications. So this will be an entry in the Blog Carnival. I don’t often do Blog Carnival posts as the topics don’t ever seem to mesh up with what I’m working on (or I don’t want to try to shoehorn them together). This one just happened to line up.

The timeline I’ve been tweeting doesn’t work as I’ve been interspersing the modules into the timeline out of order.  That’s mainly because I’m a bit impatient and wanted to incorporate the modules early to give me some ideas of things to include in the timeline.  I have enough threads running now that I can safely drop the rest of the modules in in their “appropriate” order for set of PCs to be the protagonists in all the events.  Maybe at some point I’ll go back and tweak the timeline to match the one I’m presenting here.

The modules don’t provide enough XP by themselves to move directly between them, so in addition to providing my preferred order to the modules, I’ll be providing some suggestions of additional adventures, either from the fanzines or that the Referee will need to create for their group.  Depending on how much I end up writing, this may end up as a series of posts. 

I’ve posted bits and pieces of this campaign idea over the years on various social media and forums but in this series of posts I’m going to try to collate all of that into a comprehensive document. Let’s get started.

Ground Rules

In the timeline that follows, I’m going to assume that the PC’s start as fresh, new adventurers newly minted with the Alpha Dawn Expanded rules:  a PSA and two level 1 skills. 

I’m also going to be a generous Referee and assume that in the published modules, the PCs earn the maximum (or nearly the maximum) XP possible in each of the sessions.  As we launch into each of the modules in the timeline, I’m going to present what I expect the approximate amount of XP the characters should have earned at that point.  If you are running this campaign and your characters aren’t quite there yet, run a few more side adventures for them to get them up to speed.

I’m also going to assume the module are run as written, warts and all.  You’re free to tweak them as you see fit but I’ll assume the events described occur.

TL;DR Version

In case you don’t want to read all the details, here’s the overall order I’d run the modules in sans, any intermediary adventures to get the XP progression correct.  It’s mostly the order they were published, but bumping Mission to Alcazzar after Dark Side of the Moon.

  1. SF0: Crash on Volturnus
  2. SF1: Volturnus, Planet of Mystery
  3. SF2: Starspawn of Volturnus
  4. SF3: Sundown on Starmist
  5. SFAD5: Bugs in the System
  6. SFAD6: Dark Side of the Moon
  7. SF4: Mission to Alcazzar
  8. SFKH0: Warriors of White Light
  9. SFKH1: Drammune Run
  10. SFKH2: Mutiny on the Elanor Moraes
  11. SFKH3: Face of the Enemy
  12. SFKH4: The War Machine

TSR did a good job in publishing the modules in order of increasing power level.  The exception being the two modules developed by the UK group (SFAD5 & 6) that only require PCs with a power level a little less than Mission to Alcazzar.  I’m sure if more modules had been published, they would have bounced around more but their initial offerings were spot on.

The Grand Campaign

The Great Sathar War

You may or may not have noticed in my other writing, but I will typically refer to the First Sathar War as the Great Sathar War in my writing and “in world” documents that discuss events occurring before the Second Sathar War (SWII) starts. You can’t have a “first” without a “second” so until the SWII starts, and is recognized as such, there would be another term for the first conflict. And while I typically use “The Great Sathar War” as the name, due to its localized extent – only affecting four star systems – using the term “great” is probably a misnomer and I should be referring to it as the “Sathar War”, “The Sathar Incursion”, or “The Sathar Incident”. Although since it affected the two most populated systems (Cassidine and Prenglar) it might be considered a “war”, even if mostly just a naval one.

In my mind, all these adventures take place, and in some cases, trigger, events in the Second Sathar War.  In any case, they have to occur after the First Sathar War as the PCs know of the existence of the sathar even in the first Volturnus adventure which they wouldn’t if it occurred before the first sathar invasion.

I also see the SWII as a much longer and more protracted affair than the First Sathar War with the sathar trying to undermine the UPF and Rim systems and infrastructure before the actual invasion.  This can be seen in the Detailed Frontier Timeline I’m working on and will be reflected in some of the side adventures here.  While the PCs may not be involved in any of the major military conflicts of the war (especially at the beginning of the campaign), those events will be happening in the background and the PCs may find themselves in the aftermath.

Volturnus

We begin the campaign by running though the three published Volturnus adventures.

SF0: Crash on Volturnus

Since the original boxed set included the Crash on Volturnus module, that is where we will start.  This module assumes brand new PCs with 0 XP.  I always tell the players to not spend any of their initial funds on weapons and that they will be issued weapons as part of the start of the adventure.  And then in the introduction I let them choose a weapon and tell them that it is placed in the weapons locker on the Serena Dawn.  That way they aren’t really penalized for the game fiat that their weapons are destroyed. 

In my game, there are quickdeath on Pale from the sathar invasion during the Great Sathar War.  While the PCs may know of their existence and have seen pictures, they probably haven’t seen one in real life as they have been mostly hunted and controlled.  Thus the presence of the quickdeath in the Ul-mor ceremony should be the first clue to the PCs that sathar have been on the planet in the past and may be still here.

SF1: Volturnus, Planet of Mystery

This module follows directly from the events in Crash on Volturnus and so the characters continue in their struggle to survive and escape Volturnus.  If all went well, the PCs will have picked up 18 XP in the previous module and added a couple level of skills.

In this adventure they deal with the pirate threat on the planet and discover the larger sathar history and current presence on the planet in the form of the artifact.  In my universe, the Star Devil pirates are partially supported by the Pan Galactic Corporation.  If you want to provide that level of detail, the PCs can notice that most of the equipment the pirates have are PGC models and not Streel ones, even through Streel headquarters are on Pale in Truane’s Star, the nearest star system to Volturnus.

Another change I make to this adventure is in ending 1.  If you want (as we do) the PCs to play through the next module in the series, I don’t feel that 2 weeks is enough time.  Some of the tasks in the next module can take two weeks all by themselves.  I tend to leave the time frame vague, i.e. “Attack on planet eminent”, or give it a month or so.  Additionally, I want the UPF ships to show up right after the fighting starts and I don’t feel that two weeks is enough time to get any ships assembled beyond the Truane’s Star militia and get them to the Zebulon system.

The PCs can pick up another 18 XP in this adventure.

SF2: Starspawn of Volturnus

At this point the PCs have collected 36 XP and are probably level 3 or 4 in their primary skill and have a smattering of others.  This adventure consists of a series of mini-quests to do something of benefit to each of the sentient species on Volturnus to convince them to join in the fight against the incoming sathar attack.

My players always like the Great Game of the Ul-mor and have a fun time trying to win.  My last group, which happened to be my kids, managed to no only win the game, but do so without a single of the PCs being knocked off their mount.

The retrieval of the Sacred Idol of the Kurabanda is the part of the adventure that could potentially take the most time as part of the travel is through the wilderness on foot or by vehicle.  If they drive all the way there it’s a several day journey each way.  If they fly, they have to make the last part of the trek on foot which can take a few days, and if they happen to get caught in one of the blasts while flying and crash, they have a several week trek back without their vehicle.

The module ends with the massive Battle of Volkos, where the PCs pit themselves and the various species of Volturnus against the invading sathar hordes.  Regardless of whether the PCs win or lose the battle, I have the UPF fleet arrive as the land battle is winding down and drive off the Sathar fleet.  If the PCs win the ground battle, shuttles from the UPF fleet can safely land and possibly take the PCs back to Truane’s Star.  If they lose, the UPF fleet is a naval force only and doesn’t have ground troops to fight off the surviving sathar army.  They will radio back to the Frontier, but it will be some time before ground forces can be assembled and brought to the surface.  The PCs will have to hold out until then.

I described the composition of both the UPF and Sathar fleets in last week’s Battle of Zebulon post.  If you have players already familiar with the Knight Hawks rules, you could run this battle as an evening’s session.  There are a lot of ships, so it takes a while if you use the advanced rules as I did.

The PC’s can earn up to 15 more XP from this module bringing their total up to 51 XP.

After the Modules

As the last module suggests, there are a number of other things the PCs could do on Volturnus before leaving.  I have the UPF sticking around for a while after driving off the sathar so they can get transported home at any time if they do decide to have a few more adventures on planet.   Possible endeavors include:

The Devil’s Lair

In Frontier Explorer issue 7, I detailed a small complex that is the personal hideout of the Star Devil when visiting Volturnus.  I leave clues about the existence of this hideout in the computers of Slave City one for the PCs to discover.  The Star Devil isn’t in the system at the moment, but the PC’s can clear out the hideout and learn more about the Star Devil’s operations.  This small adventure is worth another 3 XP.

Eorna Defense Installation

In Frontier Explorer issue 2, Jim Young detailed a ruined Eorna Defense Installation.  The PCs could have noticed it while flying back and forth recruiting the species for the war or maybe found mention of it in the Mound of the Mechanons or the Eorna Archives.  The article provides two different scenarios for the location’s use depending on the background you want to use.  This would worth another 3 XP if successfully explored.

Eorna Lunar Defense Battery

Jim provided another location, this time on Volturnus’s moon, in issue 3 of the Frontier Explorer.  If you plan on having a Knight Hawks component to the game, you could have the PCs find a way here before the sathar arrive and use the fighters in the base in the battle (which is a bit of bending of the standard rules) or you could have the UPF forces discover the base and send the PCs in to investigate.  The fighters discovered could form the basis of the Zebulon system’s initial militia forces.  This could generate the PCs another 3 XP.

Lizard Head Rock

A long time ago, I did an entire complex under Lizard Head Rock, a location suggested as a possible adventure at the end of the module.  In my teenage years, this complex housed another species, even older than the Eorna, in a large, active, and hidden society.  If I were to use it today, I’d redesign it (I was obsessed with the confines of a single sheet of graph paper) and make it ruins instead of an active area, but it still would make a fun little exploration dungeon crawl.  The Yernoids in the area are a primitive version of the ancient race.  Depending on how big you make this, it could be 3-6 more XP.

Sathar Survivors

Finally, they could track down sathar survivors, another adventure hook suggested by the module.  Spacefleet doesn’t have the personnel and the native species are drifting back to their homelands.  It’s up to the PCs to clean up the pockets of sathar still sticking around.  If the PCs really are in to this, it could go on for a while but assuming they only do a small number of these roundups, they could earn 3-9 XP depending on the number, the complexity, and how generous you are with XP.

Returning to the Frontier

There are a number of events that could happen once the PCs return to the Frontier from Volturnus.  At this point, assuming you’ve done some of the additional adventures on Volturnus, the PCs should have between 60 and 70 XP.

Tracking down the Star Devil

Information collected on Volturnus provided clues to the Star Devil’s operations in the Pale system.  By the time the PCs return, the Pale government has identified the location of a small Star Devil Operation on New Pale.  The PCs are sent to investigate and shut down the operation, capturing the staff if possible.  This should be worth another 3 XP.

Council of Worlds

If your players want to get involved in some political wrangling, you could have them summoned to Gran Quivera in Prenglar to testify before the Council of Worlds as to the events on Volturnus and the state of the species there. Because of the Sathar, the Council of Worlds is interested in the events in the system.

In my game, the Battle of Zebulon (the space battle) and the Battle of Volkos (the ground battle) are the opening shots of the Second Sathar War.  It takes a while for everything to get going but the loss at Zebulon jolt the sathar out of their complacency towards the Frontier and cause them to step up their activities.

The PCs are the Frontier experts on Volturnus at the moment and their words could have far reaching impacts for the future of the planet and the species living there, as well as the Frontier’s response to the sathar.  This should be worth another 3-9 XP depending on how involved you make it.  It also gets them part way across the Frontier where they could be recruited for the next module SF3: Sundown on Starmist.

Up Next

That gets us through the first three modules with the PCs earning around 70 XP (possibly a bit more) from the modules and side adventures.  In the next installment, we’ll look at the rest of the Alpha Dawn modules and supplementary adventures that will get them to the spaceship skills and ready for the Knight Hawks adventures.

How have you strung the modules together?  Have you added in additional adventures on Volturnus? Share your experiences in the comments below.

April 30, 2019 Tom 3 Comments

Battle of Zebulon

I finally got the Pursale ship deck sketches up last week but then got completely distracted by a number of other things.  One of those was the decision to write up my concept for a complete “zero-to-hero” style Star Frontiers campaign that takes the characters from starting PCs to major players in the Frontier with high level spaceship skills that uses all the published modules.  The first of those posts will be next week. 

While working on that, I talk about the space battle around Volturnus at the end of the first 3 modules.  The modules hand wave it away as, at the time, the spaceship rules weren’t published so there was no way to run it.  In this post, we’ll look at my concept for that battle.  What sathar ships are there, and what the UPF sends to the fight.  If you read my Detailed Frontier Timeline posts, you know the answers as this has already been covered in the posts there, but I thought I’d lay out some of the rationale behind the decisions and set the game up for an epic Knight Hawks board game battle.  And I’ll tell you how it played out when I ran through the scenario to generate the timeline posts.

Sathar Ship Design

In my universe, all the sathar ships of destroyer size or larger are also troop transports.  While the UPF tend to have small crews and lots of allocated space, the sathar pack in lots of ground troops on to each ship. 

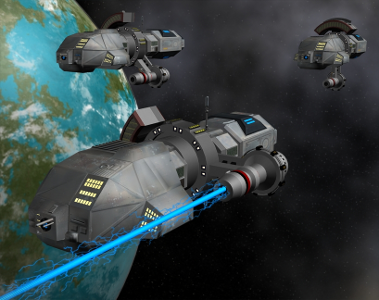
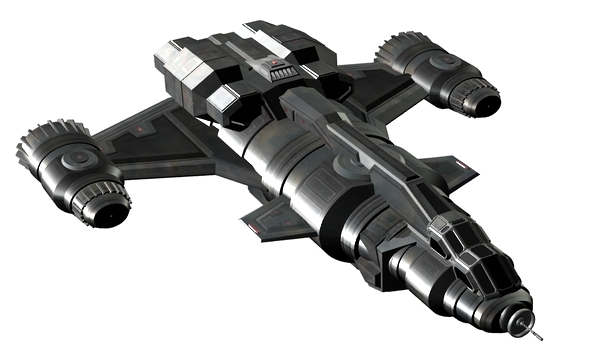
You can see an example (and more detailed explanation) of this in my Sathar Destroyer Technical Manual (link goes to product page on DriveThruRPG – it’s a free product) that details the interior of a sathar destroyer.  That ship carries over 500 ground troops packed into its bowels. 

Based on the ship sizes, I’ve extrapolated that the light cruisers carry about 4,500 troops, the heavy cruisers carry over 15,000 and the assault carriers transport around 10,000 troops in addition to up to 12 fighters.  While I haven’t completely fleshed out those larger vessels, this is a close enough estimate for this article.

How Many Sathar Ships Are Involved

Now that we know how many troops each ship transports, we can come up with a reasonable composition for the invasion fleet that is attacking Volturnus.

The boxed text from the adventure gives us the following clues:

All that can be done has been done to prepare the planet for defense against the hideous worms.  The initial reports arriving at the Eorna complex beneath the ruins of Volkos are good; the Eorna planetary defense batteries have kept the Sathar fleet at bay, and many of the Sathar shuttles have been destroyed attempting to land ground troops on the planet

The successful landing of a large Sathar army has been detected.  After scanning the planet, the Sathar advanced in the direction of Volkos.  They should arrive in full battle array sometime tomorrow morning.  They number at least 30,000 plus robots and other weapons!”

This tells us that there are at least 30,000 troops on the ground and that there were more to begin with as many were destroyed in the landing attempt.

So, we want a mix of ships that can transport something over 30,000 troops.  Based on the mix of ships given in the Knight Hawks campaign book, I settled on the following mix of ships for the fleet:

  • 2 frigates
  • 6 Destroyers
  • 2 Light Cruisers
  • 2 Heavy Cruisers
  • 1 Assault Carrier with 8 fighters

This gives me a total troop compliment of about 52,000 troops plus robots, attack creatures, and heavy weapons.  We can assume that about 40% of the troops were killed by the planetary defense system leaving about 30,000 for the assault on Volkos.

The UPF Contingent

We have to remember that this is not a planned engagement in an on-going war.  Rather it is a sudden call to arms that has to be filled in at short notice with no idea of what the opposing force will be.  In fact, given the overwhelming number of ships that were seen at Pale 50-60 years earlier (in my history), the UPF might be loathe to commit any ships fearing that they are sending them into a deathtrap.  Regardless, the ships are sent, but they are assembled on short notice.

The most obviously available ships are the Pale militia ships, consisting of a frigate and three assault scouts.  They would almost certainly be pressed into service by Spacefleet as they are only one jump away.  If Laco (in Dixon’s Star) had a militia, they too would probably have been involved but Laco is only an outpost.

Streel Corporate logo

Streel is headquartered on Pale, and it is almost certain that they have a number of military or paramilitary vessels at their disposal.  They might be conscripted by Spacefleet or possibly even volunteered as Streel has a definite interest in opening (and exploiting) Volturnus.  Keeping the sathar out of the system and off the planet is just good business practice.  So Streel will probably send some ships along.

That leaves Spacefleet.  Strike Force Nova might be around.  It patrols around the Frontier constantly so there is a chance it is nearby.  The nearest large group of ships with a known location is Task Force Prenglar, stationed in its namesake system.  The problem is that it’s three systems away from Zebulon.  Which means it’s going to take some time to get there and may not arrive in time. 

If you just use the distances between the stars as travel time, it’s only 15 days.  That’s they way the Alpha Dawn rules described interstellar travel.  However, the Knight Hawks rules say you have to accelerate up to 1% the speed of light to make the jump and then slow down at your destination.  That acceleration, at 1g takes a little over 83 hours or just over 4 days.  And then 4 days to slow down.  Assuming some maneuvering at the beginning and ending of the trip and checking vectors and such just before Void entry, a single interstellar hop really takes about 9 days, regardless of distance. Maybe a bit longer on long jumps due to extra astrogation calculation time.

Now we can speed this up a bit by accelerating faster but for a long transit, that has detrimental effects on crew.  If you expect to be coming out of the Void into a firefight, you don’t want to have spent the last two weeks strapped into an acceleration chair at 2-3 gees.

We can also speed up the transit by not slowing down in the intermediate systems.  Then we only have the astrogation time to worry about.  That might work for the Dixon’s Star system, but they will have to slow down in Truane’s Star to rendezvous with the ships from that system and coordinate their jump.  So assuming ships from Prenglar blow through Dixon’s Star without stopping it will take them 4.5 days to get to Void speed in Prenglar, 2.5 days in Dixon’s Star to do the astrogation calculations, 4.5 days to slow down at Pale in the Truane’s Star system. Then they need to accelerate and jump to Zebulon which will take another 9 days.  All told, that’s 20.5 days of travel.  Add to that any time it takes to assemble the Task Force and get the ships ready to leave.

What other options are there?  In the description of Spacefleet, it describes the two Task Forces and Strike Force Nova and then says that there are other smaller units as well.  I decided to take advantage of this.

image by Scott Mulder

At the same time as the events are unfolding on Volturnus, Streel and Pan Galactic are locked into what will be known as Laco’s War, the first corporate war.  In my games, this war is just starting to heat up.  Because of that, Spacefleet had recently dispatched a medium sized Patrol Group to the system to attempt put a damper on the rising hostilities.  Patrol Group Virgo, consisting of 2 light cruisers, 2 destroyers, 2 assault scouts, and an assault carrier with 8 fighters, has just recently arrived in Dixon’s Star.  That puts them marginally closer only requiring 18 days to get to Volturnus with the advantage that since they are already out on patrol, they can depart immediately.

So once the call comes in from the PCs, Spacefleet takes a day or two to make the decision and then dispatches Patrol Group Virgo from Dixon’s Star.  In Truane’s Star they pick up the Pale militia as well as a frigate, 4 corvettes, and 3 assault scouts that Streel sends along on the expedition.  With that, the ships arriving at Volturnus from the UPF are:

  • 8 Assault Scouts
  • 4 Corvettes
  • 2 Frigates
  • 2 Destroyers
  • 2 Light cruisers
  • 1 Assault Carrier with 8 fighters

From a campaign perspective, I have the UPF fleet arrive just as the battle on the ground is ending, driving off the sathar ships.

The Knight Hawks Scenario

We now have the order of battle.  The sides are fairly evenly matched.  The UPF fleet has more ships, but the sathar have slightly more hull points.  The UPF’s forces are concentrated into its smaller vessels, lots of little assault scouts and corvettes that can potentially be picked off fairly easily.

This scenario can be played by any number of people.  Simply divide into teams and each team takes a side.  The UPF forces divide fairly easily into three groups, one playing the UPF ships, one the Pale militia, and one the Streel ships.  Although the number of ships and their strength isn’t evenly distributed between those groups.  The sathar ships can be divided up any way that team sees fit.

Setup

A planet counter representing Volturnus is placed in the center of the map.

The sathar are the defenders in this scenario.  Sathar ships, with the exception of the frigates, are all placed in orbit around Volturnus with a speed of zero.  They have just recently finished dropping off all their troops.  Since the frigates are not troop carriers, they can start in any hex within 5 hexes of the planet with a speed of up to 5 hexes/turn.

The UPF are the attackers.  They all start along one of the short sides of the map.  The individual ships can be anywhere on that side, but all the ships have to be on the same side.  They must start within 3 hexes of the map edge and be moving at any speed up to 15 hexes/turn.  All the UPF ships have to start at the same speed.

Special Rules

Escaping the Battle

A ship is considered to have escaped from battle if it moves off any edge of the map with a) no ships in pursuit, or b) is out of weapon range and has a higher ADF of any pursuing ships.

Preserve the Fleet

Heavy cruisers and assault carriers are important vessels in the sathar navy.  If the tide of battle seems to be going against the sathar, they will try to pull back to preserve these larger vessels, sacrificing the smaller ones if necessary (even if it means ramming) to delay the UPF ships and allow the larger vessels to escape.

Victory Conditions

Sathar Victory

The sathar claim victory if they can destroy all the UPF vessels.

UPF Victory

The UPF claim a complete victory if all the sathar vessels are destroyed.  If any of the sathar vessels escape, it is only a partial victory.

When I Played

image by Scott Mulder

I played this out once using the full Advanced Combat rules of the Knight Hawks boardgame.  I wanted to test the plausibility of this mix of ships in the scenario.  Basically I was playing to make sure it was possible for the UPF to win.  I definitely thought the sathar would have the advantage.  It turned into quite the slugfest.  However, the UPF got in some lucky early blows with the assault scouts living up to their hype and taking out nearly half of the sathar fleet by round 3 of the game after losing only a single assault scout.

In the end, the sathar fleet was routed, escaping with only 1 frigate, 2 destroyers, and a heavy cruiser. The other heavy cruiser and assault carrier were lost on that fateful round 3.  The UPF only lost a Pale militia assault scout, and a light cruiser and assault scout from the Spacefleet contingent, but almost no ship escaped unscathed.  The die rolls favored the UPF and it ended up being a very lopsided game.  I suspect if played through several more times, it could go either way.

Last Thoughts

Do you like these Knight Hawks game scenarios?  Would you like to see more of them?  Should I include the statistics for the ships?  If you play this scenario out, let me know which rule set you used (Basic or Advanced) and how it turned out.

April 23, 2019 Tom 6 Comments

Sathar Cave System

I believe this is the last major piece of the of the Death at Rosegard adventure that I haven’t yet published so let’s get to it.

An old, abandoned mine

In my setting, the Streele Mining corporation is the forerunner of the Streel Corporation. Hilo Headrow did a lot for survivors and refugees, during and after the occupation, and quickly rose to take control of the company. As corporate interests widened from just mining, the company was renamed.

Located some 30-40 km northeast of Rosegard is an abandoned Streele Mining corporation mine. It has been abandoned since before the Great Sathar War. Sometime after the war, an enclave of sathar survivors found the mine and have set up shop. They mainly are lying very low but send out scouts into the surrounding area and are the ones that were controlling the operative at the Streel mine near Rosegard. In addition, they were in contact with Trey Mulden to do the cybernuk breeding.

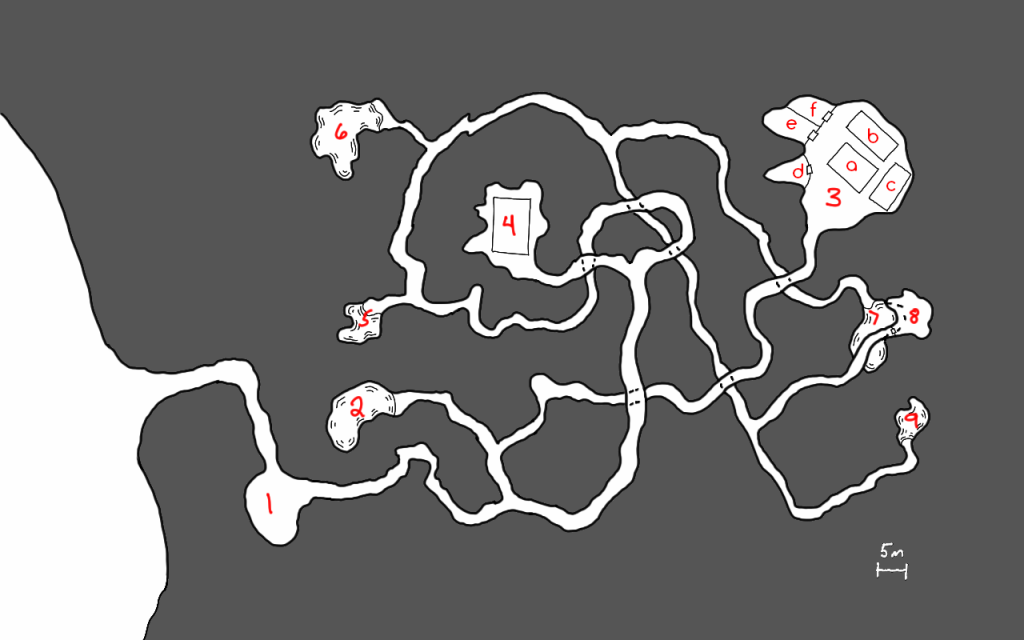
Let’s start with a map

This map was drawn by hand on my old Samsung Galaxy Note Pro 12.2 tablet. I added the shading and the letters (but not the numbers) in Gimp for this post.

In addition to the labeled locations which are described below, there is a mostly destroyed and overgrown mining complex just outside the entrance. Bits and pieces of walls and foundations still exist but there really isn’t much there.

Area Descriptions

  1. Aircar landing pad – while mainly filled with debris and rusted out vehicles from over 50 years ago when this mine was shut down, there is space for an aircar to land. The sathar have an old model aircar that may or may not currently be at the base. It was used by the sathar that was contacting the agent at Rosegard. If the PC’s captured or defeated that sathar, the aircar is not present.
  2. Pool – This is a clear water pool that the sathar sometimes use for swimming but is primarily a source of drinking water.
  3. Work area
    1. Food Production (a) – This building contains a series of terrarium-like containers that have a variety of small bugs and other creatures growing in them. Additionally there are some hydroponic vats growing plants. None of these seem to be native to Pale.  There is a single sathar working here.  The sathar does not have a weapon but does have a communicator.
    2. Tech lab (b) – This building contains what appears to be a technician or robotics lab although alien in nature. What appears to be a half assembled robot sits on one worktable and other tables contain various gadgets in various states of construction. One of the items looks like a nearly complete Cybernuk headset. There are 3 sathar technicians here.  Two of them are armed (laser pistol with 2 power clips) while the other has a communicator.
    3. Food Storage (c) – This is a climate controlled building with a freezer section.  It contains a large numbers the creatures and plants from the food production building but preserved for storage. There is several months’ worth of food here.
    4. Supply storage (d)- This area contains a wide variety of physical and technical materials ranging from various electronic parts to tubing, to wires, to chemicals. Most of the materials look to be frontier in origin but some are definitely alien in appearance.
    5. Nuk pen (e)- This pen contains three cybernuks with no cybernetic attachments.  It is locked with a level 1 lock simply to keep the nuks inside.  When opened, the nuks will charge out an attack the PCs.  An INT check will alert the PCs that something alive is inside.  Wall and door have 100 structure points.
    6. Nuk Pen (f) – This pen contains a single nuk with the cyber attachment.  It is locked with a level 1 lock to keep the nuk inside.  When opened, the nuk will charge out and attack the PCs.  An INT check will alert the PCs that something alive is inside.  If this cybernuk is released first, the other three will start bashing against the wall and door trying to get out to come to its aid (controlled by cyber implant).
  4. Power plant and water processing – This is a geothermal power generator (type II). Cabling runs from here back to area 3 that has been partially hidden by debris and rubble on the floor.  Additionally there is a large water processing facility here with fillers and processing system. Pipes run from here to areas 5, 6, 7, & 9 from here along the ceiling. There are two Sathar technician here.  One of the sathar is armed (laser pistol with 2 power clips) while the other has a communicator.
  5. Small Slime Pool – This pool houses four sathar.  There are small bins by the pool that hold the personal effects of the sathar that call this pool home.  Each has a backpack with a food jar, a small communicator, and two of them have laser pistols with two power packs each.  There are currently two sathar in the pool.
    1. backpack, communicator, food jar
    2. empty
    3. empty
    4. backpack, food jar, laser pistol with 2 power clips
  6. Large Slime Pool – Similar to area five, this larger pool houses eight sathar.  There are currently four in the pool. The contents of the bins are:
    1. Empty
    2. Backpack, food jar, laser pistol with 2 power clips
    3. Empty
    4. Empty
    5. Backpack, food jar, communicator
    6. Backpack, food jar, laser pistol with 2 power clips
    7. Empty
    8. Backpack, food jar, laser pistol with 2 power clips
  7. Large Slime Pool – Similar to area five, this larger pool houses eight sathar.  There are currently four in the pool.  The contents of the bins are:
    1. Empty
    2. Empty
    3. Backpack, food jar, laser pistol with 2 power clips
    4. Empty
    5. Backpack, food jar, communicator
    6. Empty
    7. Backpack, food jar, communicator
    8. Backpack, food jar, laser pistol with 2 power clips
  8. Robot storage – This storage area holds a dozen completed combat robots.  While the parts are Frontier sourced, the design is definitely alien. Characters have a –10% modifier to attempt any skills on these robots
  9. Leader Slime Pool – This is the personal slime pool of the compound’s leader.  This is a middle caste sathar.  There is a bin here with the leader’s personal belongings which contains a backpack, a laser pistol with 4 power clips, an inertia screen with a power beltpack, two food jars, a communicator, and a small computer.

Initial status of the mine

The mine is not on alert for intrusion.  It was fairly recently set up and does not have a lot of security features installed yet as the sathar began immediate production of the combat robots and food.

One of the residents is the controller for the agent at Rosegard and possibly was captured or killed by the PC’s.  If it wasn’t, add in another sathar to area 5 (small slime pool). Another is out returning from the Trey Mulden’s compound.  The second sathar will arrive back 5d10x10 minutes after the PCs enter the compound.

When the PCs first arrive, there are two sathar returning to area 7 from area 3 after being on duty that the PC will encounter in the passageway between those two areas when they first enter it. The next duty rotation is not scheduled to occur for another 1d5 hours at which point two of the sathar in area 6 will be headed to area 4.

None of the doors, except to the nuk pens, are locked. 

Sathar Reaction to PCs Arrival

Before the sathar are alerted

When the PCs enter one of the buildings with sathar in it, immediately start combat.  Those sathar that are armed will draw their weapon the first round but cannot fire until the second round.  They will begin to attack the PCs as soon as they are able.  Sathar with communicators will attempt to alert the rest of the compound.  It takes them one turn to open their backpack, one turn to grab the communicator, and the third turn to send the message.  The alert message will go out on the sathar’s action during the third turn.  If the PCs eliminate that sathar before then, no alert goes out.  Otherwise, consider the compound to be alerted going forward.

When the PCs enter one of the pool areas containing the lower caste sathar, there is only a 5% chance that one of the sathar is not in the water.  Regardless, the sathar will notice the PCs immediately and react.  The will start exiting the pool at the rate of 1d2 sathar per round (to represent different distances from the edge of the water) starting on round 2.  Once they have left the pool, it will take them one round to reach the bins and grab their backpacks unless the PCs block their way.  On the round after reaching the bins, those sathar that are armed may begin firing; those with communicators will simply grab their communication device and begin to activate it.  They can send an alert out as their action on their next turn (3rd after exiting the water).

Sathar with communicators will engage in melee combat (two attacks per round) with their bare tentacles once the alert has been sent or immediately if the alert has already gone out.

After the sathar are alerted

Once the alert has gone out, any sathar encountered will be ready and attack immediately upon seeing the PCs. 

Any sathar in the slime pools will immediate move toward area 8 where they will begin activating the combat robots at the rate of one every other turn.  They will remain there until all the robots are activated.  At that point they will proceed up through the cavern complex looking for the invaders.  The leader will hang back sending the robots and other sathar to engage the PCs.  If the PCs arrive at area 8 before all the robots are activated, the robots that are active and those sathar that are armed will engage them while the others continue to activate the remaining robots.  As the robots are activated, they will be sent to engage immediately.

The sathar in area 4 will take cover and immediately attack the PCs if they enter the generator and processing facility.  They will get one free round of attacks on the PCs before the PCs can react.

The sathar in the food processing facility will head across the cavern to the tech lab when the alert is sounded (if they are not the one sounding the alarm) and will either engage the PCs from behind if they are in the tech lab or wait with the sathar in the tech lab until the PCs or the main body of sathar arrives.

The sathar in the tech lab will be waiting for the PCs if they arrive before the main body of sathar and robots.  There is a 10% chance that they will have been able to reassemble the laser pistol being modified on the workbench.  The sathar using it will have a 10% penalty to hit as is hasn’t been fully converted.  If the PCs take a long time to get to the tech lab after the alert is sounded, raise the probability to 20%.

Sathar tactics

As the sathar are under-armed, they will try to attack from cover or ambush if at all possible.  If they have robots with them, they will send the robots in the fore to take damage from the PCs’ weapons.  If a sathar is in danger of being captured or thinks they will die, they will attempt to close with one or more of the PCs and trigger the self-destruct in their laser pistol (if they have one).  When the self-destruct goes off, treat it as a fragmentation grenade doing a number of d10 worth of damage equal to the SEU remaining in the clip.  If the clip is empty it will still do 1d10 points of damage.  PCs get a RS check to take half damage and intertia screens and skiensuits halve the damage as well.

Stats

Sathar Leader

STR/STA:  50/50
DEX/RS:  60/50
INT/LOG:  55/55
PER/LDR:  55/70
PS: 3
IM: 5
RW: 30
MW: 30

Skills:  Beam 4, Tech 3, Enviro 2, Unarmed 3, Robotics 2, Melee 1

Equipment:  backpack, a laser pistol with 4 power clips, an inertia screen with a power beltpack, two food jars, a communicator, and a small computer

Regular Sathar

STR/STA:  40/40
DEX/RS:  45/45
INT/LOG:  45/45
PER/LDR:  45/55
PS: 2
IM: 5
RW: 23
MW: 23

Skills:  Beam 2, Robotics or Technician or Environmental 2, Melee 1, Unarmed 1

Equipment: backpack, food jar, laser pistol with 2 power clips or communicator

Combat Robots

Type: Combat
Level: 2
STA: 100
Move: 120 m/turn
Attack: 50
Damage: 2d10 hands or 5d10 laser
Programs: Attack/Defense, Security Lock
Equipment: Laser pistol, power beltpack


March 12, 2019 Tom 3 Comments

Osiris Under Siege

This is section 4 of the the Ghost Ship Osiris module. In this section of the module, the PCs dock at Outpost Osiris and have to liberate it from the alien robots that have taken control and are exterminating the outpost’s staff. I’ve posted the maps and room descriptions already, this post fills in the rest of this section of the adventure. At the end you can find a PDF of the full adventure section that you can download.

While this section is basically done, it is just a draft for the final module. If you find any issues, or have questions, comments, or suggestions, feel free to let me know in the comments below.

Arrival

Approaching the outpost, there is no response to any attempt to contact or communicate with the miners at the outpost.  Power appears to be on and there is nothing preventing the PCs from simply approaching and docking with the outpost.

As you approach the asteroid, you see that it is slowly rotating.  It is about 1.4 km long and 1 km wide, one of the smaller asteroids in the Outer Belt.  The stream of ejected tailings from the mining operation that you followed in ends several kilometers before reaching the base, as if the ore processing has stopped.  The docking bay doors are wide open with light spilling out into the darkness of space. You also see some lights through a few small windows about 50m from the docking bay.

The docking bay is more than large enough to accommodate the Mirage and is located right on the rotation axis of the asteroid.  Unless they try some strange maneuver, docking is straightforward.  There is no gravity in the docking bay at the moment but it can be turned on by a control panel next to the airlock if desired.  Gravity is present in the rest of the base.

As the PCs open the airlock’s inner door, they are greeted by a member of the mine staff, covered in blood, running down the corridor toward them.  Rounding the corner at the far end, is a Pursale combat robot exactly like the one encountered on the Dawn’s Luck. (see this post)  It takes aim at the mine staff member and fires, hitting her squarely in the back.  She collapses to the floor at the PCs’ feet, wounded but not dead. The robot shifts its attention to the PCs still standing.

The robot has orders to eliminate the alien lifeforms and will fight until it is destroyed or has killed all the PCs.

After defeating the robot, the PCs can stabilize the miner.  They learn that she is Kella Rezal, one of the scientists at the outpost.  A few hours after the scavengers left, a number of alien robots emerged from the deeper mine area and began attacking the staff.  She and another staff member had been holed up in the sensor and communications office and when they saw the PCs’ ship approaching, decided to try to reach them.  Unfortunately, they were detected by one of the robots roaming the halls. Her companion was killed as they tried to escape.

She can lead them back to the sensor and communications nexus where they can begin the process of clearing the outpost of the robots.

Clearing the Complex

Pursale Combat Coordinator Warbot

STR:    100        BP:    500
AGL:    60         INIT:    3
CRD:    70         Move:    13, Walking
PER:    65         Frame:    Huge
INT:    65         Docking: 15CU

Programming:  Warrior +0, Marksman +0, Commander +10 (Violent Plan)

Equipment: A/V, IR, motion, vocal, & lifeform scanners, communicator, military grade reflec & ballistic screens, heavy laser rifle, devastator, grenade rifle, comm jammer, 800 EU powerpack, military grade armor, computer link, 4 EMP grenades, 4 tangler grenades, 8 smoke grenades, & 8 frag grenades.

Styled similarly to the combat robot, the coordinator warbot is about the same size as a full grown Pursale.  It has a short squat body with six legs and two arms extending from the sides of the body near the front. Extending up from the front of the body are two long slender stalks, about 1.2 m in length that end in sensor clusters.

The arms end in manipulator hands that have three fingers and a thumb.  The left arm has a built in heavy laser while the right one is sporting a devastator and grenade rifle. The powerpack is built into the body as is the magazine that feeds the grenades to the grenade launcher.

These robots are designed for both front line combat and controlling and coordinating squads of combat robots in independent actions while communicating with a central command if necessary.

The Pursale robots have effectively taken control of the mine complex and are attempting to eliminate the mine staff.  There are a total of 16 combat robots all controlled by a single Combat Coordinator Warbot (see sidebar for stats). The arrival of the PCs and elimination of the combat robot at the airlock  has alerted the warbot to the PCs’ presence and it will begin marshalling its forces to oppose the PCs.

Complete maps of Outpost Osiris can be found in the room descriptions post.  The following sections describe the complex, the initial location of the robots and mining staff, and tactics that they will use to capture and eliminate the PCs.

The PCs should quickly realize that the robots they encounter are not just working at random but are being directed.  A successful skill check (Technician or Scientist) with a -20 modifier for working with alien technology should allow them to identify the communication channel being used by the robots to communicate and track it back to the warbot.  If the PCs attempt to jam the communications, see the section Jamming the Robots’ Communications near the end of this section for details on that process.

Initial Locations of Robots and Mine Staff

Mine Staff

When the PCs arrive, the surviving mine staff are scattered throughout the complex attempting to hide from the robots that are trying to eliminate them.  Of the original 16 staff members only 12 are still alive. Three were killed in the initial foray of the combat robots into the complex and the fourth was killed as she and Kella attempted to reach the Docking Bay and the PCs.  The staff members (both surviving and dead) are in the following locations.

  • Dr. Jamis Grandt (Hm) – Overwhelmed by the situation, Dr. Grandt has hidden himself in the hydroponics lab where he has so far been undetected.  If rescued, he will be able to provide lots of information about the staff and operations but will not have any suggestions as to solutions for the current situation.
  • Kella Rezal (Hf) – Kella is with the PCs and will either accompany them as they move through the complex or will stay on the Mirage.  She doesn’t want to stay anywhere else until she knows that the robots have been eliminated.
  • F’Vothee (Yf) – F’Vothee is hiding out inside the nuclear reactor on the power level figuring that would be one of the last places the robots would search for her.  Unbeknownst to her, in her haste to get into the reactor, she tore a very small hole in her radiation suit and is taking radiation damage (1D/hour – currently has 12 BP left).  If she is not found and treated within a couple of hours she will succumb to radiation poisoning.
  • Hiloo (Nm) – Hiloo is hiding  out in the Mineral Processing Plant (Docking Level).  He has backed himself up into one of the little side maintenance passages and wedged himself under some of the machinery.  The robots are a little too big to enter the maintenance passages directly but are starting to dismantle and destroy the machinery in an attempt to get to him.
  • Reid Esperon (Hm) – Reid had ventured down to the alien ship after Thrawl’s crew left to investigate and was caught by the robots leaving the vessel.  His body is about 2/3rds of the way from the mine airlock on the docking level to the alien ship. He was able to get a warning back to the staff allowing them to attempt to defend themselves or hide.
  • Clese Whayeson (Hm) & Vothi (E) – These two were killed in the Ore Loading Area (Docking Level) trying to defend the airlock connecting the mines to the outpost against the advancing robots.  They managed to destroy one of the robots whose body is in that area with them before they were overwhelmed by the other robots.
  • Petoph Baker (Hm) – Petoph is hiding in one of the robot storage room.  He’s working on trying to activate and reprogram the spare mining robot in that room to use it to attack the invading robots.  If he is not found, he will have the robot ready to go in 2d10+10 minutes after the PCs dock at the outpost.
  • Donio Welley (Hm) – Donio grabbed the blankets off of his bed and is hiding out in the Freezer.  He’s been there for a while though and is starting to succumb to the cold.
  • K’Yuuxan (Yf)- K’Yuuxan is hiding in the gym.  She has turned the lights out and set the area to zero gravity.  She has hidden himself in one of the upper corners of the room. She has a laser rifle and a 50 EU power pack and will fire on any robot that discovers her.
  • Melni (Nf), G’Vorta (Ym), & Taxu (E) – These three are attempting to hid out in the mine shafts.  They have managed to evade the robots searching the shafts for now but are slowly being herded toward capture.
  • Yo’Viltri (Yf) – Her body is in the stairwell between the Crew and Docking levels.  She and Kella were attempting to reach the PCs’ ship when they were caught by one of the combat robots (the one destroyed by the PCs) she was killed as they made their way through the stairwell buying Kella time to escape.
  • Chofa (Nf) – Chofa is hiding in the largest of the mineral storage bays.  She has squeezed herself into one of the shipping containers by removing some of the refined material that was originally in there which is spilled out on the floor.
  • Yuror (E)- Yuror is hiding out in one of the currently unused housing units.  They has barricaded themself into the bathroom with the lights out.

Robots

There are 16 robots currently active and moving throughout the outpost.  They are initially in the following locations but will start converging on the PC’s location as directed by the Combat Coordinator Warbot.  These are the positions of the robots when the PCs dock at the outpost.

  • Mine shafts – there are 6 robots here working in three pairs to search the shafts for the miners hiding there.
  • Stairwell – There are two robots in the stairwell.  One is sitting in the area between the crew and power level.  It is currently just on station watching for anyone to traverse this area.  The second is descending the stairwell between the docking deck and crew deck and is enroute to start searching the recreational areas of the crew deck.
  • Life Support and Hydroponics – A robot has just entered this area to start searching it.  
  • Central housing corridor – There is a robot in the central corridor between the housing units.  It is at the end of the corridor and will break down the door to and enter each room in turn working it’s way up the corridor.  It has already searched the units off the left corridor.
  • Raw Ore Intake – There is one robot in this area that has started to smash and dismantle its way down the maintenance access corridors searching for crew members.
  • Processing Control Center – There are two robots here attempting to dismantle and work their way into the maintenance passages looking for Hiloo whom they know is in the area somewhere.
  • Mineral Storage Corridor – There is a robot about to enter the leftmost Mineral storage area.  
  • Robot Repair Shop and Storage Rooms – A single robot is in this area looking for Petoph Baker.
  • Airlock to Mines – A single robot is stationed in this location to prevent any of the staff moving between the outpost and the mine shafts.
  • Alien ship access tunnel – About half way down this tunnel from the airlock to the ship is where the Combat Coordinator Warbot has stationed itself allowing it to communicate with all of its robots and the ship.

Robot Tactics & Timeline

Tactics

The destruction of the combat robot at the airlock has alerted the Combat Coordinator Warbot to the presence of a potential threat.  1d5 turns after the robot is destroyed, it will begin marshalling its other combat robots to identify and eliminate the threat.

The warbot does not have access to the outpost’s camera and security system so it only knows where the PCs are when they encounter one of the combat robots.  It will start by sending the combat robot from the Mineral Storage area to the airlock to investigate the destruction of the combat robot there.

If the PCs are still at the airlock when the combat robot arrives, or it sees them in the corridor, it will engage them immediately.  Otherwise it has a 60% chance per turn to pick up their trail and pursue them.

If a robot encounters the PCs and is destroyed, the warbot will retask the closest robot to that position to resume the pursuit.  If the PCs are making short work of the robots, feel free to direct two or more robots to their location.

It should become quickly obvious to the PCs that the actions of the robots are coordinated and being controls from somewhere.  If they can jam the communications, then the robots will just go about their last assigned task.

If the communications are jammed, the warbot will come out of the access tunnel to deal with the threat directly.  If needed the warbot can summon up to eight additional combat robots from the ship embedded in the heart of the asteroid (provided communications haven’t been jammed).  This gives the referee some flexibility to provide the necessary challenge for the PCs.

Timeline

The PCs can’t afford to take their time once they enter the outpost.  The robots are looking for them and for the mining staff. The longer the PCs take to eliminate the threat, the more of the mining staff will be killed by the robots.  The referee should convey this sense of urgency through the actions of the robots and any NPCs encountered.

The following timeline assumes the PCs do nothing to intervene or are ineffective.  Adjust events appropriately based on the PCs’ actions. All times are given in minutes after the initial encounter at the airlock with the combat robot.

Time (min)Event
3Chofa found in Mineral Storage Bay and killed.
5Petoph Baker found in robot repair shop.
8Yuror found in housing unit and killed.
13Dr. Jamis Grandt will be discovered in the Hydroponics lab and killed.
18Donio Welley will be found in the freezer by the robot that killed Dr. Grandt.
22K’Yuuxan will be discovered in the gym by the robot originally traversing the stairwell.  A short fight will ensue before he is killed.
26The robots will have smashed their way through enough of the mineral processing machinery to capture and kill Hiloo.
35Donio Welley will exit the freezer due to the cold if not previously discovered and start looking for survivors or a new place to hide.
60Melni, G’Vorta, & Taxu finally cornered and killed in the mines.
74F’Vothee  will succumb to radiation induced damage if not found and treated.

Jamming the Robots’ Communications

One option the PCs have for dealing with the coordinated assault of the combat robots is to jam the communications between them and the warbot.  To do this, a successful skill check with a -40 modifier would allow them to jam the communications. However, this check would have to be performed either using the equipment on the Mirage or in the Sensors and Communications room.  PCs with the relevant skills would know where they would have to be to jam the communications. Setting this up takes 1d10 minutes.

If the PCs jam the communications, the warbot no longer has input from the combat robots as to the PCs’ location and can no longer task robots to intercept and pursue the PCs allowing them to move around more freely.

The combat robots themselves will pursue their last assigned task, i.e. searching whatever set of rooms they were in, and then go idle and assume a defensive posture.  They will attack anyone that approaches them them will not actively patrol or seek out engagements.

Even with communications jammed, the warbot will still be broadcasting attempting to contact its combat robots and the PCs can still follow this signal to the warbot if they have thought to do so.

Destroying the Warbot

The warbot is actively controlling the combat robots as an extension of itself during this encounter.  If it is destroyed or deactivated, all robots without a specific target (e.g. the combat robots pursuing s3 and m3 or engaging the PCs) will immediately stop all action.  They will defend themselves if attacked but will not initiate an attack or pursue anyone. Those robots who are already pursuing someone or engaged in a fight will continue their current task and then stop when it is completed.

This deactivation only occurs if communications between the robots are not jammed.  If the warbot is destroyed or deactivated while the communications are being jammed, the robots will not stand down until the communications jamming stops.

Aftermath

Once the PCs have secured the outpost and defeated the warbot, the surviving mine staff can fill them in on the events that occured before they arrived.  The PCs can also send a message back to Nova Vista appraising them of the situation and outcome. If they have not already decided to do so, NVC will direct them to explore the ship embedded in the asteroid (Section 5) and secure it for future study.

Here’s a PDF of the full adventure section including the room descriptions:

GhostShipOsiris-section4Download
January 22, 2019 Tom 1 Comment

Variation on a trap

This post originally appeared on the now-defunct Arcane Game Lore blog.

I was playing Star Frontiers with my kids last night and they dreamed up a trap far worse than what was actually there.  They are in the last section of the SF-1: Volturnus, Planet of Mystery module (PDF).

Warning: spoilers for the adventure.  If you’re a player in this module stop reading now!

Trap corridors from the module

In this part of the module, the characters have to assault a Sathar artifact.  The module is designed such that the characters can easily find a false entrance that opens up into a small closed set of interconnected tunnels that were circular in cross section (see area labeled 4 in the image at right).  The trap here being that once the characters pass a certain distance in either direction (the dashed lines in the image to the right) the entire tunnel complex flips 180 degrees tossing them about for some damage.  That’s all this area does, continuously.  There is absolutely nothing else here, just empty halls that flip over every time you cross one of those lines.

My kids were smart and were looking for traps but the technician looking barely made his skill roll, so I declared that he saw something at the positions of the dashed lines that looked like a triggering mechanism but didn’t know what it was.  He carefully moved over and made another skill roll to try to figure it out, again barely making it.  He was informed that it seemed that the tunnel system could pivot around a central axis but couldn’t figure out anything else.

At this point they all began speculating wildly about what could happen.  Not being able to see the entire structure (it was dark, they only had flashlights, and couldn’t see around the corners), they came to the conclusion that the corridors were balanced and that if they went too far in any one direction, it would tip over, dropping them to the bottom.  And if that wasn’t bad enough, they were also convinced that there were large 2 meter balls in the hidden portions of the tunnels that would roll down and squish them.

They immediately started looking at the weights of the different races (2 Dralasites, a Yazirian, a Vrusk, and 2 combat robots) and trying to send equally weighted characters in opposite directions.  This obviously didn’t work and they got flipped over and there were (luckily) no balls to go rolling through the halls.  After a couple of flips they decided this wasn’t working and found the correct (secret) entrance.

I’ll have to admit though, that the trap they dreamed up was much more interesting (and deadly) than the actual one.  I may just have to use it in a future adventure.


Comments

neoproxy – July 8, 2014 at 12:22 pm

Nice, that is ingenious on their part and far more believable (IMO). Their trap required no actual power source as the character’s own weight powers the trap. Their logic to counter that trap is admirable. I like it better as the current trap is doesn’t appear to have a way for them to overcome the trap other than just leaving.

June 5, 2014 Tom Leave a comment

Campaigns I’d Like To Run – Power Play

This post originally appeared on the now-defunct Arcane Game Lore blog.

This month’s RPG Blog Carnival topic is “Campaigns I’d Like To Run” and is hosted by the Age of Ravens blog.  Every GM has a campaign or two up their sleeve that they would love to trot out and play.  But invariably they lack the time, the players, or just already have too much going on.  In my case, it’s all of the above.  Lacking an active gaming group, I’m not actually running any games right now.  (That’s not completely true, I manage to get in about one gaming session every other month with my kids, but they are few and far between.)

So here’s my entry into the blog carnival, a mini-campaign I’d like to run if I ever had the time and players to pull it off.  This is a campaign concept that I had over two decades ago and that still swirls around in my head.  Ideally, it requires two or more separate gaming groups that could be brought together for the finale.  It also is intended to have a high attrition rate with no chance for bringing in new characters so is maybe more suitable for some sort of tournament play.

Power Play

High Concept

Multiple teams are stranded on an alien world fighting against the local flora and fauna as well as possibly each other to be the first to claim an amazing alien artifact.

Setting

Originally envisioned for the Star Frontiers setting.  While it could fit into any sci-fi setting, it is designed to be set in one with a tech level not too far ahead of our own.  There are FTL, laser guns, and such but, as in my Star Frontiers setting, no fusion.  Fission reactors abound and are common but fusion tech is still under development.

Synopsis

On an uncharted world, an alien artifact has been discovered that shows the unmistakable signs of containing a working fusion reactor.  The race is on to be the first to arrive at the artifact and claim the prize.

Goals

The concept is designed to be a challenge for high level PC’s and experienced players.  The challenges, both in terms of the local flora and fauna, the environment, and the artifact itself, are intended to be hard and deadly.  In the end, the idea is to have the separate teams, whittled down by the challenges, have to work together to claim the prize.

Campaign Thoughts

  • In my setting, a working fusion reactor would be a big deal as none exist.  Control of one would provide the opportunity to either understand and recreate the tech or at least duplicate it, providing a huge source of power.  Since the setting’s currency is based on energy, this translates into huge financial and therefore economic and political power.  If running in a setting with fusion power already, make it some other future tech with the same impact.  The idea is that it should be something people are willing to kill for.
  • The reactor is actually part of a defense installation which is still operating.  Nothing can  approach within 1000 km in space without being shot down.  Also any air vehicle above the installation’s horizon will be shot down as well out to that same distance.
    • This is how the first probe was destroyed.  As it came into orbit around the planet it detected the energy signature and altered it’s orbit to investigate.  As it passed within range it was blasted out of the sky.
    • One or more of the teams should have a ship shot out from under them.  Maybe not the PC’s team but there should be some early indication that this is all going to be on foot.
blue triangle with gold excalemation mark in the middle
(This image is currently missing. I”ll update it when I can rescan it.) An old topographical map I drew (back in the early 90′s) of the surrounding terrain. The contour lines are 500′ elevation and the grid squares are 250 km. The red circle is the 1000km range for the defense battery. The horizontal line across the map a bit below center is the planetary equator. Click on the image for a larger version.
  • The installation is on a mountain top, at ~24,000 ft (~7300m) altitude.  This means that the horizon is nearly 190 miles (~300 km) way, So anything in the air within that range will be shot down.  In addition the installation can see any large object (i.e. vehicle sized) that is moving on the ground in the open and is programmed to consider this a threat and destroy it.  Did I mention I wanted the characters on foot?
    • There should be come encounters with destroyed/decayed/corroded vehicles, aircraft, and possibly ships from both the PC’s society and other alien races.
    • These could be years/decades/centuries/millennia old as the installation has been around for a long time.
  • The high altitude of the installation location means that it’s cold up there and the atmosphere is thin.  Appropriate gear needs to be hauled along.
  • Treacherous terrain.  The terrain should be rugged and varied.  The final bit will be an uphill climb, possibly requiring ropes and other climbing gear to scale the final bit of the mountain.
  • Poisonous Atmosphere – Not horribly so but enough that special gear will have to be used, cared for, and protected.  Exposure should cause minor effects in the short term with progressively worse effects as time goes on.  In the end it should be debilitating if not deadly.
Maybe they’ll run into one of these.
  • No large fauna. It would have been eliminated by the installation (triggering it’s large vehicle algorithm). However there are smaller (tiger & lion sized and below) threats that will have to be dealt with.
  • Food and water – Water should be easy enough to come by but will need to be purified. Food on the other hand could be an issue. Can the PC’s scavenge and eat the local local flora and fauna? Is it totally inedible? Mildly poisonous? Edible with precautions? or maybe just fine? If it’s not safe to eat, they will have to pack in food with them over the entire trip.
  • There will be rival teams to deal with. Teams from other mega corps, other governments, and even other alien races. If running this in the Star Frontiers setting, there would definitely be a major Sathar force that the PC’s would have to deal with. Since the Sathar don’t seem to care about losses, I can envision them sending down dozens of shuttles simultaneously such that the automated defenses can’t destroy them all and managing to put a sizable force on the ground, maybe in several different locations. Possibly use this force to push the rival teams into cooperation.
  • The tech of the installation is completely alien in origin so there will be penalties all around on skill checks when dealing the alien tech.
  • Do we let the PC’s pull out and return to base and reequip or call in resupply? My original thinking was that this wouldn’t be possible but it could be considered.
  • How do we bring the separate teams together?
    • The “enemy alien” force is one (and maybe the easiest) possibility.
    • Have the various teams each have part of what is necessary to succeed.  None can succeed alone and they need to cooperate.  How to do this assuming a good PC mix in the various teams?
    • Other ideas?
  • Once the artifact is recovered/controlled, what happens?
  • What do PC’s learn about the alien race that created it? Are they still around somewhere? Did they die out? Are there clues that could lead to further adventures?

Rules Considerations

  • Would need to work out details of supply and travel costs.  Most travel will be on foot.  How much can the PC’s take with time and how fast can they travel?  Will they have to make multiple trips across the terrain?  If it seems too much, might have to pull back on the defensive perimeter to allow them to get closer with heavy support.
  • Need details on the effects of atmosphere, eating the flora/fauna, etc.
  • Need to detail out the flora and fauna for a large region.
  • Need the planetary details (gravity, length of day, weather, etc) and how that impacts the player’s travels.
  • Rules needed for climbing and cold weather operations.
  • Need to work out the safe heights as a function of distances for various directions to allow for air travel when below the installation’s horizon.
  • At some level this is a logistical campaign where resource management could be critical.  Need to make sure all relevant rules are covered.

So there you have it.  The mini-campaign I’d love to run.  It’s been stewing in my brain for years.  Maybe someday I’ll actually get to run it.

I have a bit more material over what I posted here.  In addition to the topographic map above, I have a planetary map, and some more detailed region maps that I drew years ago.  Plus I have an installation map of the reactor building itself.  I also have some additional background and flavor text to go with the scenario and some development on the planetary characteristics and flora and fauna.  But I think I’ll save those for an article in the Frontier Explorer. [Ed: I never did write that article 🙁 ]


Comments

neoproxy – May 16, 2013 at 4:54 am

I think this would be excellent fun. I’ve often thought it would be cool to have two groups play in parallel and bring them together in a climatic final battle.

I think in the final battle they would run at each other, stop at the last minute, shake hands, and then work out something where everyone wins.

jedion357 – May 20, 2013 at 3:37 am

I think you could run this in much the same way a table top skirmish wargame would run- each player has a squad of miniatures (characters) that they are managing in a play by post game. When teams encounter each other the players can communicate by email and post their negotiations in game.

Actually this sounds like a good premise for a table top skirmish wargame run with Star Grunt rules or something similar. 3 players with the “sathar” forces and 4 players with smaller “good guy” forces. Fussion reactor is the main objective on the table but other smaller objectives are possible- sounds like a great Saturday morning to afternoon at the local wargaming club.

May 14, 2013 Tom Leave a comment

Posts navigation

← Previous 1 2 3
Become a Patron!

Recent Posts

  • State of the Frontier – January 2024
  • Detailed Frontier Timeline – FY62.069 to FY62.99
  • State of the Frontier – August 2022
  • Battle of Hargut (Gruna Garu) – FY62.098
  • Archived Arcane Game Lore Posts – May 2013 to Dec 2014
  • A Look at Yachts and Privateers
  • Homeworld Bound – A Campaign Concept
  • Second Battle of Fromeltar (Terledrom) – FY62.083
  • Sample Star System Data
  • Detailed Frontier Timeline – FY62.038 to FY62.068

Categories

  • 3D Models
  • Adventures
  • Background
  • Creatures/Races
  • Deck Plans
  • Equipment
  • Game Design
  • General
  • Locations
  • Maps
  • NPCs
  • Optional Rules
  • Patreon-only
  • Project Overviews
  • Reviews
  • Setting Material
  • Starships
  • System Brief
  • Vehicles
  • Writing

Recent Comments

  • Tom on State of the Frontier – January 2024
  • Tom on State of the Frontier – January 2024
  • Tom on Star Map Generator – GUI Edition
  • David on Star Map Generator – GUI Edition
  • DM_Shroud on Star Map Generator – GUI Edition
  • Tom on Fighter Miniatures
  • Rlaybeast on Fighter Miniatures
  • Loguar on Detailed Frontier Timeline – FY62.069 to FY62.99
  • Loguar on Detailed Frontier Timeline – FY62.069 to FY62.99
  • Tom on Detailed Frontier Timeline – FY62.069 to FY62.99

Archives

  • January 2024 (1)
  • September 2022 (1)
  • August 2022 (9)
  • July 2022 (3)
  • June 2022 (3)
  • May 2022 (3)
  • June 2021 (1)
  • April 2021 (1)
  • February 2021 (4)
  • January 2021 (6)
  • December 2020 (5)
  • November 2020 (11)
  • October 2020 (4)
  • September 2020 (5)
  • August 2020 (4)
  • July 2020 (6)
  • June 2020 (5)
  • May 2020 (8)
  • April 2020 (5)
  • March 2020 (5)
  • February 2020 (5)
  • January 2020 (5)
  • December 2019 (7)
  • November 2019 (4)
  • October 2019 (6)
  • September 2019 (5)
  • August 2019 (6)
  • July 2019 (7)
  • June 2019 (5)
  • May 2019 (6)
  • April 2019 (7)
  • March 2019 (4)
  • February 2019 (5)
  • January 2019 (7)
  • December 2018 (5)
  • November 2018 (10)
  • October 2018 (4)
  • September 2018 (4)
  • August 2018 (5)
  • July 2018 (4)
  • June 2018 (4)
  • May 2018 (12)
  • December 2015 (1)
  • November 2015 (2)
  • December 2014 (4)
  • November 2014 (3)
  • June 2014 (1)
  • January 2014 (1)
  • July 2013 (1)
  • June 2013 (2)
  • May 2013 (3)

Meta

  • Log in
  • Entries feed
  • Comments feed
  • WordPress.org

Recent Posts

  • State of the Frontier – January 2024
  • Detailed Frontier Timeline – FY62.069 to FY62.99
  • State of the Frontier – August 2022
  • Battle of Hargut (Gruna Garu) – FY62.098
  • Archived Arcane Game Lore Posts – May 2013 to Dec 2014

Recent Comments

  • Tom on State of the Frontier – January 2024
  • Tom on State of the Frontier – January 2024
  • Tom on Star Map Generator – GUI Edition
  • David on Star Map Generator – GUI Edition
  • DM_Shroud on Star Map Generator – GUI Edition

Archives

  • January 2024 (1)
  • September 2022 (1)
  • August 2022 (9)
  • July 2022 (3)
  • June 2022 (3)
  • May 2022 (3)
  • June 2021 (1)
  • April 2021 (1)
  • February 2021 (4)
  • January 2021 (6)
  • December 2020 (5)
  • November 2020 (11)
  • October 2020 (4)
  • September 2020 (5)
  • August 2020 (4)
  • July 2020 (6)
  • June 2020 (5)
  • May 2020 (8)
  • April 2020 (5)
  • March 2020 (5)
  • February 2020 (5)
  • January 2020 (5)
  • December 2019 (7)
  • November 2019 (4)
  • October 2019 (6)
  • September 2019 (5)
  • August 2019 (6)
  • July 2019 (7)
  • June 2019 (5)
  • May 2019 (6)
  • April 2019 (7)
  • March 2019 (4)
  • February 2019 (5)
  • January 2019 (7)
  • December 2018 (5)
  • November 2018 (10)
  • October 2018 (4)
  • September 2018 (4)
  • August 2018 (5)
  • July 2018 (4)
  • June 2018 (4)
  • May 2018 (12)
  • December 2015 (1)
  • November 2015 (2)
  • December 2014 (4)
  • November 2014 (3)
  • June 2014 (1)
  • January 2014 (1)
  • July 2013 (1)
  • June 2013 (2)
  • May 2013 (3)

Categories

  • 3D Models
  • Adventures
  • Background
  • Creatures/Races
  • Deck Plans
  • Equipment
  • Game Design
  • General
  • Locations
  • Maps
  • NPCs
  • Optional Rules
  • Patreon-only
  • Project Overviews
  • Reviews
  • Setting Material
  • Starships
  • System Brief
  • Vehicles
  • Writing

Meta

  • Log in
  • Entries feed
  • Comments feed
  • WordPress.org
Powered by WordPress | theme Layout Builder