It’s been over seven months since I last posted a miniature. And a month and a half since I posted anything at all. I didn’t get back to posting in May like I had hoped but I have started working on projects again. I just haven’t found time to write up the posts. That will probably continue through mid-July (once I finish the next issue of the Frontier Explorer) but things should start picking up after that.
Which brings us to the Moonbright Stinger model. This is a miniature from the Privateers boxed set. I had mentioned in the past that I had all the miniatures from that set that I had collected loose, but not from a single set. I also mentioned that I had misplaced three of the minis. Several people offered to send me theirs so I could use them to recreate the miniatures. I’m grateful to those that offered. However, during the intervening months when I wasn’t posting, a new, still in shrink-wrap Privateers boxed set came up on Ebay. While I’ve been burned with sealed minis having lead rot, that has only been on the Federation Ships boxed set. I’ve never had an issue with any other ones. I really think it was something in the production run of that particular set of minis.
In any case, I decided to take the chance and exercised the “Buy it now” option on Ebay and purchased the miniature set. It arrived a few days later and when I opened it up, I was happy to discover that the figures were in pristine condition.
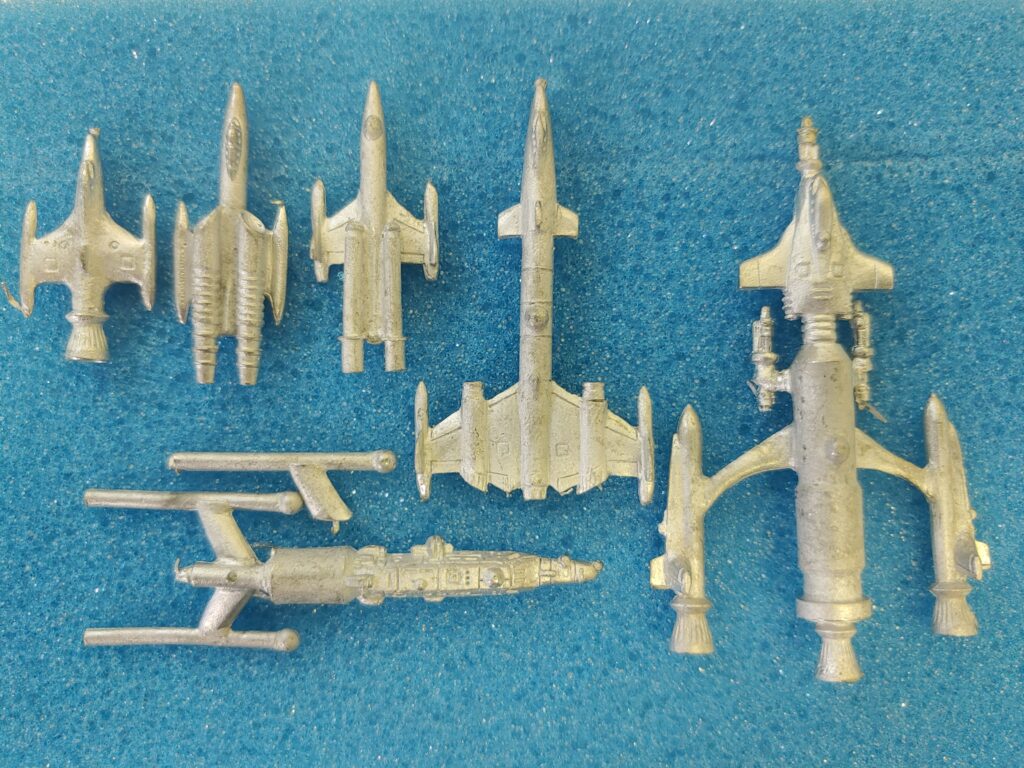
I had already started working on the Moonbright Stinger model by then as it was one of the ones I still had, but this gave me a second miniature to compare to. The name Moonbright Stinger is the name of the miniature that is give on the Privateers box. Most Star Frontiers gamers know a much more famous ship of the same class. In fact, after the assault scout, this is probably the second most iconic ship of the game. Of course I’m referring to the Gullwind, which features in the Dramune Run module:
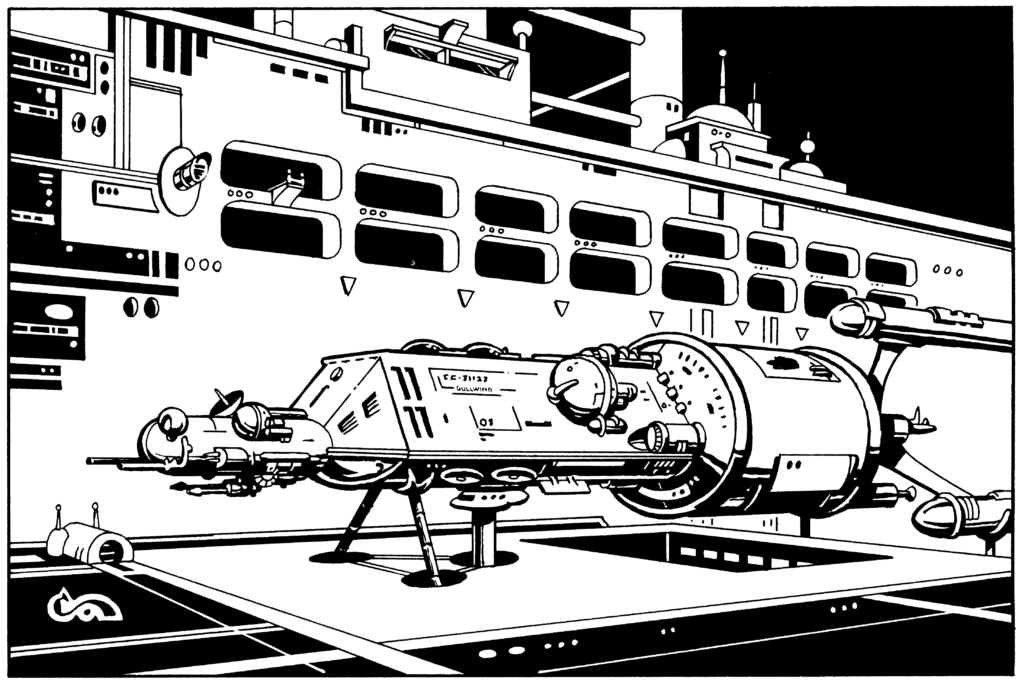
And while the miniature doesn’t quite have the detail of the artist’s drawings, it’s pretty close.
The 3D Model
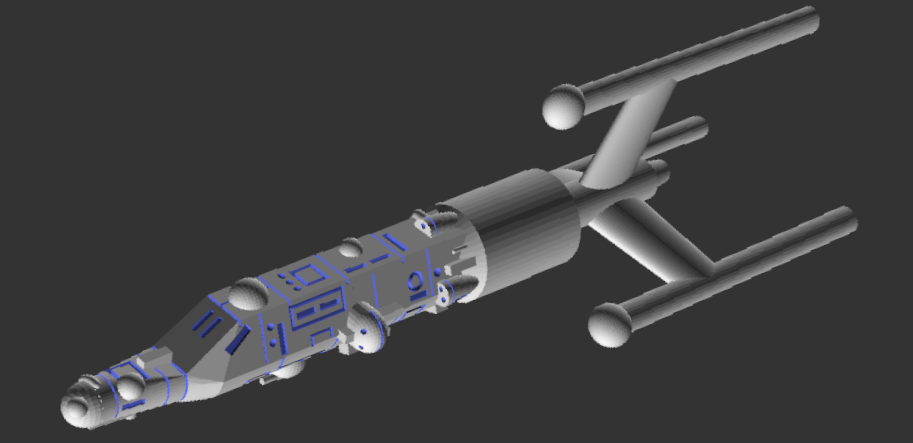
The above is a render of the completed 3D model as seen from the “top” of the ship. The decks are perpendicular to the thrust axis as is true for all ships in Star Frontiers, but the artists like to draw this ship this way so I oriented the image that way as well.
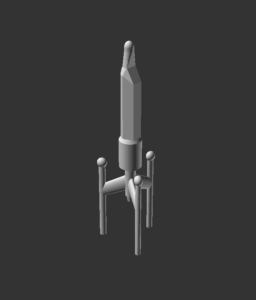
This model was a bit complicated but I think of all of the Privateer models, it’s going to be the easiest to recreate so that’s why I started with it. I began by roughing out the body. The engines were easy as was the fuselage up through the cargo bay (that large cylinder at the back). Forward of the cargo bay, the “underside” (not seen) is cylindrical while the “top” is a trapezoid. It took a little bit of jiggling to get that just right and in the end, I ended up making the top of the trapezoid a bit too wide but not enough to worry about.
The other thing is the nose of the ship is 1) not perfectly round, and b) off-center from the axis of the ship. Luckily my modeling software has a “hull” command that allows you to define a series of shapes at various layers and then the computer will smoothly connect them to form a surface. I used this to do both the nose (below where it became cylindrical) and the transition region from the main body to the nose. The roughed out body is shown in the image to the right. The observant reader may notice that the engines are not lined up in this roughed out version as they are in the final model. I didn’t notice that I did that until I was comparing the printed version of the miniature with the original.
After I had the basic hull done, I added in all the details on the miniature. Adding the positive features was fairly straightforward although those pods on the side of the ship just forward of the cargo bay were a bit tricky. With the easy stuff done, it was time to start adding in the negative details that were cut out of the body of the ship.
Of course life got in the way and there was a five month gap between adding the positive features and when I started added the negative details. I did this in sections, first I added details to the “top” of the ship, working from the cargo bay to the nose. I then went back and added in details on the starboard side and then port side, and finally the the rounded bottom of the ship. While I measured out all the features to get their sizes and positions, the final placement was done by eye to try to match the miniature. In the process, I discovered that I had gotten the length a bit wrong on parts of the ship’s fuselage (the final model is 1mm longer than the original miniature) and had the positions of some of the positive details slightly wrong as well. Positions and sizes (except for that 1mm length difference) were corrected as I went along. That gave us the final model as seen in the images below showing the two sides of the ship.
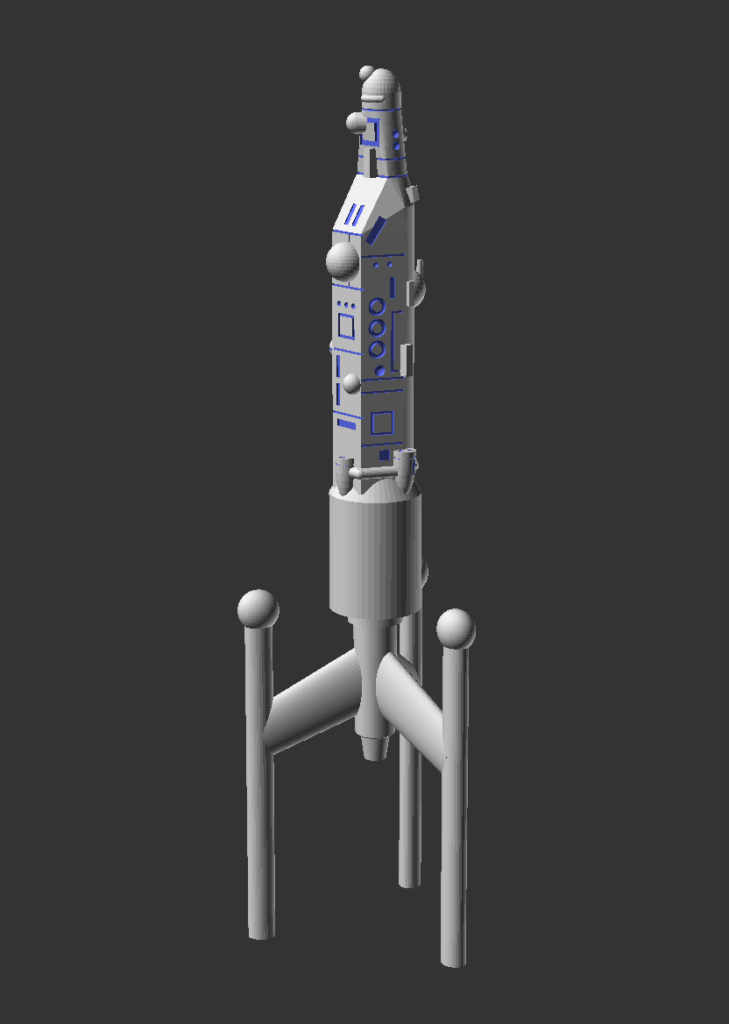
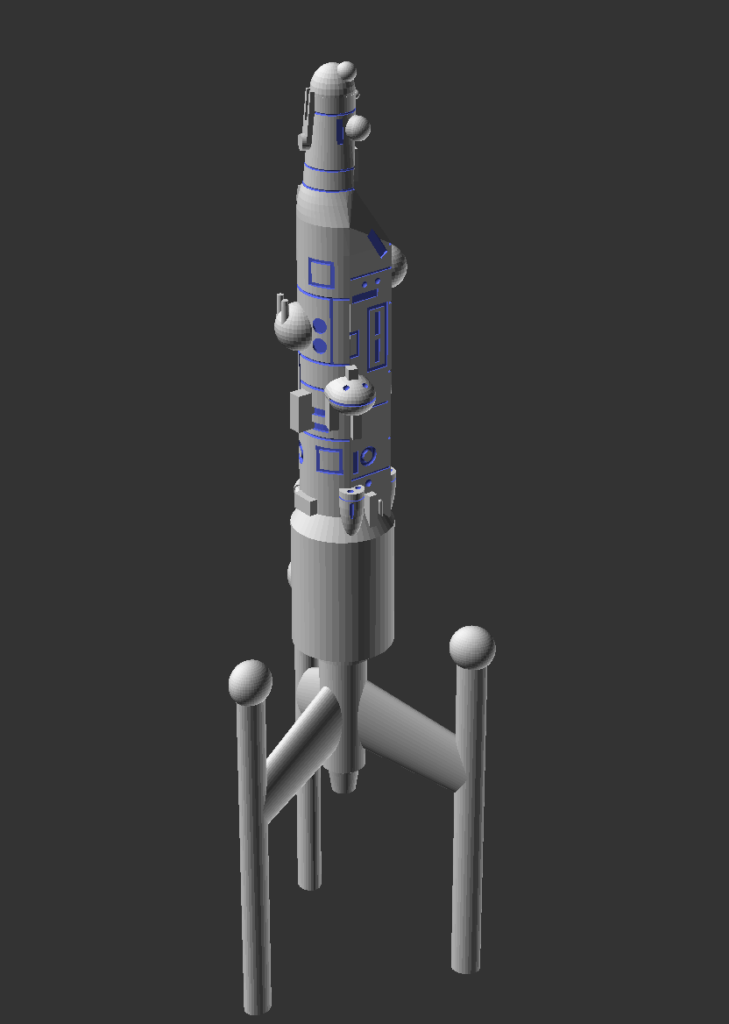
Printing
With the model done it was time to print it out and compare it to the original. Here’s what that first print looked like:
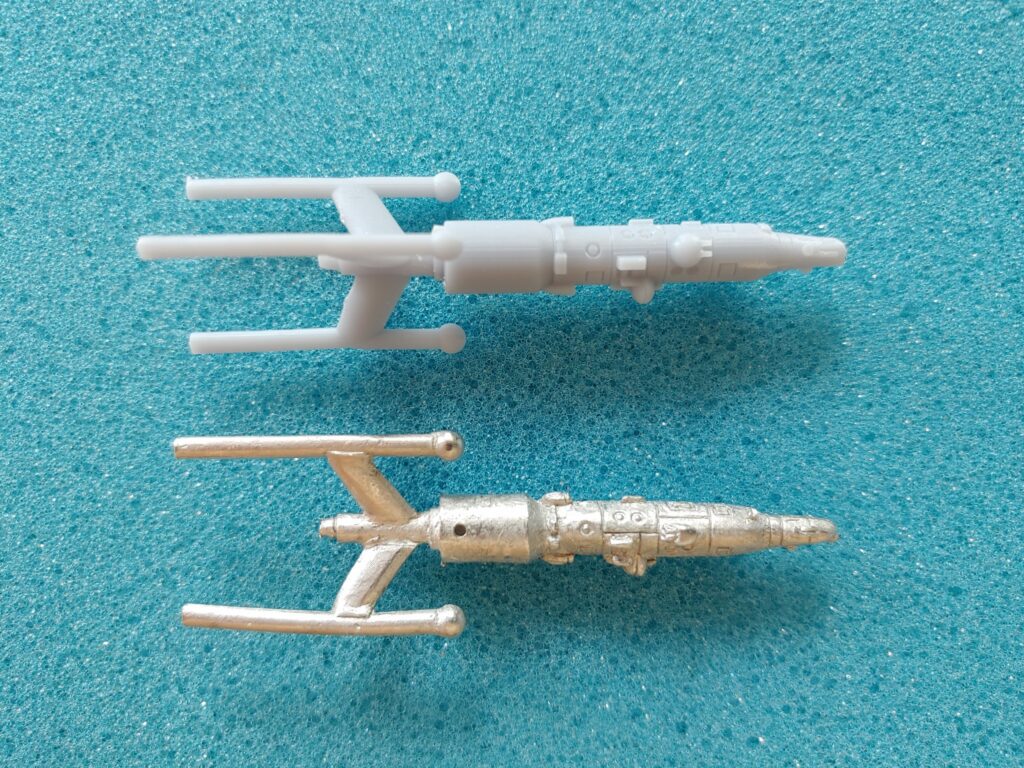
After putting these next to each other and taking this picture, I noticed a few thing immediately:
- I need to get a better camera than just my cell phone for taking close-up (macro) shots. Also, the discoloration on the printed miniature is is probably due to my haste in the cleaning and curing process. I might not have let it dry enough before curing.
- This is when I noticed that the engines in the model are rotated 30 degrees from where they should be. I’m not sure how I missed that. The hole in the top of the metal miniature near the back is where the third engine on that mini is supposed to attach when you glue it on.
- The positive features are mostly fine, but it turns out the negative feature on the fuselage are not quite deep enough to really make them stand out like they do on the original. I thought that might be the case when I was making the mode and it turns out that I was right. I will need to tweak them all to make them deeper.
- The big dome and boxy structure near the nose of the ship are a bit too big. They need to be shrunk down just a tad.
- Finally, this is when I noticed that the model is 1mm longer than the original. The discrepancy is in the nose area starting in the transition region down to the smaller nose and the nose section being a bit too long. When I was building the model I noticed I had a bit more space there but wasn’t sure why. I’m not going to fix this.
Observations in hand, I went through and doubled the depth of the negative features, tweaked the size and positions of the positive features, and reprinted the model.
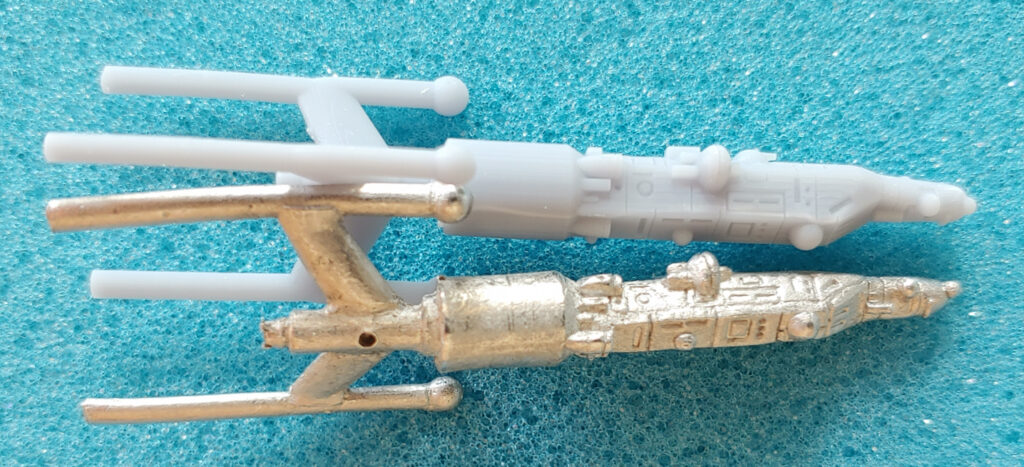
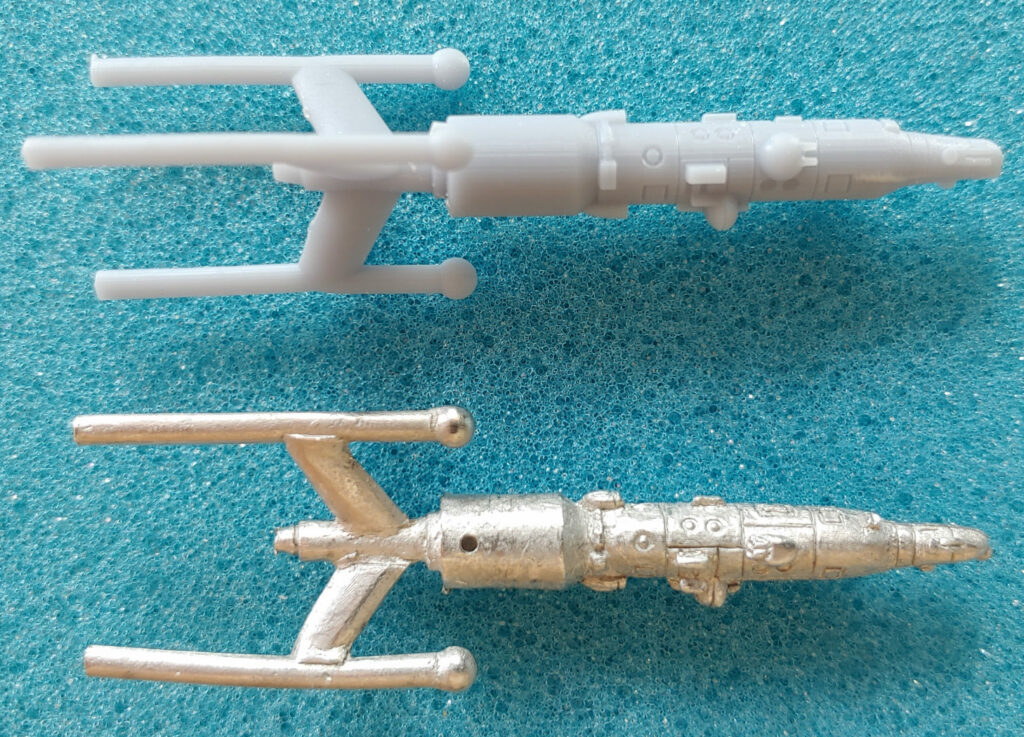
And then I noticed I rotated the engines the wrong direction so now they are 60 degrees off instead of 30. Oops. But the negative details stand out much better now and I’m happy with the way it looks. After this print I fixed the engine position and that resulted in the model image at the top of the post. I haven’t since reprinted the model but will at some point.
What’s next?
Next up is one of the smaller Privateer models, the Thruster class. It’s the small one in the upper left of the group picture up above. That one will take some work to get the wing features correct as that smoother shape is not something my CAD software does natively. I did it for the Freighter miniature, so I just need to relearn how.
I will be getting this model up on DriveThruRPG along with the rest of the models there as well as getting a price on to the price list here on this site.
Let me know what you think about this miniature and model in the comments below.