Facing overwhelming odds, the local militia assault scouts are annihilated after inflicting serious but non-fatal damage on one of the sathar vessels. The sathar then proceeded to destroy the armed station orbiting the planet as they approached and settled into orbit themselves.
Strangely, they have made no move against the planetary surface as they did against Pale 62 years ago. Rather, they remain in a high orbit around the planet. The population of Zik-kit wait in fear of what may come.
T’katt’ska – Zit-kit Wire News
Background
With the K’aken-Kar militia head off to help in the K’tsa-Kar system, and the Fromeltar milita tied up with sathar forces in their own system, the two assault scouts are left to face the on-coming sathar attack by themselves.
With no chance against the overwhelming odds, the plan was to get an assault rocket shot off at the sathar ships and slip away to the K’aken-Kar system where they hoped to meet up with other ships as reinforcements.
Order of Battle
Militia Forces
- 2 Assault Scouts
- 1 Armed station
Sathar
- 1 Frigate
- 2 Destroyers
- 1 Light Cruisers
- 1 Heavy Cruiser
The Battle
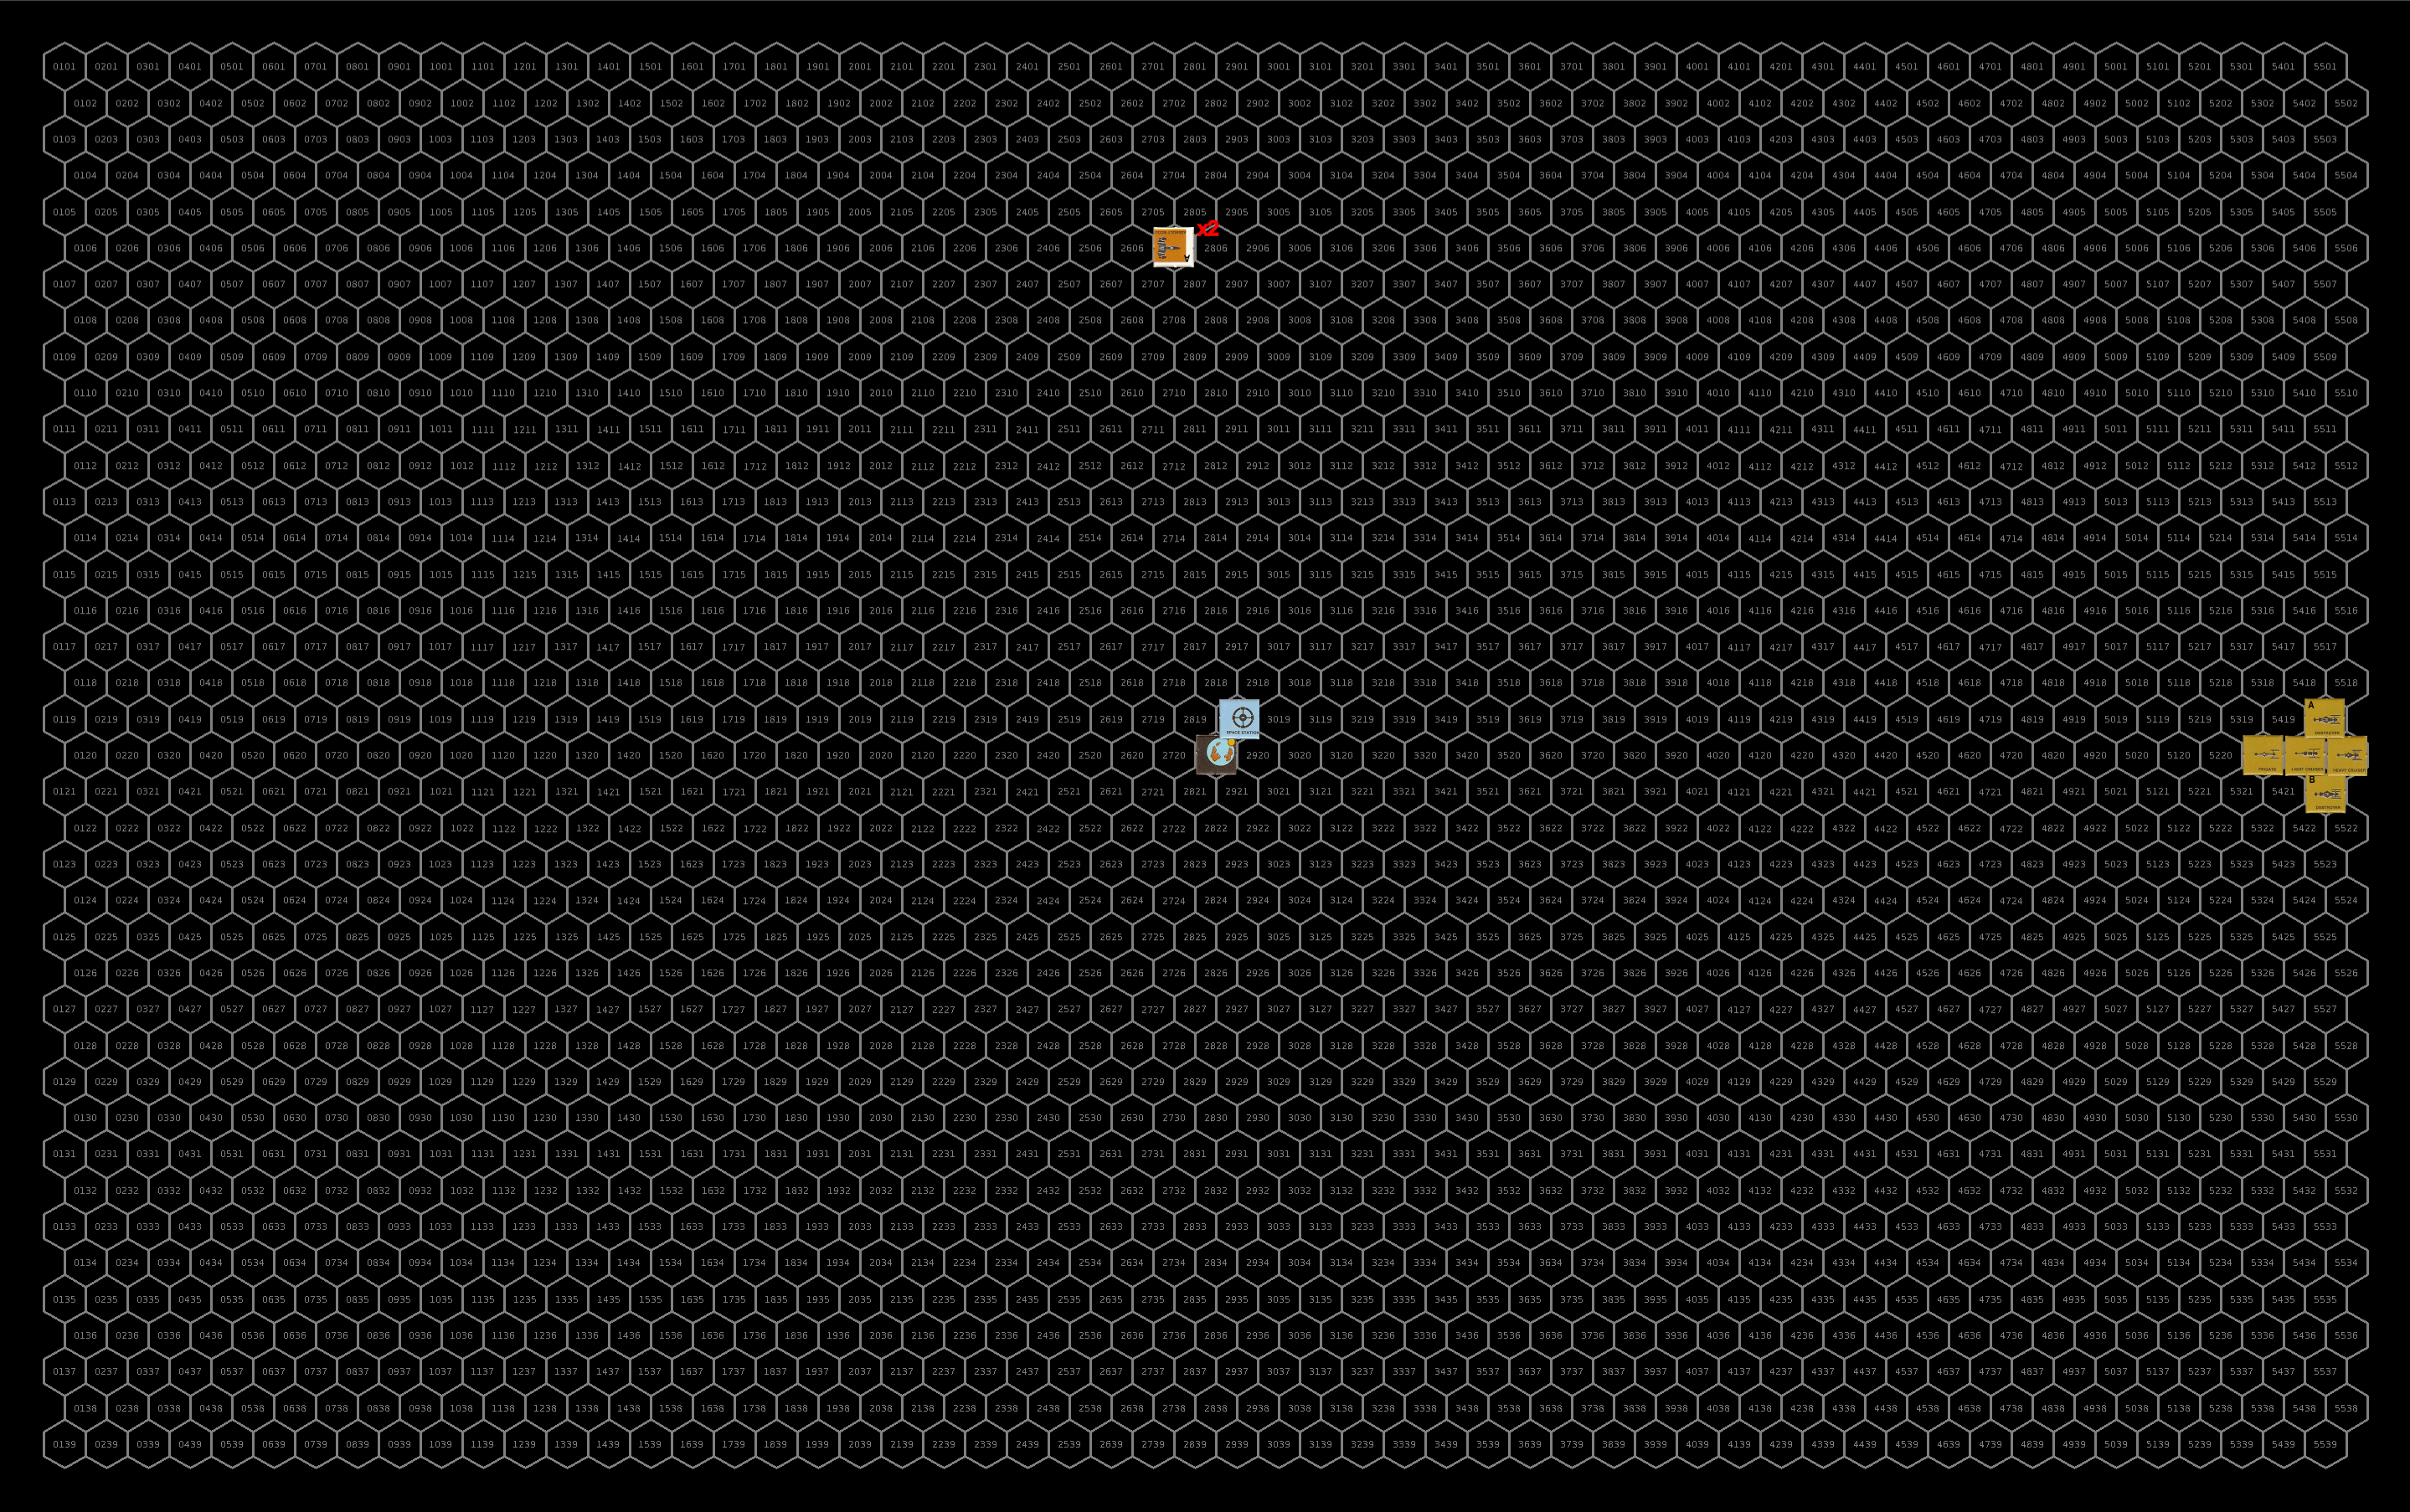
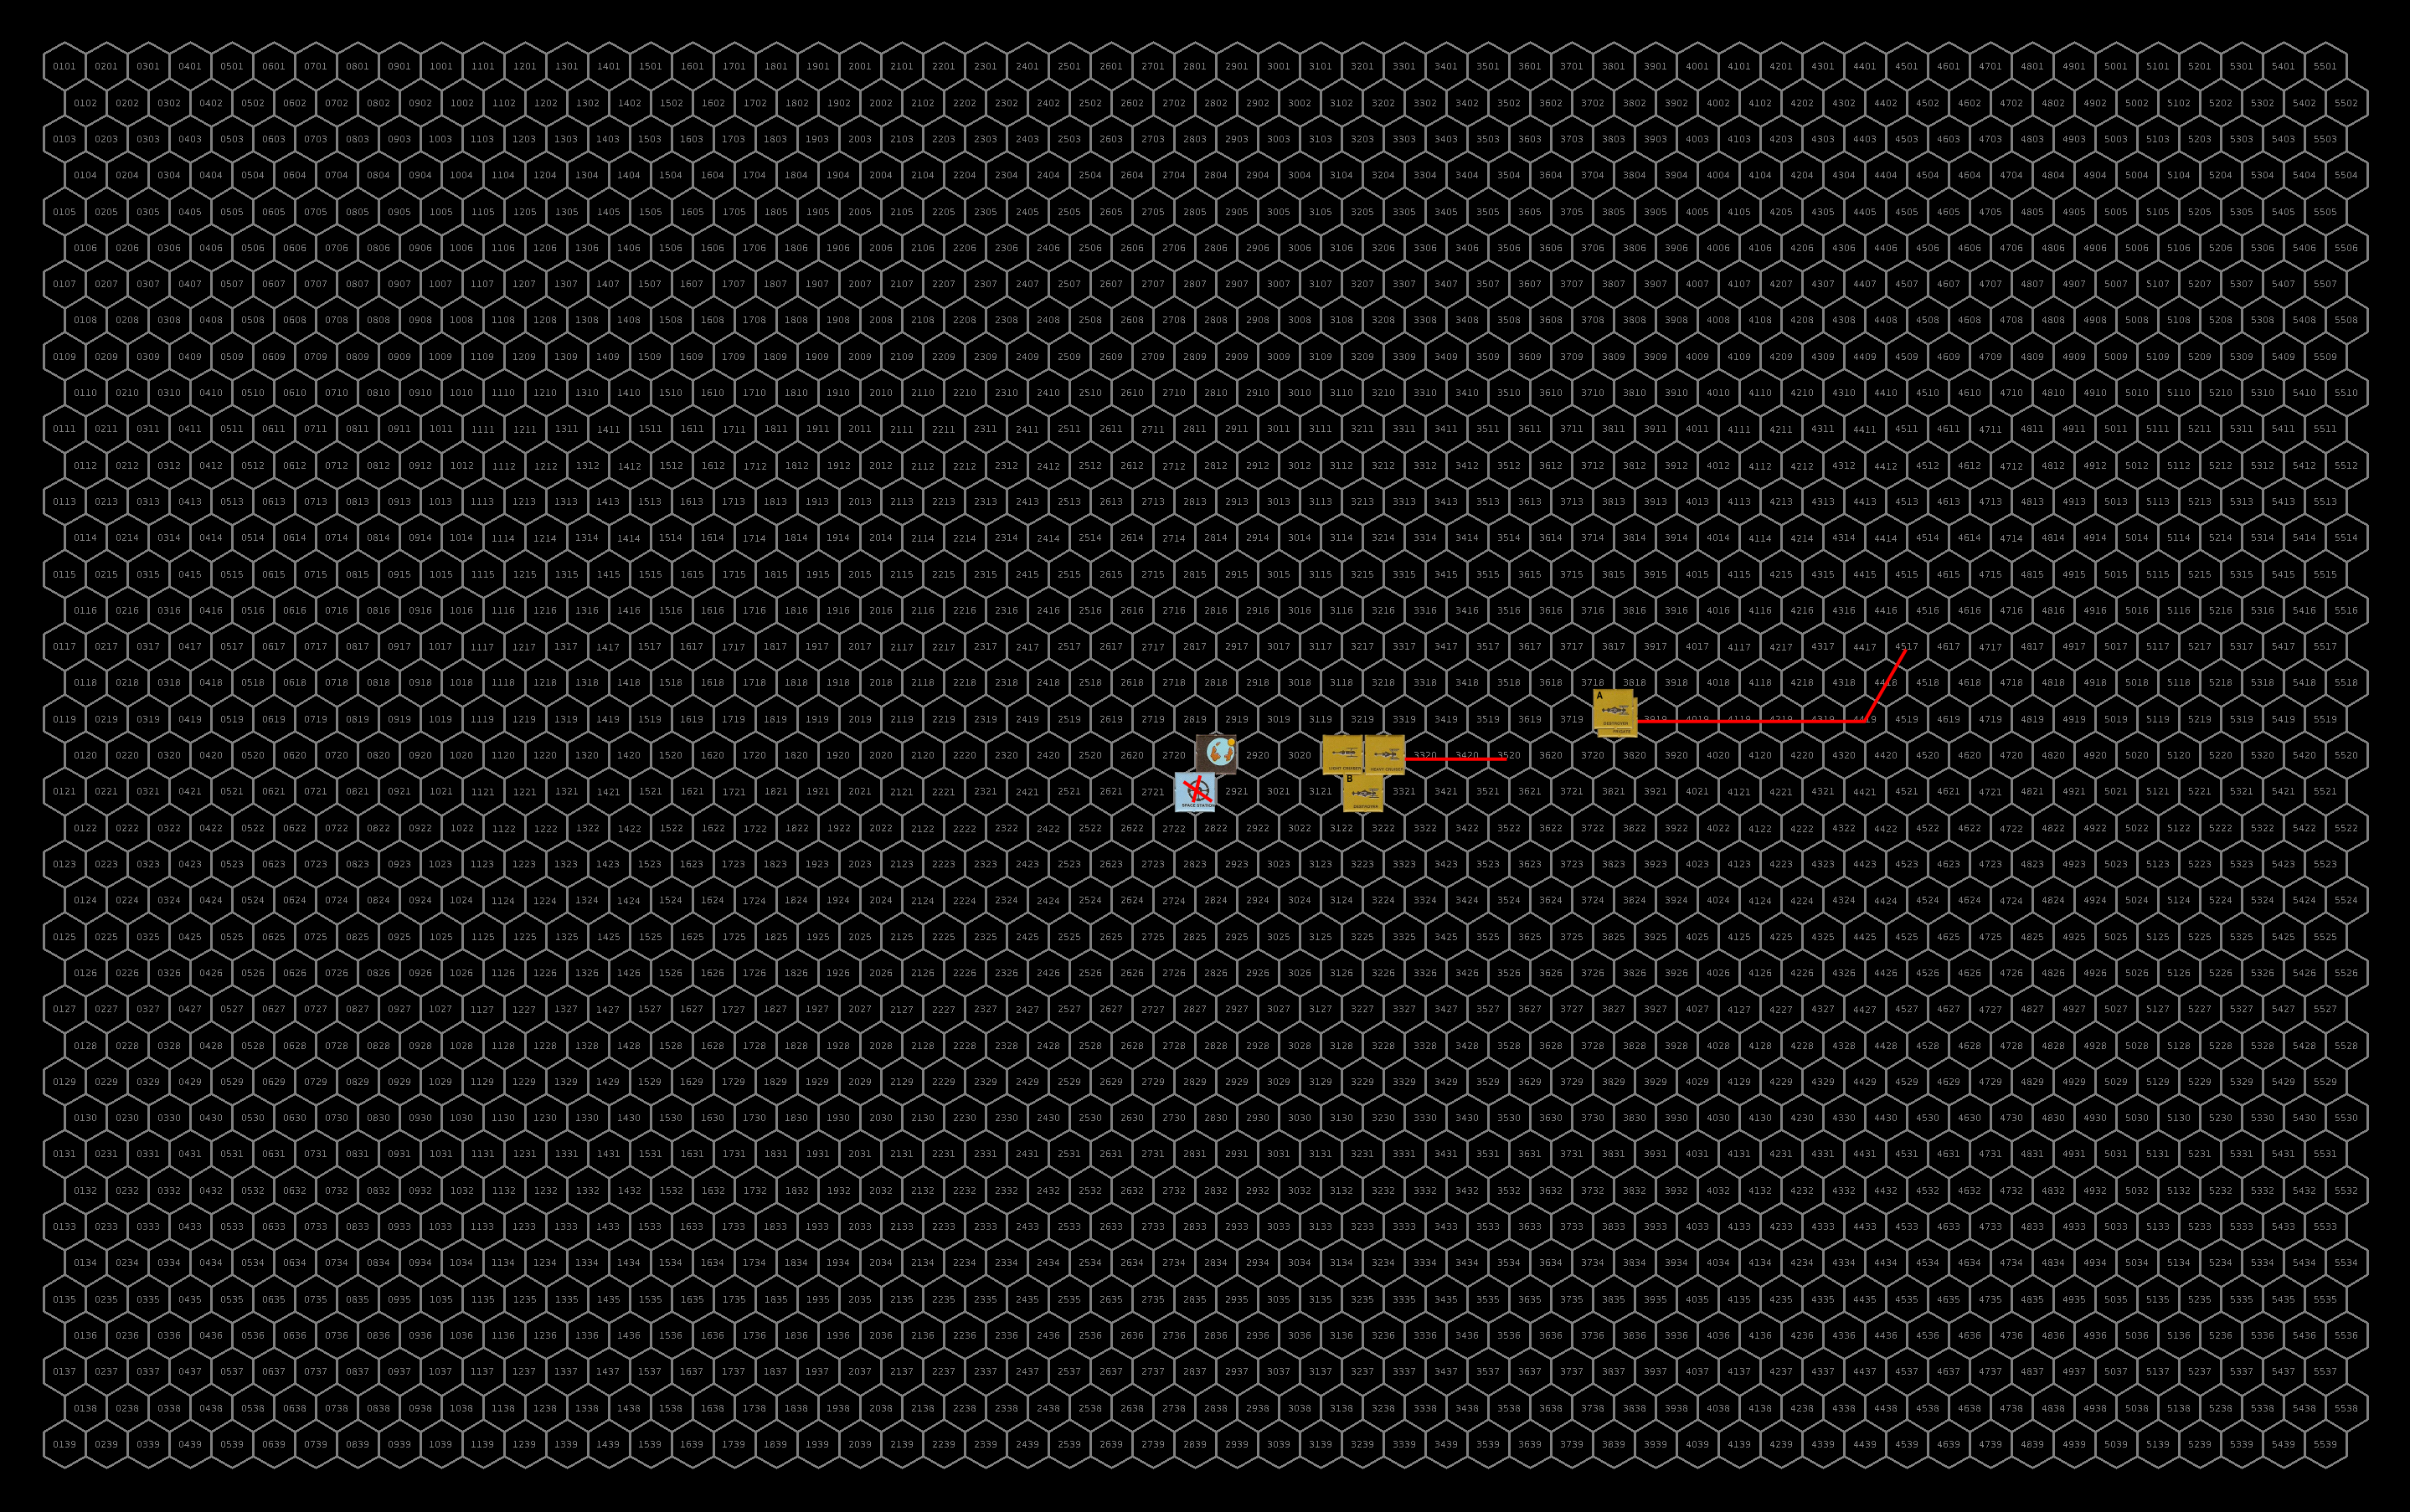
Setup
The militia assault scouts are high above the planet moving at speed 30 and planing on swooping in on the sathar from above. The station is orbiting counterclockwise (I always roll randomly to see which hex the station happens to be in to start).
The sathar appear in their diamond formation with the frigate, light cruiser, & heavy cruiser in the center and a destroyer on each wing. They are moving at speed 10.
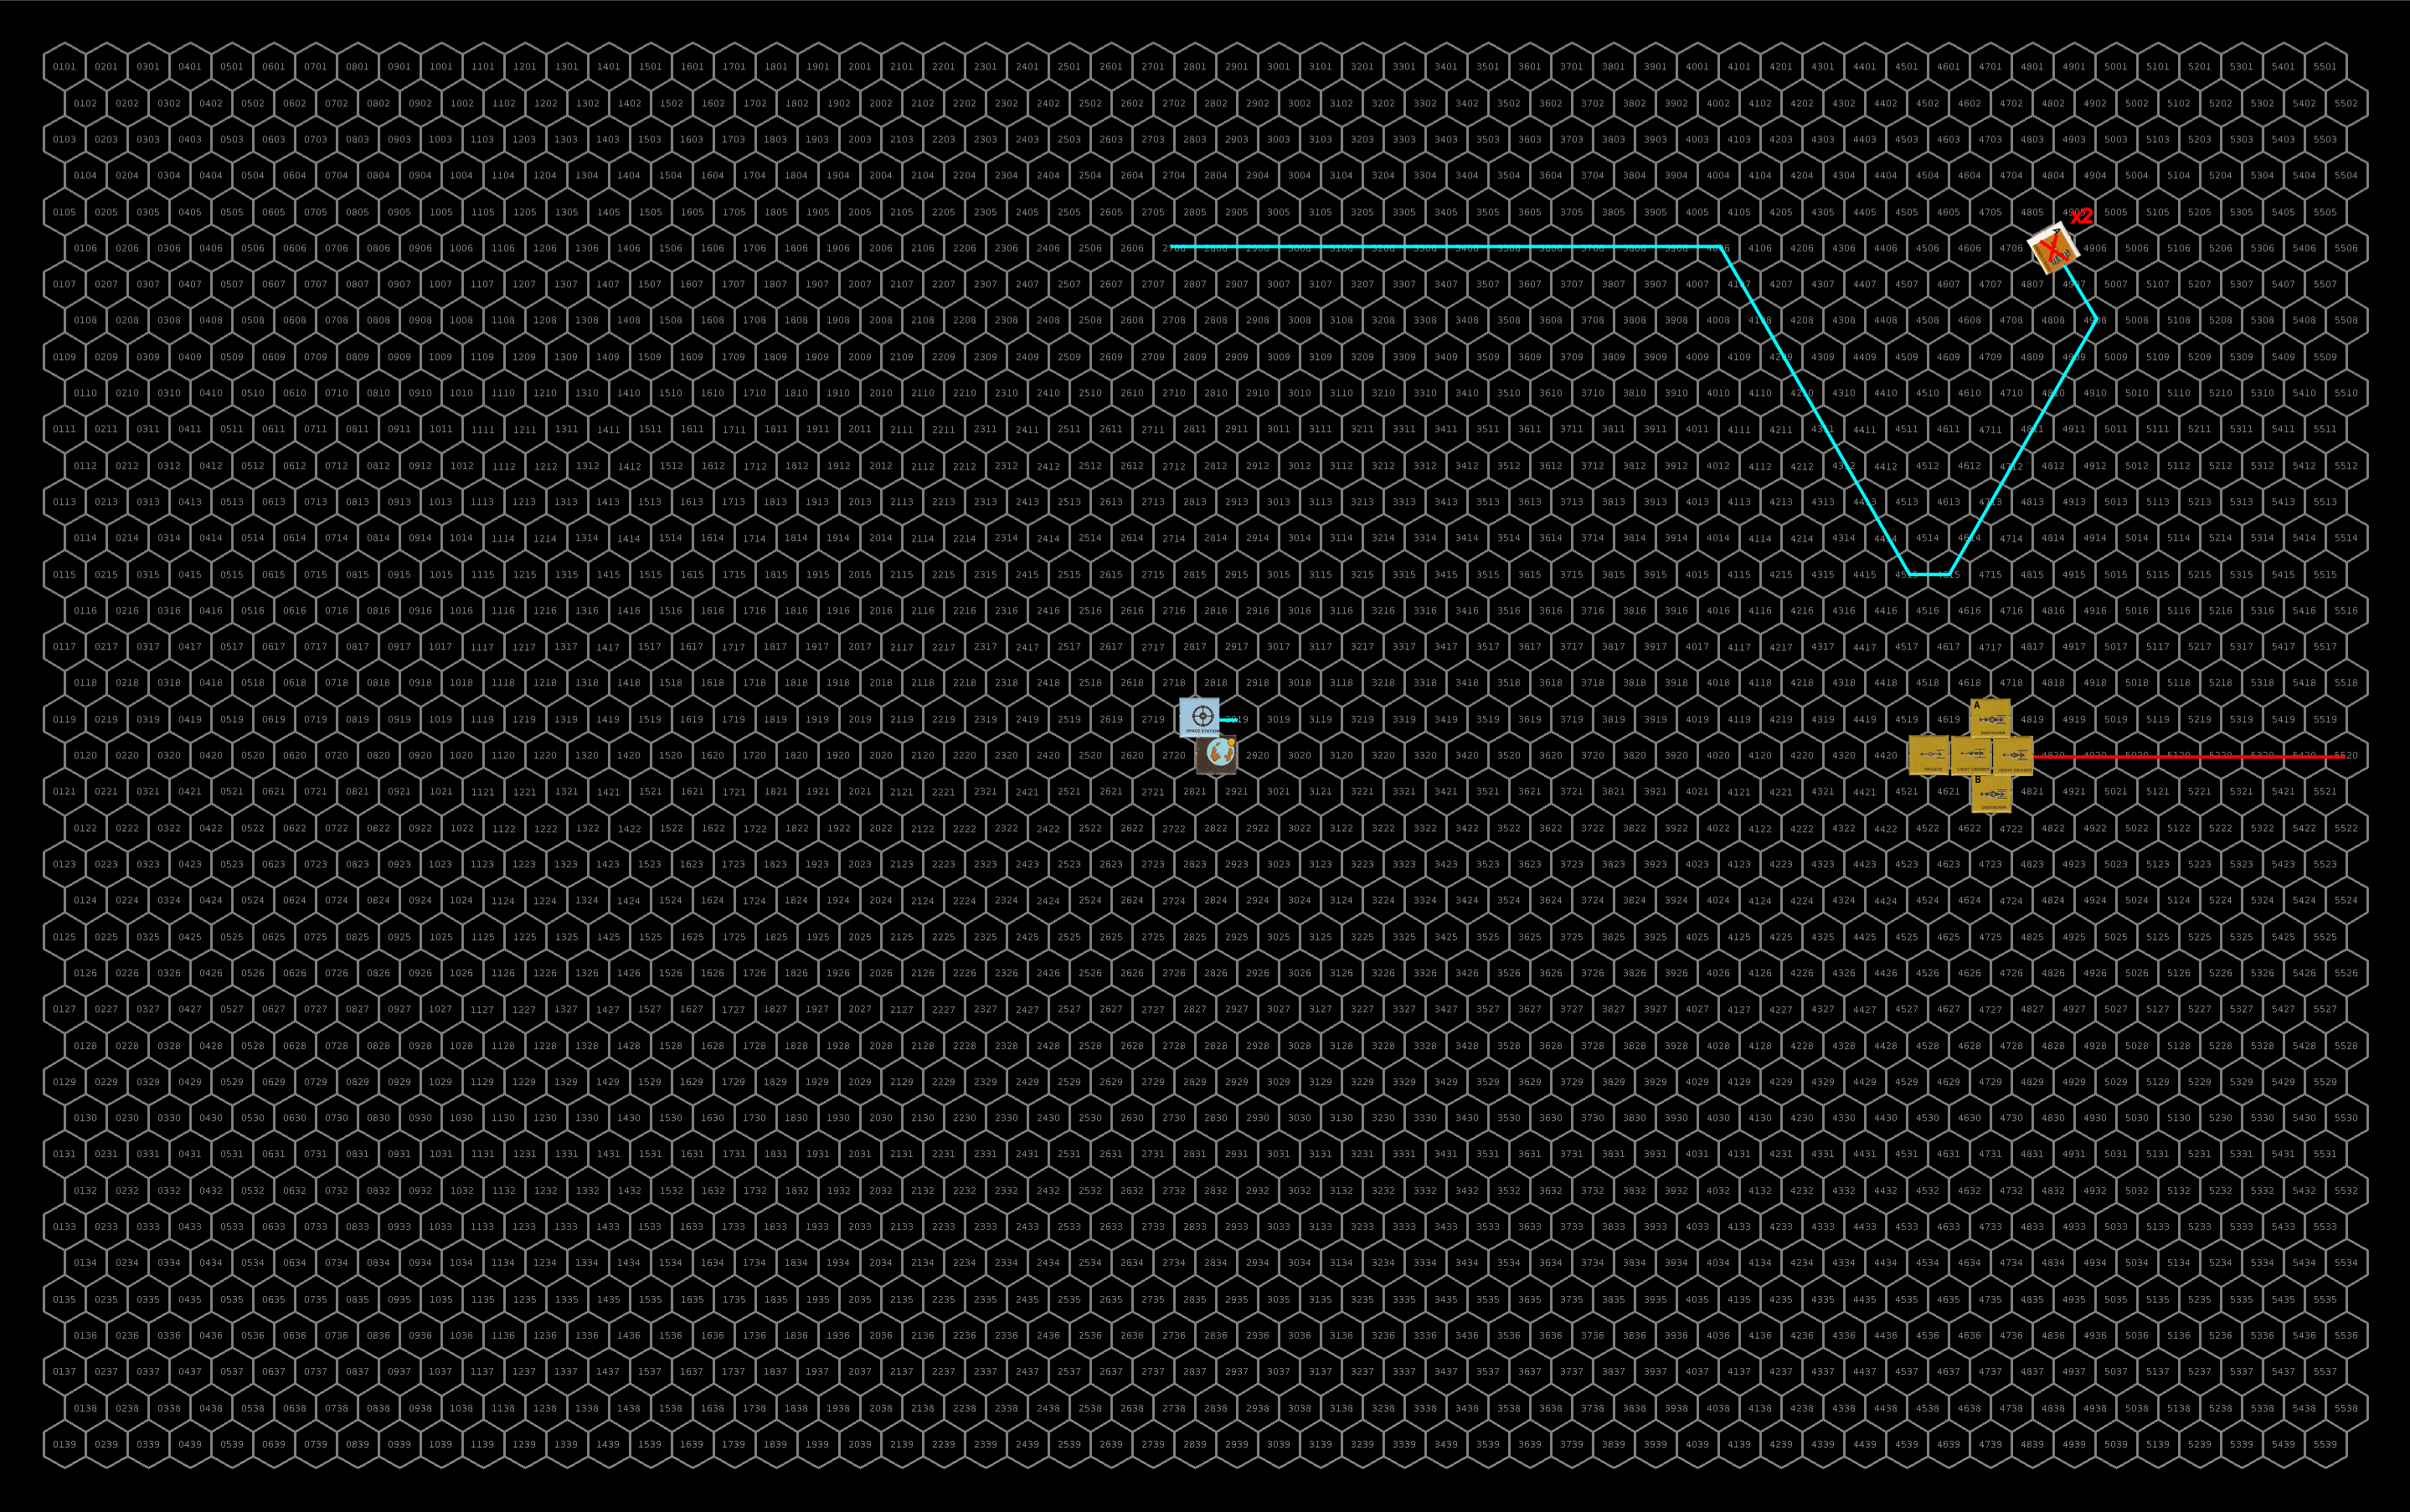
Turn 1
The sathar advance, decelerating to speed 8 as they approach the planet. The assault scouts accelerate to speed 32 and sweep in to make a maximum range assault rocket attack on the upper destroyer.
Defensively the sathar focus all of their fire on the lead assault scout hitting it with a laser battery (from the heavy cruiser), and two electron batteries (one from each cruiser) doing a total of 16 HP of damage destroying the assault scout before it has a chance to fire.
The surviving assault scout hits with its assault rocket taking out nearly half of the destroyer’s hull integrity.
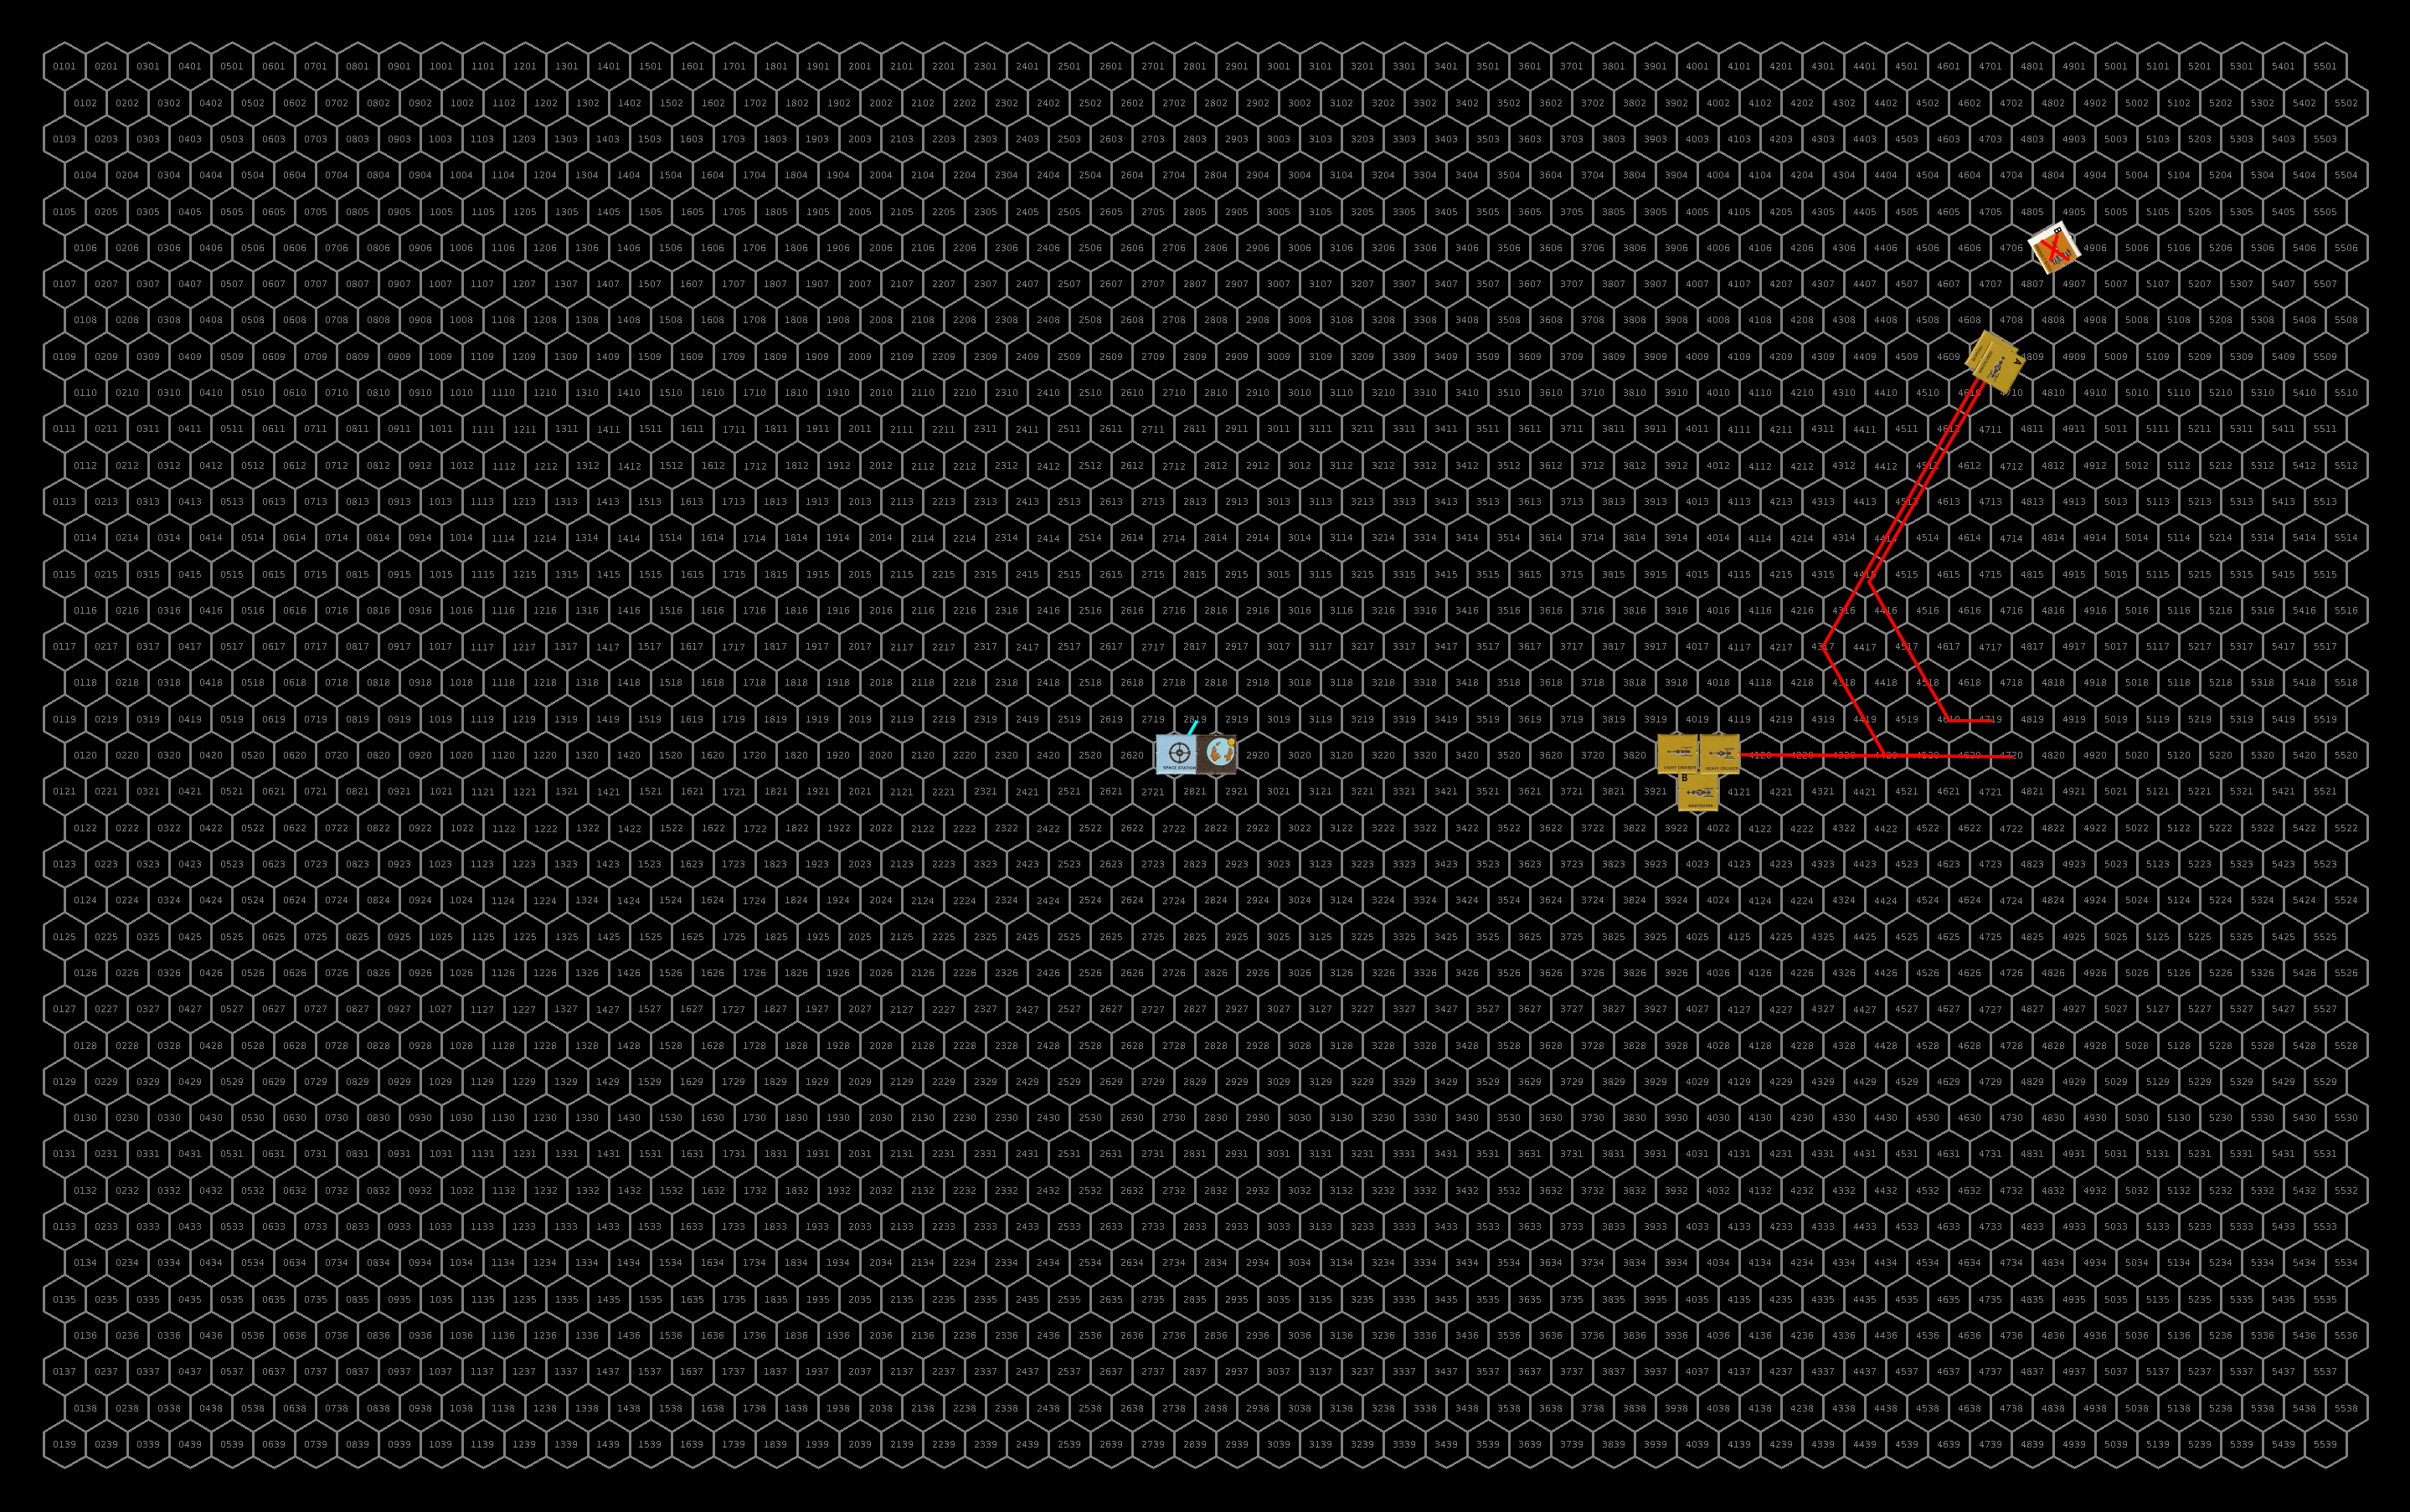
Turn 2
The sathar frigate and damaged destroyer turn off from the main group and pursue the remaining assault scout, which now regrets not using its full acceleration previously as it is in range of torpedoes and rocket batteries from both ships. The other three ships continue toward the station and decelerate to speed 7. Unfortunately, the assault scout misses its defensive laser battery attack on the destroyer.
The sathar frigate and destroyer fire their energy weapons and rocket batteries at the assault scout but elect not to fire torpedoes. Unfortunately for the militia ship, the sathar gunners are well trained and the small ship is hit by both laser canons, a laser battery, an electron battery, and a rocket battery. Together the weapons start an electrical fire, take out the ship’s combat controls system, and do enough hull damage to destroy three assault scouts. The small ship is nothing more than a small debris cloud.
The station is at the extreme range of the light cruiser’s particle weapons but they all miss.
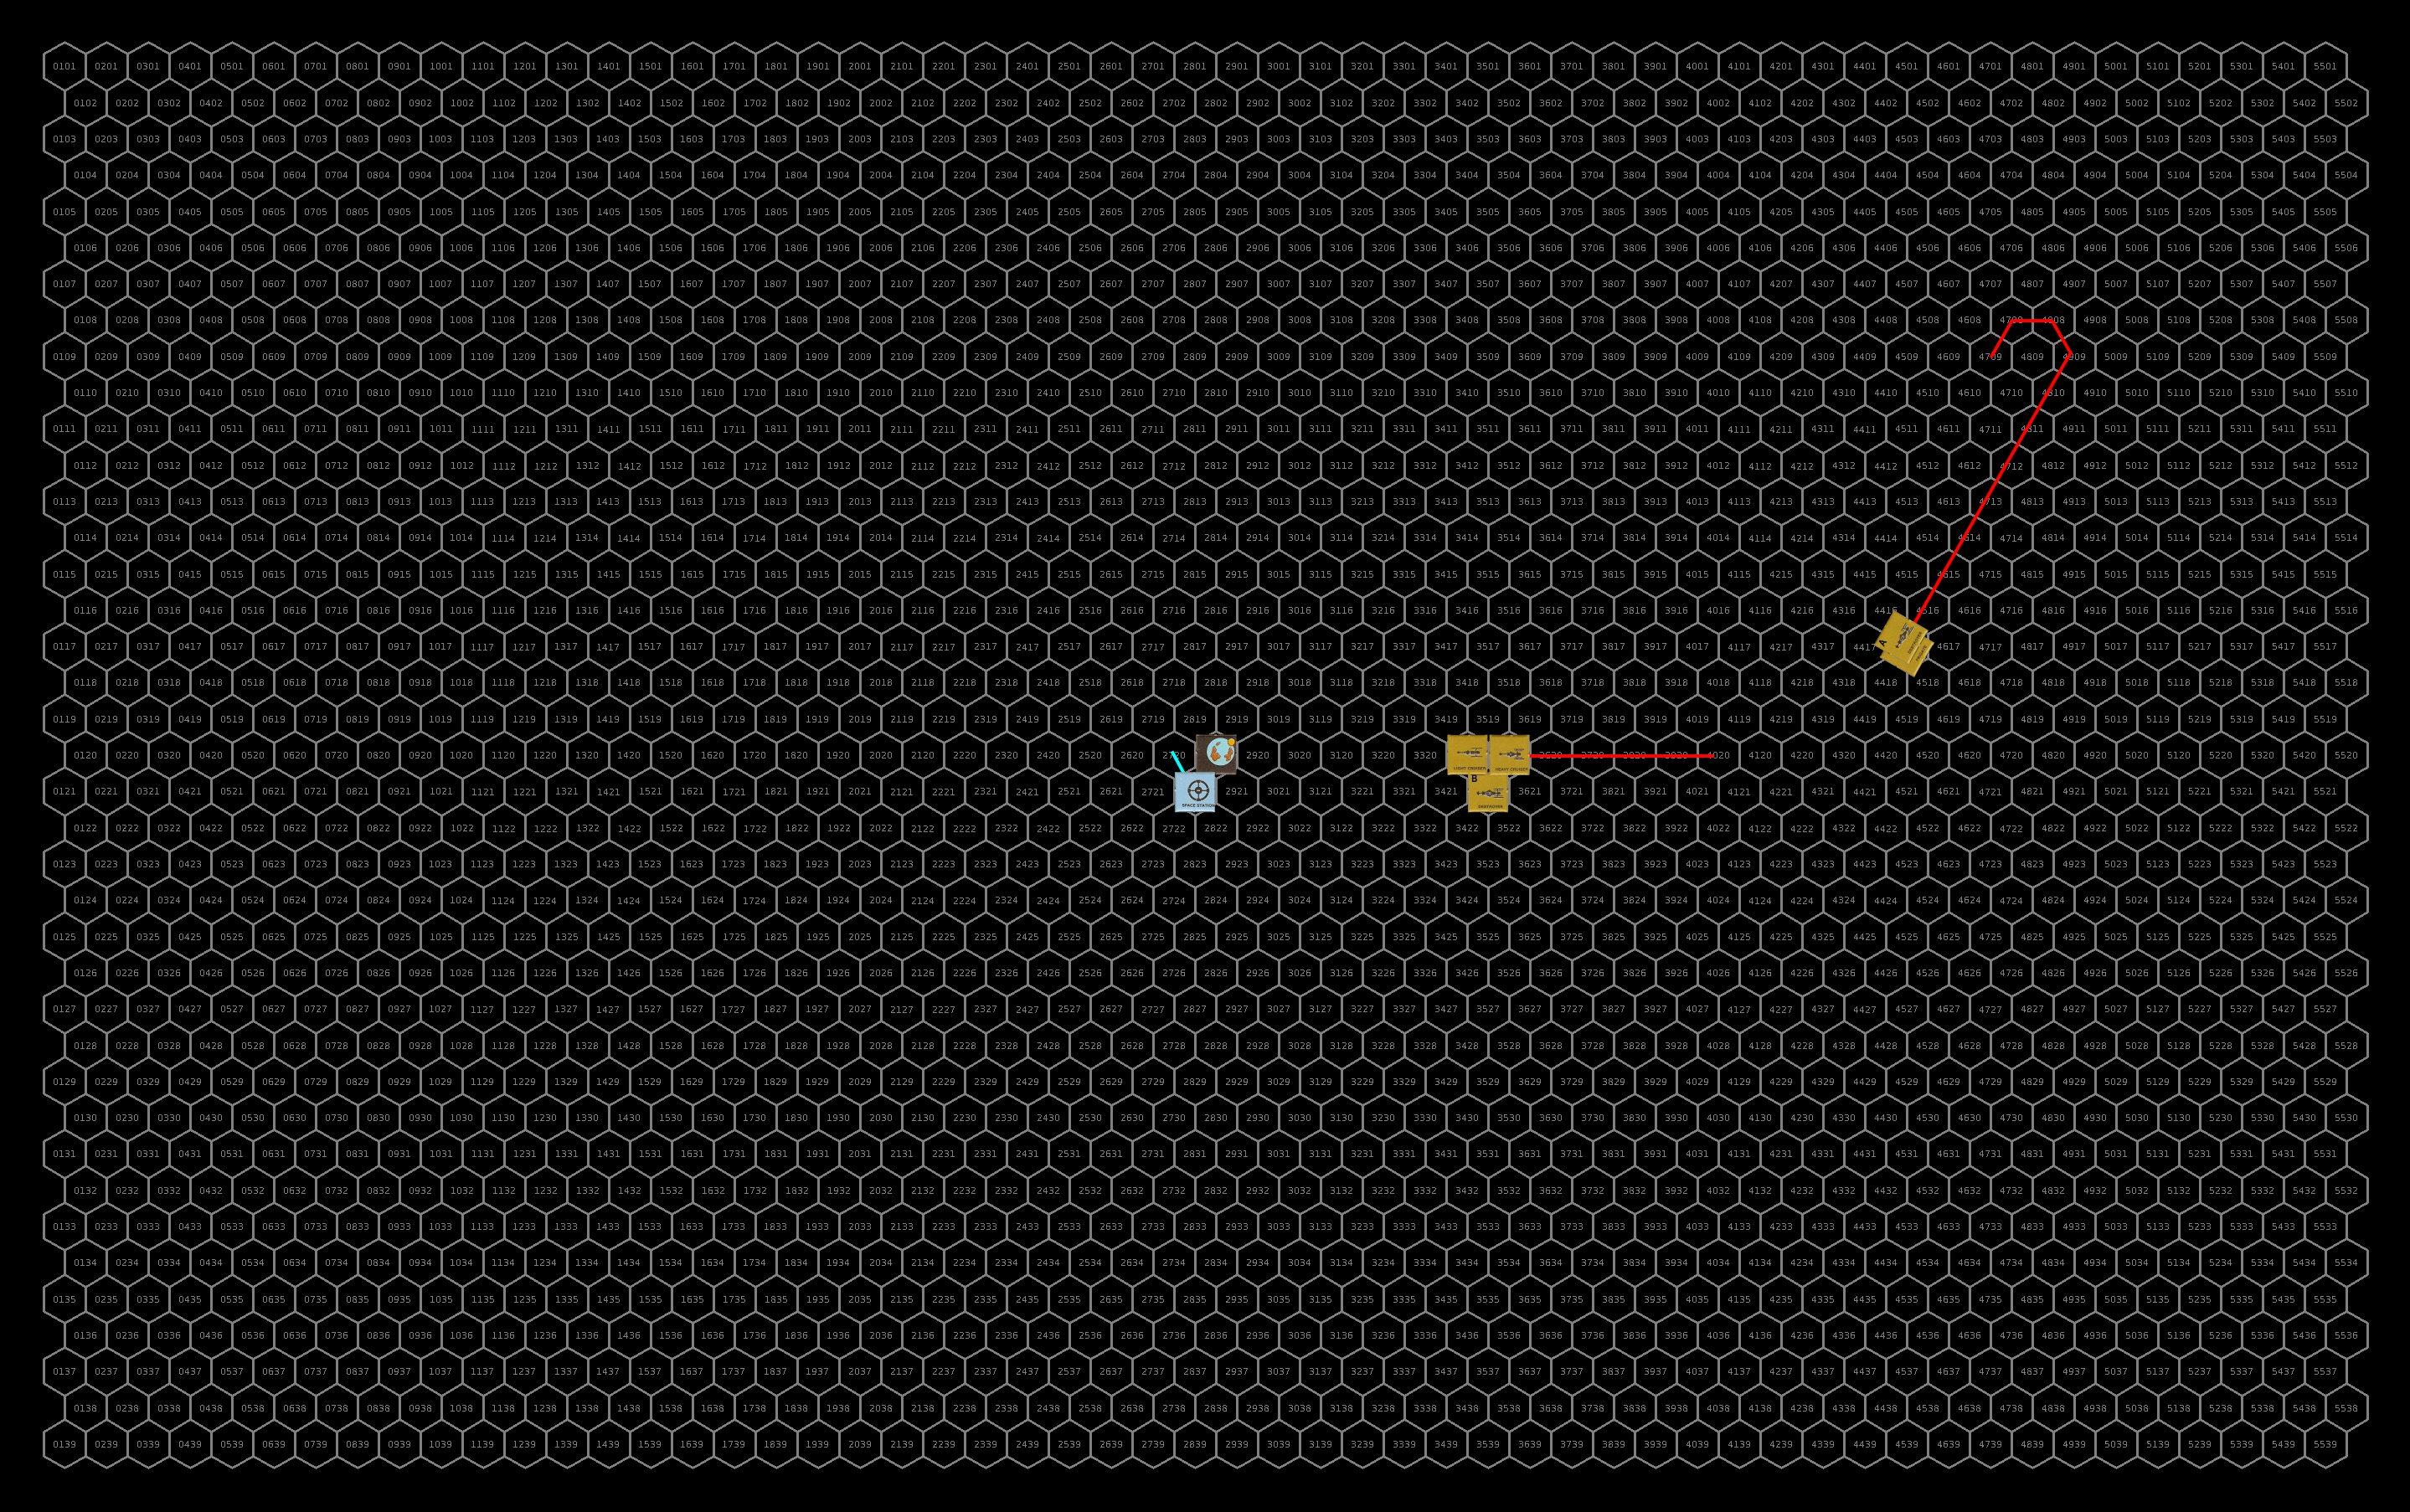
Turn 3
With the militia ship destroyed, the frigate matches speed with the destroyer (11) the two ships loop around to return to the main group. The rest of the sathar vessels decelerate to 5 as they approach the planet. With the station shielded by the body of the planet, no shots are fired.
As the station emerges from behind the limb of the planet, the closer sathar vessels fire their energy weapons at it hitting with a laser canon, laser battery, electron battery, and proton battery and reducing the station’s hull integrity by nearly half. The station returns fire with its laser battery but misses.
Repair Turn
The sathar destroyer and the station both manage to repair a bit of their hull.
Turn 4
The sathar ships closest to the planet decelerate to speed 3 as they approach. The other two ships decelerate to speed 8 and turn toward the station and planet.
With the sathar vessels just out of rocket battery range, the station fires its laser battery at the approaching destroyer but misses.
All of the sathar ships fire their energy weapons at the station and the light cruiser and destroyer fire torpedoes. The station fires 2 interceptor missiles at each torpedo. Unfortunately, both torpedoes hit as well as several of the energy weapons. The weapons damage several of the station’s system but more importantly, overcome the station’s hull integrity and it breaks apart as the sathar ships settle into orbit around the planet.
Repairs
The only damaged ship is the sathar destroyer and it works to fully repair its hull damage over the next hour.
Lessons Learned
Two assault scouts are no match for a massed group of capital ships. Against a single, isolated opponent they are probably fine but not up against a large group as they were here. To survive and escape to fight another day, they should have just taken a maximum range shot with the laser batteries and flown away. They had the speed and acceleration advantage over the sathar ships and would have made it, possibly unscathe but also probably not inflicting any damage on the sathar. However, they wanted a shot at the destroyer (and with 2 AR and 2 LB had a reasonable chance to take it out or at least do significant damage) and got a little too close.
Plus, the dice for the sathar were hot for this fight and the Frontier forces couldn’t hit the broadside of a barn with their energy weapons. The elimination of the assault scout before it could fire was pure luck of the dice that every weapon did hull damage. I wouldn’t have expected the two electron batteries to both do hull damage but they did and it was just enough to take out the small ship.
This one goes to the sathar.