Arriving from the recent engagement in the K’tsa-Kar system, the local militia ships, together with elements from Spacefleet arrive back at Ken’zah-Kit just as the sathar arrived at the planet. Arriving just too late to prevent the destruction of the fortified defense station in orbit, the militia and Spacefleet vessels made quick work of the sathar invaders, destroying all five ships in just twenty minutes of fighting.
While several ships will need time in a starship construction center to complete repairs, the only loss, beyond the station, was one of the militia assault scouts which was lost with all hands.
With Task Force Cassidine in-system and only three days out, it feels like Ken’zah-Kit is secure for now.
Rak’tal-ka, StarPlay News
Background
The UPF forces had wanted to engage the sathar in deep space, but having jumped in on the opposite side of the system, they were only able to intercept the attacking forces as they approached the planet. The frigate UPFS Flying Cloud, which has been on a continuous high speed transit from the Liberty system before the fighting started, finally joins up with the rest of PG Meteor just a day before the sathar are engaged. Task Force Cassidine is also in the K’aken Kar system. However, they just jumped in a day ago and are too far away to participate in this fight.
With Task Force Cassidine coming in behind them and the militia and PG Meteor ahead of them, the sathar have to fight and intend to take on the smaller group first, hoping to defeat them and then join up with SBF-B2 that is currently en route from the K’tsa-Kar system before taking on the UPF task force.
While the UPF have more ships, the sathar have a slight hull advantage in this fight. It was supposed to be a tough fight for the UPF forces.
Order of Battle
K’aken-Kar Militia
- 2 assault scouts
- 1 fortified station
UPF – PG Meteor
- 3 assault scouts
- 1 frigate
- 2 destroyers
Sathar
- 1 frigate
- 2 destroyers
- 1 light cruiser
- 1 heavy cruiser
The Battle
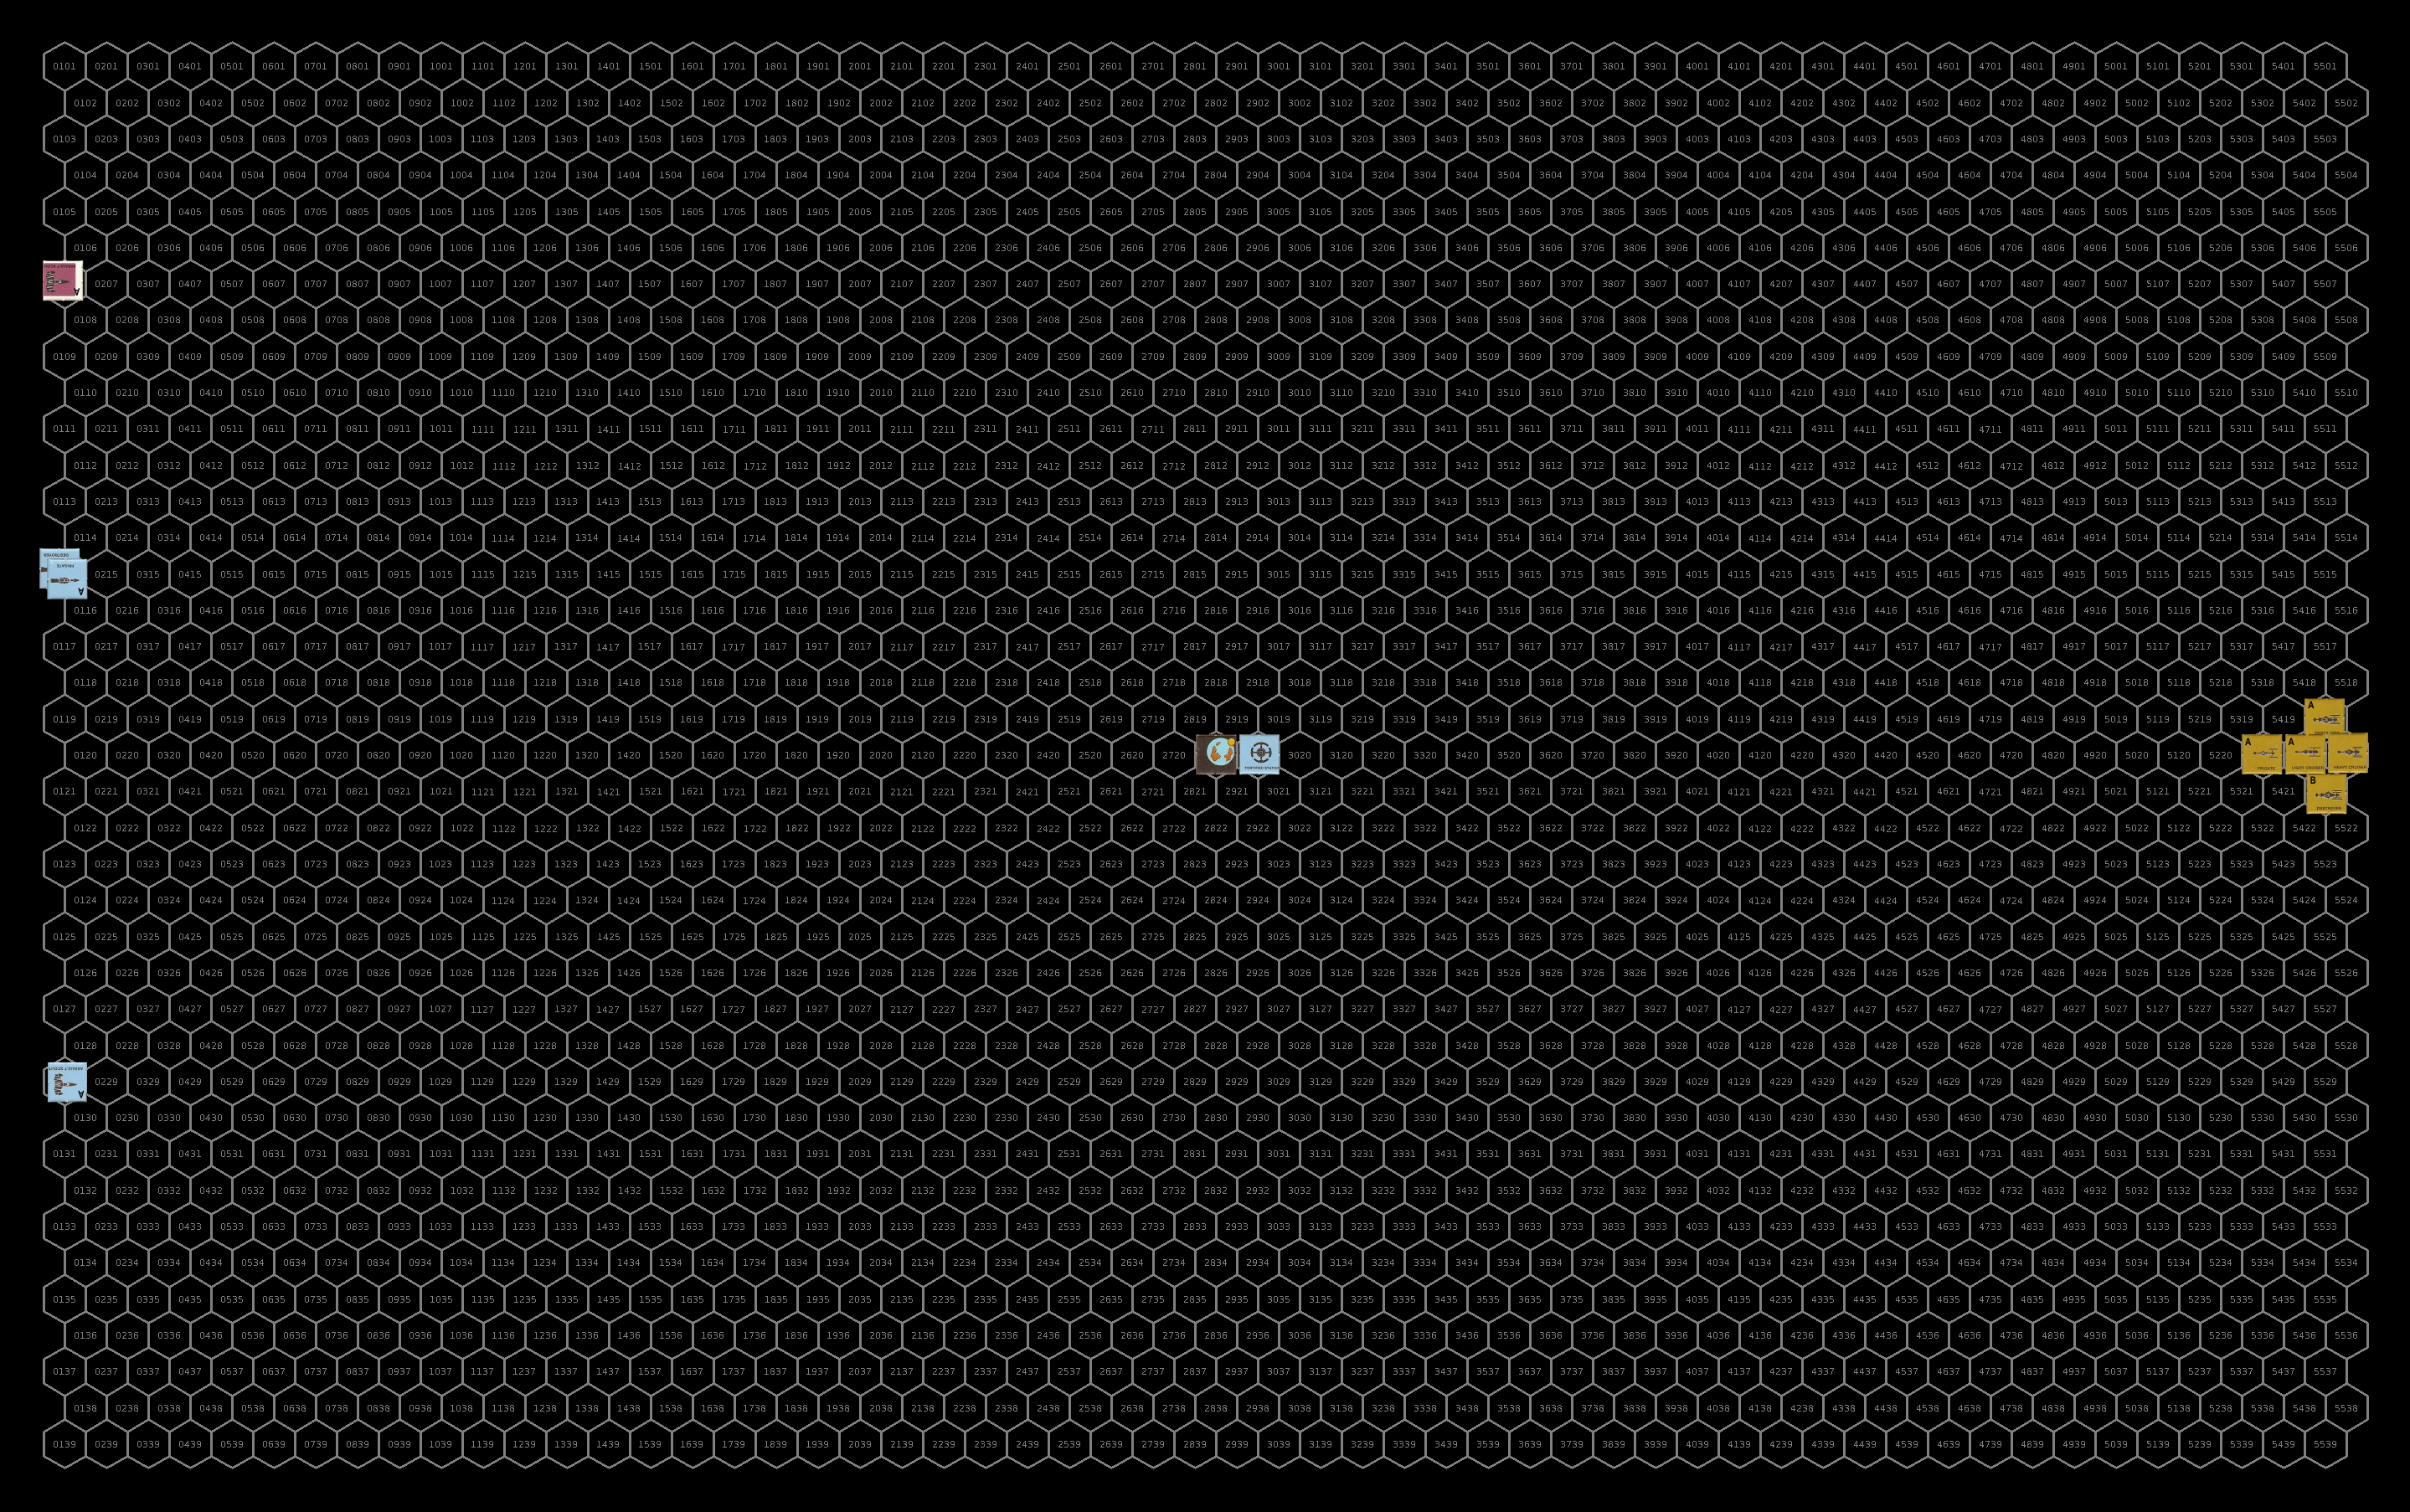
Setup
The station is on the side of the planet facing the invading sathar forces and orbiting counterclockwise. With both fleets racing to intercept and coming directly from jumps into the system from opposite directions, they are starting on opposite sides of the map. The K’aken-Kar militia and PG Virgo are coming in fast on the left side of the map moving at speed 30. The K’aken-Kar militia assault scouts are high above the planet with the UPF assault scouts are below the planet. The frigate and destroyer are flying in formation in the middle and come in just above the planet.
The sathar, moving fast at speed 25, appear in their standard diamond formation headed straight at the station and planet. They intend to make a fast run at the station before engaging the smaller ships.
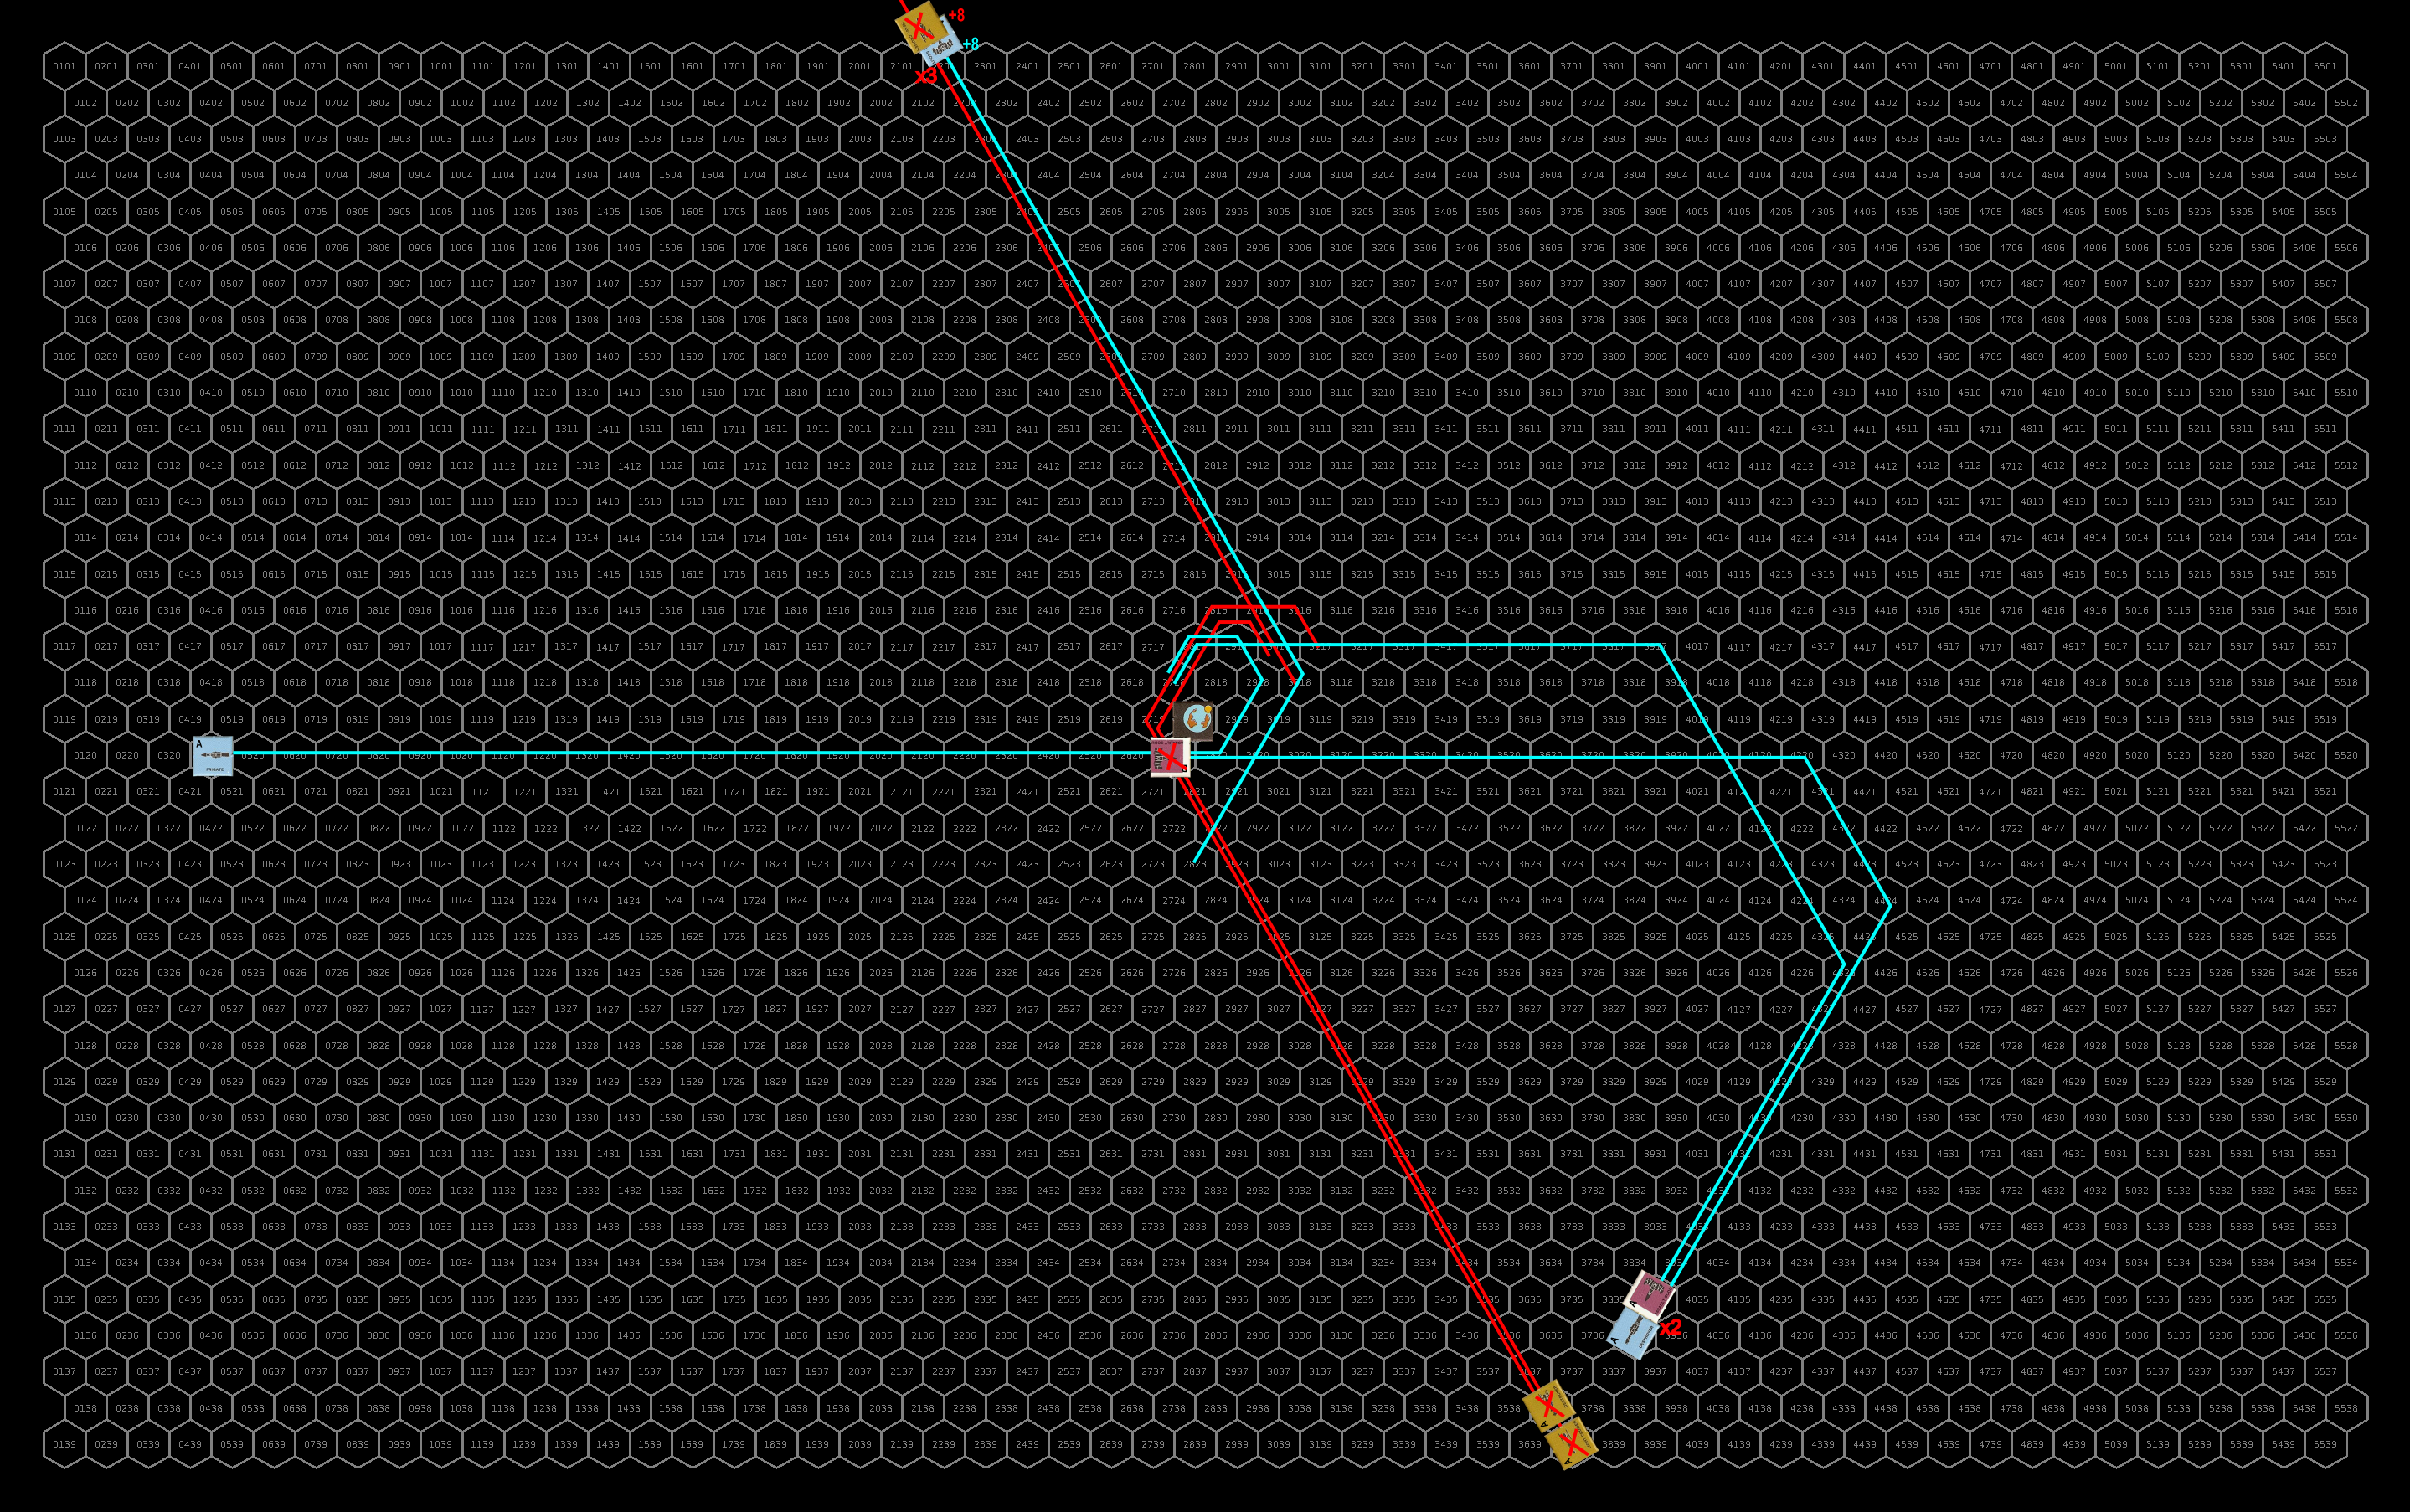
Turn 1
The sathar maintain their speed making a full frontal assault on the station, veering off just 20,000 km away to avoid colliding with the planet and turn toward the UPF capital ships and the militia.
Defensively, the stations fires all of its weapons at the closest sathar destroyer hitting with its laser batteries knocking out the destroyer’s masking screen launcher and causing an electrical fire. It also fires all of its ICMs at the salvo of incoming torpedoes.
Offensively, the sathar fire every weapon they have at the station. The UPF and militia forces can only watch helplessly as 17 of the 26 weapons fired, including 3 torpedoes that made it through the ICM screen, connect with the station and obliterate it.
Angered by the destruction of the station, the Frontier forces swoop in to exact their revenge. The UPF assault scouts use their maximum acceleration and swing up from below the planet to fire at the lower destroyer. The militia assault scouts line up for an assault rocket run at the sathar frigate and then veer off behind the planet, accelerating to speed 34. The frigate and destroyers slow to speed 29 to just come within rocket battery range and fire on the sathar heavy cruiser; they turn away from the planet at the last moment to prepare to fire at the sathar ships as they fly by.
Defensively, the sathar frigate and light cruiser fire their energy weapons at the militia assault scouts, each targeting a single ship, and their rocket batteries at the UPF frigate. The other three ships target the lead UPF destroyer. The sathar frigate misses completely but the light cruiser connects with its laser battery and electron battery damaging the assault scout’s engines and causing a loss of navigation control. It also hits the frigate with the rocket battery knocking out its laser cannon. The other sathar ships don’t do much better with the far destroyer and heavy cruiser missing completely while the closer destroyer only hits with its electron battery shorting out the UPF ship’s defensive systems.
While the gunners on the sathar vessels were not very effective, the same cannot be said for the gunners on the Frontier ships. The militia ships hit with one laser battery and both assault rockets destroying the sathar frigate. Similarly, the UPF assault scouts hit the lower destroyer with a laser battery and two assault rockets destroying that vessel. The UPF capital ships fare nearly as well. While the torpedoes didn’t make it through the screen of ICMs fired by the heavy cruiser, the large ship was still hit by a rocket battery from the frigate and each destroyer hit with their laser cannon, laser battery, and a rocket battery. Combined, the damage from the weapons disabled the cruiser’s distruptor cannon, damaged its engines, knocked out its maneuvering, and seriously damaged it, leaving it’s hull integrity at a mere 26 percent.

Turn 2
Seriously damaged, the sathar heavy cruiser just drifts away from the battle firing at the UPF frigate as it passes. The light cruiser and surviving destroyer loop around the planet (speed 25 and 26), buzzing the UPF capital ships and firing their torpedoes at the lead destroyer. They then train all of their energy weapons on the militia assault scouts and fire their rocket batteries at the UPF assault scouts.
Defensively, the UPF frigate fires at the heavy cruiser and connects with its laser cannon, cutting the large ship’s remaining hull integrity by over half but not quite destroying it. The UPF destroyers fire at the remaining sathar destroyer only missing with a rocket and laser battery. The weapons that do hit knock out the destroyer’s electron battery before ripping its hull to shreds. The assault scouts all fire at the light cruiser and two of the UPF assault scouts hit knocking out the light cruiser’s laser batter and causing significant hull damage with maximum damage laser battery hit (20 HP).
Of the weapons brought to bear, only the heavy cruiser’s electron battery misses the UPF frigate with the torpedo slipping through the ICM screen. The frigate has its damage and navigation control systems comprised and its hull severely damaged, knocking its hull integrity down to just 32 percent. The torpedo from the light cruiser misses the UPF destroyer, but it hits the trailing militia assault scout with it’s proton battery and distruptor cannon destroying it. It also hits one of the UPF assault scouts with the rocket battery knocking its hull integrity down to less than half.
The 3 UPF Assault scouts chase after the Heavy cruiser while the destroyers and surviving militia assault scout go after the light cruiser. The UPF Flying Cloud (frigate) with a damaged navigation control system, pulls a hard turn to starboard, looping around the planet. It manages to hold its damaged hull together and not break up from the strain of the maneuver.
The heavy cruiser fires at the incoming assault scouts but only hits one with a laser battery knocking its hull integrity to just 33 percent. The light cruiser fires at the militia assault scout hitting with an electron battery knocking out half of the small ship’s hull integrity. It fires its rocket battery at the lead UPF destroyer but misses.
The UPF assault scouts hit the heavy cruiser with 2 of their assault rockets finally destroying the larger vessel. The other ships combine their fire on the light cruiser hitting with 2 laser canons, a laser and rocket battery, and an assault rocket and torpedo. The torpedo took out the cruiser’s proton screen but the other weapons all ripped into its hull destroying it.
Repairs
The UPF frigate manages to hold together after another hard turn to port and then gets its navigation control issues fixed despite its reduced damage control capabilities. Over the next 3 hours it repairs the rest of its systems but can only get its hull to 75% without spending time in a shipyard. The militia assault scout repairs some of it’s hull but only gets it back to 66% before running into issues that will require a shipyard. The UPF assault scout hit by the heavy cruiser repairs most of its hull but has a little (13%) that needs attention in a shipyard. The other assault scout and the damaged destroyer get all their systems back online in under an hour.
Lessons Learned
This one didn’t go anything like I expected. With the ships staring out on the opposite sides of the map, I knew the sathar would get a free round on the station. I expected them to take out the station (it was a primary target) but maybe not as spectacularly as they did (170 of 140 HP with three weapons, including 2 torpedoes, doing double damage).
From there everything went pear shaped for the sathar. Their tactics were actually pretty sound but their gunners couldn’t hit to save their lives (literally). The sathar light cruiser gunners did just fine, constantly hitting their targets but the other ships, beyond hitting the station, were not so accurate. This really didn’t help the sathars’ cause as they were unable to eliminate the assault scouts and suffered a few more assault rocket hits than they would have liked.
That, combined with the absolutely amazing firing from the UPF, both just in accuracy in hitting and also some well-placed double-damage rolls on the first round (two AR for 34 HP each on the frigate and destroyer, a LB hit for 14 HP on the destroyer, and a RB hit for 34 HP on the heavy cruiser), destroyed two of the sathar ships and seriously wounded a third right off the bat shifting the balance of power to the UPF. Had those ships survived that first round, the UPF would have probably still won but the casualty list would have been much higher. The rapid destruction of the ships on round one allowed the UPF to focus their fire on round 2 and keep the engagement short.
The incoming SBF-B2, being a just slightly larger version of the fleet destroyed here (an extra destroyer plus an assault carrier with 7 fighters) doesn’t have a chance against the combined forces of Task Force Cassidine (which is roughly the same strength, substituting a frigate, 3 assault scouts and a battleship for the three sathar destroyers), PG Meteor, and the surviving militia assault scout. The sathar are going to have to reasses their strategy.
One thought on “Battle of Ken’zah-Kit (K’aken-Kar) – FY61.296”