More progress on the ship model. If you haven’t read part one of this series, that describes how I laid out a model of the interior of the ship as a skeleton to build the hull around. In this post, I’ll actually start building the ship out. Let’s dive right in.
Try 1
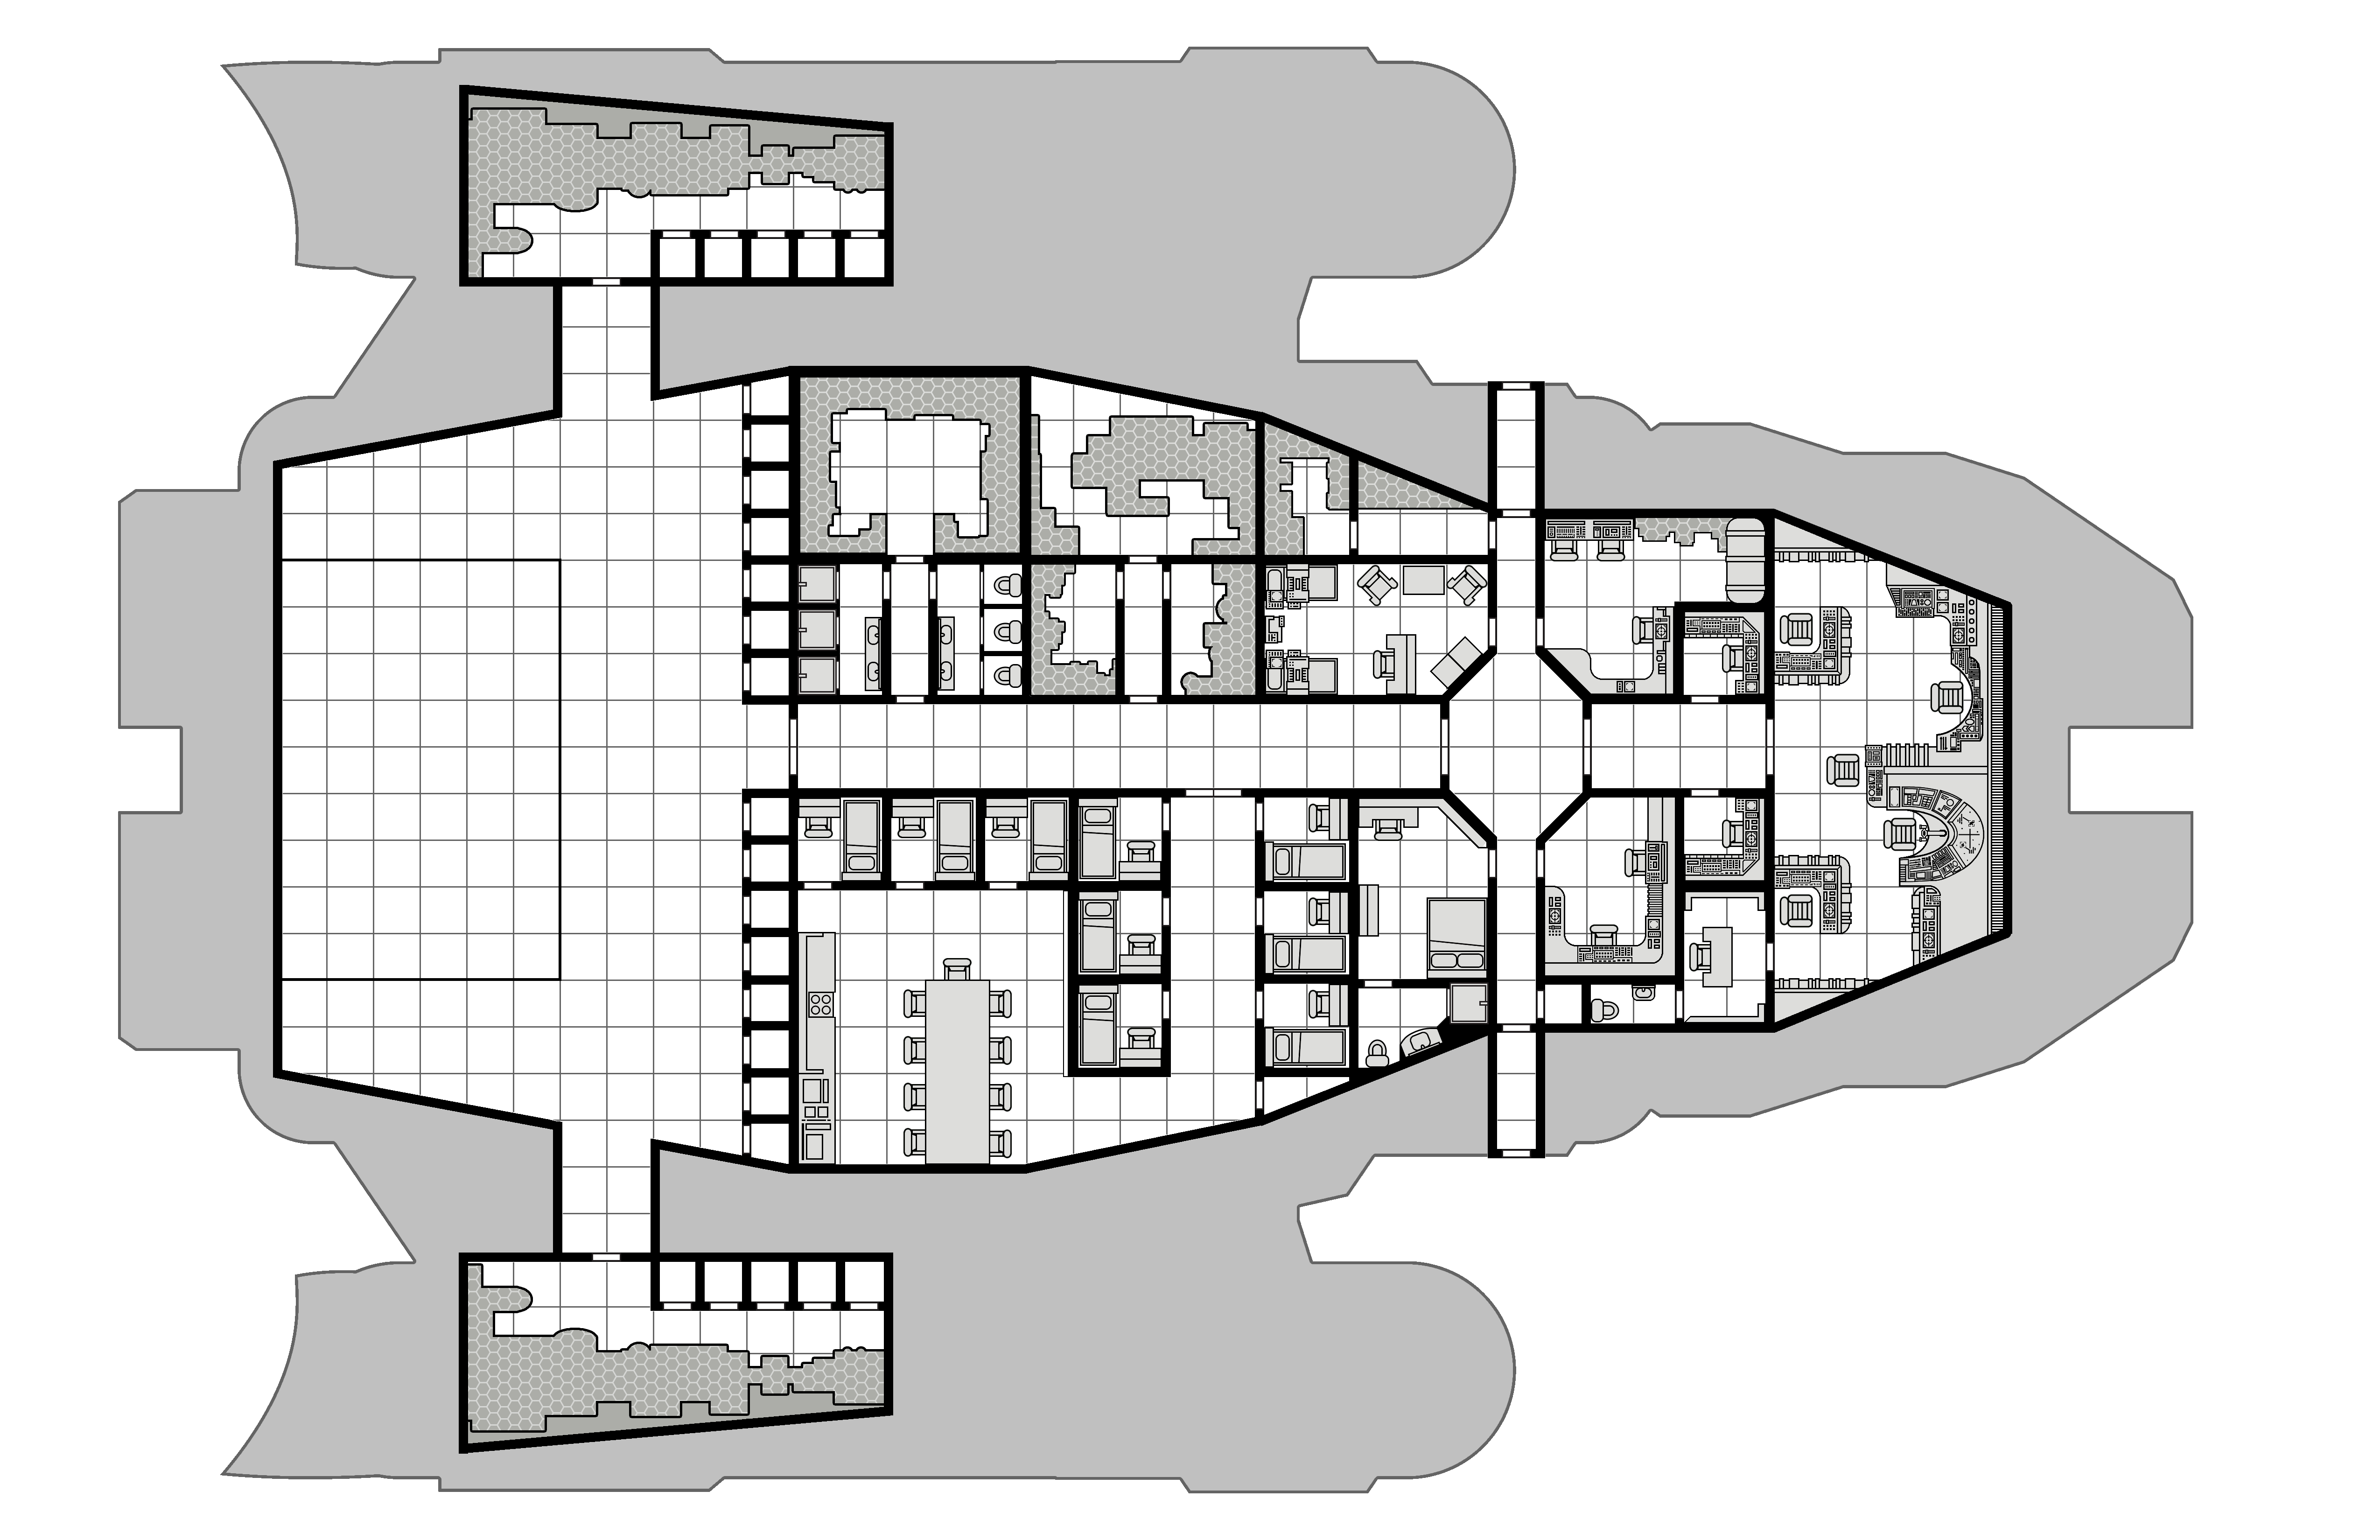
I started by pulling the skeleton model I exported from OpenSCAD into Blender. The first thing I noticed is that Blender likes to work on really small scales. The model isn’t that big, only about 50mm long, half that wide and tall but it was was huge in the default view port. I had to zoom way back.
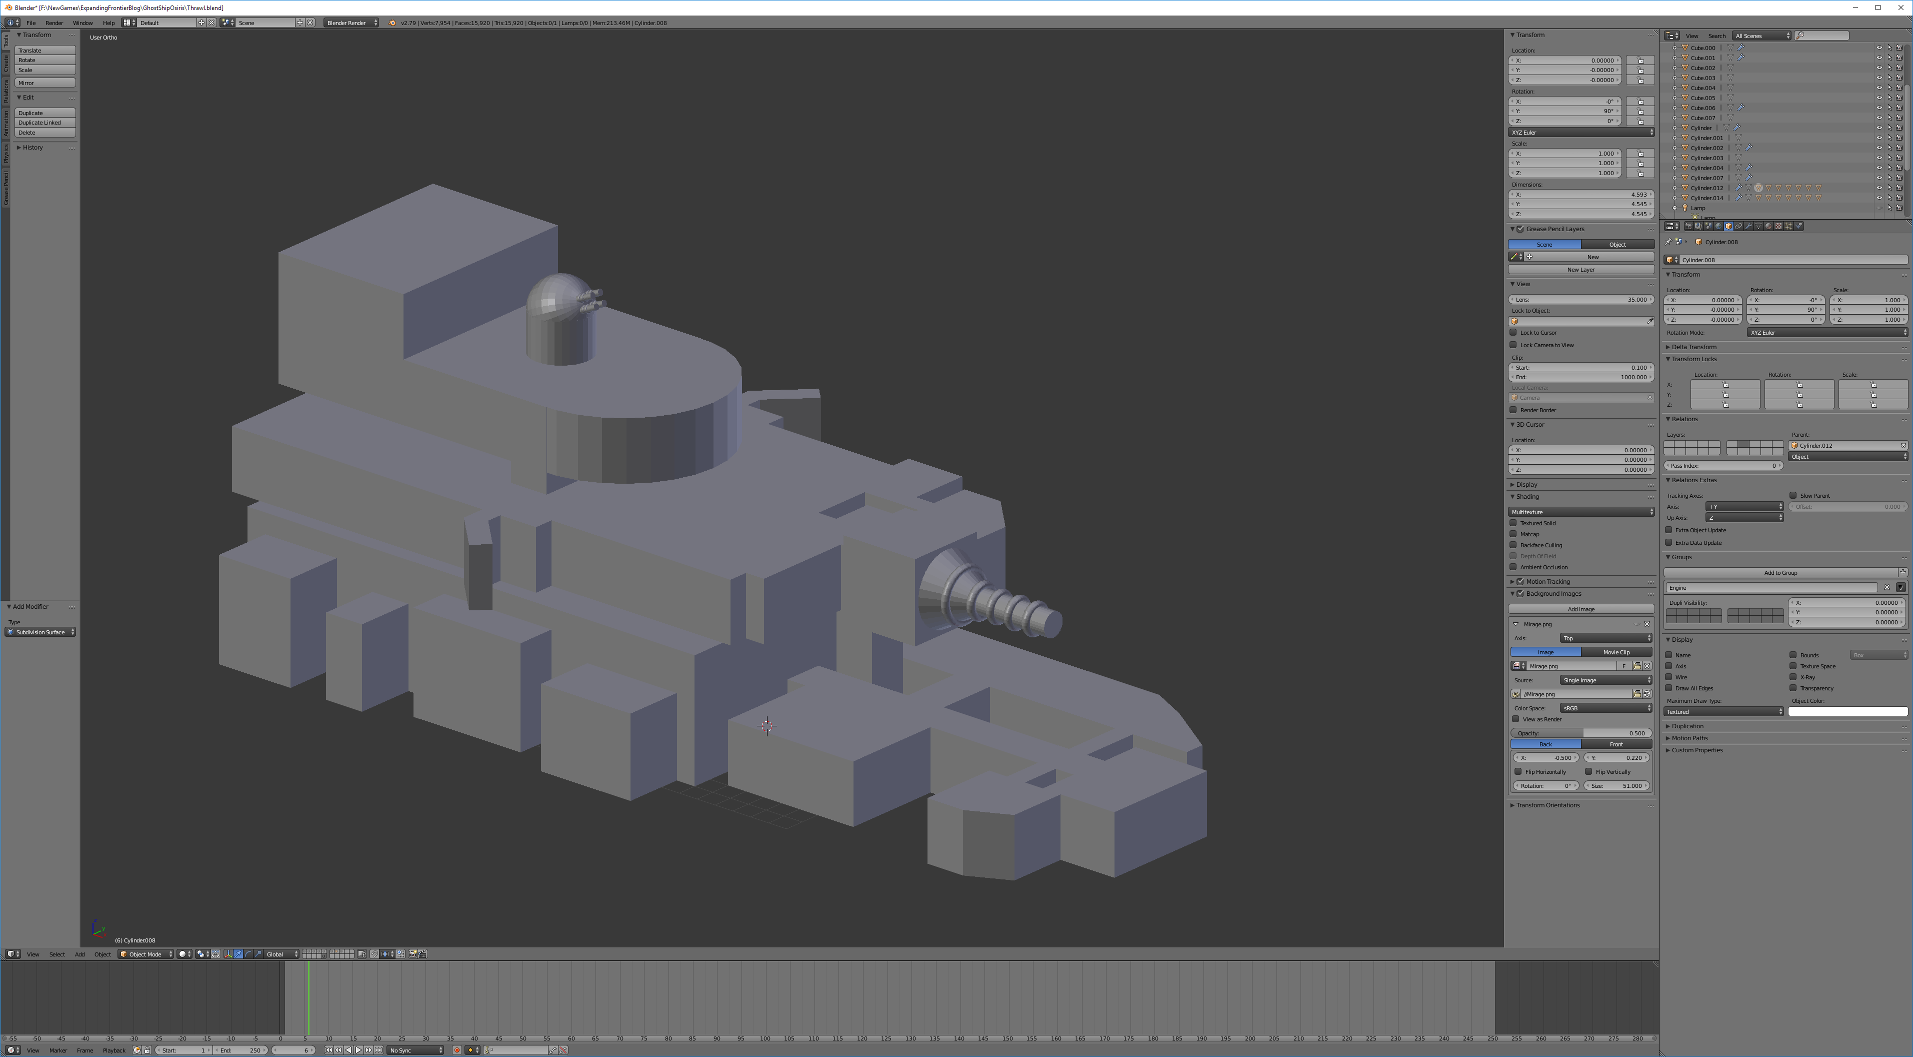 (If the text on that image looks a little small, that’s because its a screen capture of my entire 4k monitor’s screen. It’s a 43″ screen so I work at full resolution for maximum screen space.)
With that loaded, I can start forming the hull around it. It all starts with a cube. I created a cube the height of the cargo bay and then stretched, extruded, and molded it to fit around all the rooms and sections of the lowest level. Once that was done, I extruded part of the top of that level up to form the basis of the hull around the middle deck and then stretched and molded it to properly fit. Finally I did the same thing for the uppermost layer.
In modeling the hull, I had it extending out beyond the bay doors on the sides and back so that they were inset from the hull slightly. The circular bridge area on the upper deck was modeled as a separate piece.
With the hull done, I created a model for the ion cannon and the laser battery and placed them in their appropriate positions on the model. When I was done, it looked like this.
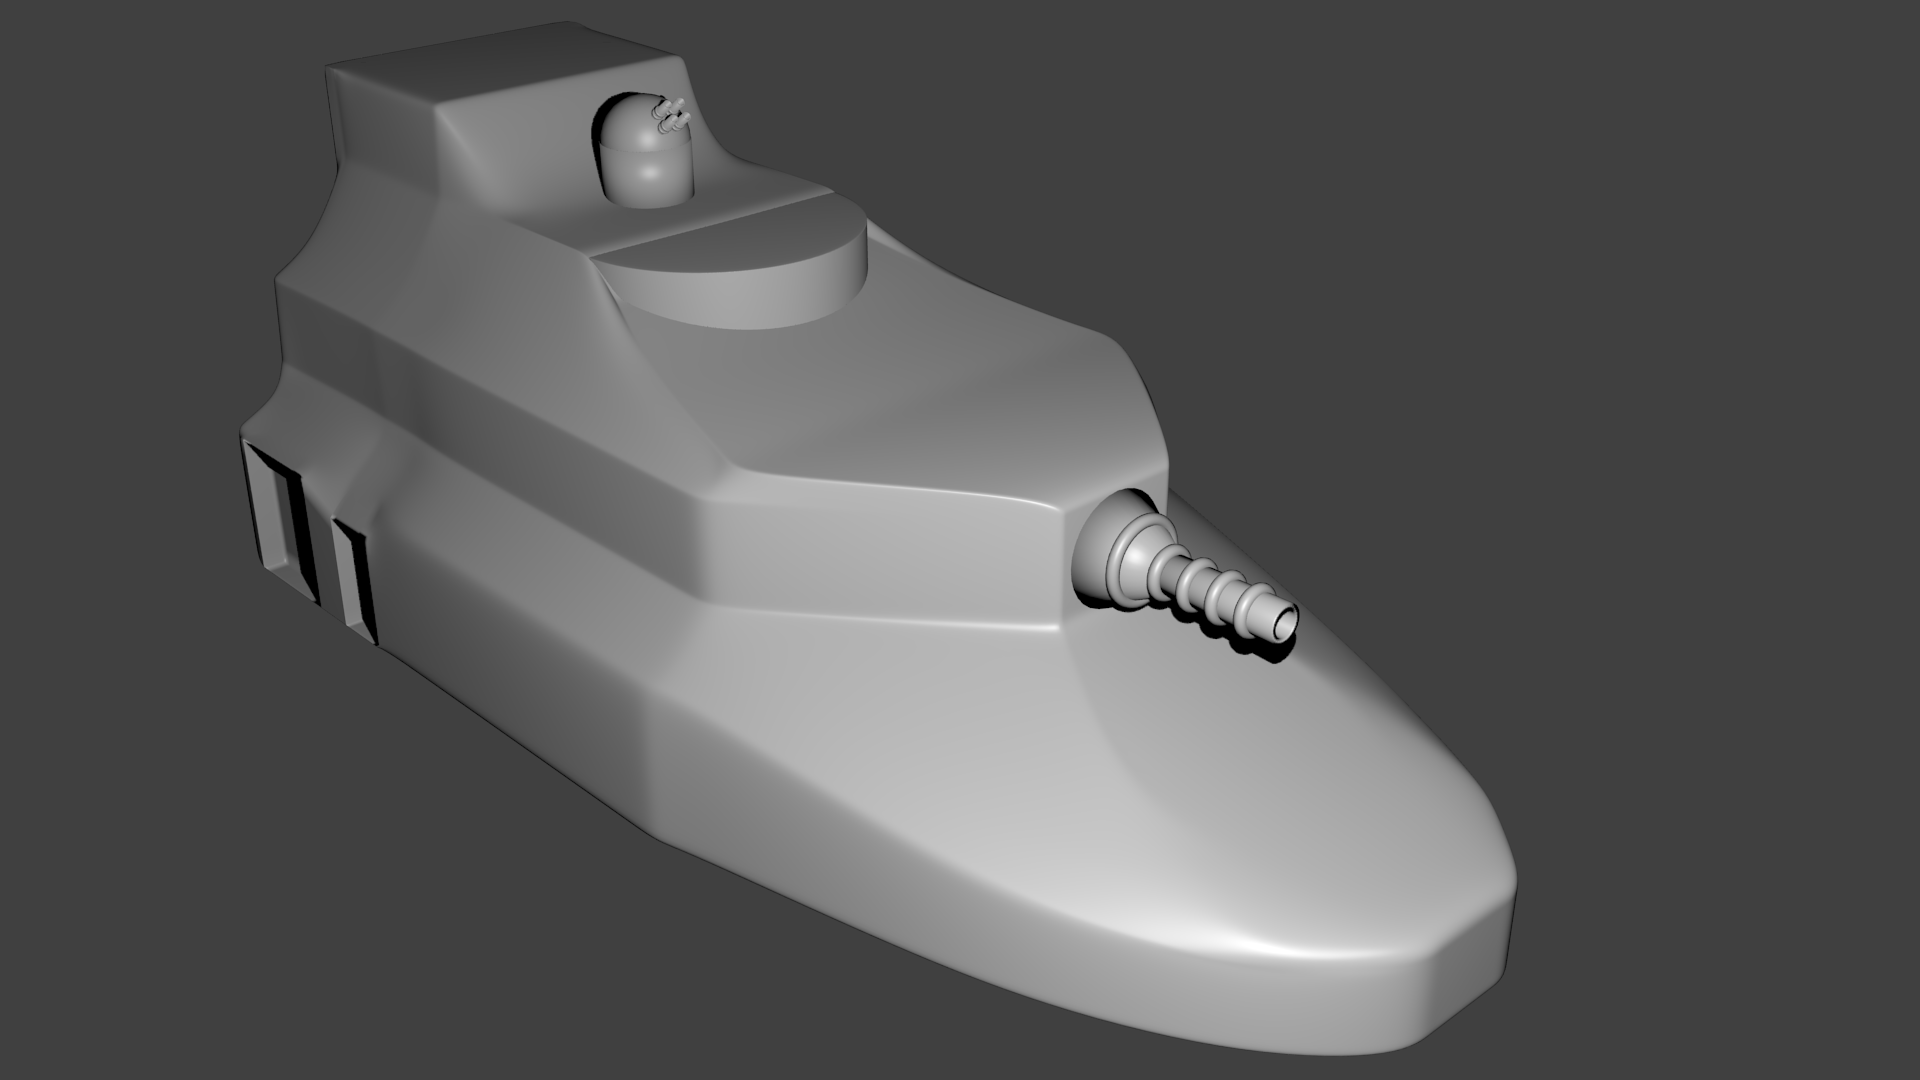 It looks pretty good. But for some reason, I just didn’t like it. I think a big part of it was that it felt too smooth. I could have turned that down a bit but I still didn’t like the shape. There were bits of the hull that just looked weird up close and had somewhat strange geometries. One was the the bit of hull on the left and right side of the bridge “window” area. If you look closely at the image, you can see that it dips back down between the outer edge of the hull and the bridge proper. There were some other areas like that on the back of the ship and around the hanger bay doors as well.
So like all good prototypes, I threw it out and started over. The only thing I kept was the bridge, the laser battery, and the ion cannon.
Try 2
With a little more experience under my belt, I decided to start over and try again. I kept the original version around in case try 2 was worse but I didn’t expect it to be. This time around I decided that instead of trying to do the hull as a single piece of geometry, that I would break it up in to connecting pieces. While I had originally planed to do five pieces (one for each deck and two for the spaces between decks), I ended up only doing two overlapping pieces as you’ll see below.
This time around I decided to make the outer hull on the back and side be flush with the cargo, shuttle, workpod, and runabout bay doors. I’ll probably add a bit of overhang to those but that detail will be added to the exterior instead of built into the basic hull shape.
Again I started with the bottom of the ship. The process was the same but I made some different design decisions. I also was much more careful about coordinates when pushing, squeezing, extruding, and scaling parts of the hull. There were a number of times that I realized I had done something wrong and destroyed my symmetry. Each time that happened, I went back and fixed it. This is something that I didn’t do on the first attempt. I probably should have worked on just half the ship and mirrored it but it seemed to make more sense at the time to do it the way I did. (I also should have taken more screenshots as I was working on the model to show the stages but I didn’t. I’ll try to be better next time.)
Regardless, I created a lower deck model that I was much happier with than the first one. Once that was done, I started a second section of the hull and modeled everything on the second level except raising it to the full four meter height of the room containing the machinery for the ion cannon or the area that would connect the engineering spaces to the engines proper. The former would be done as part of the connection between deck 2 and 3 and the latter when I actually modeled the engines.
Once I was happy with the second deck it was time to connect the two. My original plan had been to created a completely separate piece of geometry to make the connection but sitting here with the two pieces in front of me, I decided to just extend the top of the lower deck and form it into the shape I wanted. So I extruded the bits under the second deck up and got to shaping the hull. In the end I didn’t just stop this modeling at the bottom of deck 2 but because of some of the feature that I wanted to continue extending, parts were modeled all the way up to the top of the second deck. Satisfied with that, it was time to move on to deck 3.
Again, the original plan was a separate piece of geometry but since this level was fairly simple, I decided to just extend the top of level 2 upward. I was several hours into the project at this point and feeling comfortable with the tools so it went fairly quickly.
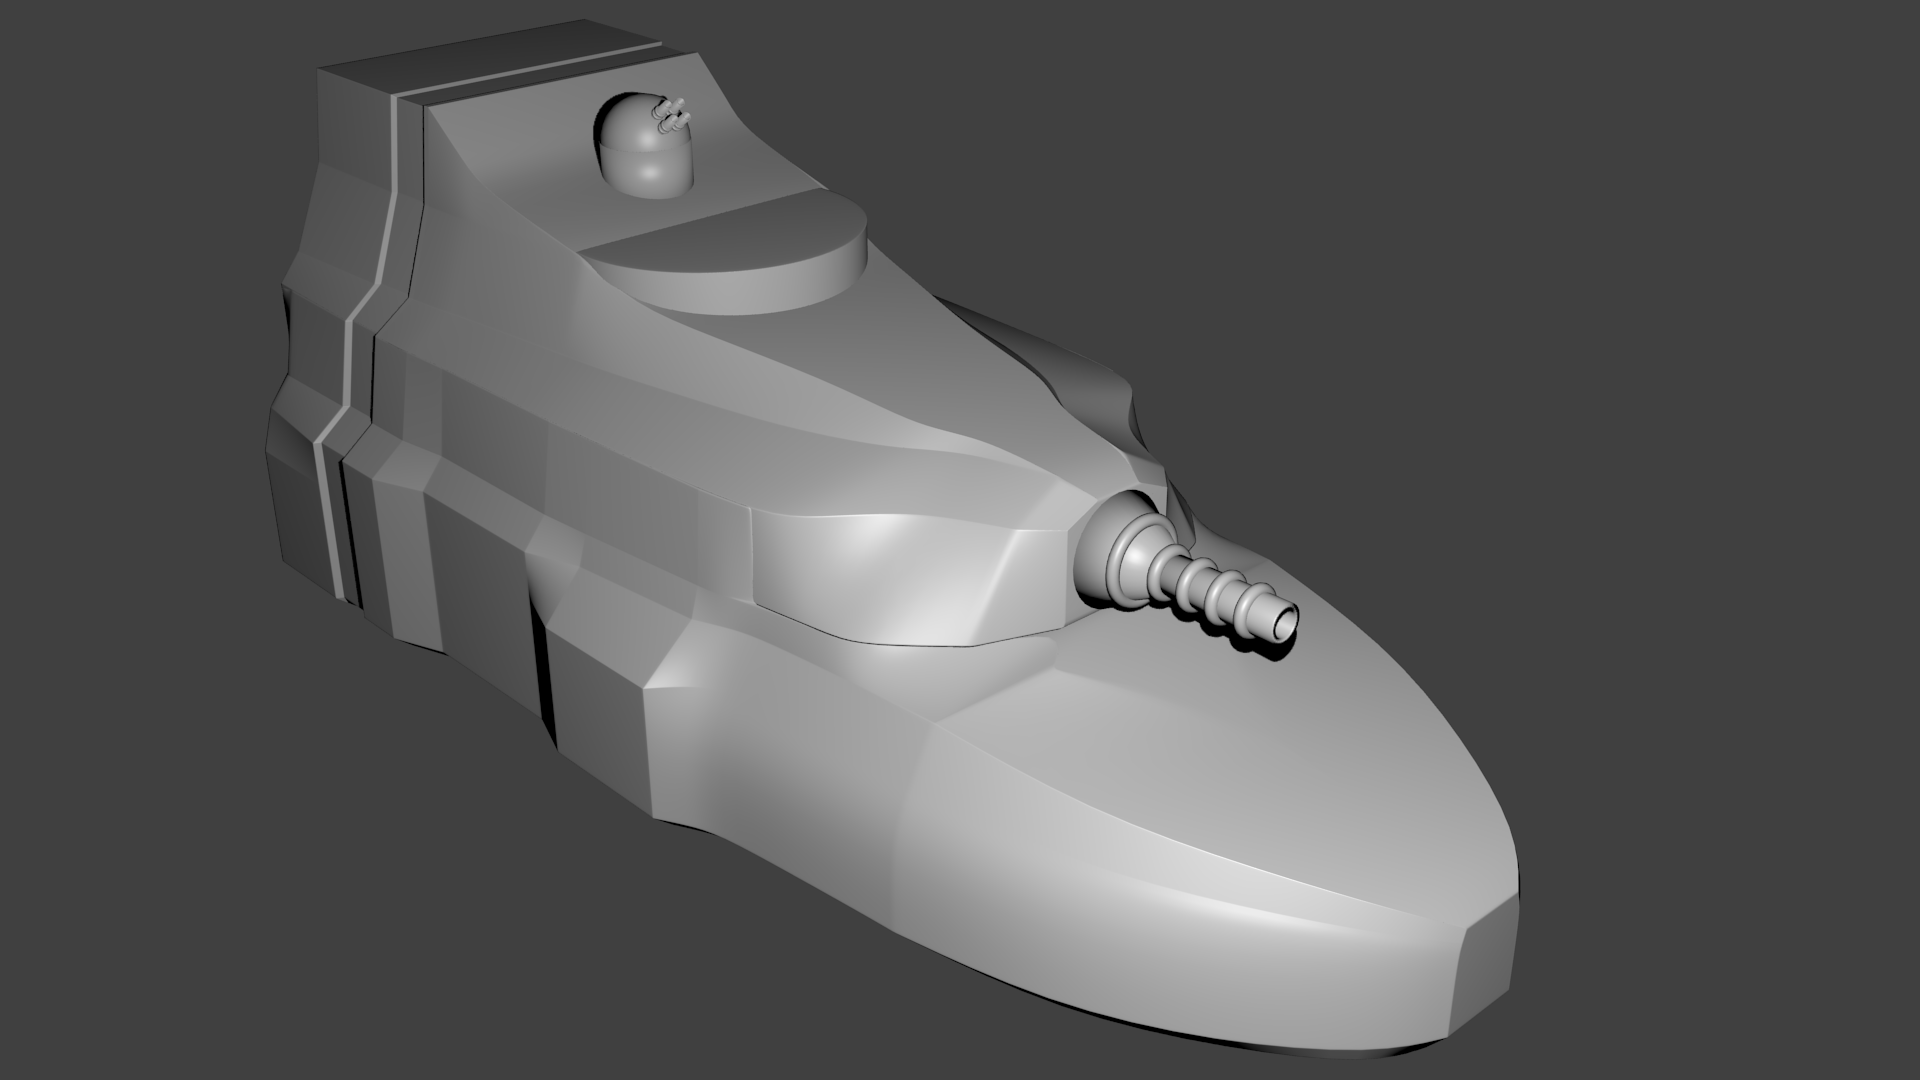
Since the bridge area, laser battery, and ion cannon were already done, I just had to turn them on. Doing so made me realize that the area where the cannon was attached felt a little two boxy so I tweaked the design a bit there. I also needed to tweak the geometry around the bridge to expose a bit more of it. With that done, I ended up with this model for my second attempt.
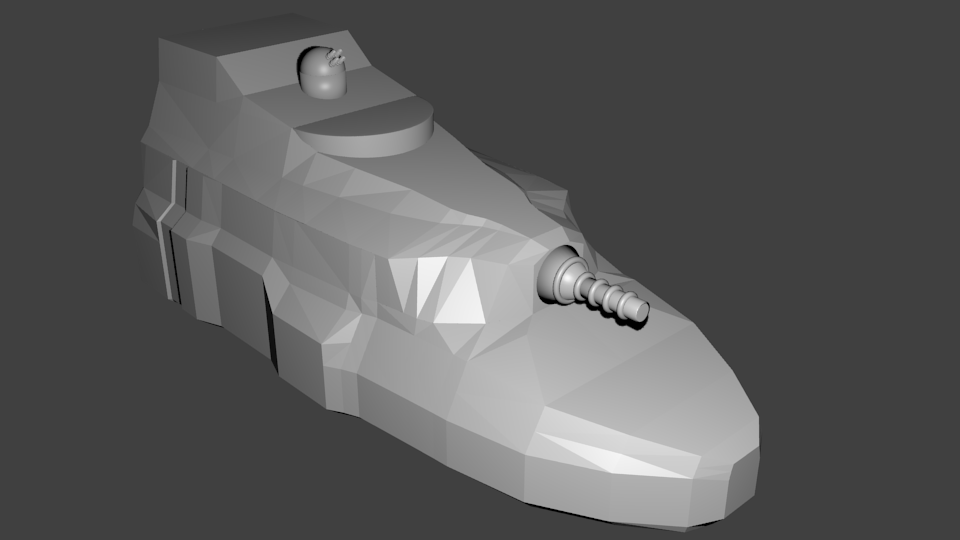 You’ll notice that this one is much blockier than that first one. In that first attempt I had already applied some smoothing filters before exporting the image. I had not yet done so on this one and had first planned on leaving this one as is. I thought this looked pretty good so I even exported this as a 3D model and did a small test print.
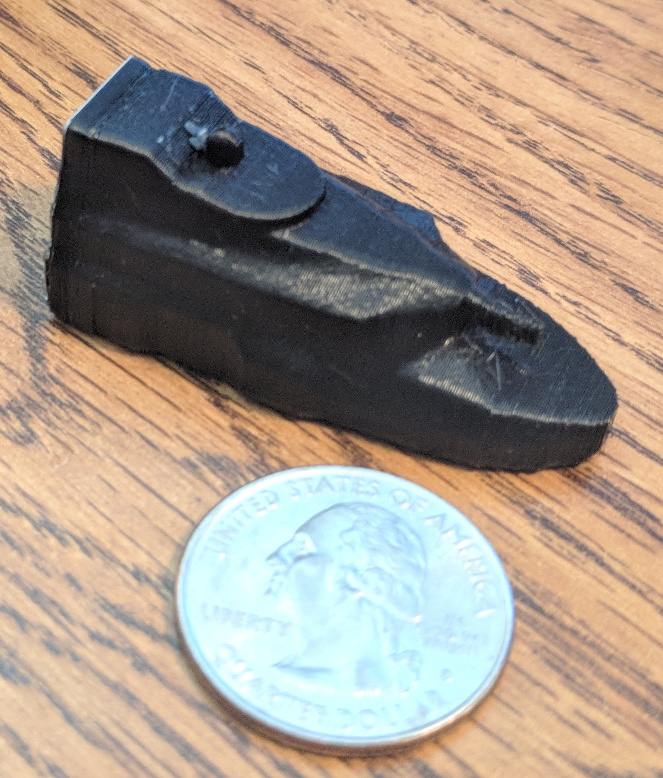 I was quite happy how the print turned out. The barrels on the laser battery were too small to print at this scale (1/1000) but otherwise it looked pretty good.
However, looking at the actual model some more I decided I didn’t like it so faceted. Plus if you look at the back of the ship, there is that little bit of contouring that is pushing in a bit. That section fills the space between the doors for the shuttle and workpod bays. I decided that I wanted that to be a feature that ran all the way up the ship.
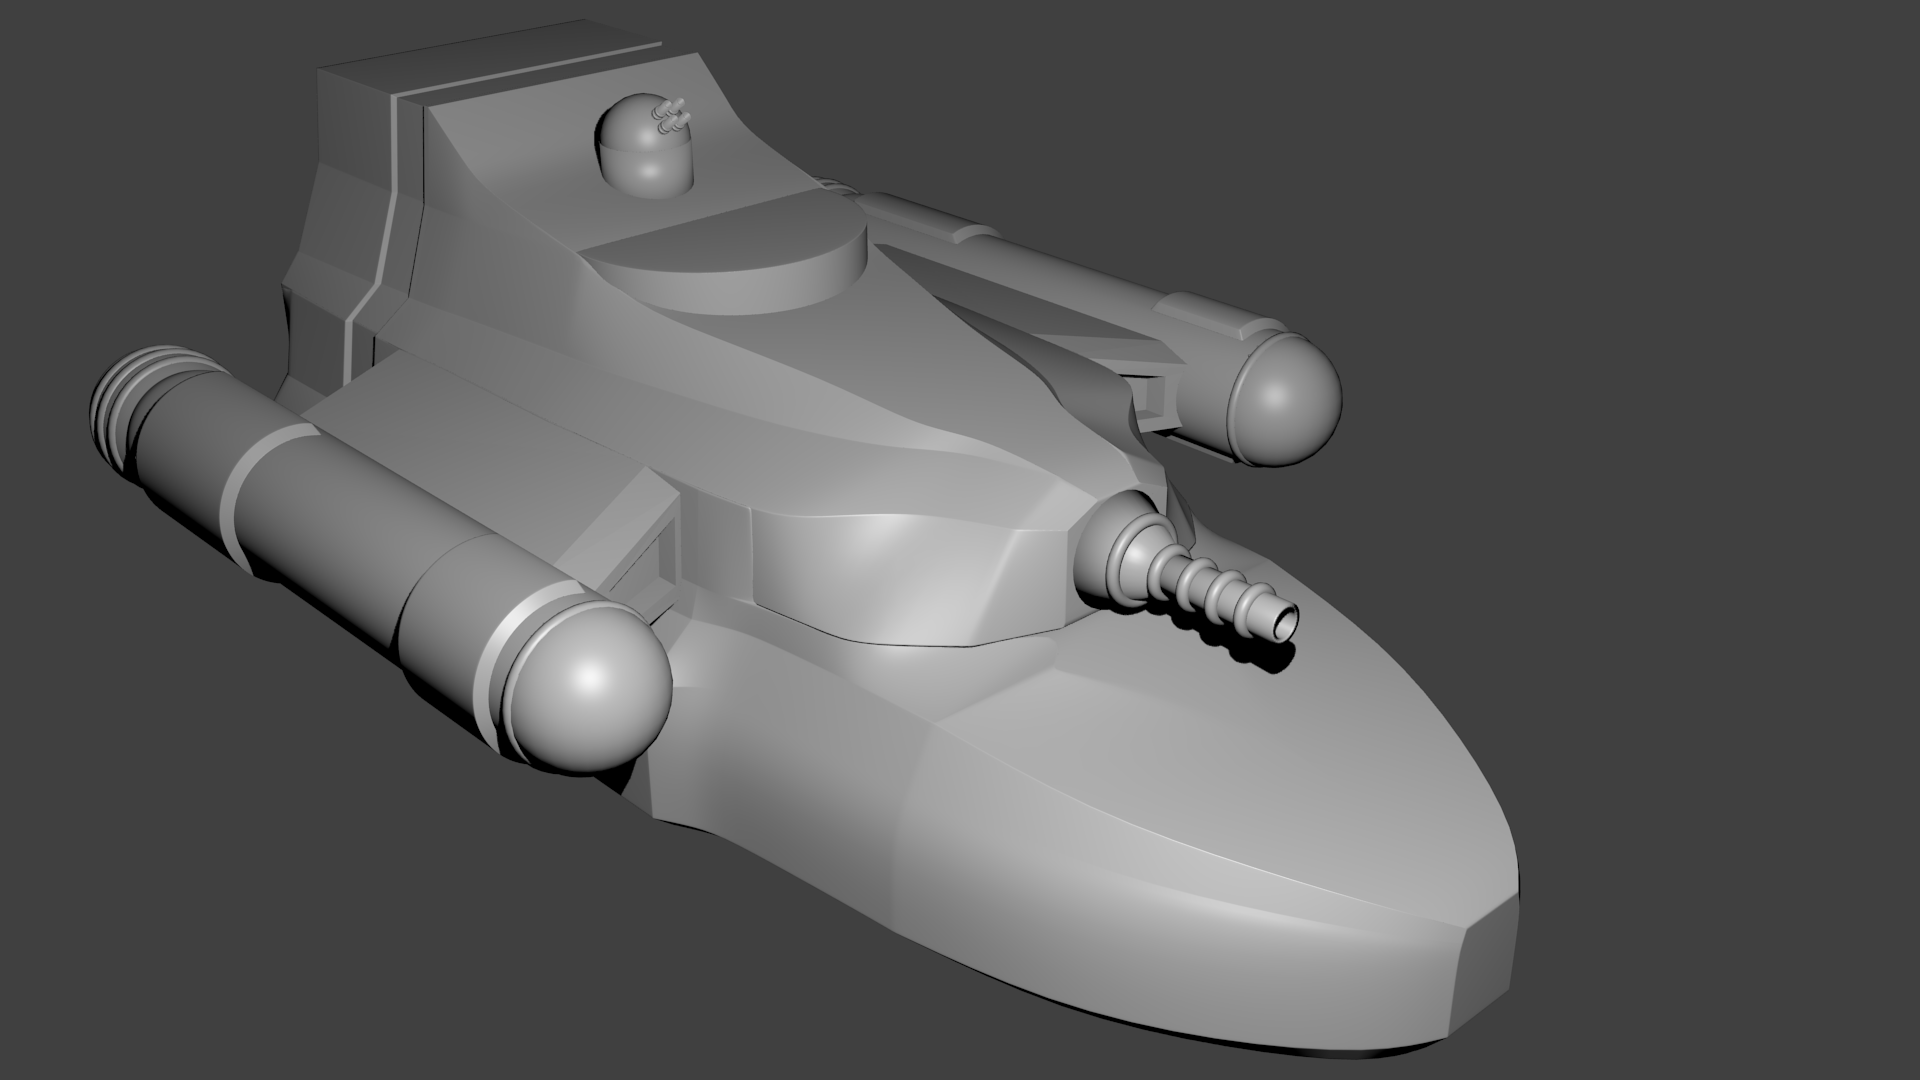
So I went back into the model and started tweaking. First I modified bottom part of the upper deck geometry to continue running that feature all the way up the aft portion of the ship. This was actually fairly easy as at this point in the ship, the outer edge of the hull is well beyond the interior walls. After that was added, I started smoothing out the surface and adding edges and features in where I wanted the model to have sharp edges. I ended up with the following model.
 The one thing that adding the smoothing did was somewhat highlight the fact that it is two different pieces of geometry. You can see a slight seam between the two pieces in the area under the ion cannon. It runs around the front of the ship and back to the point just in front of the bulge mid-ship on the lower deck (that bulge is the location of the reflec screen on this side of the ship) where it turns upward to the top of the second deck.
This seam is not visible in the unsmoothed version as it is an artifact of the extra facets added to the geometry to make it smooth. It’s something I’ll need to clean up. I haven’t decided exactly how I’m going to do it but I have two options. One is to go in and tweak the geometry so that the two pieces (with the smoothing) line up better. That is actually what I did on the back half of the ship. You can’t see the seam back there. The other is to put surface details, such as pipes, equipment, etc. that run over that area of the ship to mask the region affected. It will probably end up being a combination of those options in the end but that is for later.
The other thing you can’t see in this image is that there is a bit of hull under the lower deck. It actually extends about a half a meter below the deck but it is beveled inward so it doesn’t really show up in the angle of this view. And the bit that is visible (just below the front of the bow and below the parts jutting out a little on the side) are in shadow from the lighting. This extension allows for some machinery and piping beneath the hull and the addition of landing pads as well.
Now that the outer hull is done, it’s time to add the engines.
The Engines
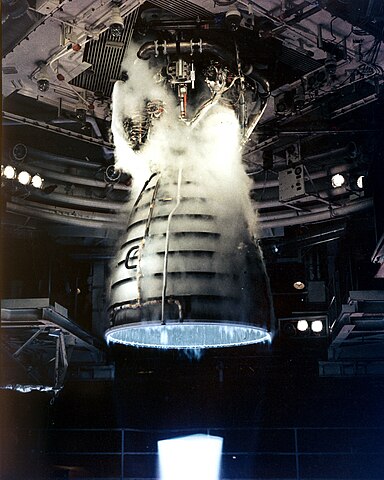
I didn’t really have any ideas for a design on the engines, I just knew they needed to be big and were going to be outboard on either side of the ship. So what I decided to do was use the engines depicted on that map at the end of the last post as a model. I imported that image into Blender to use as a reference and got to work. Here it is again.
 I’m going to match the silhouette of those engines at the top and bottom. In this case, I am only going to model one engine and then mirror it to the other side of the ship.
The engine design is fairly simple. It’s mainly a cylinder with a spherical cap at the front and an exhaust cone at the back. Plus some decorations along the side. I made a couple of variations on this image for the model. First, the exhaust cone at the back is symmetrical on my model I might go back and add that curve to it later but for now I left it alone. I also added some tori around the exhaust cone section of the ship reminiscent of the ribbing on current day rocket engines.
I also added one around the connection point between the cylinder and the sphere at the front of the engine (to mask the seam that shows up there when I applied the smoothing  ).
).
For those bits of geometry sticking out on the sides, I modeled them as extensions that ran a little more than half way around the engine instead of all the way around.
To connect the engines to the ship, I created some simple swept forward “wings”. All of these pieces were then smoothed and added to the model. With that done, I had the final model of the base hull ready to go.
What’s Next
Now that the base hull is done, it’s time to add the details. That will be the subject of the next post. First up will be those bits of the interior rooms that actually extend beyond the hull. On the side face in these images, the grapple launcher extends a bit out of the bow of the ship. On the other side we have the rocket battery launcher on deck 1 and the sensor array and airlock on deck two.
After that, I need to add in all the bay doors on decks one and three. That will complete the full basic structure of the ship. At this point I’m going to do another 3D print. At the small scale that I used for the first test print, that is all the detail that might show up. Any other smaller details would only show up on a larger print.
Once those final necessary features are added on, I’ll go through and add some other details and features to break up the completely smooth surfaces just a little as well as some recessed landing gear on the bottom of the ship. While the ship doesn’t normally dock or land on planets, it is capable of landing on smaller, very low gravity objects so I need to add that feature in.
So what do you think about the design? Any additional features you think should be included? Let me know in the comments below.
One thought on “Scavenger Transport 3D Model – part 2 – The Basic Hull”