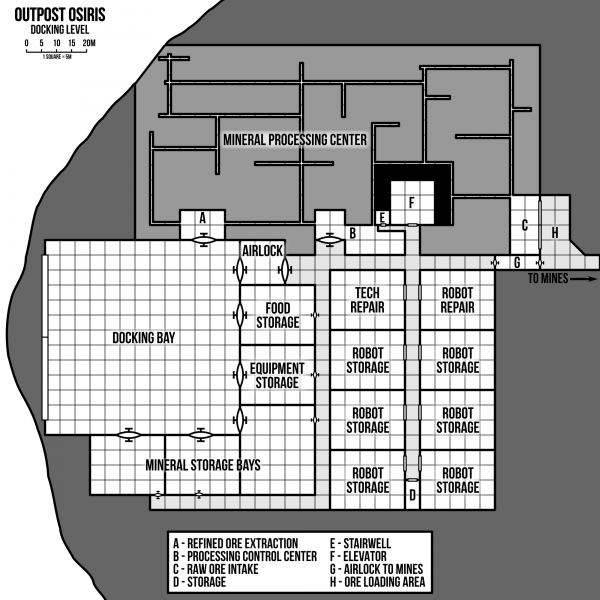
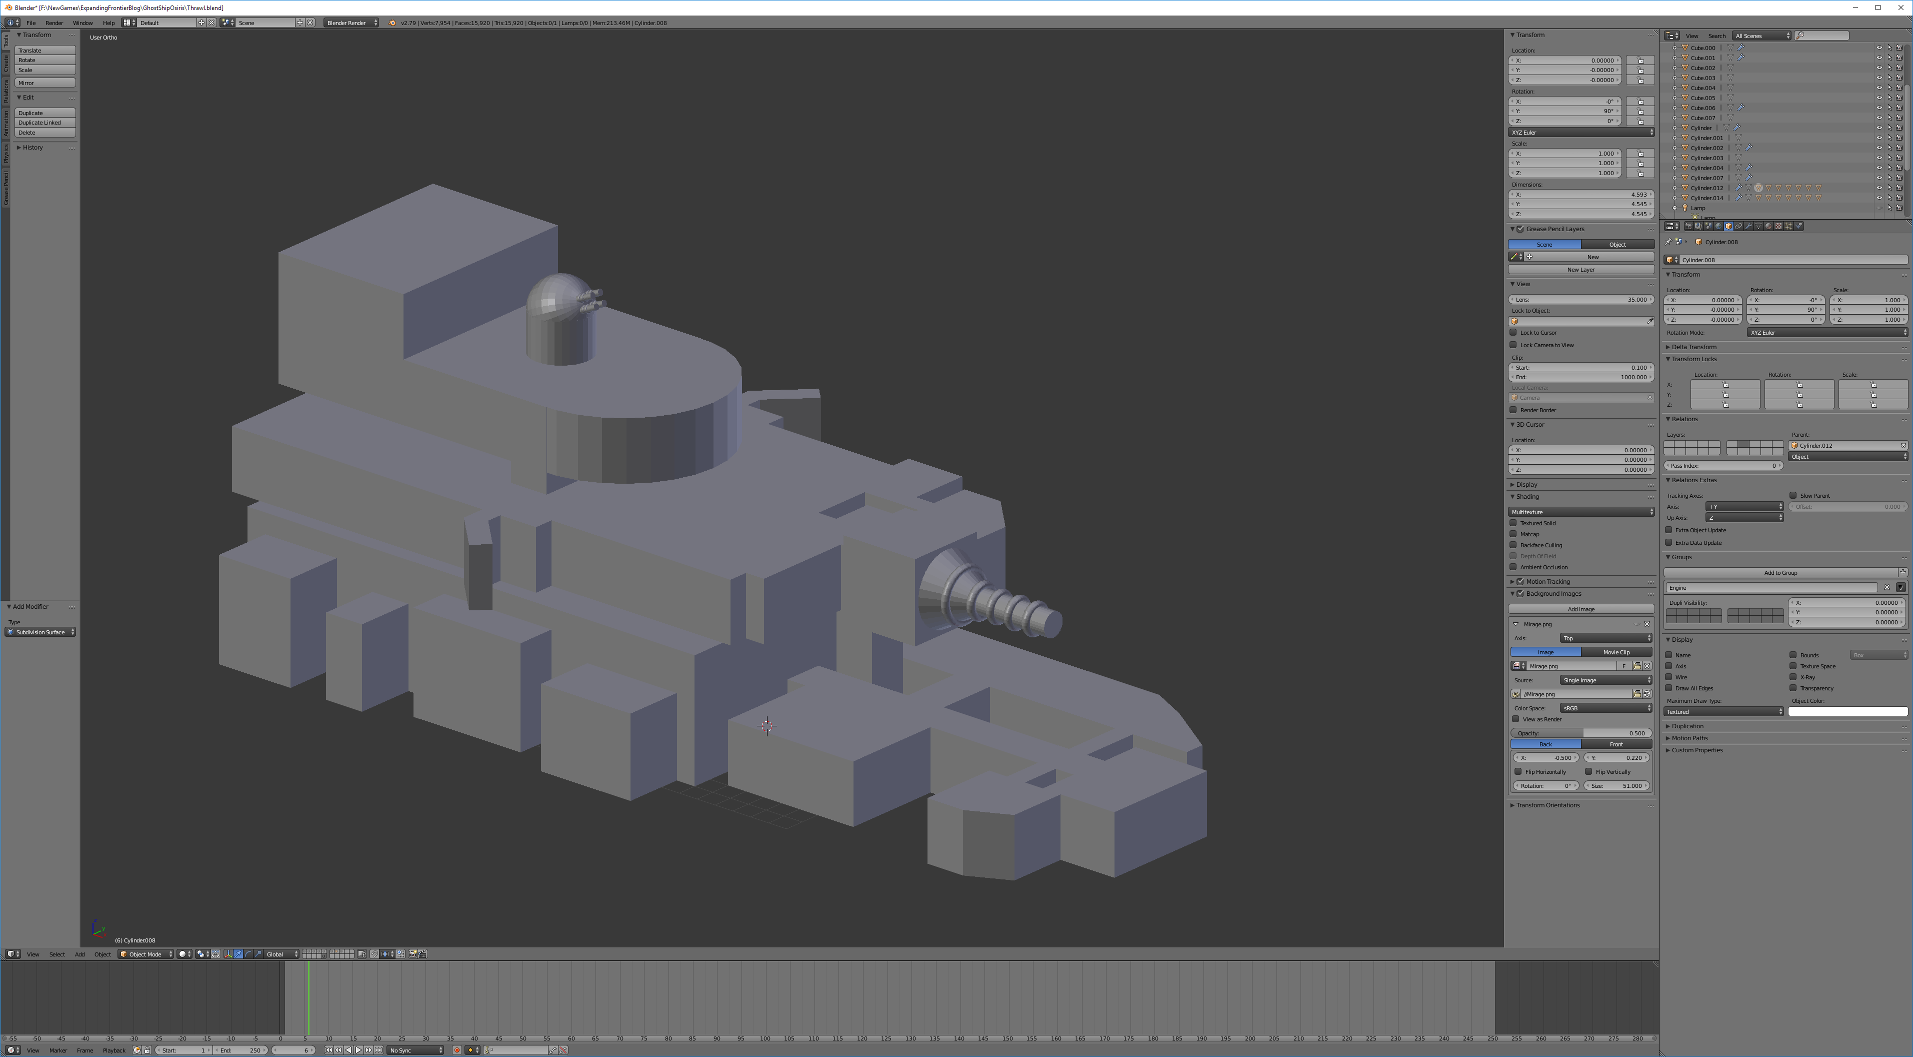
I was working on the one of the sections of the Ghost Ship Osiris module and it includes an alien robot. I realized that to do the alien robot justice, I needed to know the race that created it. So I busted out the Alien Species rules from the FrontierSpace Referee’s Handbook (p. 98) to give me some ideas. I didn’t need a completely functional race as they are all dead (at least the ones you encounter in this adventure) but only a rough physical description. The write-up below is what I came up with.
The following is the Referee’s write-up on the race to be included in the module. It’s a working draft, hence the work in progress flag in the title. It will probably go through some revisions as we flesh the module out a bit more and Bill chimes in. I’ll also probably add more to the physical description as we go.
Pursale
Physical Description
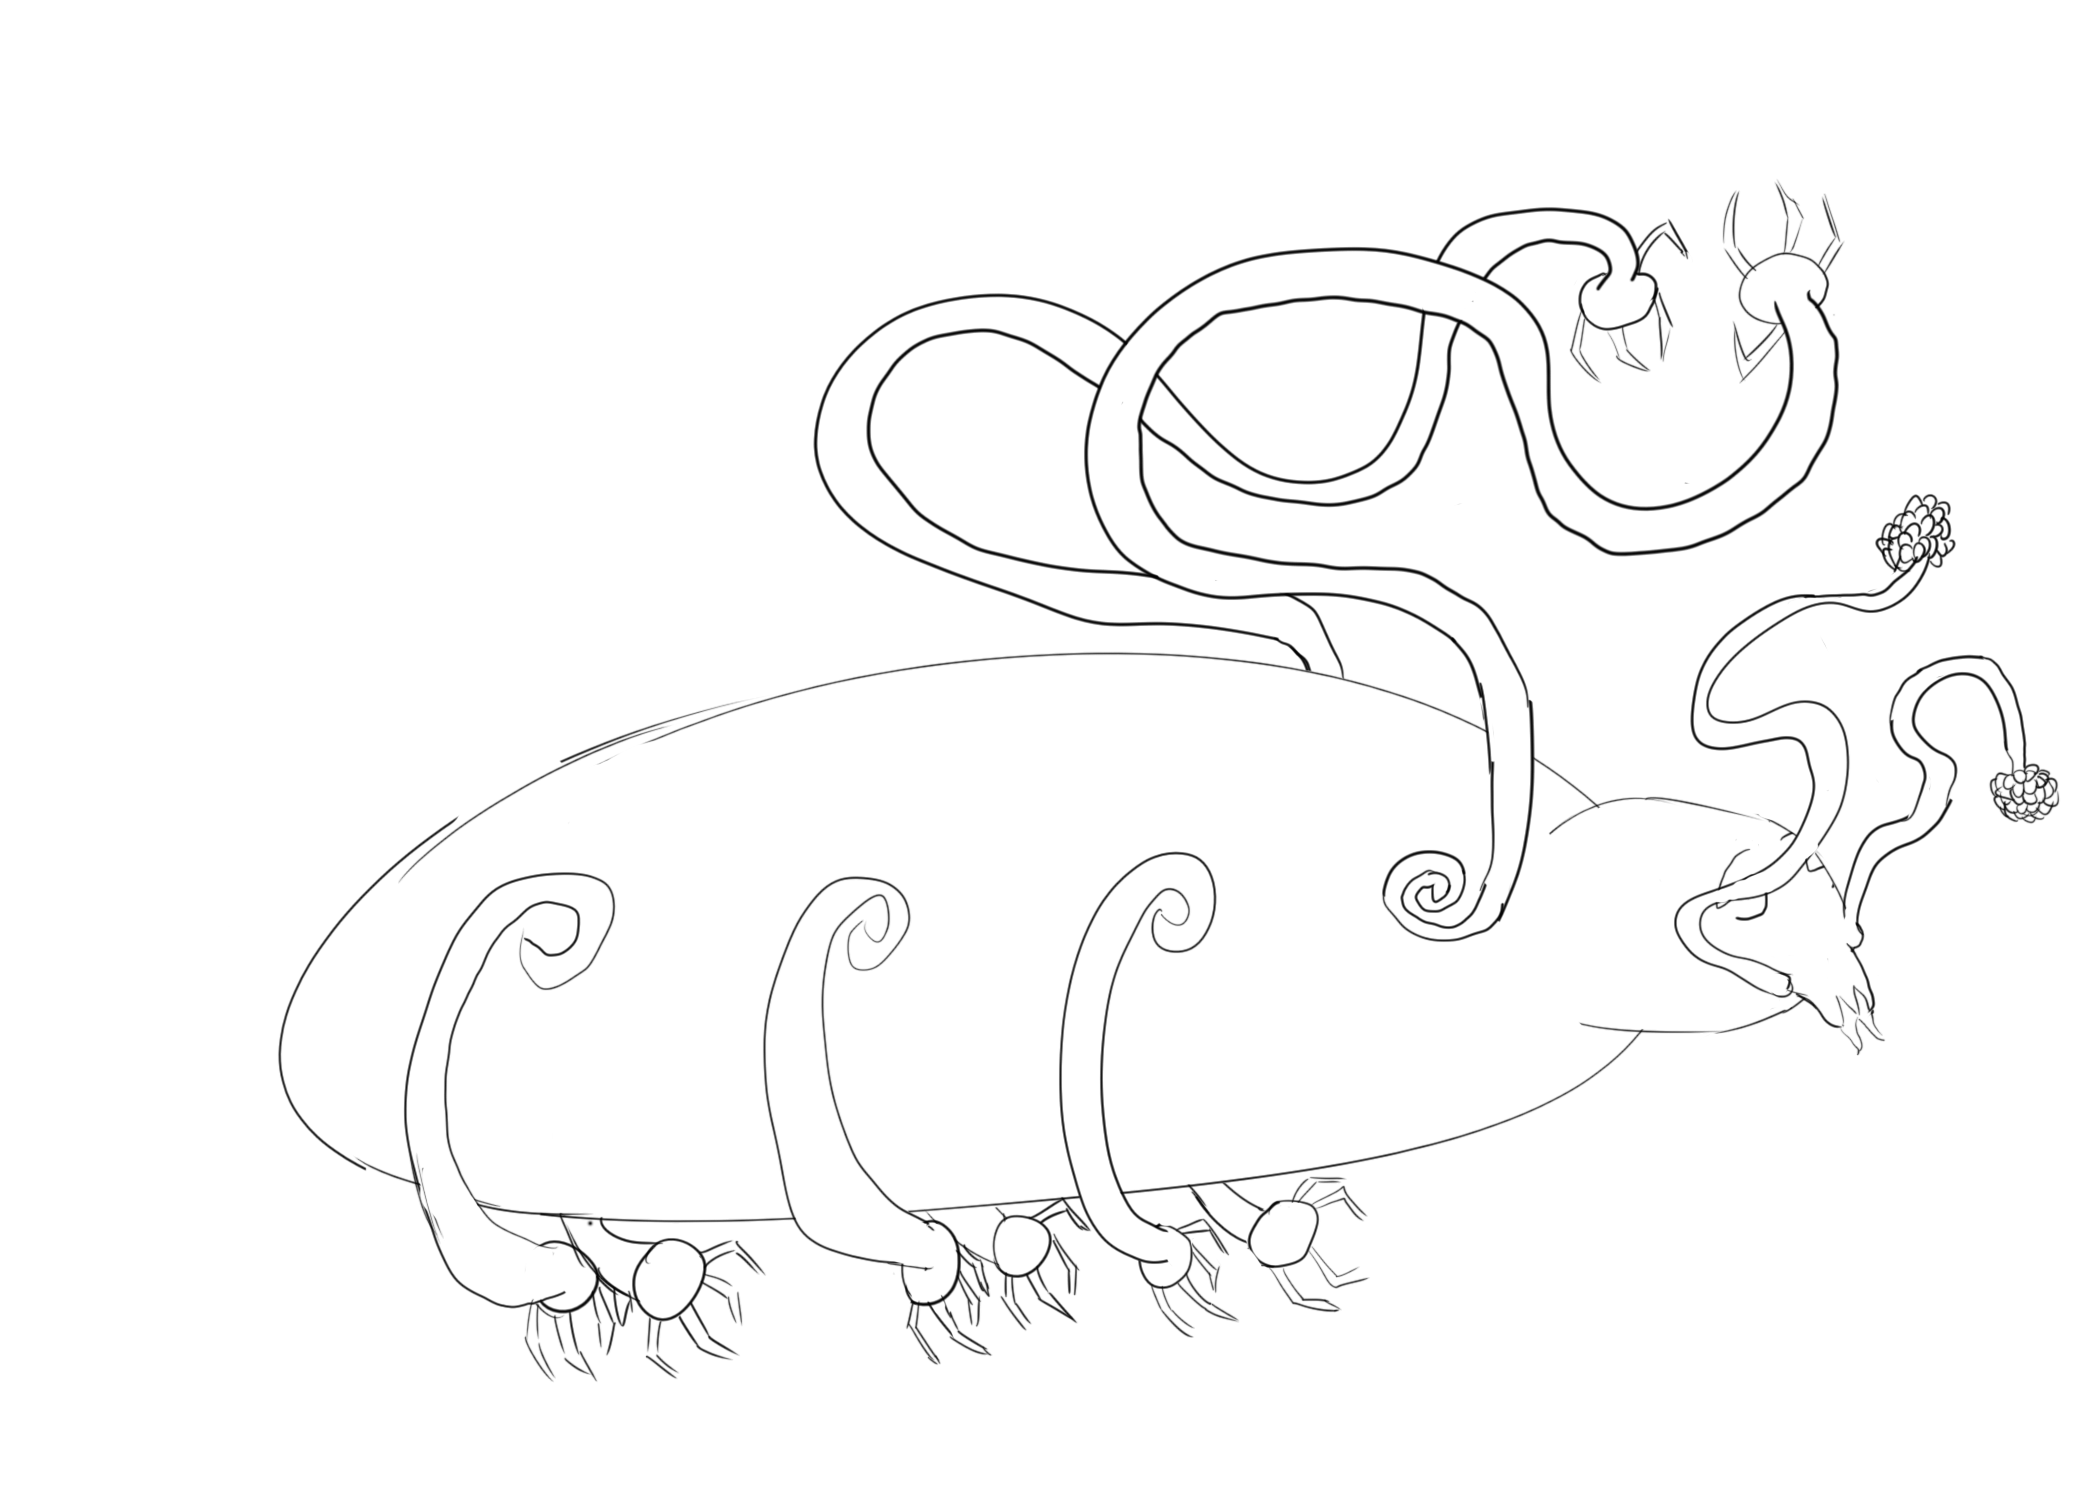
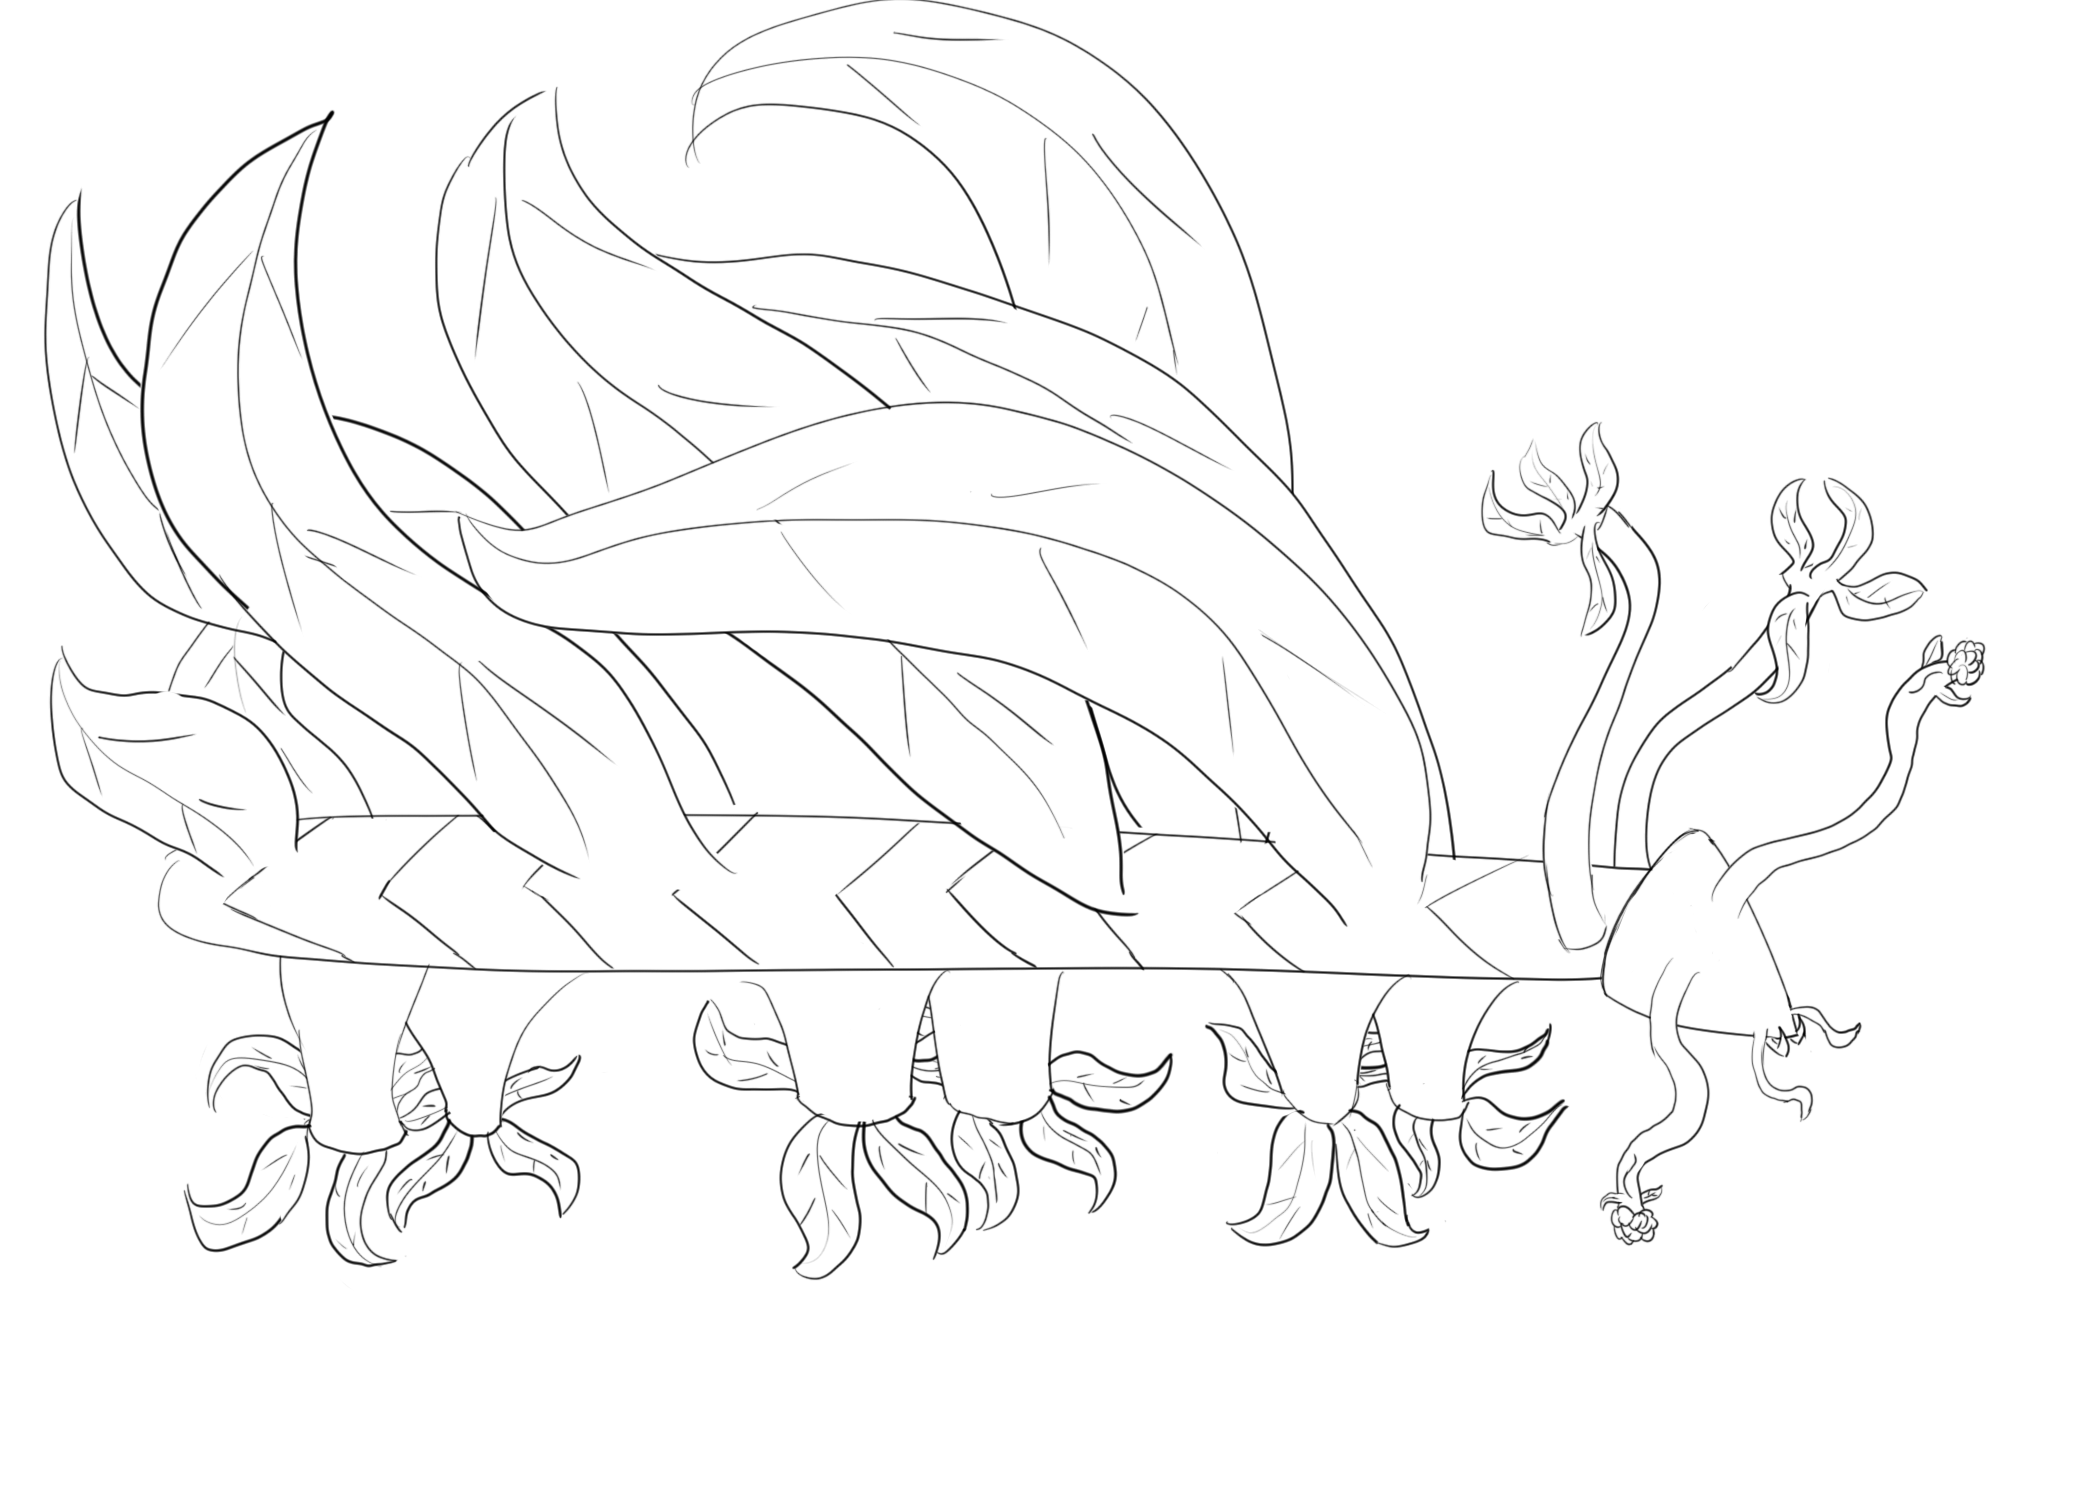
The Pursale are a large omvinorous species. They are quite massive, over 3 meters in length (front to back) with six legs, two arms, and a short squat “head”. Their main body is typically 3-3.5 meters in length, 1-1.5m in width and about a meter in height. They weigh in at about 2-3 tons.
The Pursale’s head, which sits at the front of the body, contains its mouth, another set of olfactory organs, and is where the sensory stalks are attached. The mouth sits low on the head which can be bent downward to touch the ground. It has no upward range of motion beyond the horizontal.
Rising up from their head are two slender, long (about 1.2m) appendages that end in their sensory clusters. Each cluster contains an eye as well as olfactory and auditory organs. The sensory stalks are also flexible and can be positioned as high or as low as they can reach. Typically held high and wide, the Pursale have excellent depth perception and directional hearing.
Their legs are relatively short (about 0.7m long) keeping the body low to the ground but each one ends in a four-toed foot.
The Pursale’s brain is not located in its head but rather further back in the body just behind the creature’s arms. The arms themselves are attached just behind the neck. The arms look like longer skinnier legs, 1.2m in length each ending in a hand with three fingers and an opposable thumb. The Pursale’s shoulder joints have a full 360 degree range of motion.
History
The Pursale are descended from large plains-grazing animals on their homeworld. For millennia, their technology developed slowly and was primarily focused on food-production and medicine. Over time they slowly developed spaceflight and colonized the other semi-habitable planet in their star system which they terraformed into a food production world.
They had just recently discovered FTL travel capabilities when one of their outposts was discovered by the Thazzar, a war-like race bent on conquering known space. Luckily for the Pursale, a ship managed to escape the Thazzar attack and warn the home world of the pending danger.
While not a war-like race, they learned quickly. However, with only a single industrial star system, they were no match for the much larger Thazzar forces. In the last years of the war, Pursale scientists developed a new technology, the phase shield, that allowed material affected by the shield to pass through normal matter and remain unaffected.
Unfortunately for the Pursale, this discovery came too late to turn the tide of war. However, it did provide a way for some ships to escape damage from the Thazzar weapons. In an effort to save their race from destruction, a number of colony ships were built and equipped with this new, although unperfected, technology. These ships were launched in many directions in the hope that some would escape and be able to rebuild the Pursale society.
Relation to the Module
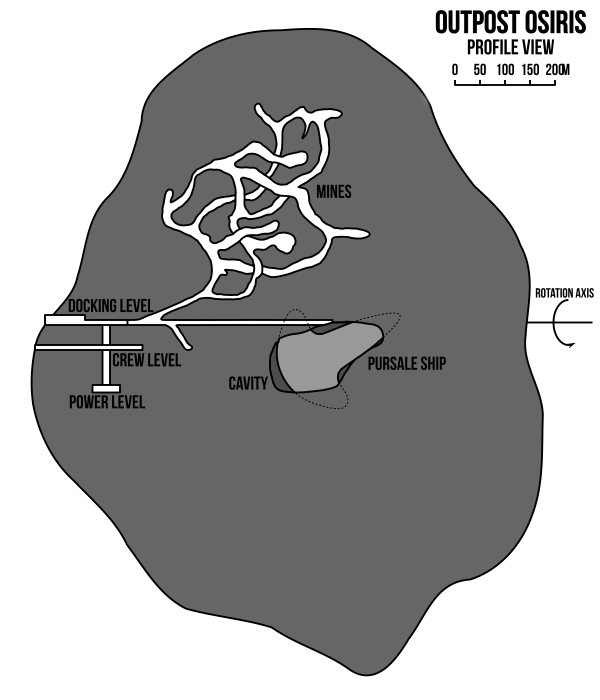
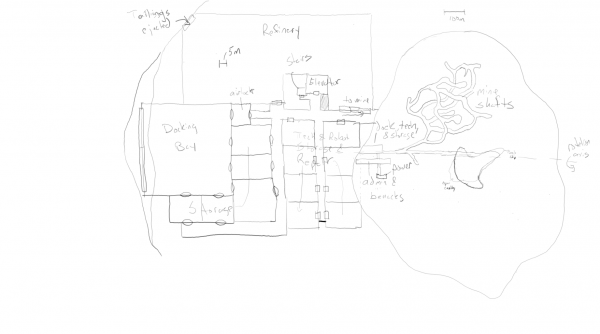
The ship embedded in the Osiris asteroid is one of these colony ships. Unfortunately, the second system it arrived in, now known as Duergan’s Star in the frontier, was occupied at the time by a Thazzar battle cruiser that detected the ship and pursued it. Using its phase shield, the Pursale vessel attempted to hid inside the Osiris asteroid which they discovered to be partially hollow.
That was when the final tragedy struck. While hiding, the phase shield temporarily failed, fusing the ship with the rock and permanently disabling it, dooming the crew and colonists. Not all of the ship was destroyed and there are portions that are not fused with the surrounding rock. The ship lay dormant and entombed for millennia until it was discovered by the miners on Outpost Osiris.
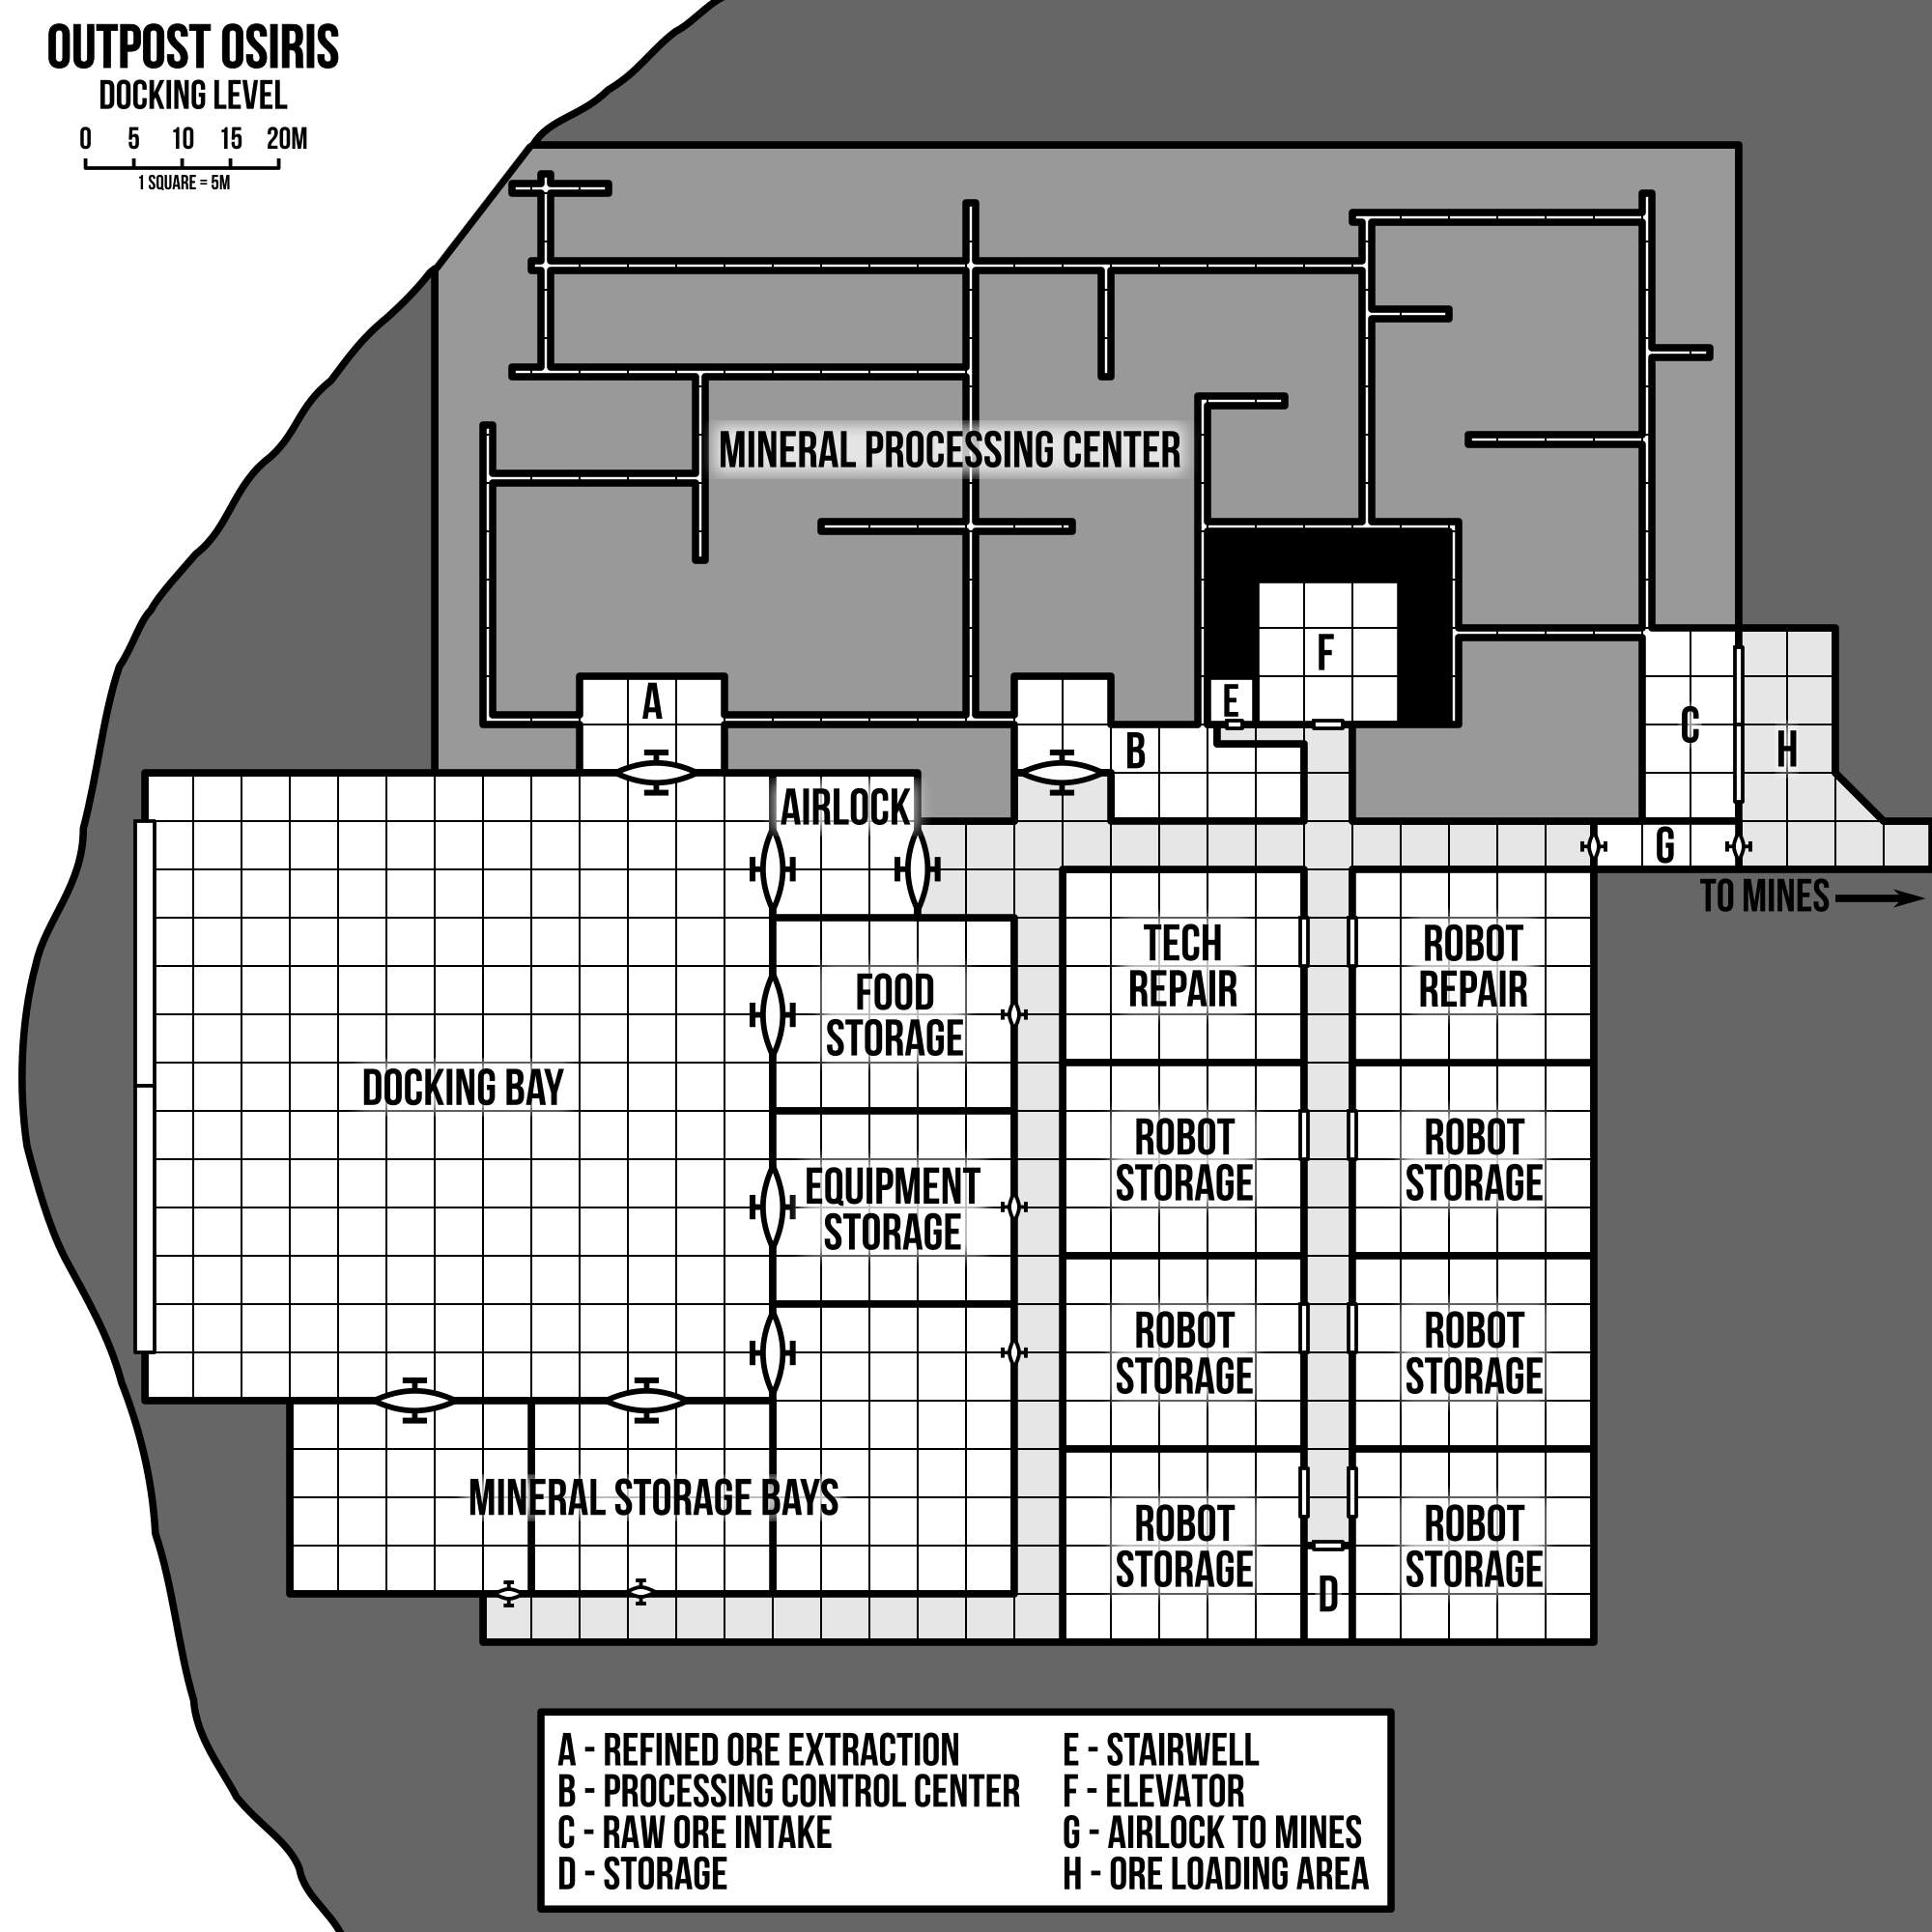
When the ship was entered, some of its security systems were activated prompting the call for help. The scavengers’ activities on the ship have also activated more of the defenses that are now threatening the lives of the outpost’s crew.
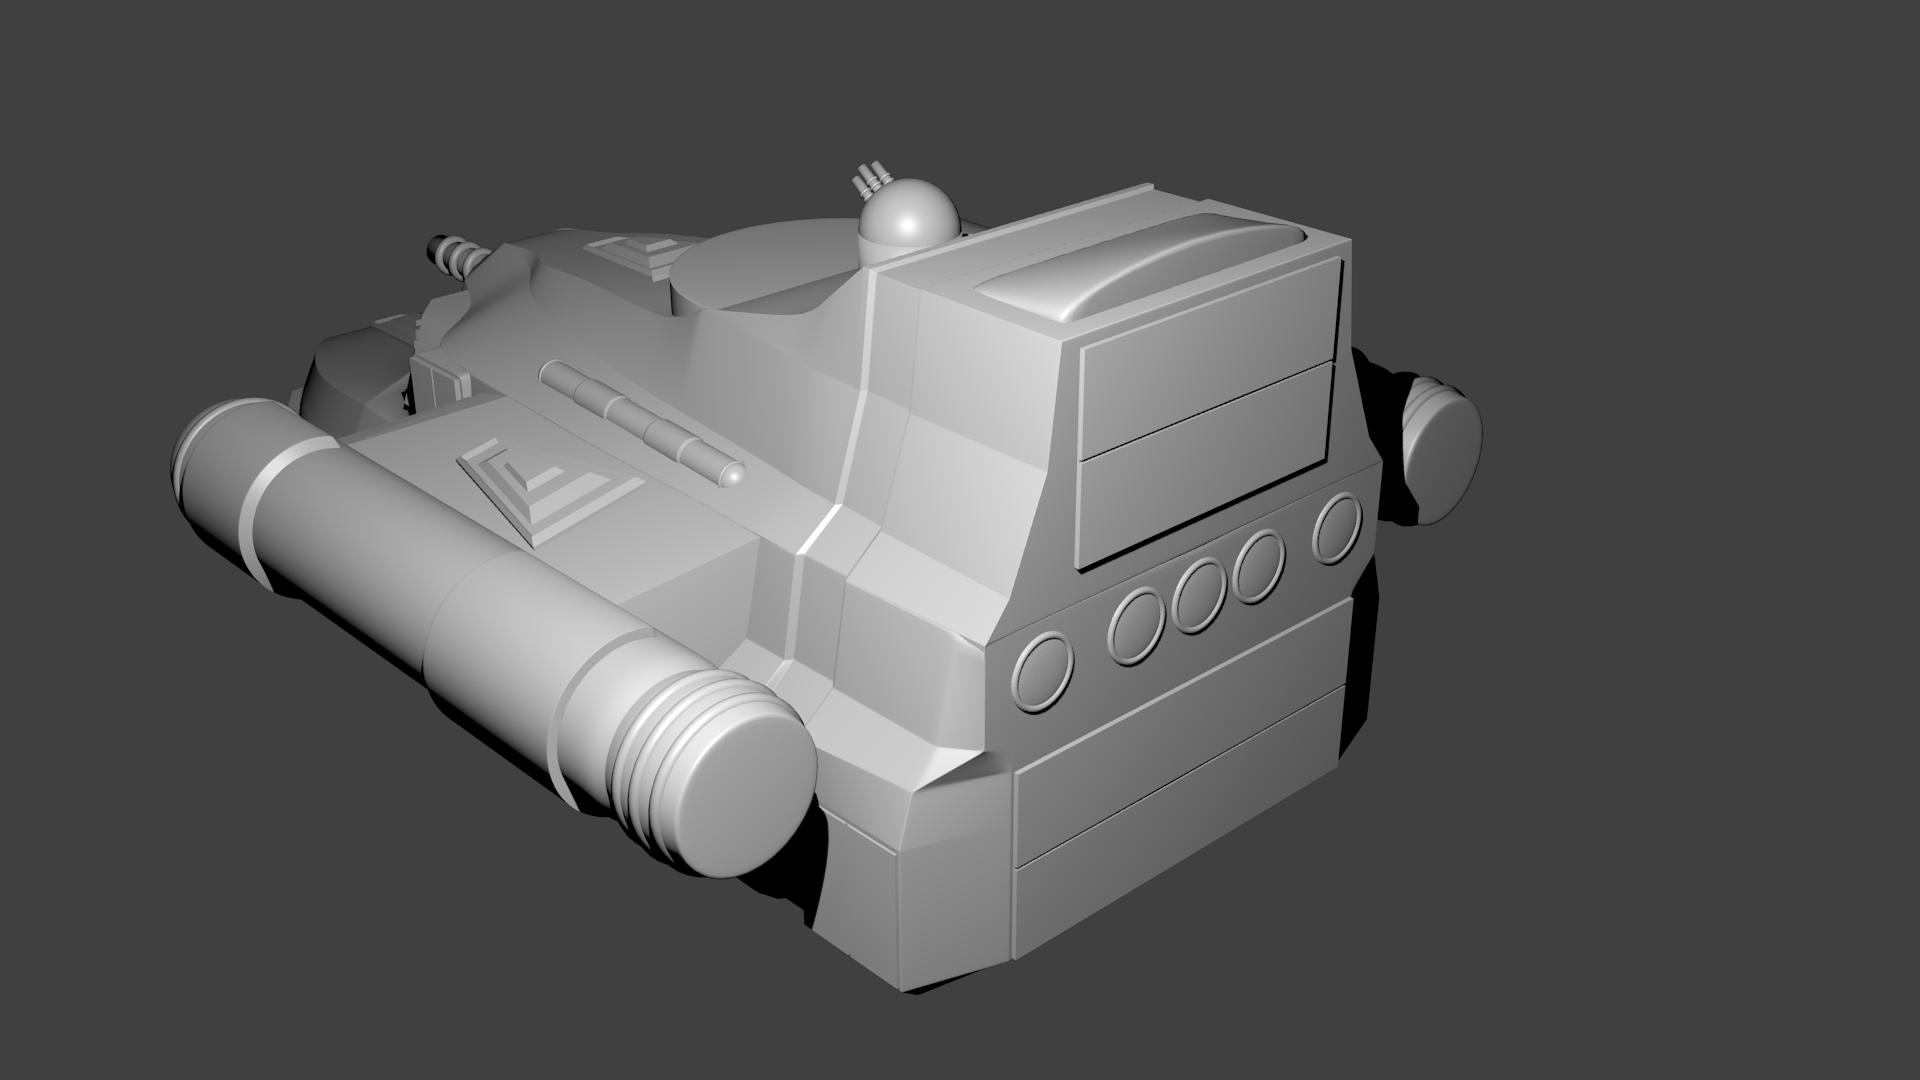
Robots
Once I had the physical description of the Pursale, I was ready to create the robots. There are actually two different robots (at least) that the PCs will encounter as part of the adventure. The first is the basic combat robot. The scavengers took one (or more depending on play balance) of these and activate them in an attempt to drive the PCs off their ship. The second is a command and control warbot that is coordinating the efforts of several combat robots within the confines of Outpost Osiris itself.
Pursale Combat Robot
Frame: Medium
STR: 50
AGL: 45
CRD: 60
PER: 45
INT: 50
BP: 100
INIT: 2
Move: 12, Walking
Docking: 4CU
Skills: Marksman +5, Warrior +0
Equipment: Audio/Visual, IR, motion, & lifeform scanners, communicator, military grade reflec & sonic screens, laser rifle, distruptor, 2x 100 EU backpack.
Weapons: Laser Rifle, Distruptor
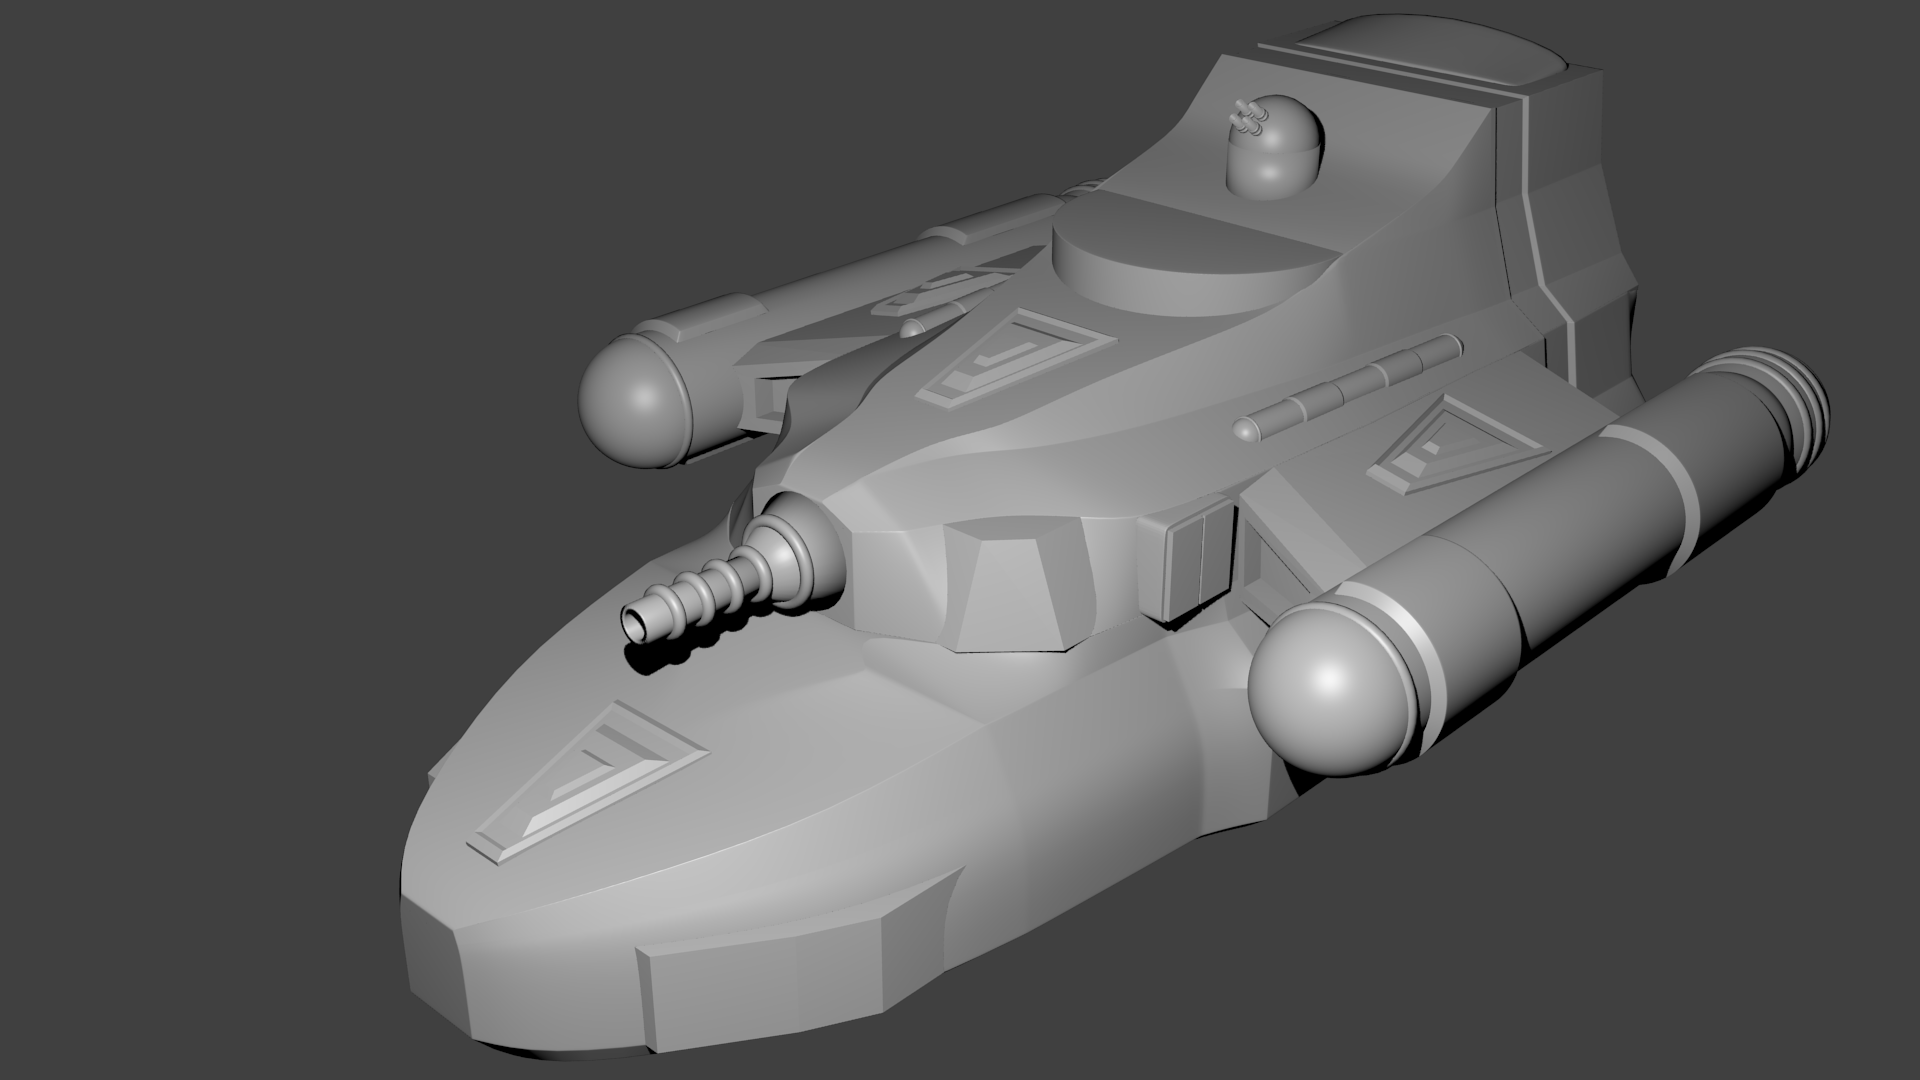
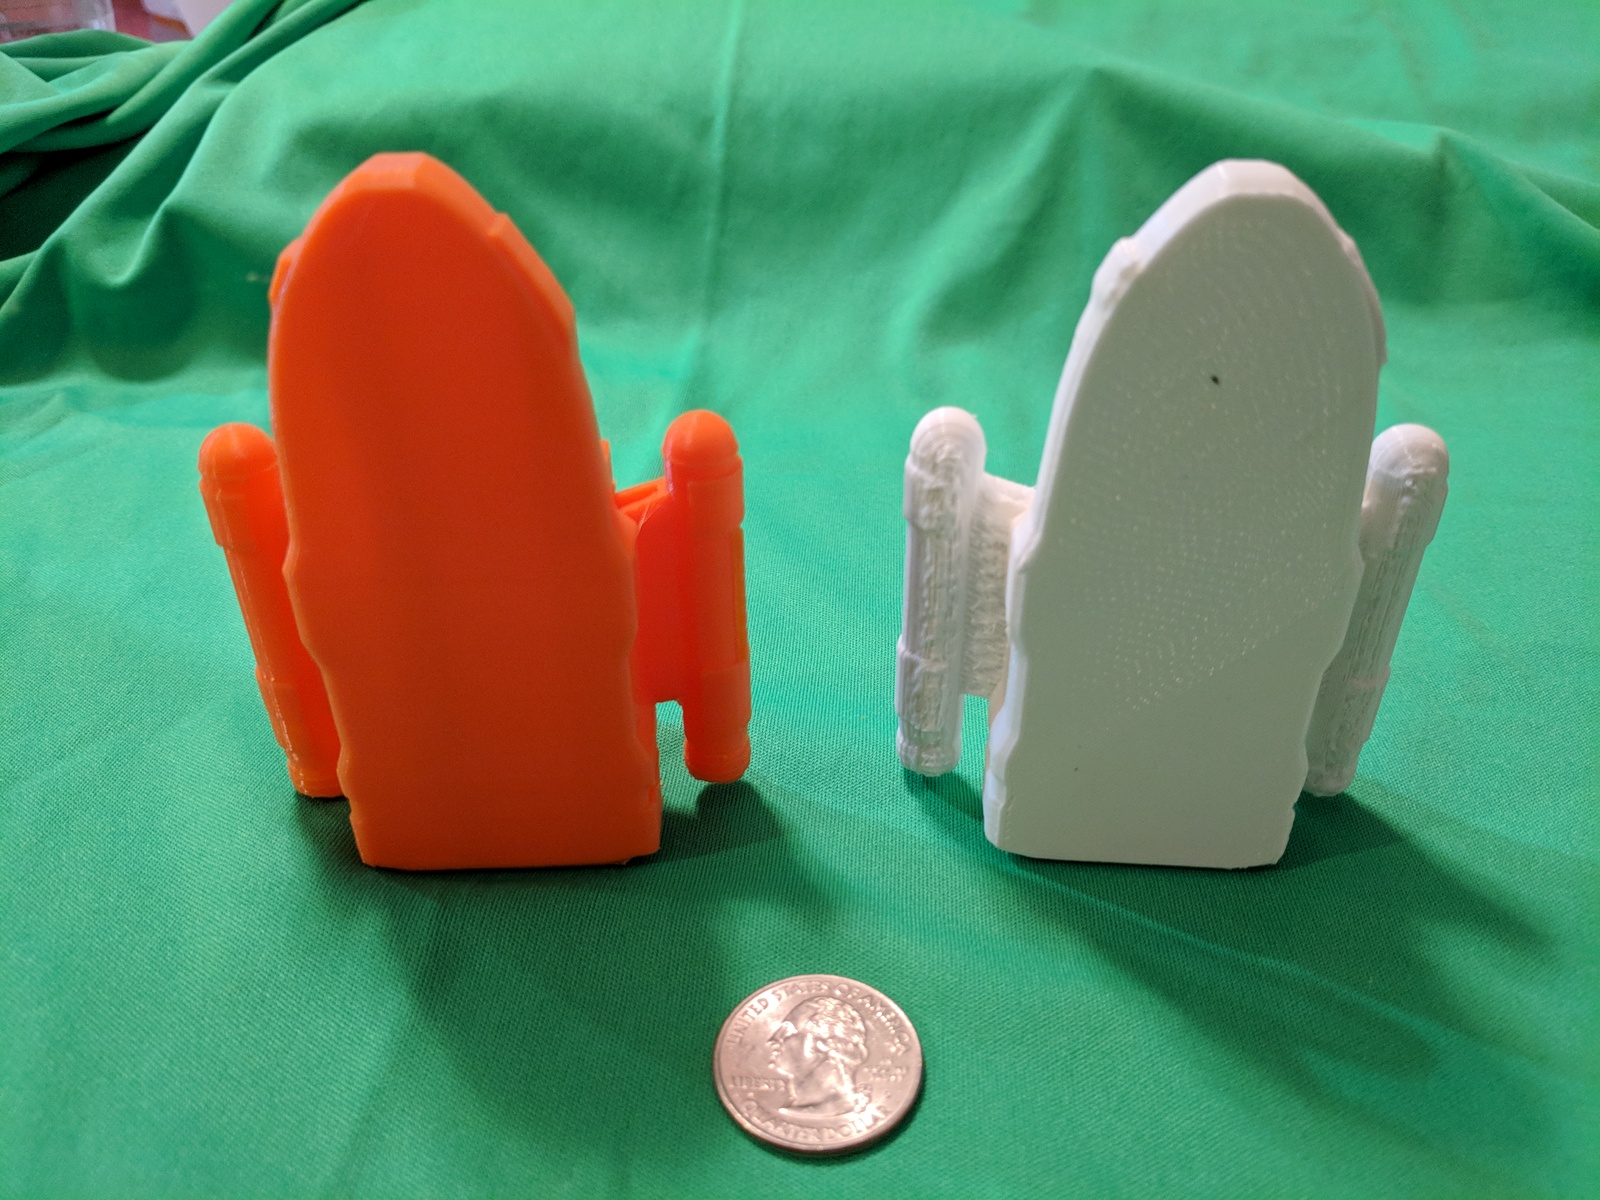
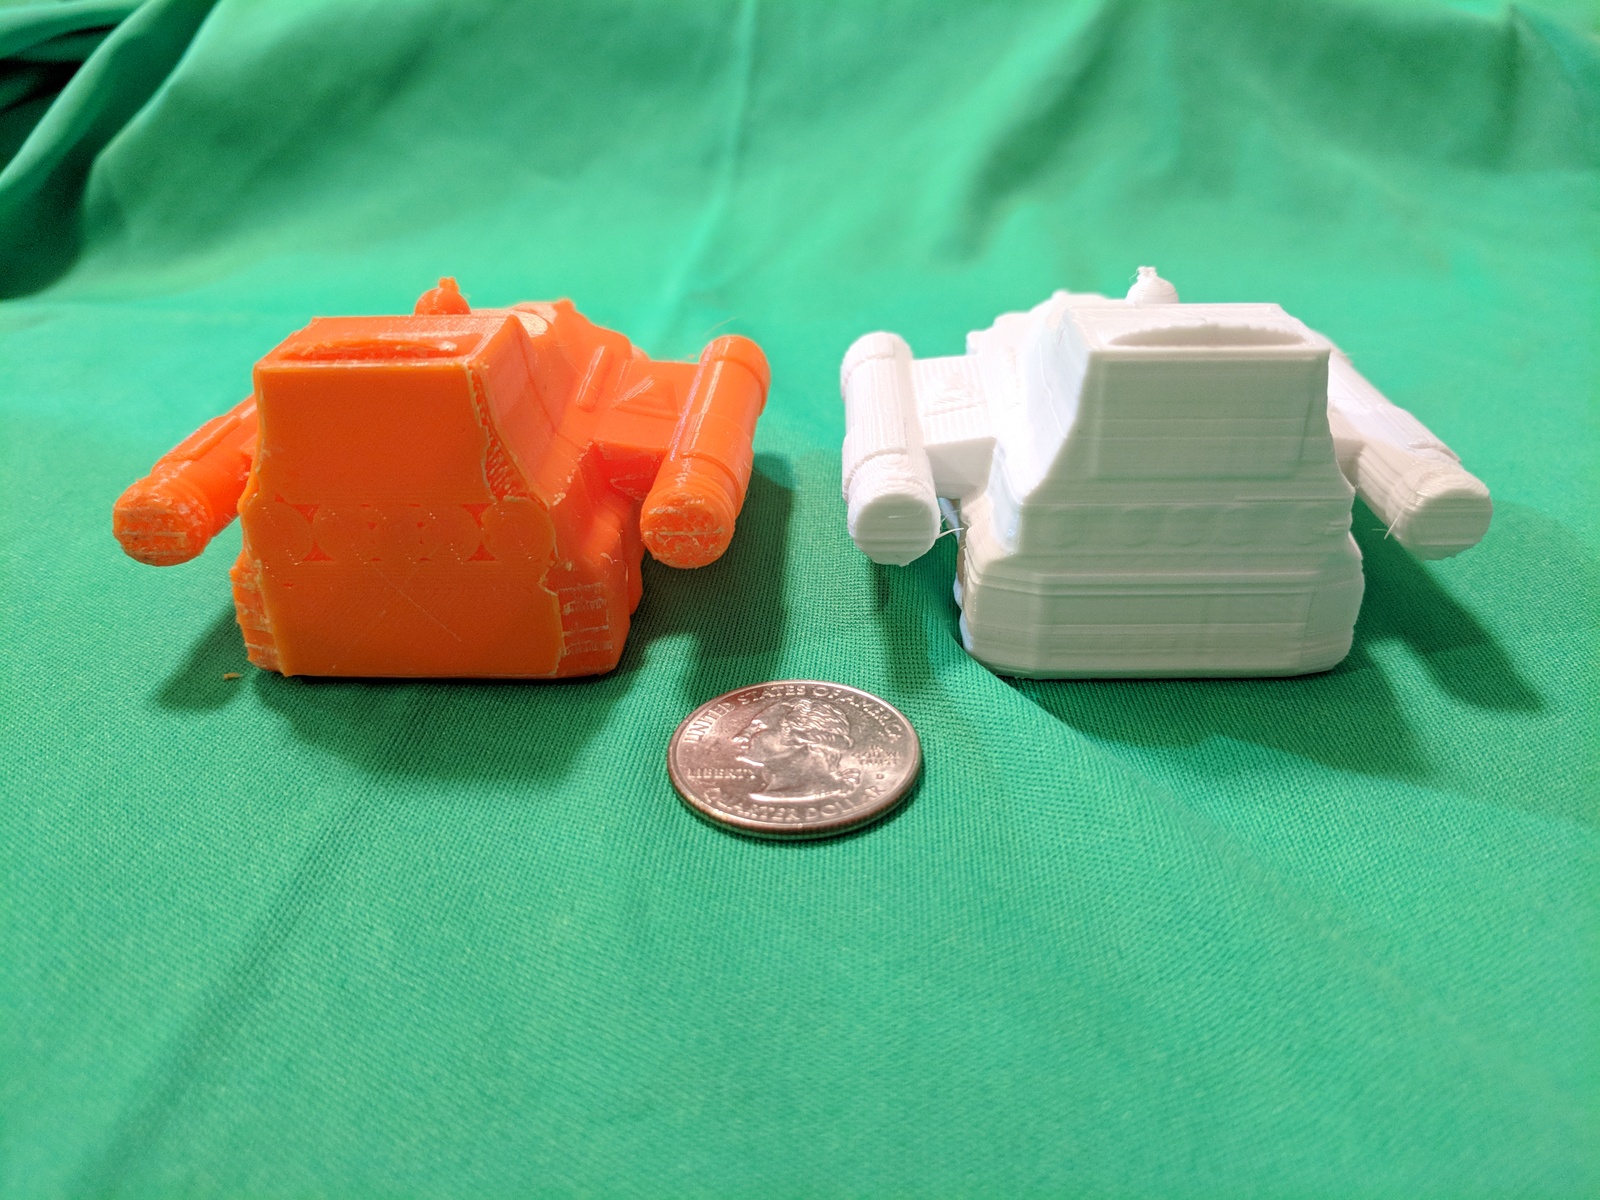
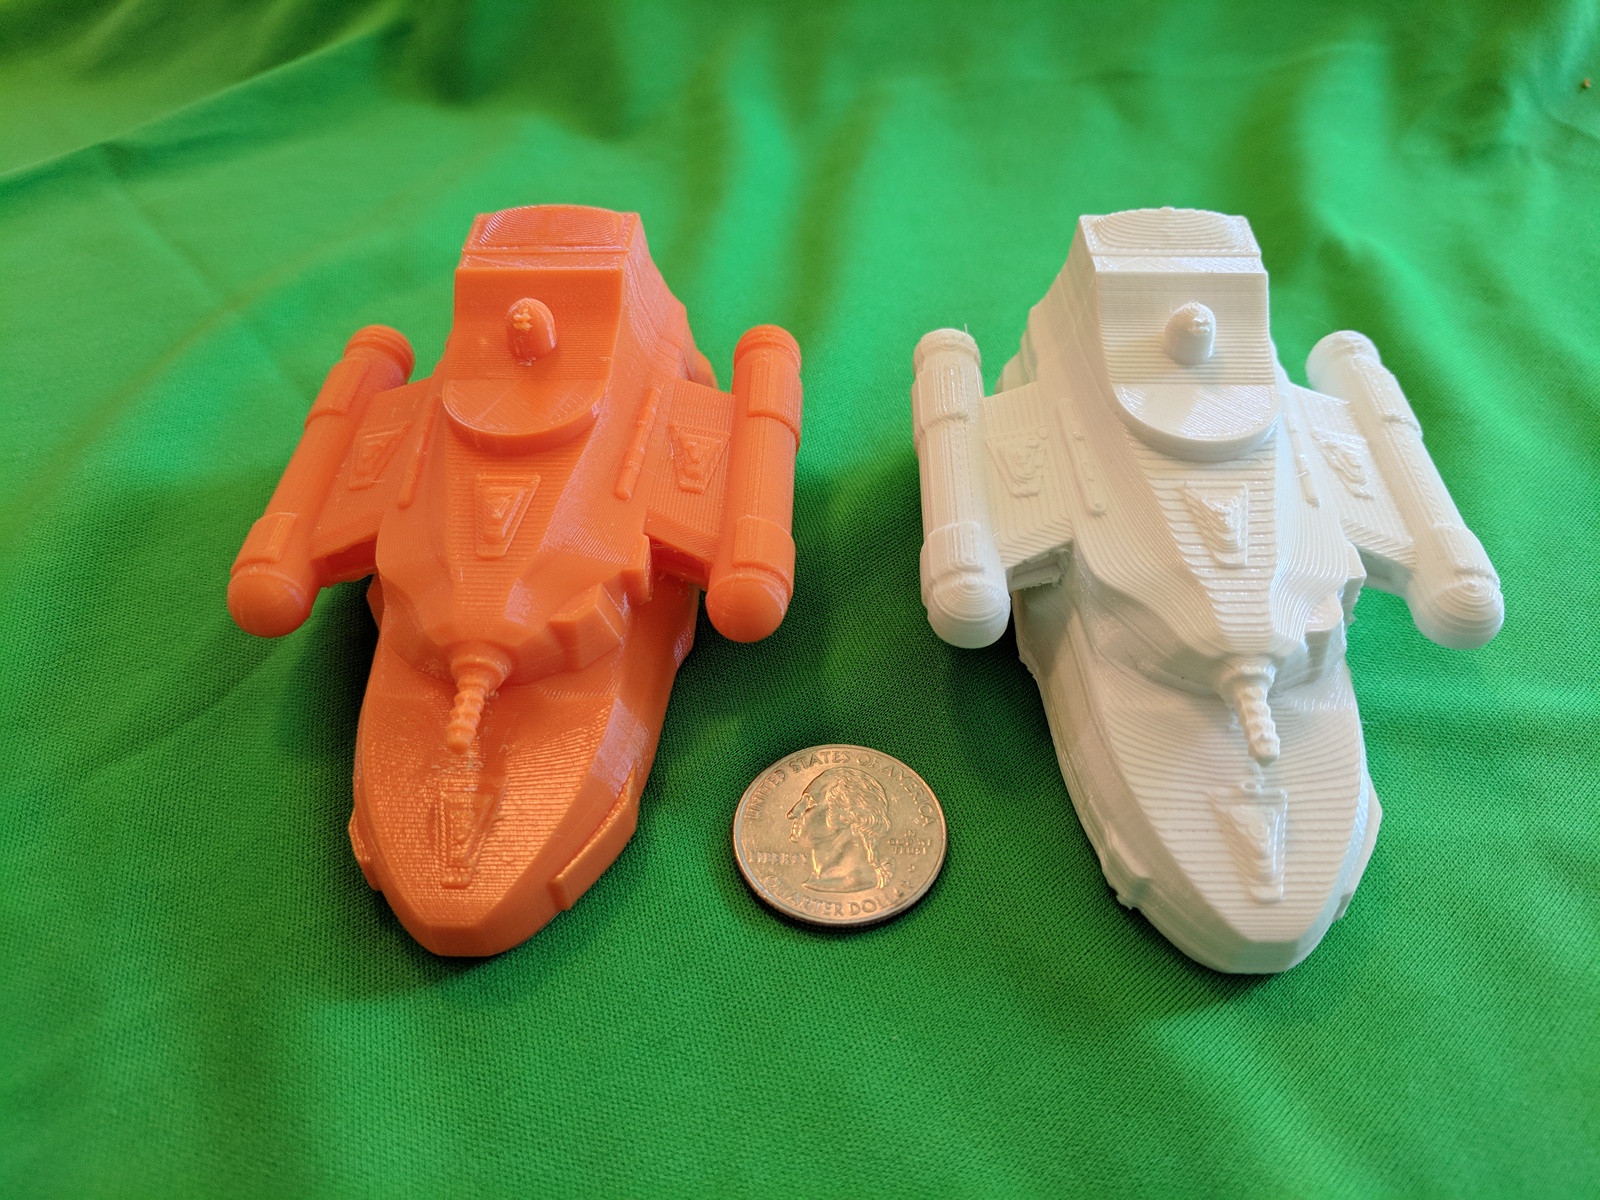
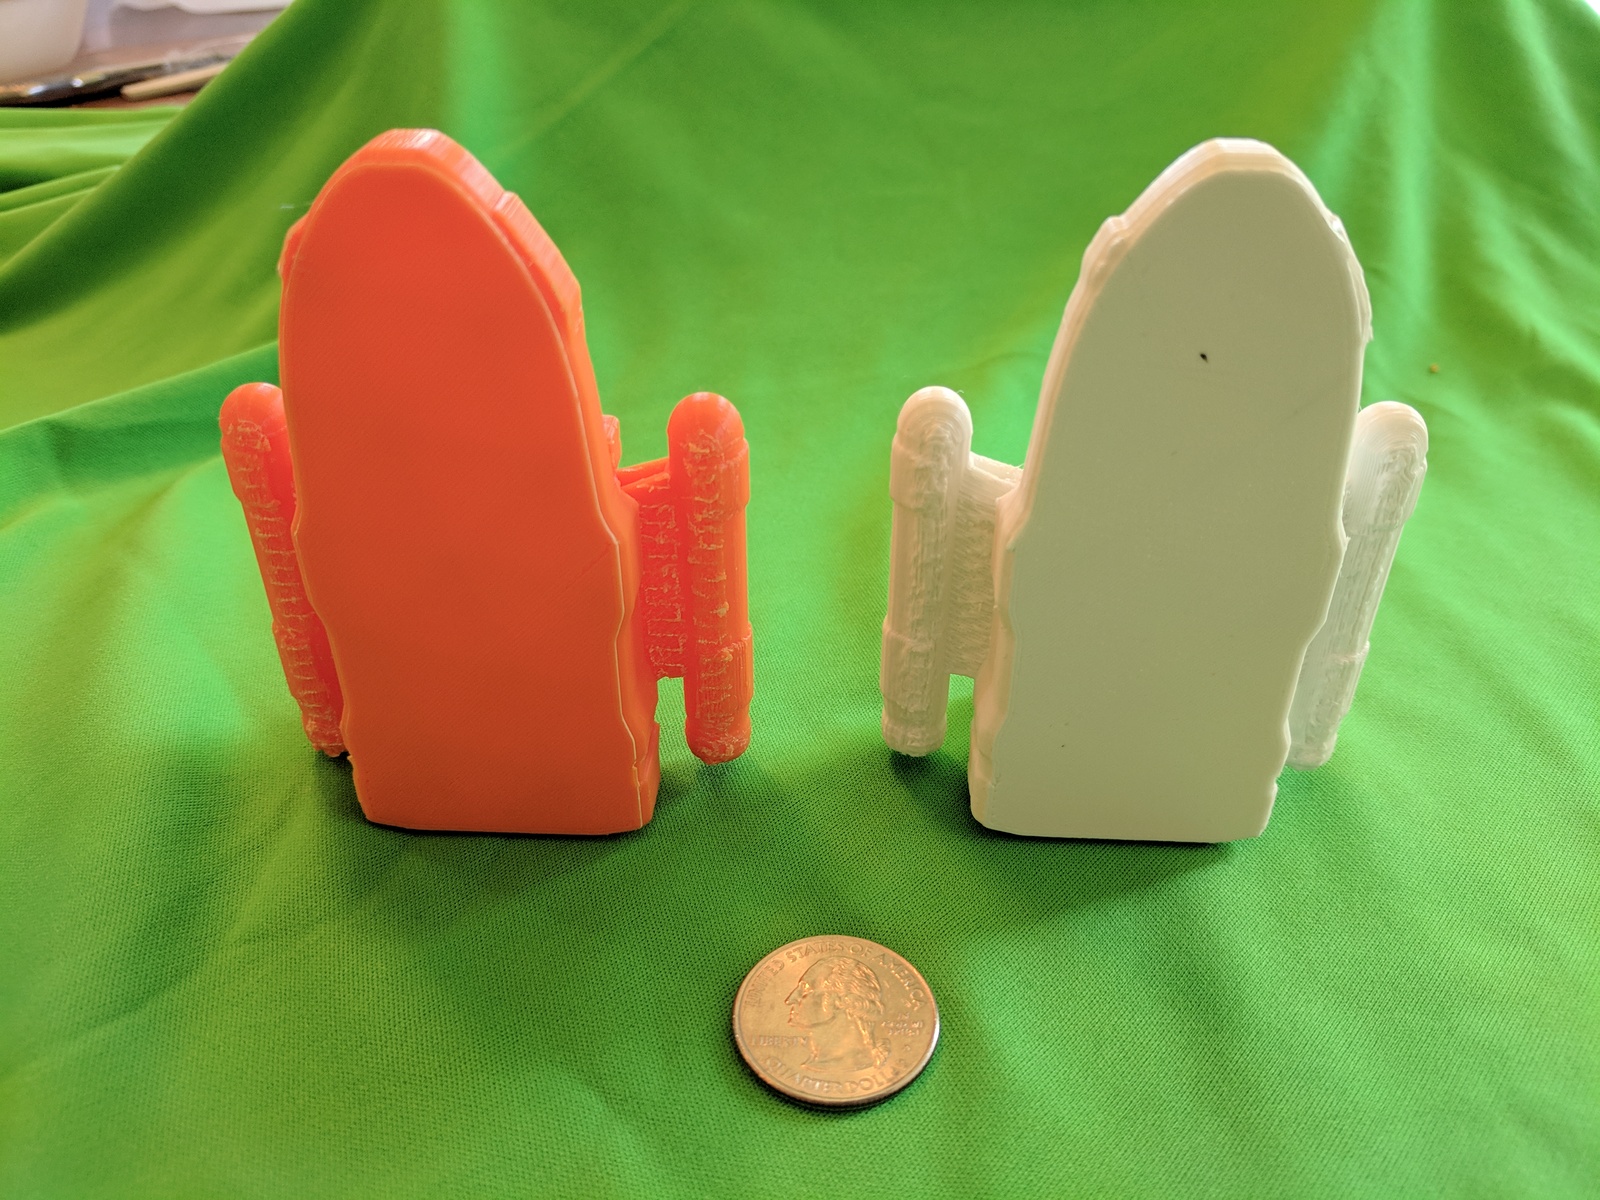
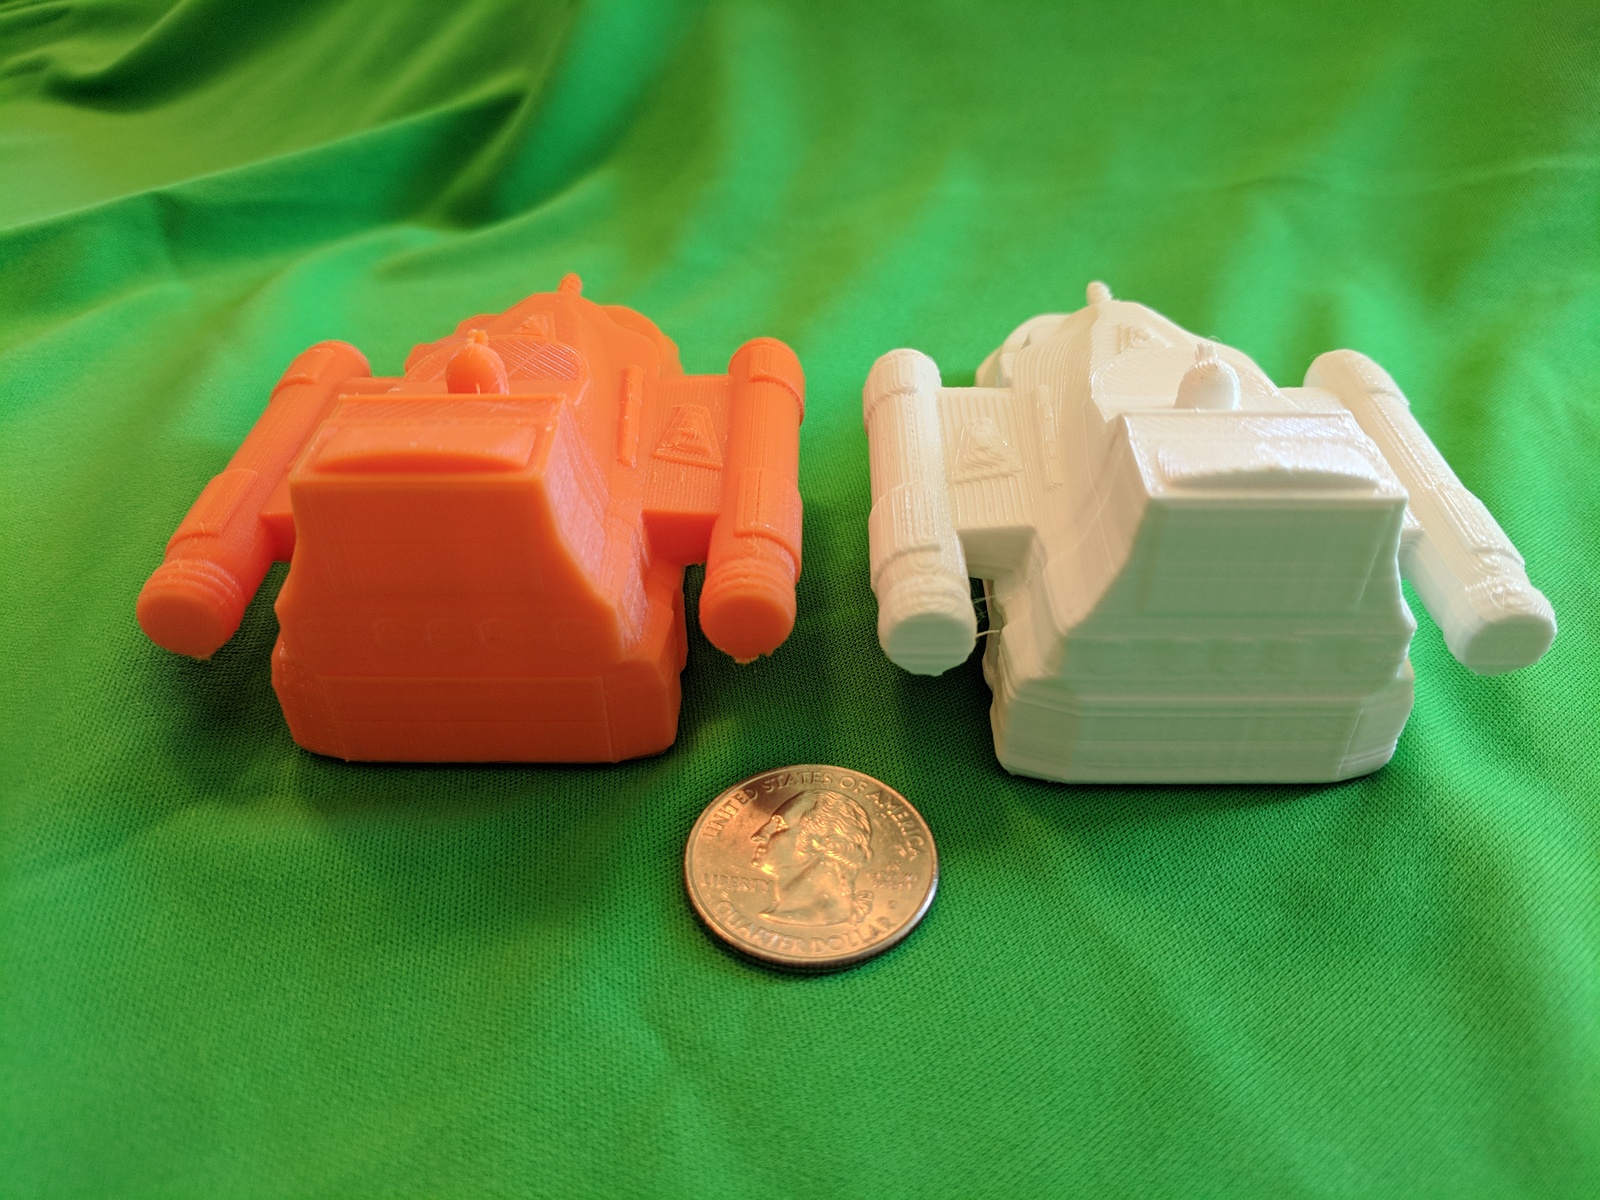
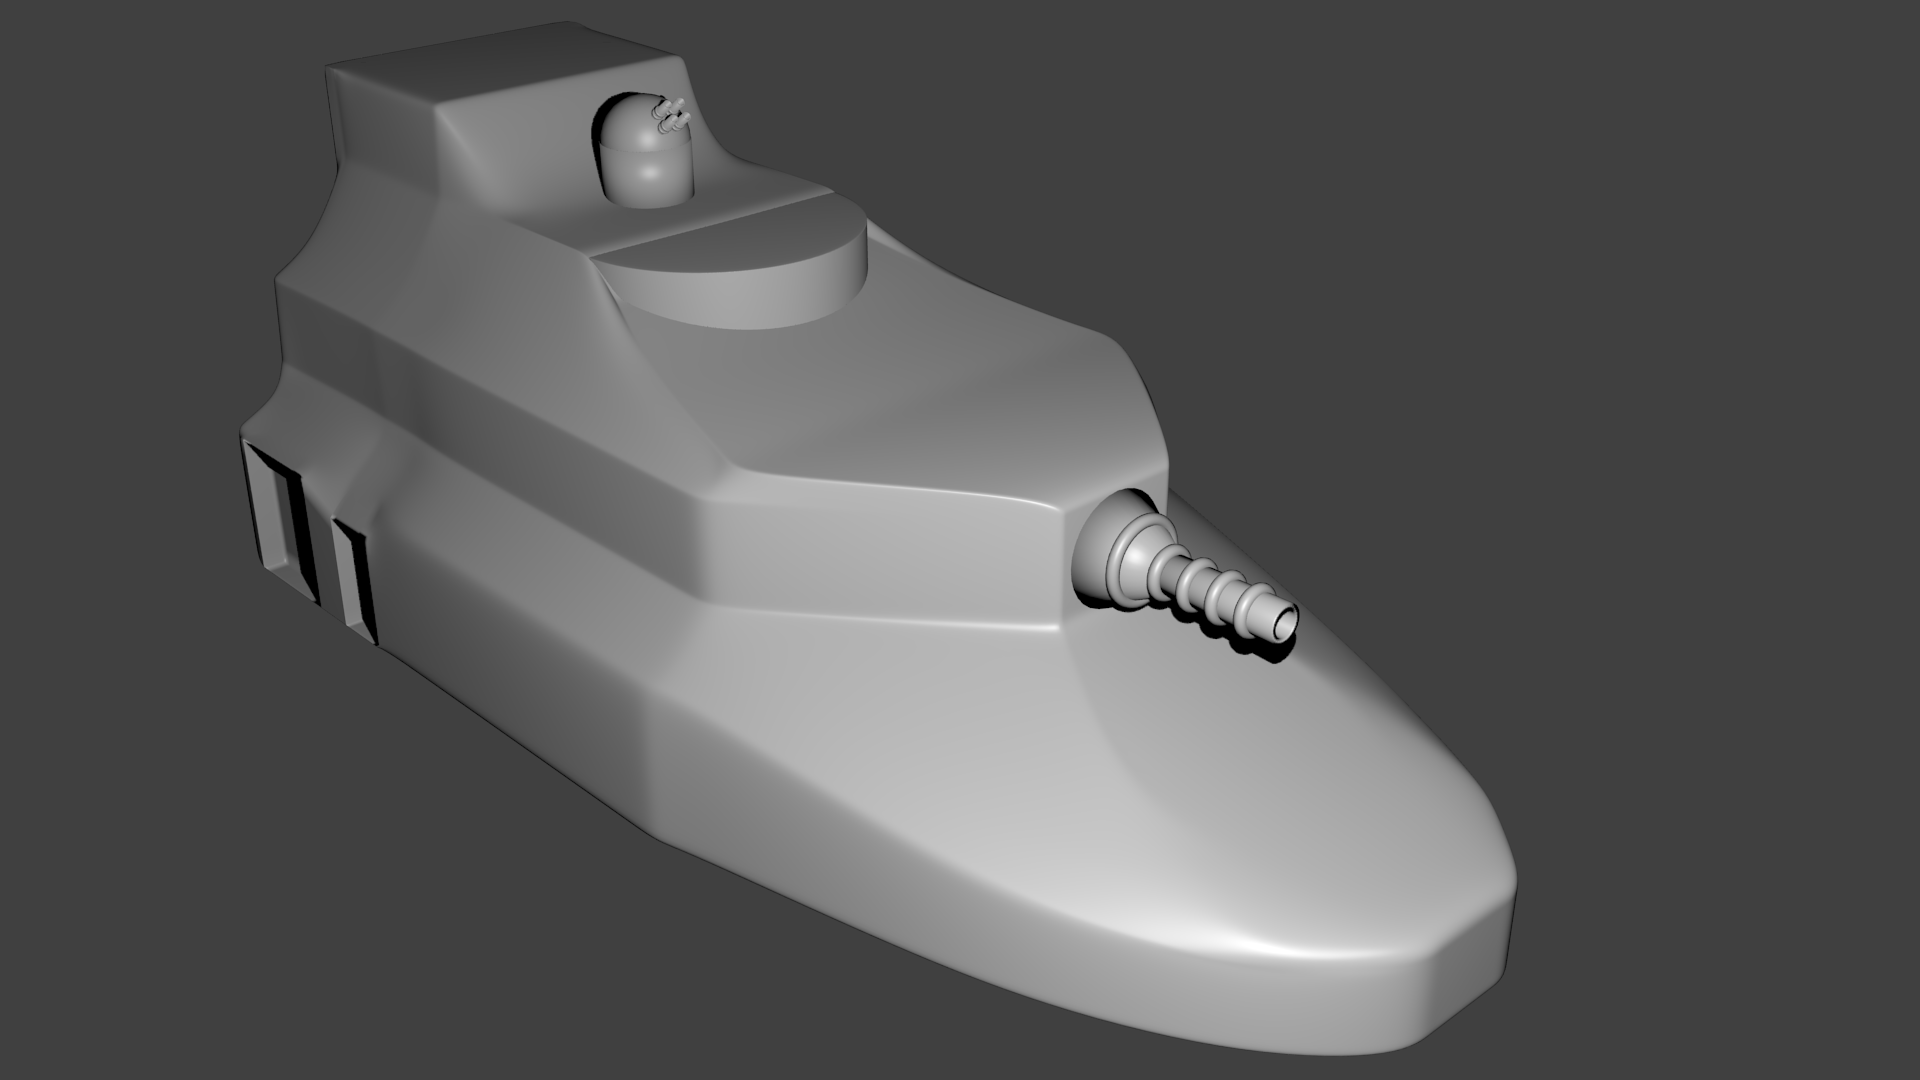
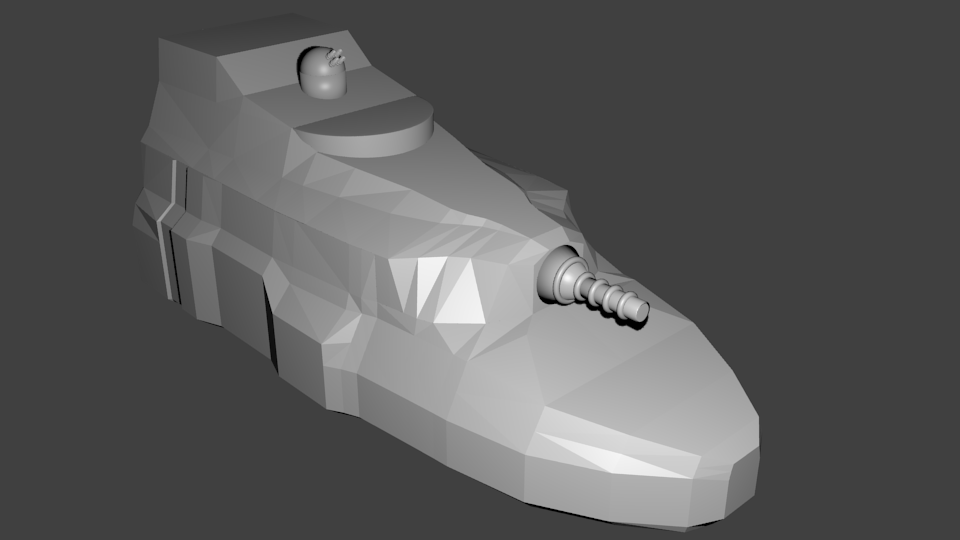
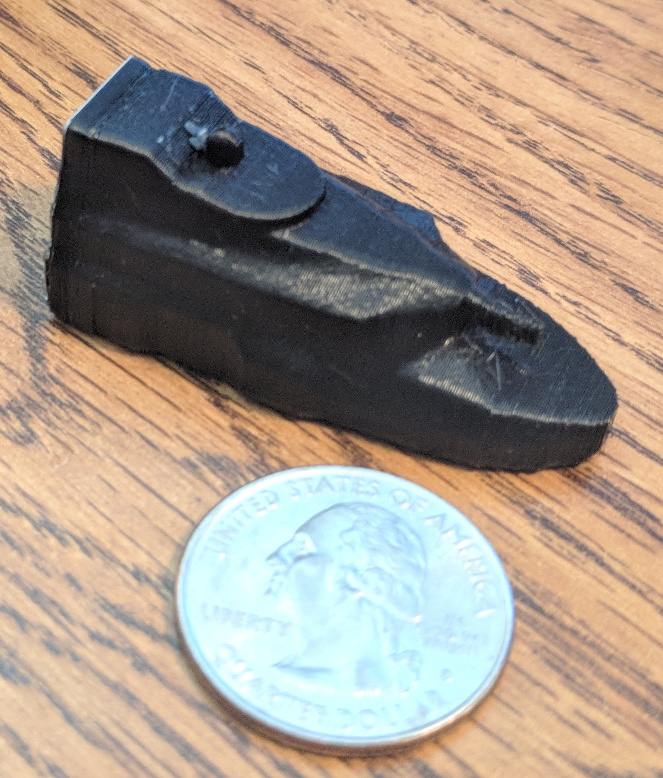
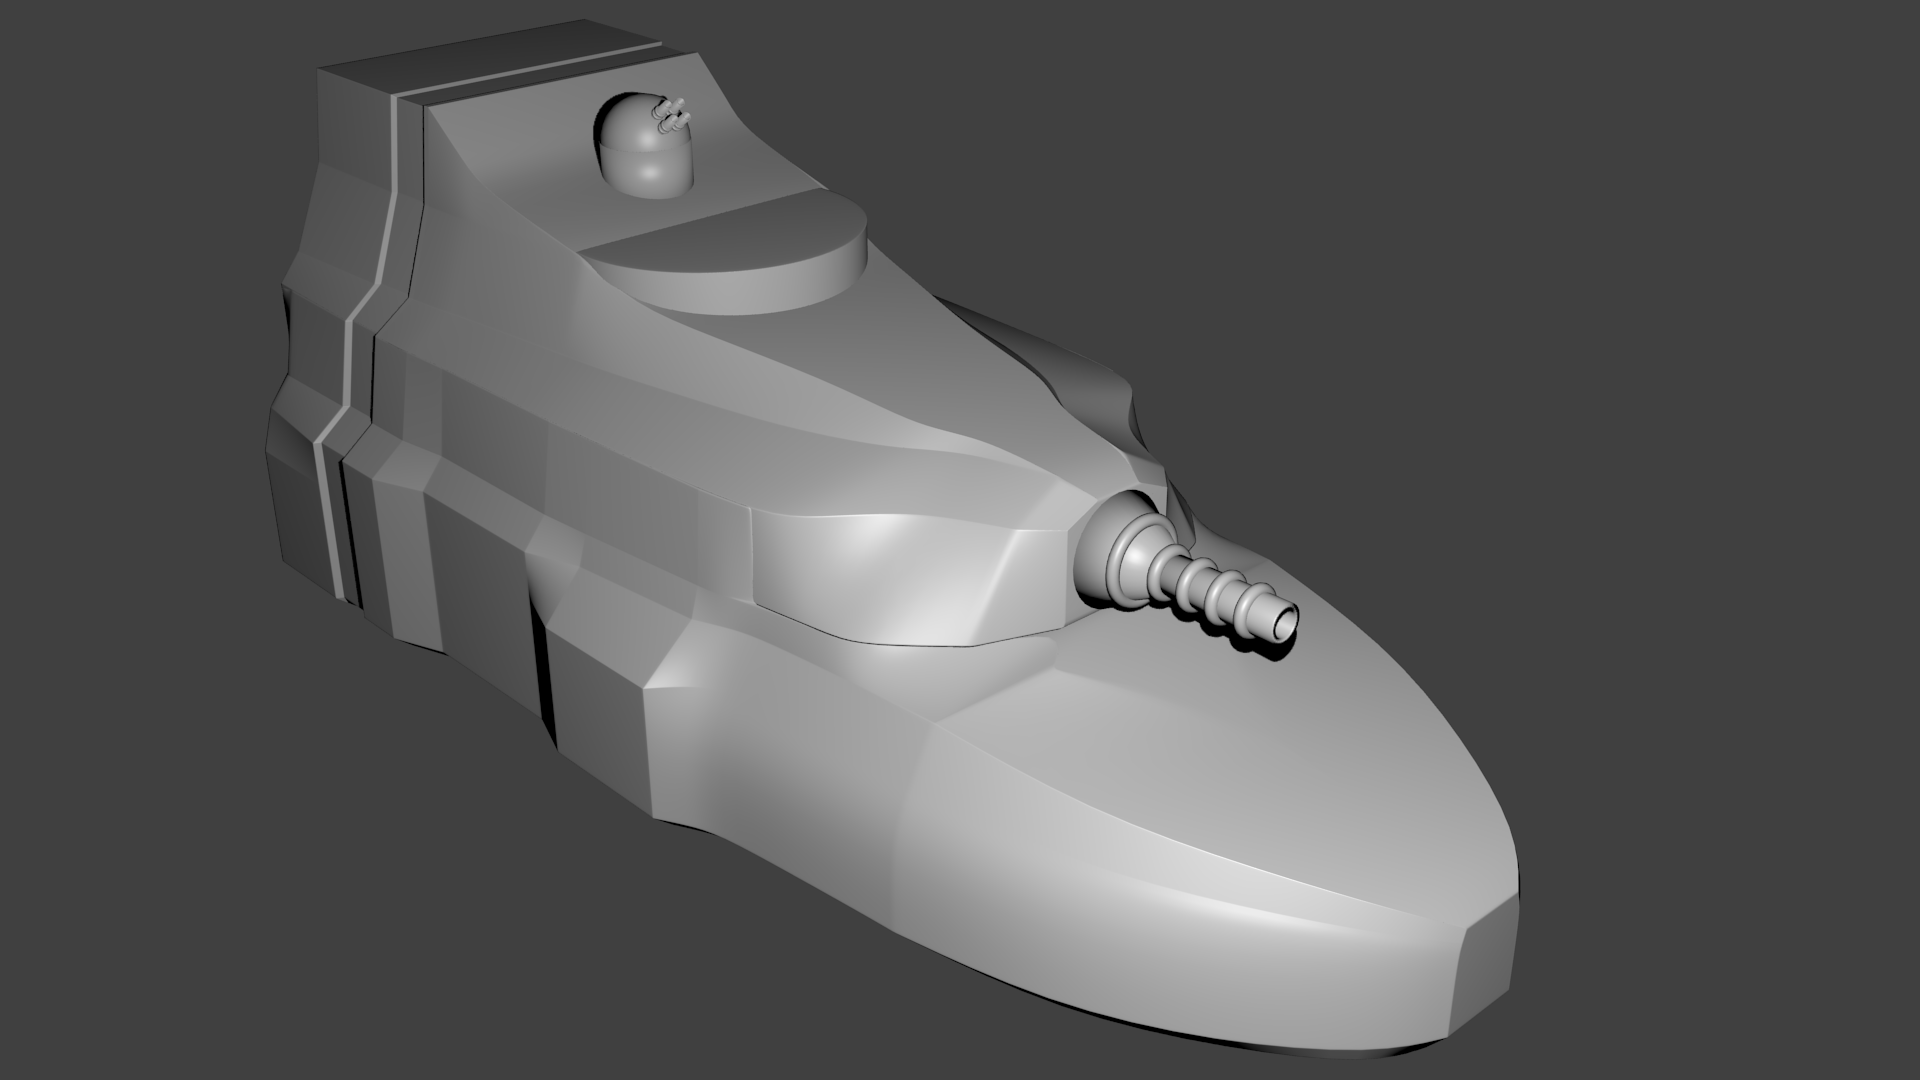
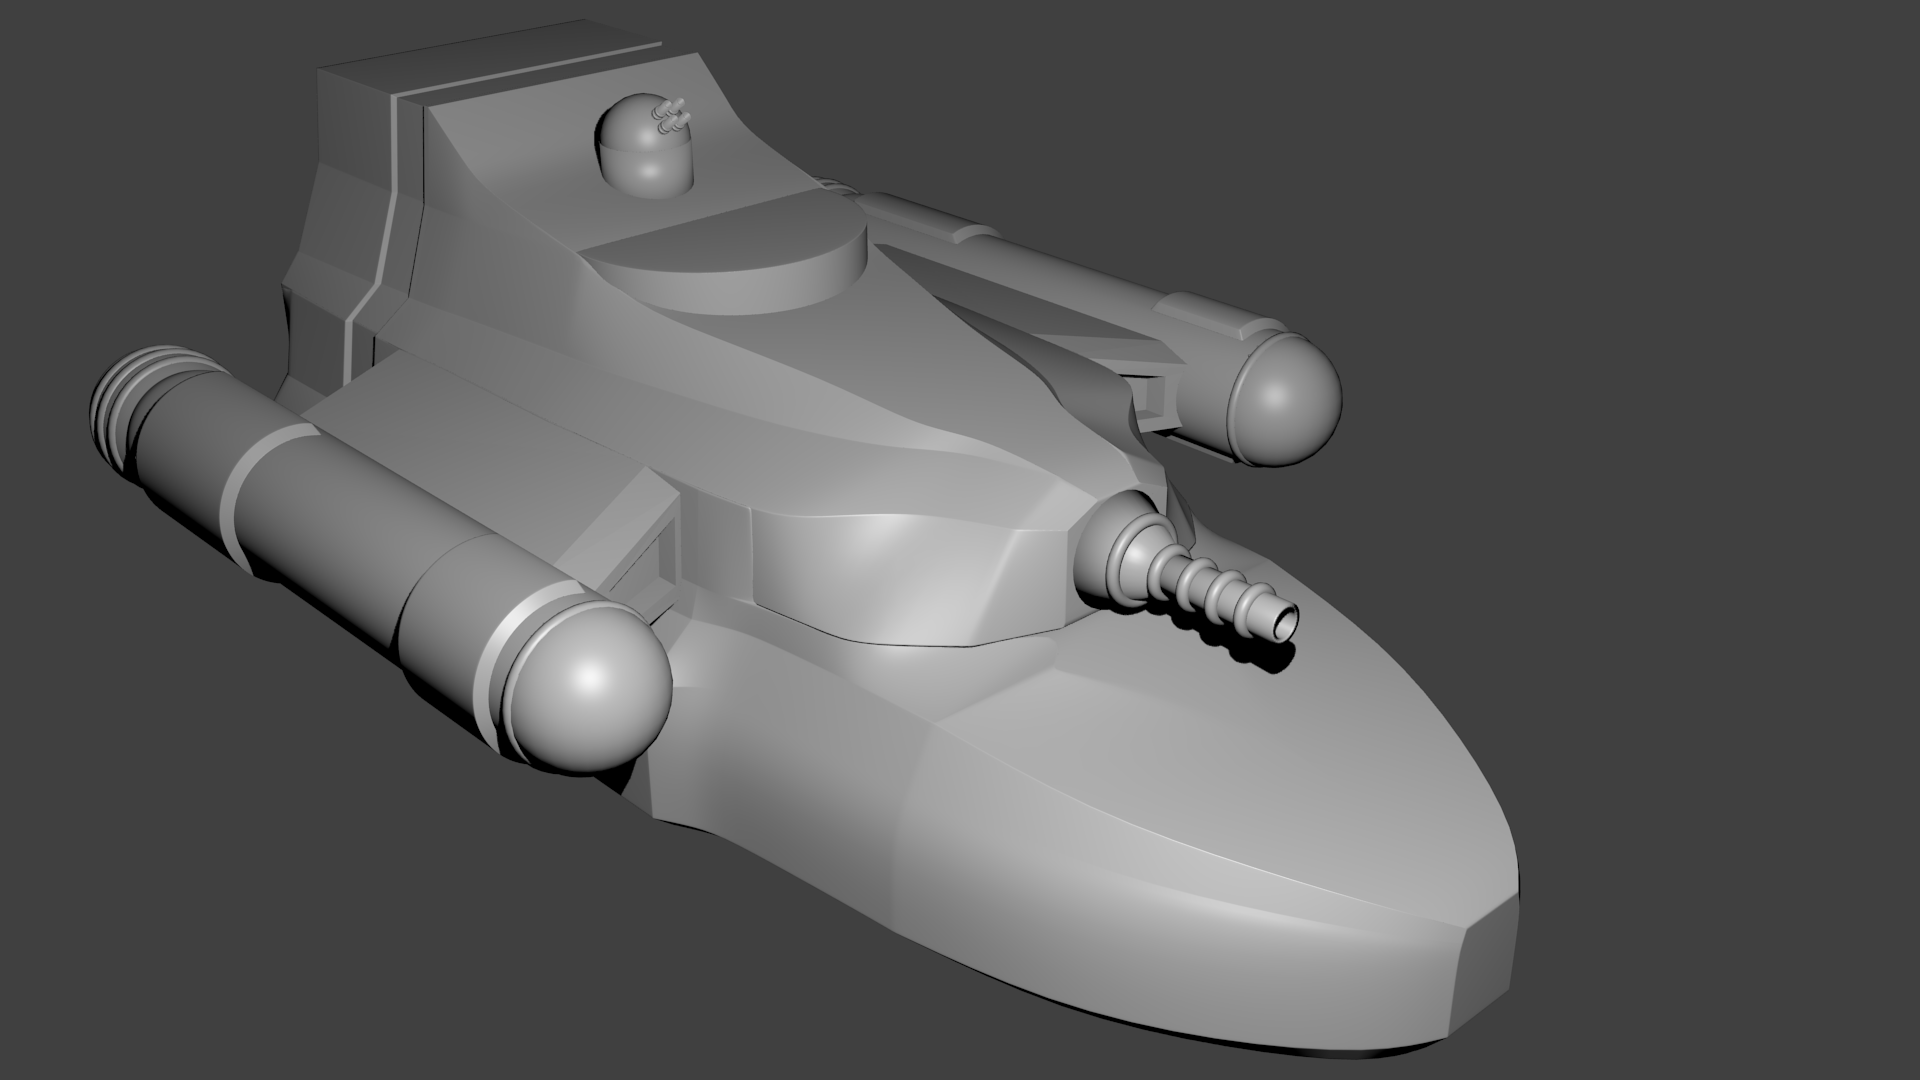
Description: This robot is like no other you have ever seen in the Frontier. It has a short squat body with six legs and two arms extending from the sides of the body near the front. Extending up from the front of the body are two long slender stalks, about 1.2 m in length that end in sensor clusters. Attached to the back, are what appear to be power packs. The arms end in manipulator hands that have three fingers and a thumb. Each arm has some sort of weapon built into it.
Referee Notes: The left arm has a built in laser rifle while the right one is sporting a distrutpor. These robots look like miniature, metallic versions of the Pursale and are designed for front line combat.
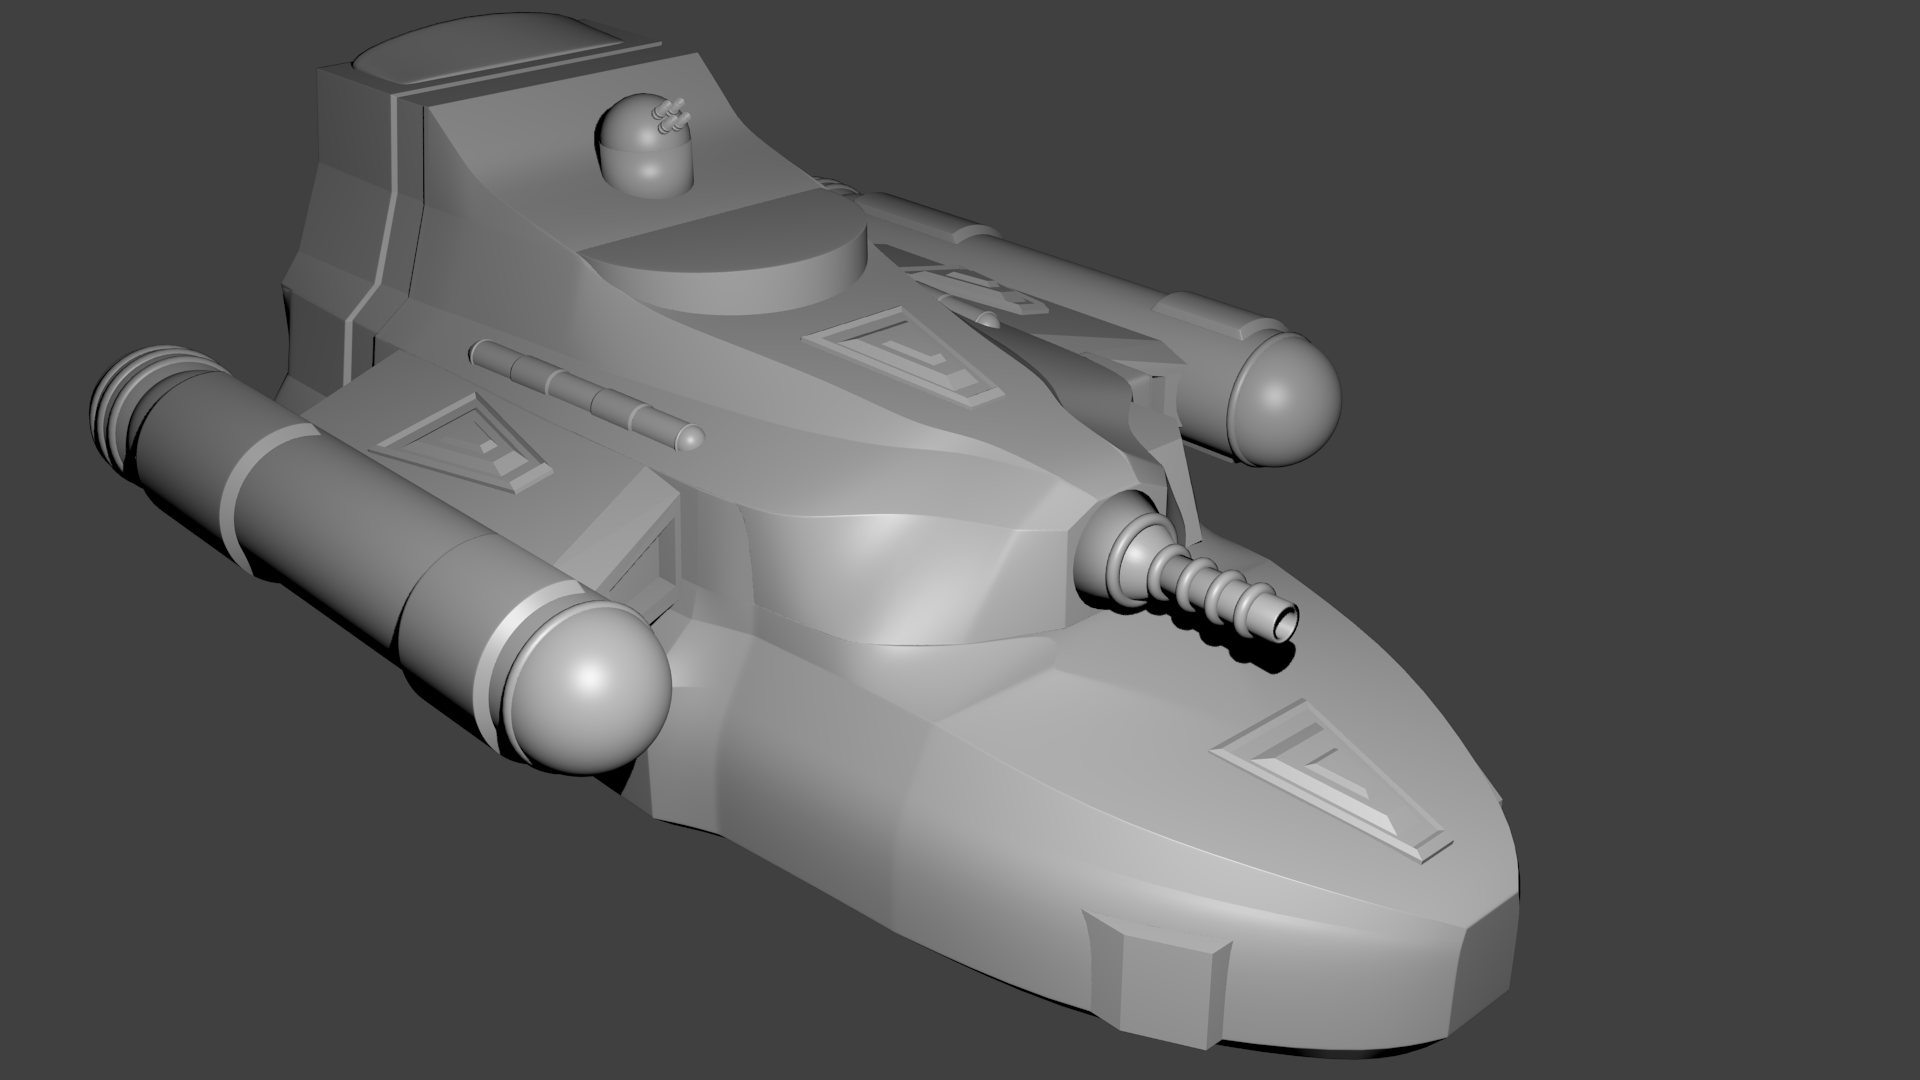
Pursale Combat Coordinator Warbot
Frame: Huge
STR: 100
AGL: 60
CRD: 70
PER: 65
INT: 65
BP: 500
INIT: 3
Move: 13, Walking
Docking: 15CU
Skills: Commander +10 (Violent Plan), Marksman +0, Warrior +0
Equipment: Audio/Visual, IR, motion,, vocal & lifeform scanners, communicator, computer link, military grade reflec & ballistic screens, 800EU power source, military grade armor, comm jammer
Weapons: Heavy Laser, Devastator, Grenade rifle with 4 EMP, 4 tangler, 8 smoke, & 8 frag grenades
Description: At first glance, this robot is basically a larger version of the combat robot, roughly the size of the Pursale themselves. It is heavily armored and has a number of large weapons mounted on (and into) its “arms”.
Referee Notes: The left arm has a built in heavy laser while the right one is sporting the devastator and grenade rifle. It has a computer link to allow coordination with a central control point but can operate independently. It can coordinate the operations of up to 64 Combat robots at any given time.
When directing the robots it controls, it has the equivalent of the Commander skill benefit Violent plan (+5 to hit, +2 damage) and uses it effectively during its operations.
It uses its grenades to attempt to disable or pin enemies and reduce visibility for its opponents. The robots can see right through the smoke from the smoke grenades and both the Combat Coordinator Warbot and the Combat Robot are shielded against the EMP blasts from the grenades the Combat Coordinator Warbot carries.
Images
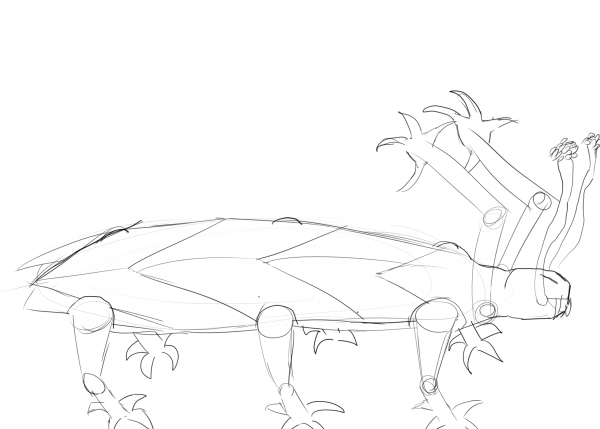
The jury is still out on the final look for the Pursale. I handed off the physical description above to my resident biology artist (aka my daughter) and she came back with a few possible sketches of what these things might look like based on the description I gave her. Here are some possible options:
Insectoid:
Puffy:
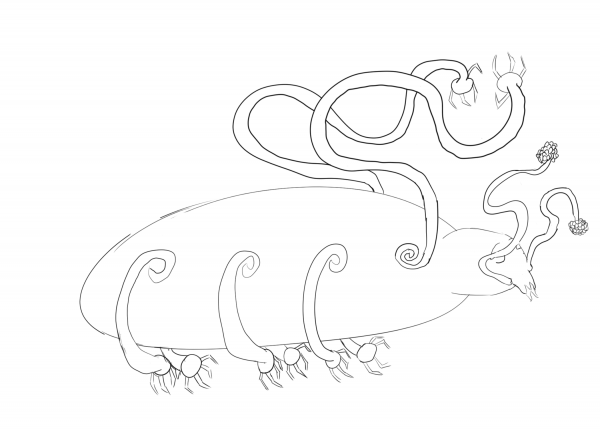
Leafy:
(she actually called this one Butterfly)
 The interesting thing is that I didn’t give her any direction at all. I was actually thinking more of a leathery, rough body like an elephant or rhino or a smoother leathery body like a seal or hippo.
In any case, work is progressing. I’ve basically finished section 3 of the module and have sent it out to my Patreon supporters. If you’d like to get the early releases, consider supporting me on Patreon.
What do you think about the race and robots? What physical description came to mind when you read the write-up above? Let me know in the comments below and it might get incorporated into the final version.