In part 2, we ended with the final version of the hull model for the Scavenger Transport and all that was left was to add in some of the details, most notably the doors and other bits that extended through the hull. After that, it is just “decorations” to add a little character.
Finishing the Physical Model
Adding in the bay doors was straightforward. They are just basically rectangles after all. For the smaller shuttle and workpod bay doors toward the back on the lower level, I added a split vertically down the middle for the doors to open and swing outward on the sides. For the larger cargo and runabout bay doors, I decided that they would open top and bottom so the seam detail runs horizontally. In the case of the cargo bay doors, the lower portion of the door can double as a loading ramp if necessary.
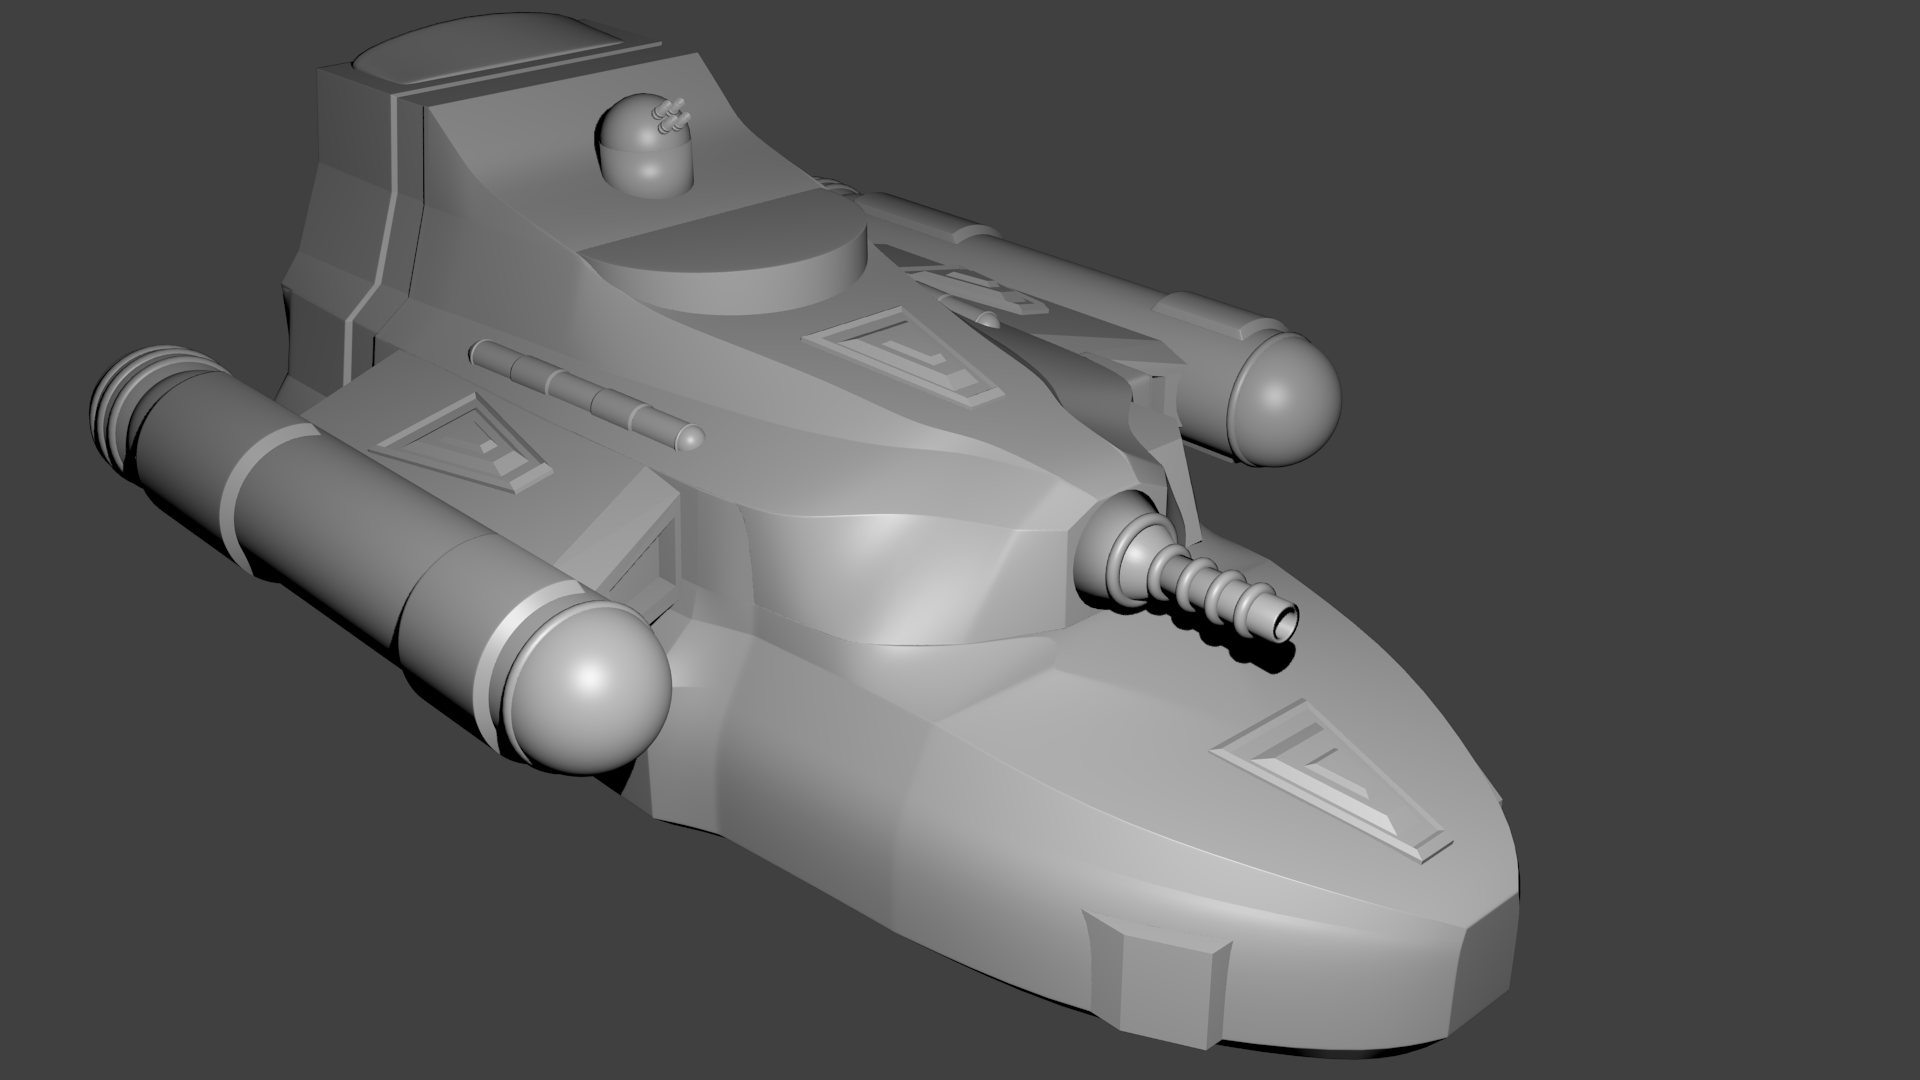
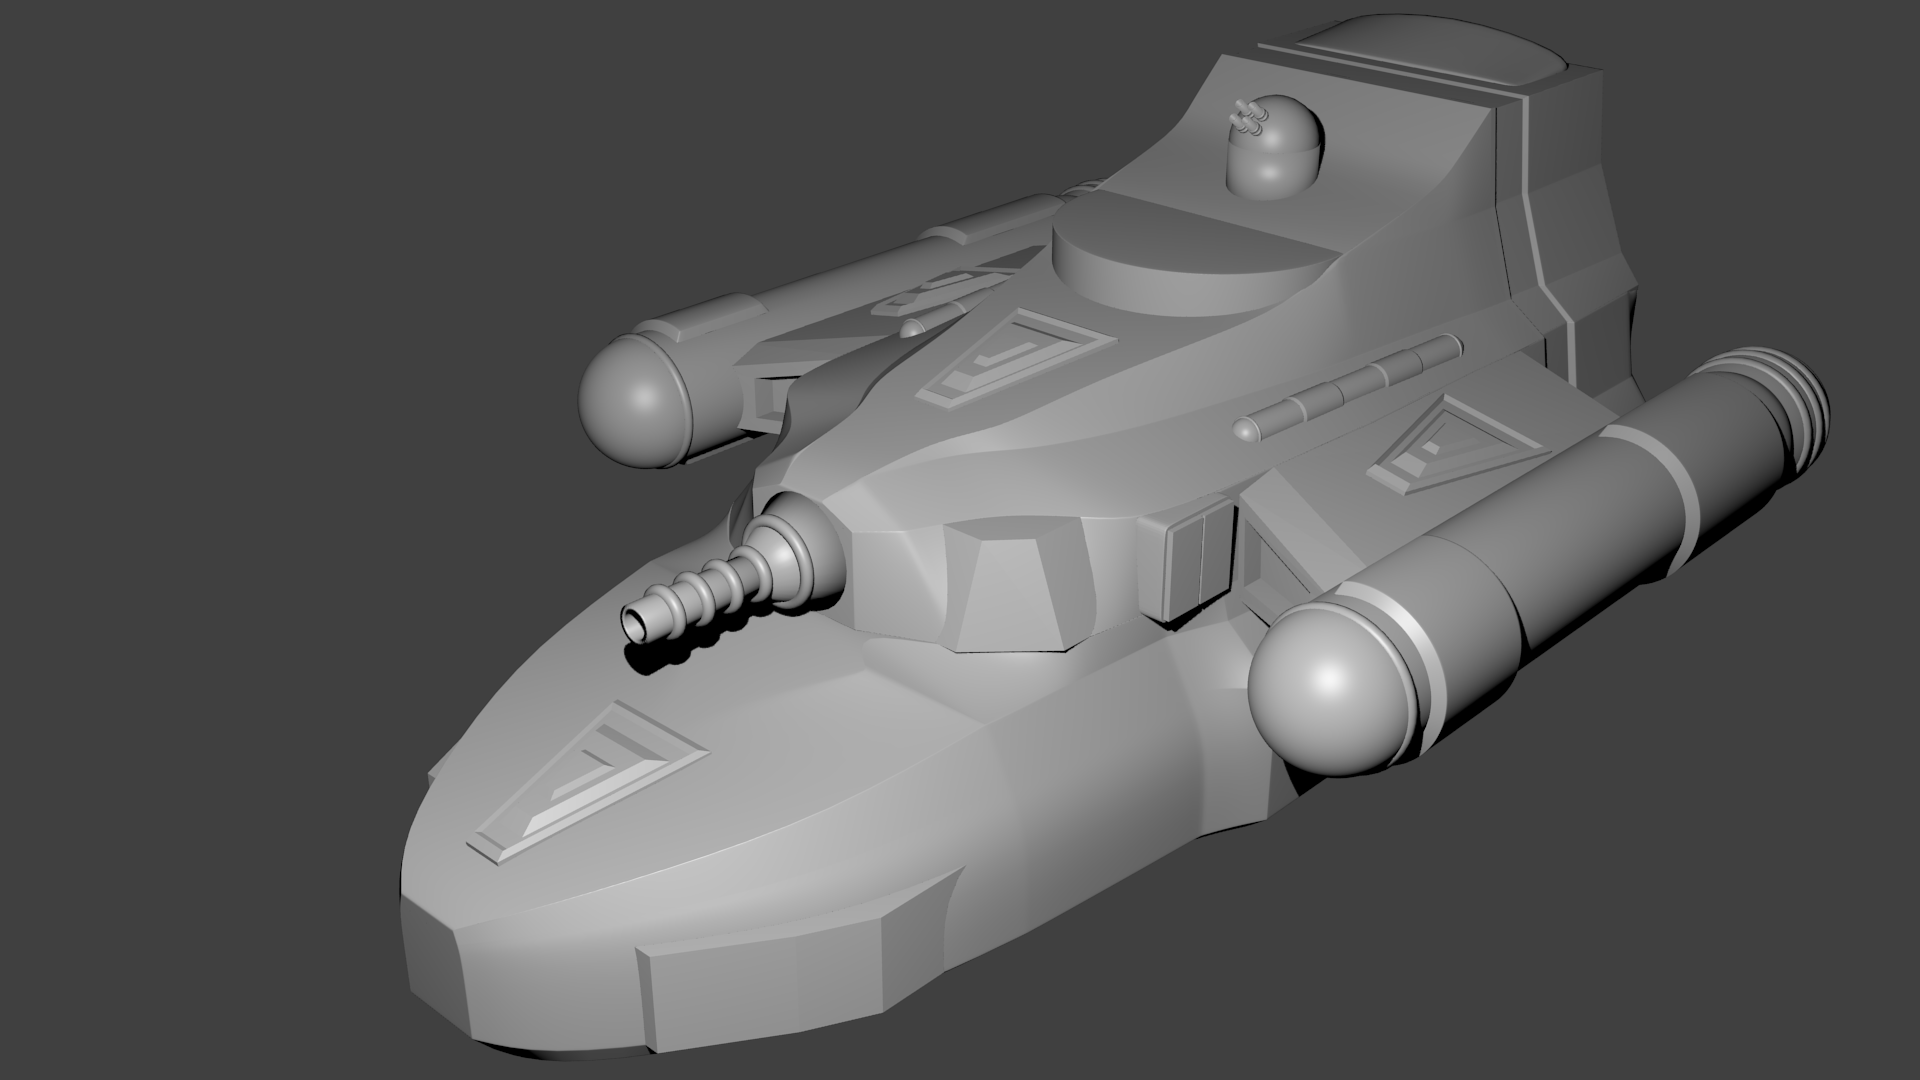
Next I wanted to break up the hull a bit so it wasn’t so plain and I created a little triangular design that I placed on the lower and middle decks for and aft of the ion cannon as well as on the wings. I then added a cylindrical structure on either side of the second level. Next, I added a bit of a domed structure on top of the runabout bay. Finally I created some large (2m diameter) portholes and placed them on the back of the ship on deck two between the cargo bay and runabout bay. These are positions to be in the rec room at the back of that level and the two cabins back there as well.
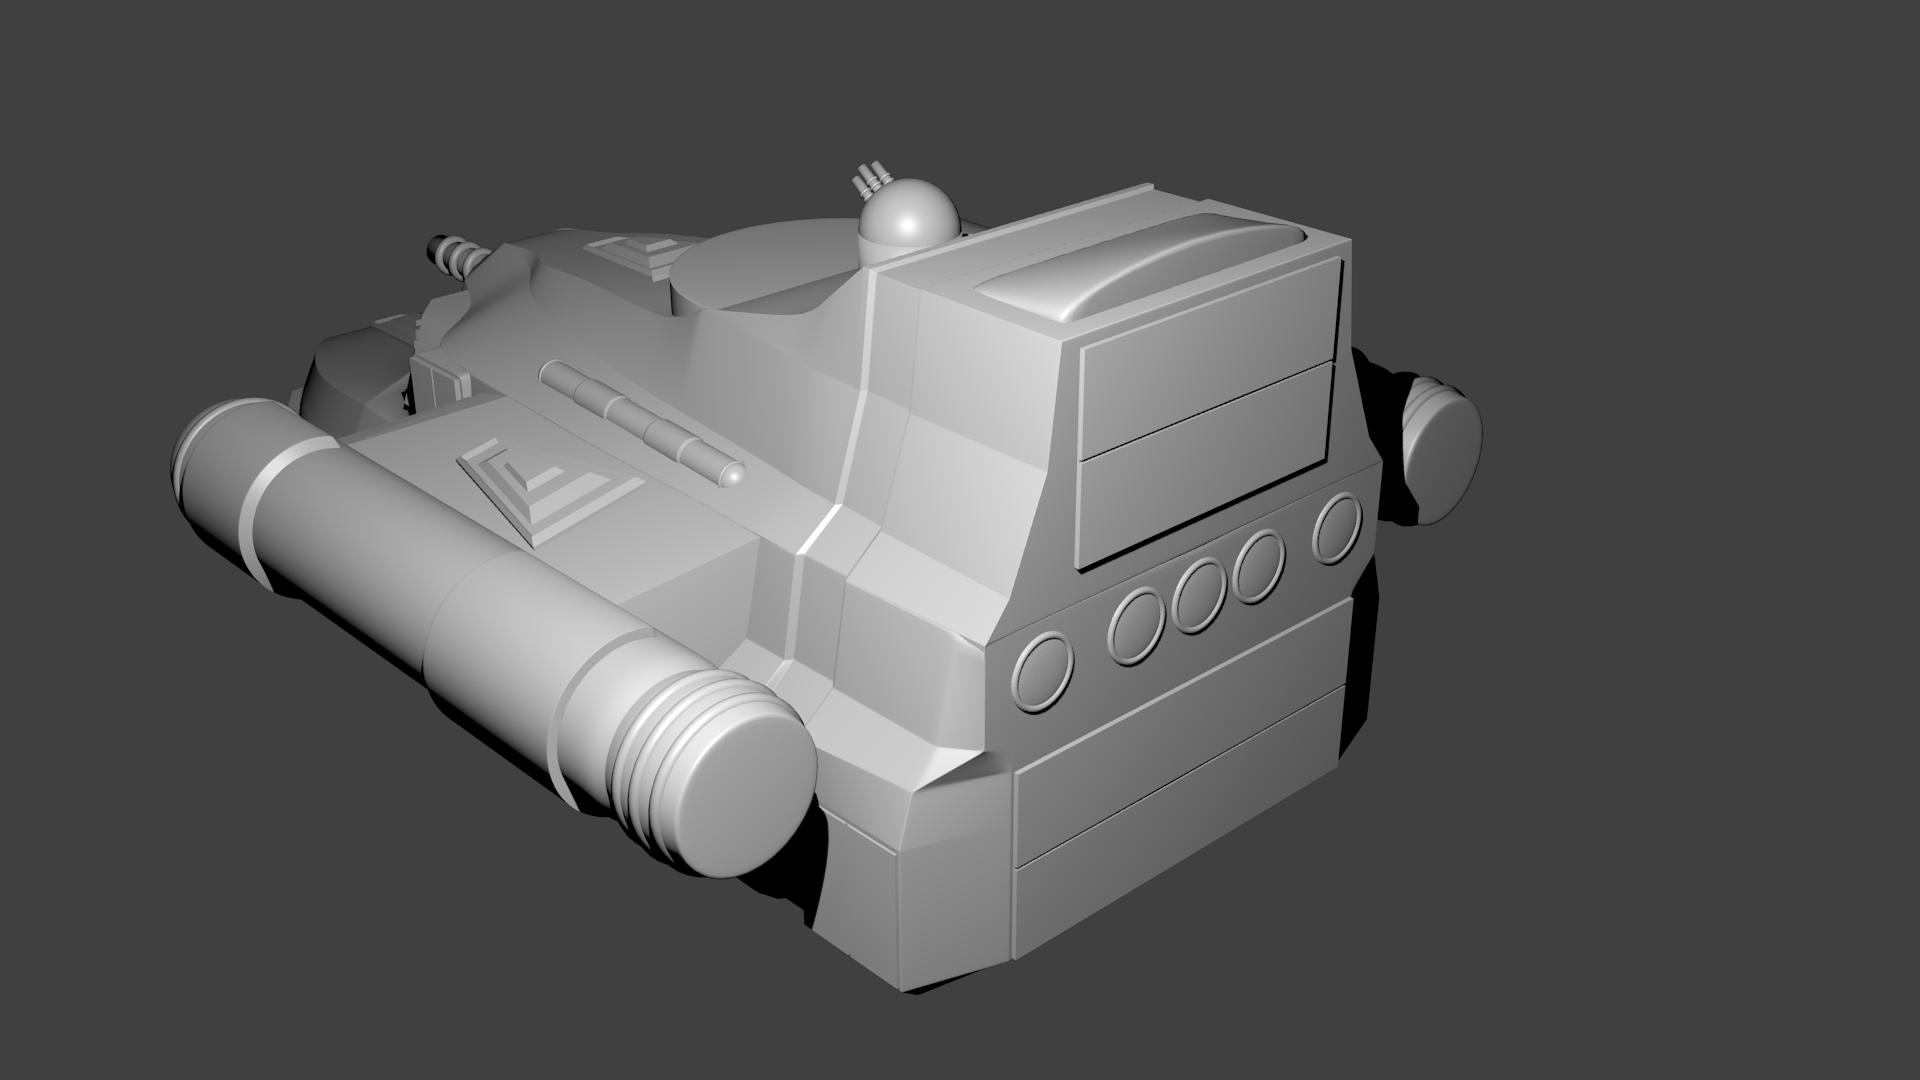
At this point I was looking at the model and thinking it was looking pretty good and then I realized: I forgot to add in all the bits and pieces that stick out through the hull! Again these were fairly straightforward as they are fairly simple shapes. I tweaked the block that was the sensor array extension as it was sticking too far out. The rocket launcher (deck 1, starboard side) may get some tubes added to it for the missiles to launch out of in the future, but for now, I just left it as a solid block. I also rounded the edges of the airlock a bit.
Speaking of the airlock, after adding it in, I realized it was really poorly placed. It’s right up against the wing and behind the front part of the engine. Luckily the wing didn’t overlap it at all. I didn’t even consider it’s placement when I made the wing so I was lucky I didn’t have to go back and tweak that. It probably would have been better to put it on the lower level toward the front of the ship. I guess the engineers weren’t thinking too hard about how the engines were going to be placed when they designed the fuselage :-). However, its poor placement gives a bit of flavor and something to hassle the crew with (and for them to grumble about). It truth, it’s more of a backup measure anyway since the ship isn’t designed to actually dock at stations but rather pull up next to them and transfer via the shuttles and open cargo bay doors. So in practice it’s only a minor annoyance.
Once I had these last structures added, the ship was all done.
3D Printing
With the physical model done, it was time to start testing out 3D prints. I started with a simple small, low resolution print. This was done at 0.2mm/layer and at the native scale of the model (1/1000 scale). It only took about 50 minutes.
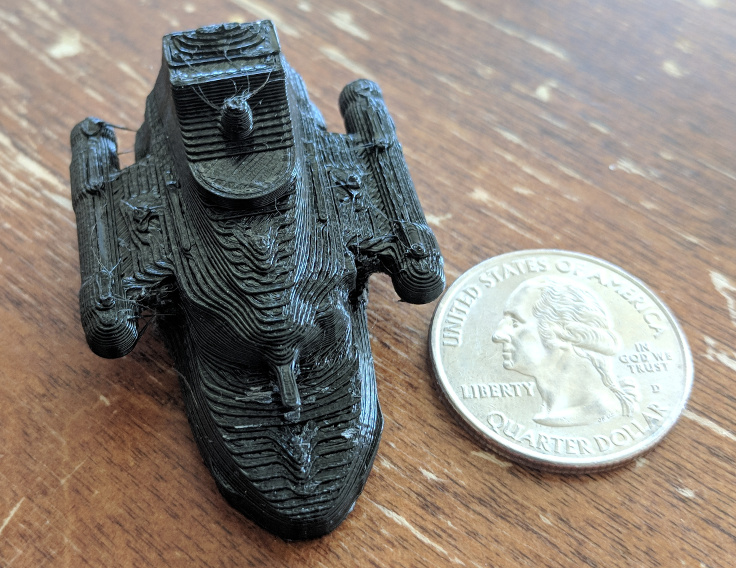 You can definitely see the print layers on the model. There are also hints of the details on the body, wings and engines although the size of the features are such that they just don’t show up at at this scale. This particular print was done with the bottom of the ship on the build plate. That may not be the best way to print as we’ll see in a minute.
Since it look good enough small, it was time to scale it up. The next print was a 1/500th scale print, double the size of this one. Again I printed at 0.2mm/layer and with the bottom of the ship on the build plate. Although this time I switched to white plastic. Here’s a picture of that print, together with the smaller black print, our trusty quarter, and a Star Frontiers Assault Scout model at the same scale as the larger print. This print took about 5 and a half hours
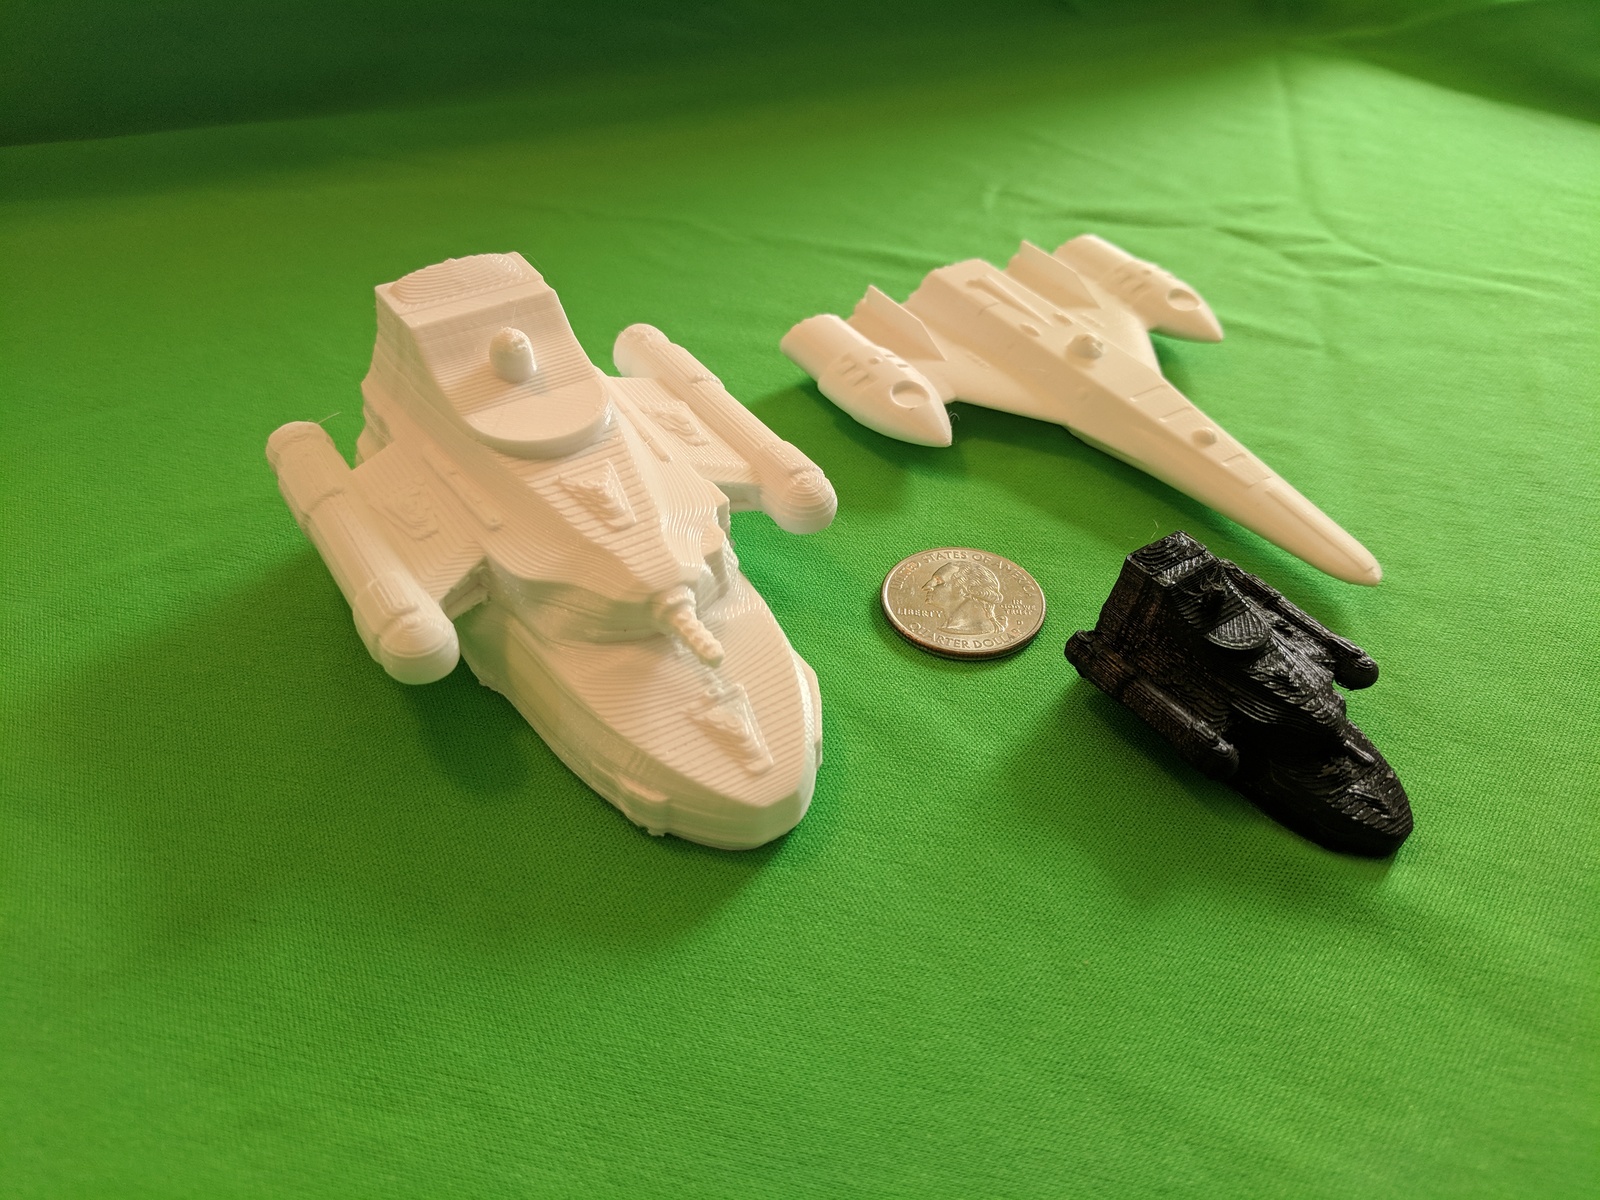 If you look closely at the larger print, you can still see the layer lines although since the print is bigger, they are not as pronounced. You can also see the turrets on the laser battery print at this scale. They were just too tiny to print on the smaller scale. You’ll also notice that the assault scout model in the back looks super smooth. That is because it was printed at 0.1mm/layer and was printed standing up.
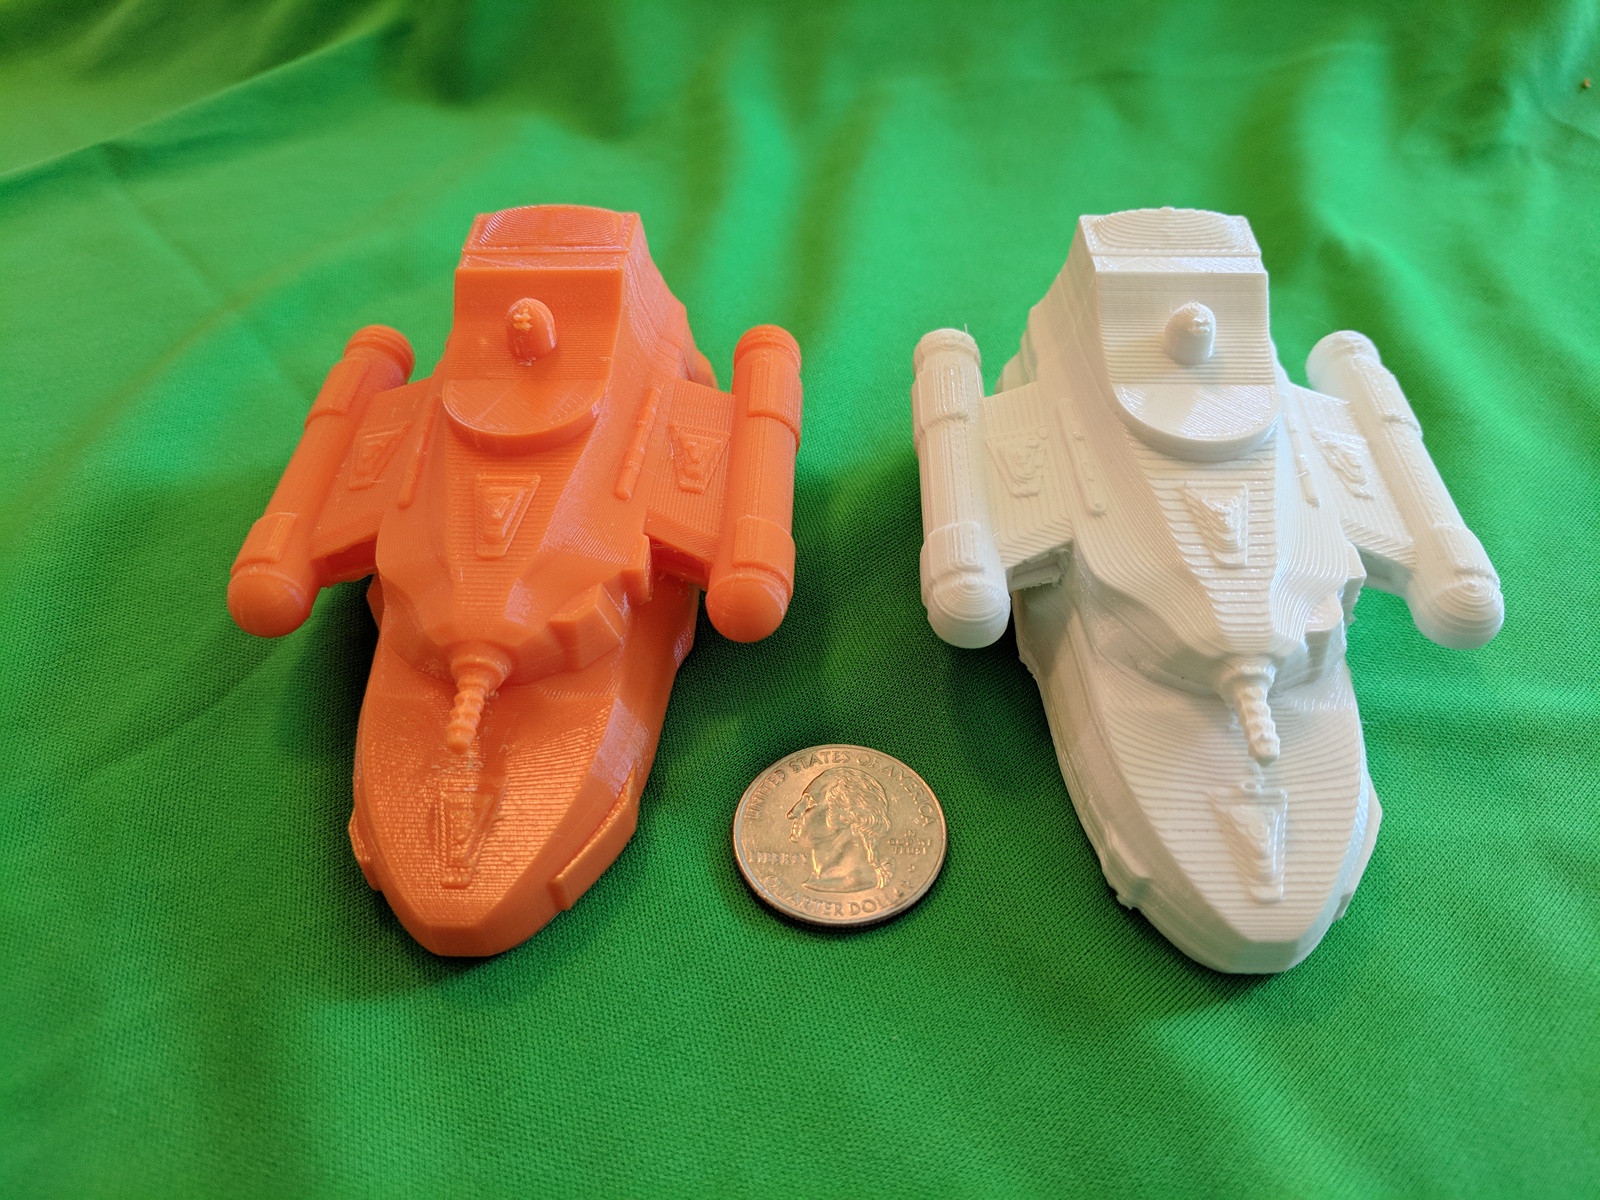
So that’s the next thing to try. My 7-year-old son really liked the ship and wanted an orange one (that’s his favorite color). Since I have a spool of orange filament for my printer just to print things for him, I swapped out the white for orange, flipped the model on it’s back, and started a 0.1mm/layer print. Here is the result, five and quarter hours later:
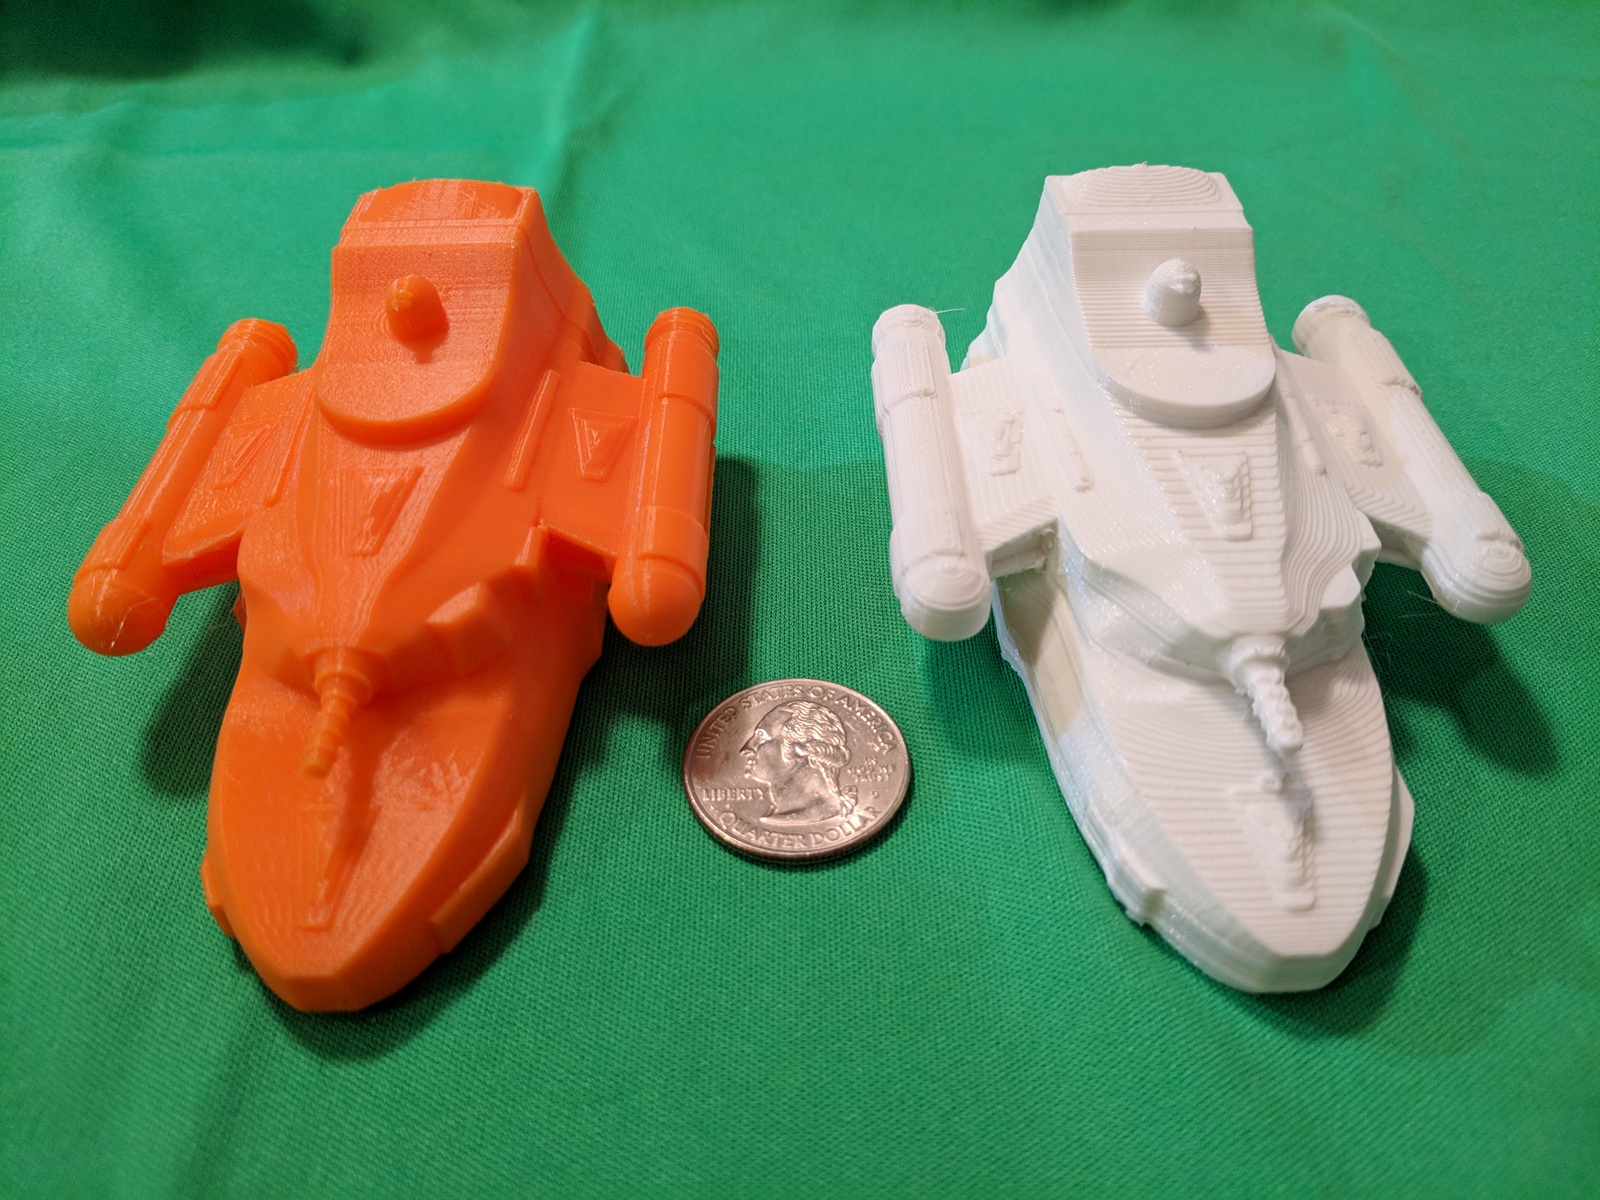 The surface on this one is much cleaner. That is partially due to the smaller print layers and partially due to the orientation of the layers relative to the model, but more of the latter. A 0.2mm print in this orientation would look pretty good too. The bigger difference, however, is the backs and undersides of the models. Let’s take a look at those. Here are the undersides:
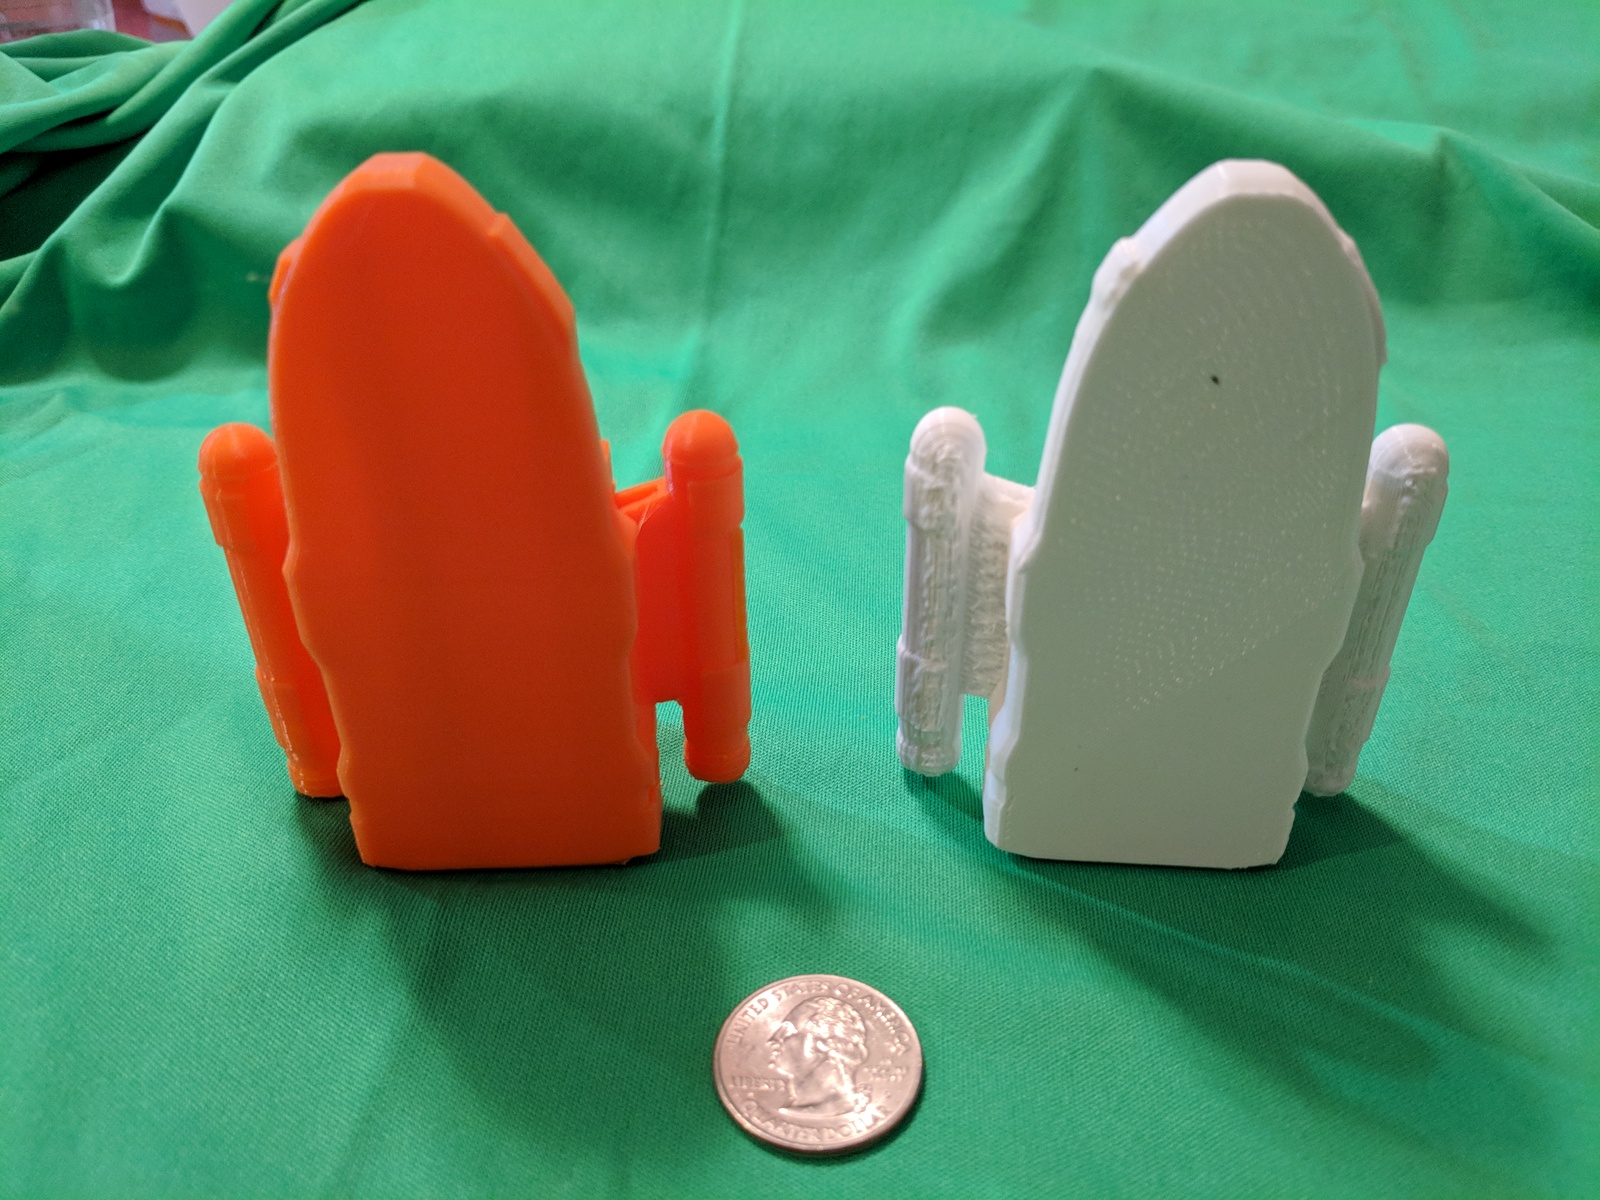 The lighting could be better but you’ll notice that the bottoms of the wings and engines on the white model are really rough. That is partially due to the fact that I didn’t completely clean them up but also due to the nature of 3D printing. Since each layer has to be placed on the layer below, if you have a floating bit of your model with nothing under it, the printer prints support material to get up to that that point where it can start printing the model. So in the white model, a bunch of support material had to be printed to support the engines and wings. Most of that will clean off with some effort using an sharp knife and sandpaper (and my Dremel) but it’s not completely clean. On the orange model, we don’t have that problem and the engines and wings look really good and there was nothing to remove. However …
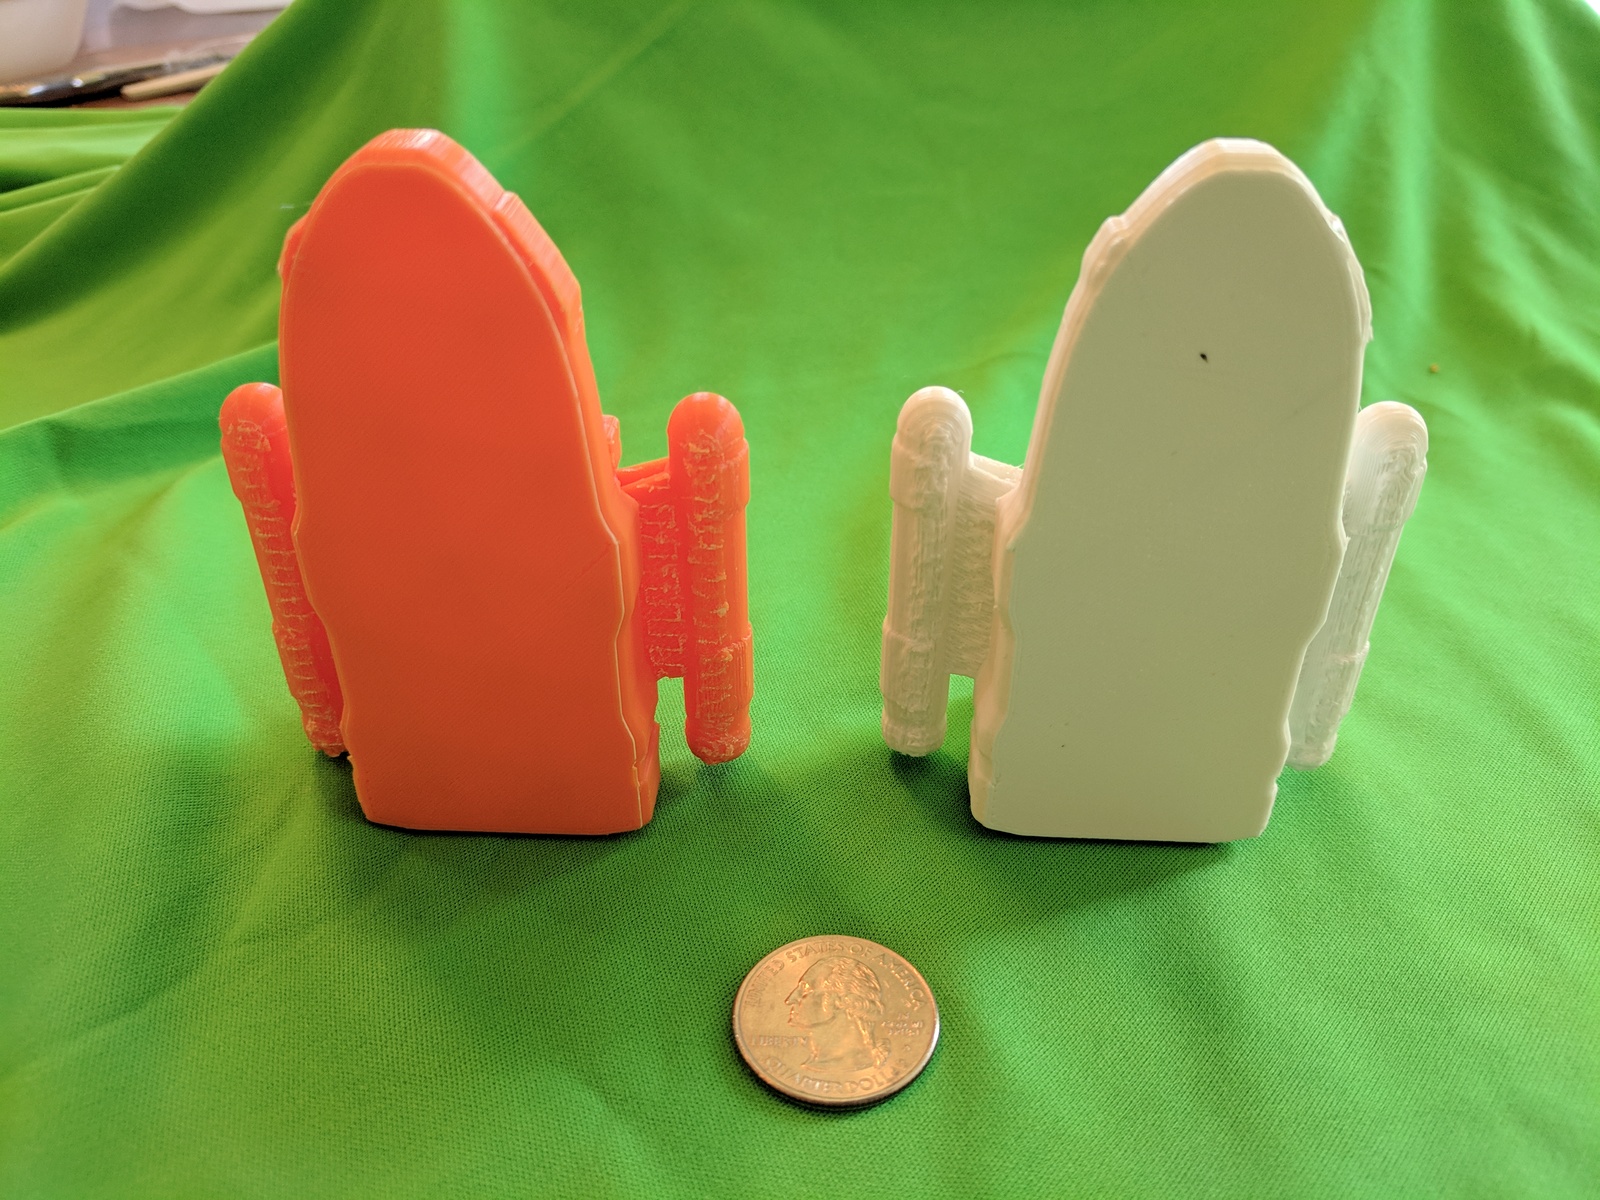
 the back of the orange print has some issues. Granted the back of the white one isn’t the best, as you can see some issues with the layers of the print being slightly misaligned (I need to re-tighten the belts that drive the print head or slow down the print). However, you can see the detail of the bay doors and the portholes (barely, they should probably have been a bit thicker for printing).
On the orange print, this was the side toward the build plate and so had to have supports to the parts of the model that were suspended. In this case that is the back of the engine and wing as well as parts of the back of the ship. The bits on the engine and wings again are not completely cleaned up but they are flat surfaces in is orientation and much smaller surfaces as well. They will be much easier to clean up than the rough sections on the white print.
The back of the ship is a different matter. The surfaces of the cargo and runabout bay doors were the only parts actually touching the build plate. The rest of the back of the ship and the portholes were raised slightly. Because of that the printer had to lay down support material. However, because they were only slightly raised (like one or two 0.1mm layers), there really wasn’t that much room to print support material and it is all fused together. It could probably be cleaned up with some work but it would be pretty tough.
Finally I did a last print at the higher 0.1mm/layer resolution with the ship on it’s bottom (same orientation as the white print) just so see how that higher resolution affected the look.
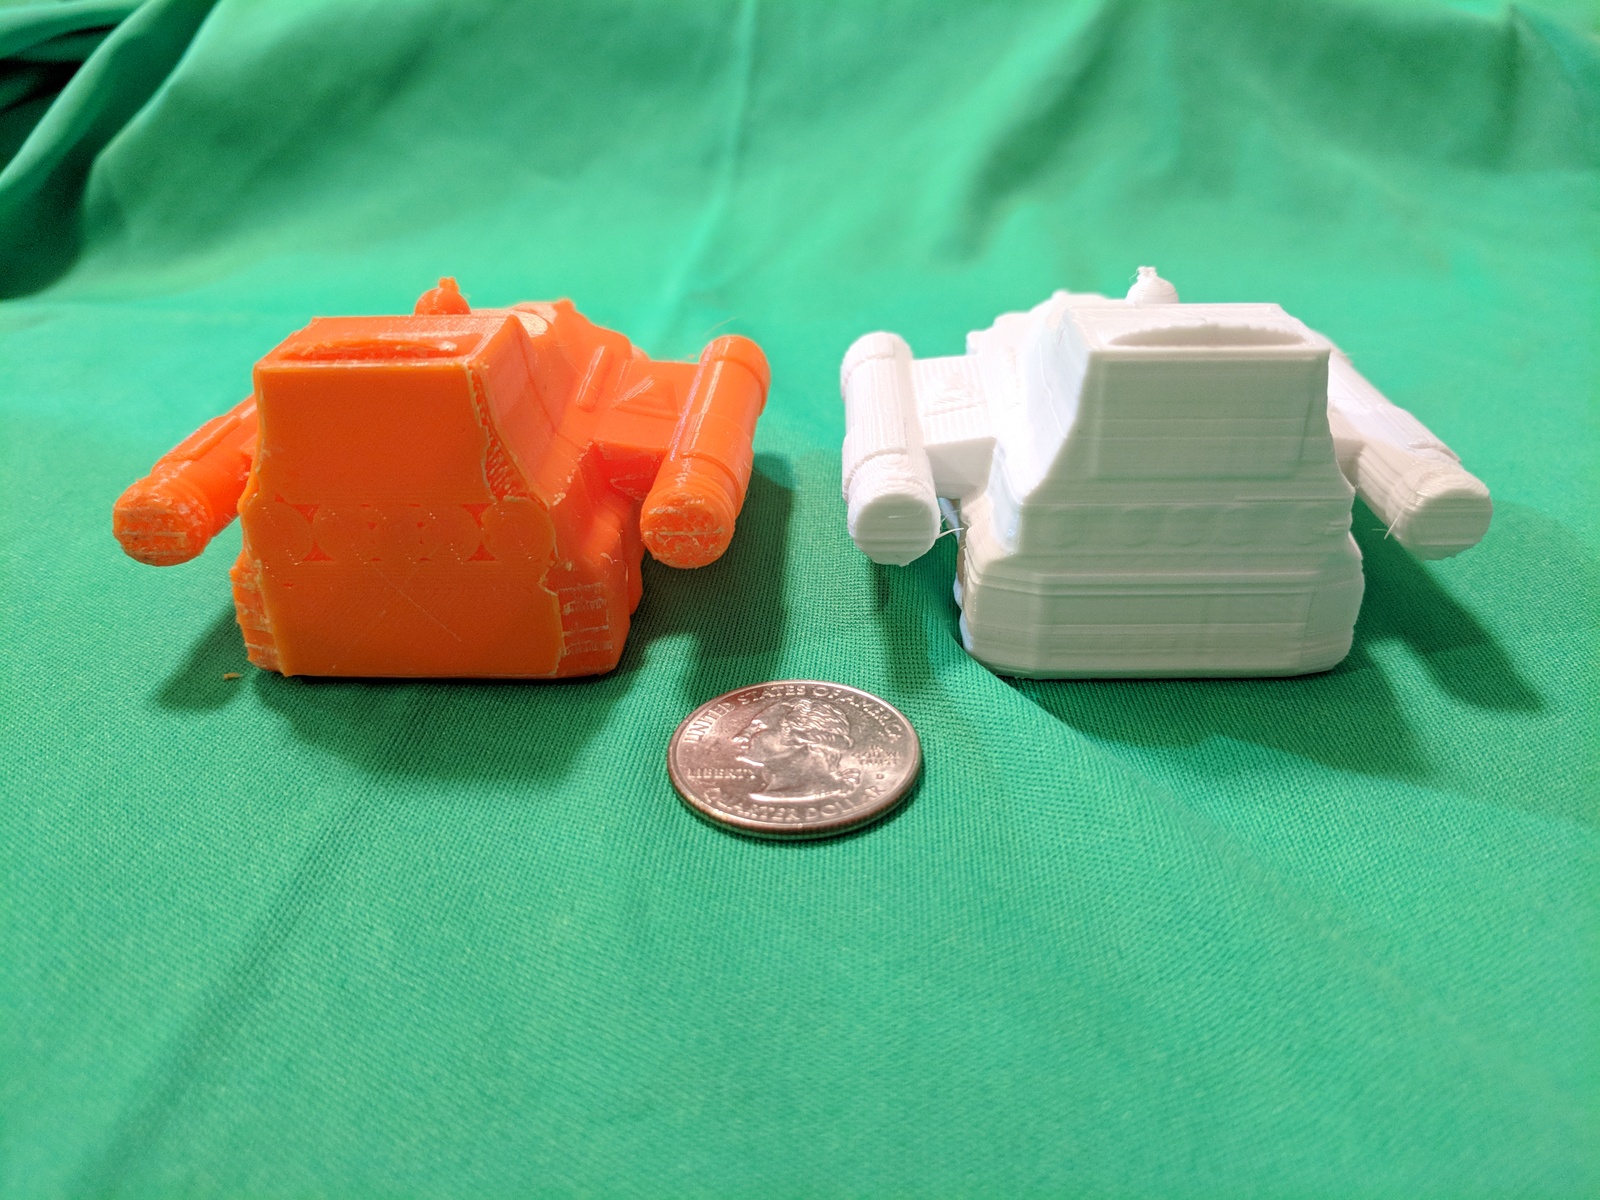
 As you can see, the to surfaces are much cleaner in this print. In fact, I would be very satisfied with that print surface on the model. Here’s the bottoms and backs:
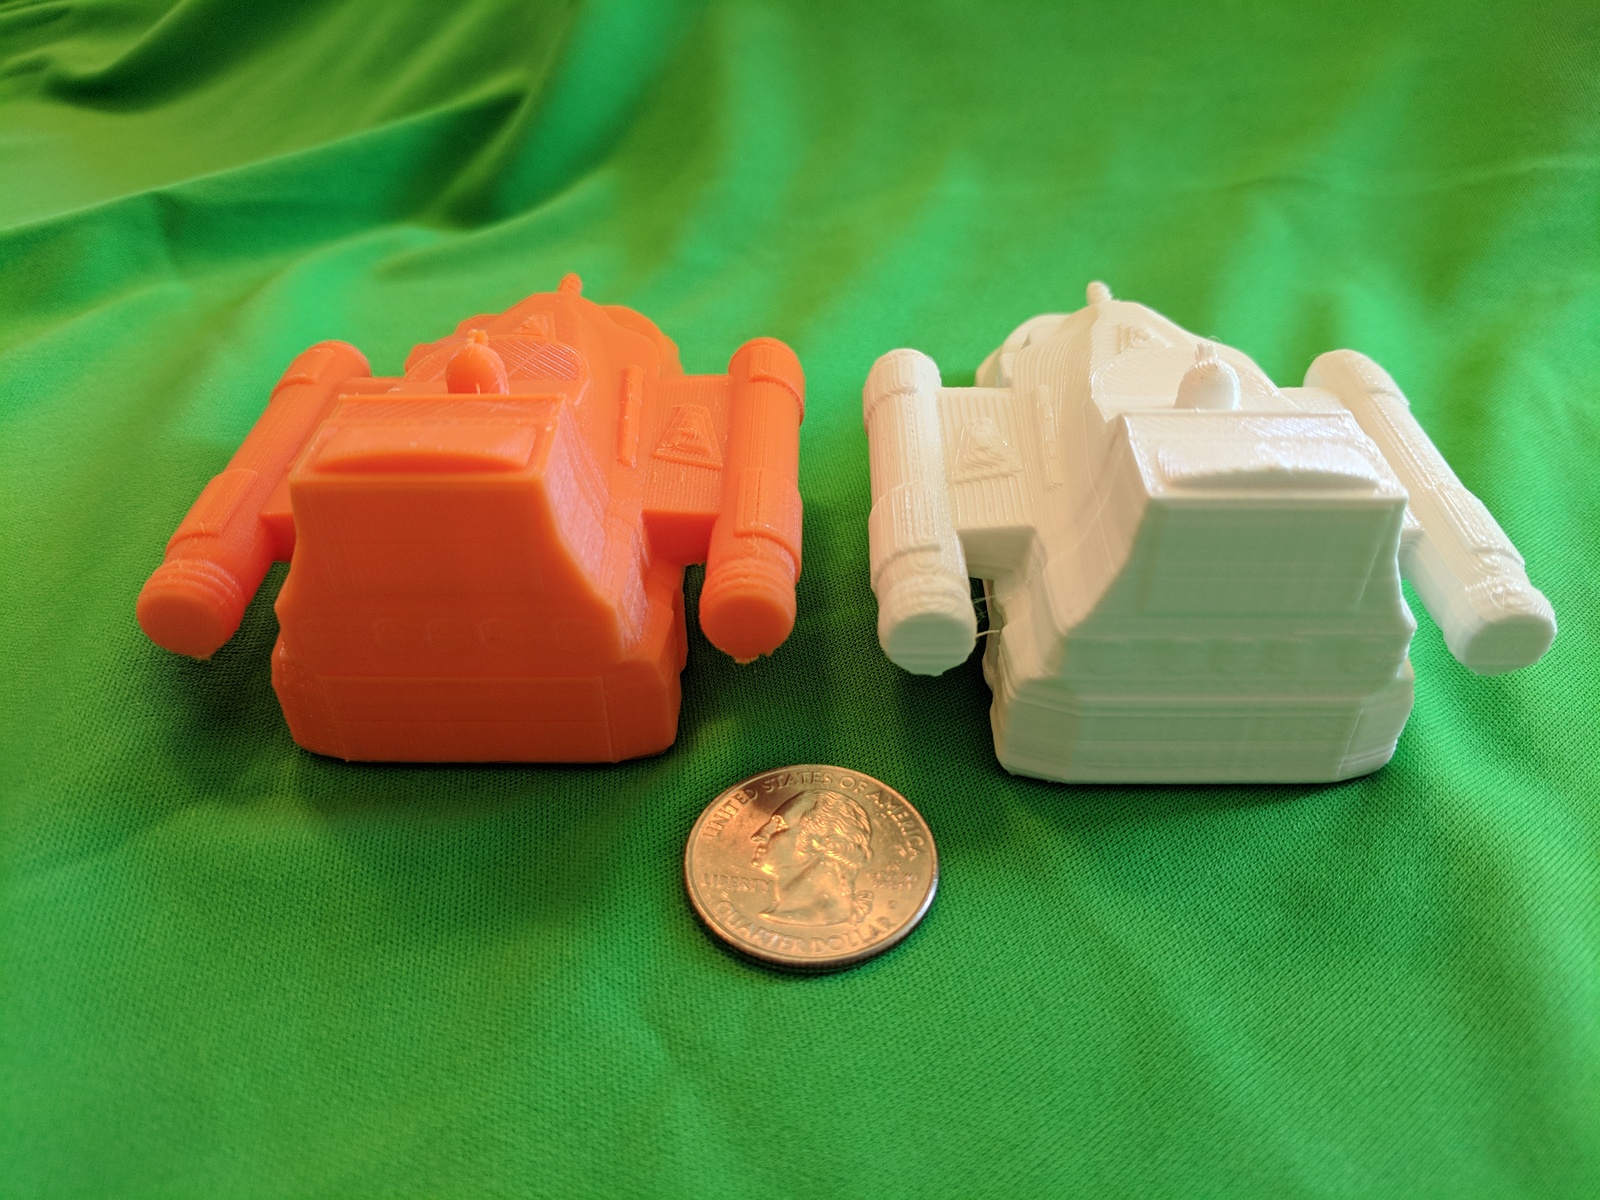 Those bottom surfaces are still fairly rough although I think they are better on the higher resolution print. The back of the higher resolution print is definitely cleaner.
I think the print with the ship on it’s back is still the better way to go, but barely. It’s a tough call and I could be convinced otherwise. To address the problem with the support material on the back of the ship, I have a couple of options. One is to just remove all the surface features on the back of the ship completely. That would give a flat surface to print and would eliminate the problem but you would lose the details on that part of the unpainted model (you could always paint them back on). Another option would be to just eliminate the portholes. There is enough relief to the doors that you could trim the support material from around them. The rest of the back of the ship might be a bit rough but it is an easily accessible area to sand and clean up. The final option would be to increase the relief on everything, both the doors and the portholes, so that there is a bit more space there making the support material easier to clean off. I haven’t decided which route I’ll take yet but I’ll probably do some experimenting to try out the different options.
Going Forward
My Patreon supporters have already received a copy of the model file as it currently exists (that’s one of the perks of being a supporter). At some point I’ll put the model up for purchase for those that would like to get a copy (That will be on DrivethruRPG and either here or my New Frontier Games website). I’ll also make 3D printed models available. That will come once I’m comfortable with the way the prints are coming out.
The next step for the model is to back to the digital model and paint it so it can be used in 3D renders. I need to add textures and materials to the model to give it color and life. However, I’m going to put that bit on hold for bit as it’s not really needed for the module (and I want to go over the Blender tutorial on how to do all of that stuff. I have some experience from the assault scout but it was very trial and error). So this project will probably go on hold for a few weeks while I work on some other bits and pieces.
Bill is also working on the final versions of the deck plans and I’ll post a copy of those once they are available.
Let me know if you have any questions, comments, or suggestions below.