The Expanding Frontier

Creating Sci-fi RPG Resources

  • Home
  • Order Eclipse Glasses
  • Order a Map
  • Order Miniatures
  • Supporters
  • About
  • Bio
  • Home
  • Order Eclipse Glasses
  • Order a Map
  • Order Miniatures
  • Supporters
  • About
  • Bio

Tag Archives: Star Frontiers

A Module Based Campaign – part 2

Having survived Volturnus, it’s time for the PCs to attempt first contact with the Heliopes on Starmist. Originally, I had planned to cover the remaining 3 Alpha Dawn modules in this post but in reviewing Sundown on Starmist, I realized I had a lot to say about this module alone. So it gets its own post.

Issues

I started to write up this module like the Volturnus ones, but the more I looked at this module, the more concerns I had with it.  Playing it in the 80’s as a teenager when it first came out, I didn’t think much about it.  You need to rescue your employer who had been kidnapped, you found a cool super tank, and you got to blow things up.  It’s no fun to lose the tank in the end but I understand that for play balance reasons.  Give the PCs a fun toy to allow them to take on harder challenges but take it away so it doesn’t unbalance the game.

But looking at it with older eyes, you see the other side of the adventure.  As part of the adventure, the PCs transgress the social structure of a primitive society, violate and destroy their temple, and eventually completely destroy an artifact central to the religion of that culture.  Granted, the other option is complete annihilation of the species (and the PCs) but it’s still not the best story-line for success.  Especially after just leaving Volturnus where they actually worked to build up and sustain the native cultures.

Now if you’re players don’t care about those issues, you can play it as written.  Or if you want to give them a morally hard situation and choice, maybe it is still okay.  But if you want to avoid that kind of situation in your campaign, you might consider skipping it.  Looking at the pregenerated characters, the PCs are going to be a bit overpowered coming into this adventure if they just finished the Volturnus series.  So skipping it won’t hurt them for future adventures.  And their higher levels might give them some options for other paths through the adventure that don’t require the tank.

In any case, we’ll proceed assuming you do want to include the adventure, so let’s get to looking at it in a bit of detail.
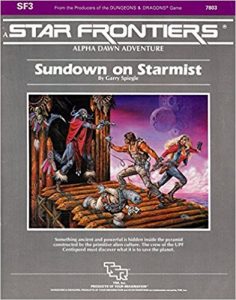
Sundown on Starmist

Location, Location, Location

First of all, we need to figure out where this planet and system is located.  If you look at the beautiful map in the Zebulon’s Guide to Frontier Space, the artist placed Sundown way on the left side of the map by Araks and Scree Fron.  Based on the information in the module itself, this location doesn’t really make any sense to me and since Zeb’s Guide has other issues, I’m going to not use this location for the system.

Now, I thought that the module itself gave an approximate location for the system, but it turns out that if it does, I can’t seem to find it any more.  All the other modules do give locations for their systems, so that’s probably why I thought this one did as well.  In any case, there are clues as to the location of the system in the text of the module that we’ll look at to divine its location.

The module says that Sundown was discovered when a ship that Maximillian was serving on was forced to make an emergency landing on the planet Starmist.  That doesn’t exactly jive with the Knight Hawks rules (And since the module specifically references the Knight Hawks rules, we know they were out when it was published.) but if we take it to mean that the ship misjumped into the system, then we know that it is somewhere near where that ship was traveling.

Looking at Maximillian’s background, he was born in a vrusk enclave in Valentia City, which is on Clarion in the White Light system.  And he went to school on Ken’zah Kit in the K’aken-Kar system.  His ship, the VSS Last Legs, is registered in that same system and he purchased and refitted the ship right after returning from Sundown the first time.  Since he grew up and worked in this part of the Frontier, near the vrusk inhabited worlds, and was in this sector when he returned from the Sundown system.  It makes sense that the system is somewhere nearby.

Astute readers will recognize this map as a cutout of the one I’ve been making in my Expanded Frontier Map series. Even more astute readers will notice that there is a nebula on it. This is a sneak peak of a portion of a map I’ll presenting next week.

To that end, I’ve chosen Sundown to be the star in the triangular region formed by Madderly’s Star, K’sta-Kar, and White Light.  You can see this location represented on the Expanded Frontier Map.

Starting the Adventure

Getting the PCs on this adventure is a bit of a trick.  They are either in Truane’s Star, or if you had them go testify at the Council of Worlds, they are in the Prenglar system.  Neither of which is over in the part of the Frontier where you really want them.

Prenglar is easier.  In that case you could just declare that Maximillian was having his ship refit in the starship construction center there and is looking for a crew.  He can recruit them at some point after their testimony.

If they are in the Truane’s Star system still, you need to come up with a reason to get them to the other side of the Frontier.  Maybe they are invited to talk about their experiences on Volturnus at the University of Clarion, all expenses paid. Or maybe the Pale government gives them a lead and offers transport to chase down someone who works with he Star Devil that skipped town.  Or some other small adventure that appeals to the players’ interests that get them across the Frontier.  Once they are on Prenglar or Clarion, they can be approached by Maximillian.

Regardless of where he approaches them, he’s heard of their exploits and is seeking them out specifically because of their experience working with native primitive cultures and he wants assistance dealing with the Heliopes.

Running the Adventure

Once they have signed on, they are off to Starmist.  The trip there should be fairly boring so it can pass by as quickly as you’d like.  It’s a chance to get to know their employer and decided what equipment they might need/want for the trip.  They should have quite a bit a cash from the Volturnus adventure so let them spend it.

The adventure itself is fairly straightforward: Head to the village, poke around to try to find the sources of the metal, learning along the way some of the history and seeing the strange artifacts, rescuing Maximillian, fighting off the sathar robots, discovering the tank, and assaulting the sathar base.

Skimming through the adventure, a few things stood out to me.

  1. Maximillian has plot armor, at least until the tank is discovered.  I thought it was funny how in the very first encounter, the module tells the referee to adjust die rolls as needed to keep him alive.
  2. The adventure is always pushing the PCs to find and explore the tank.  As I said before, this is a possibly morally questionable action and the players may not be comfortable with it.  I’d say if the players want to pursue that, let them but if they don’t show interest in the tank, don’t push it as hard as the module is written.  More on this below.
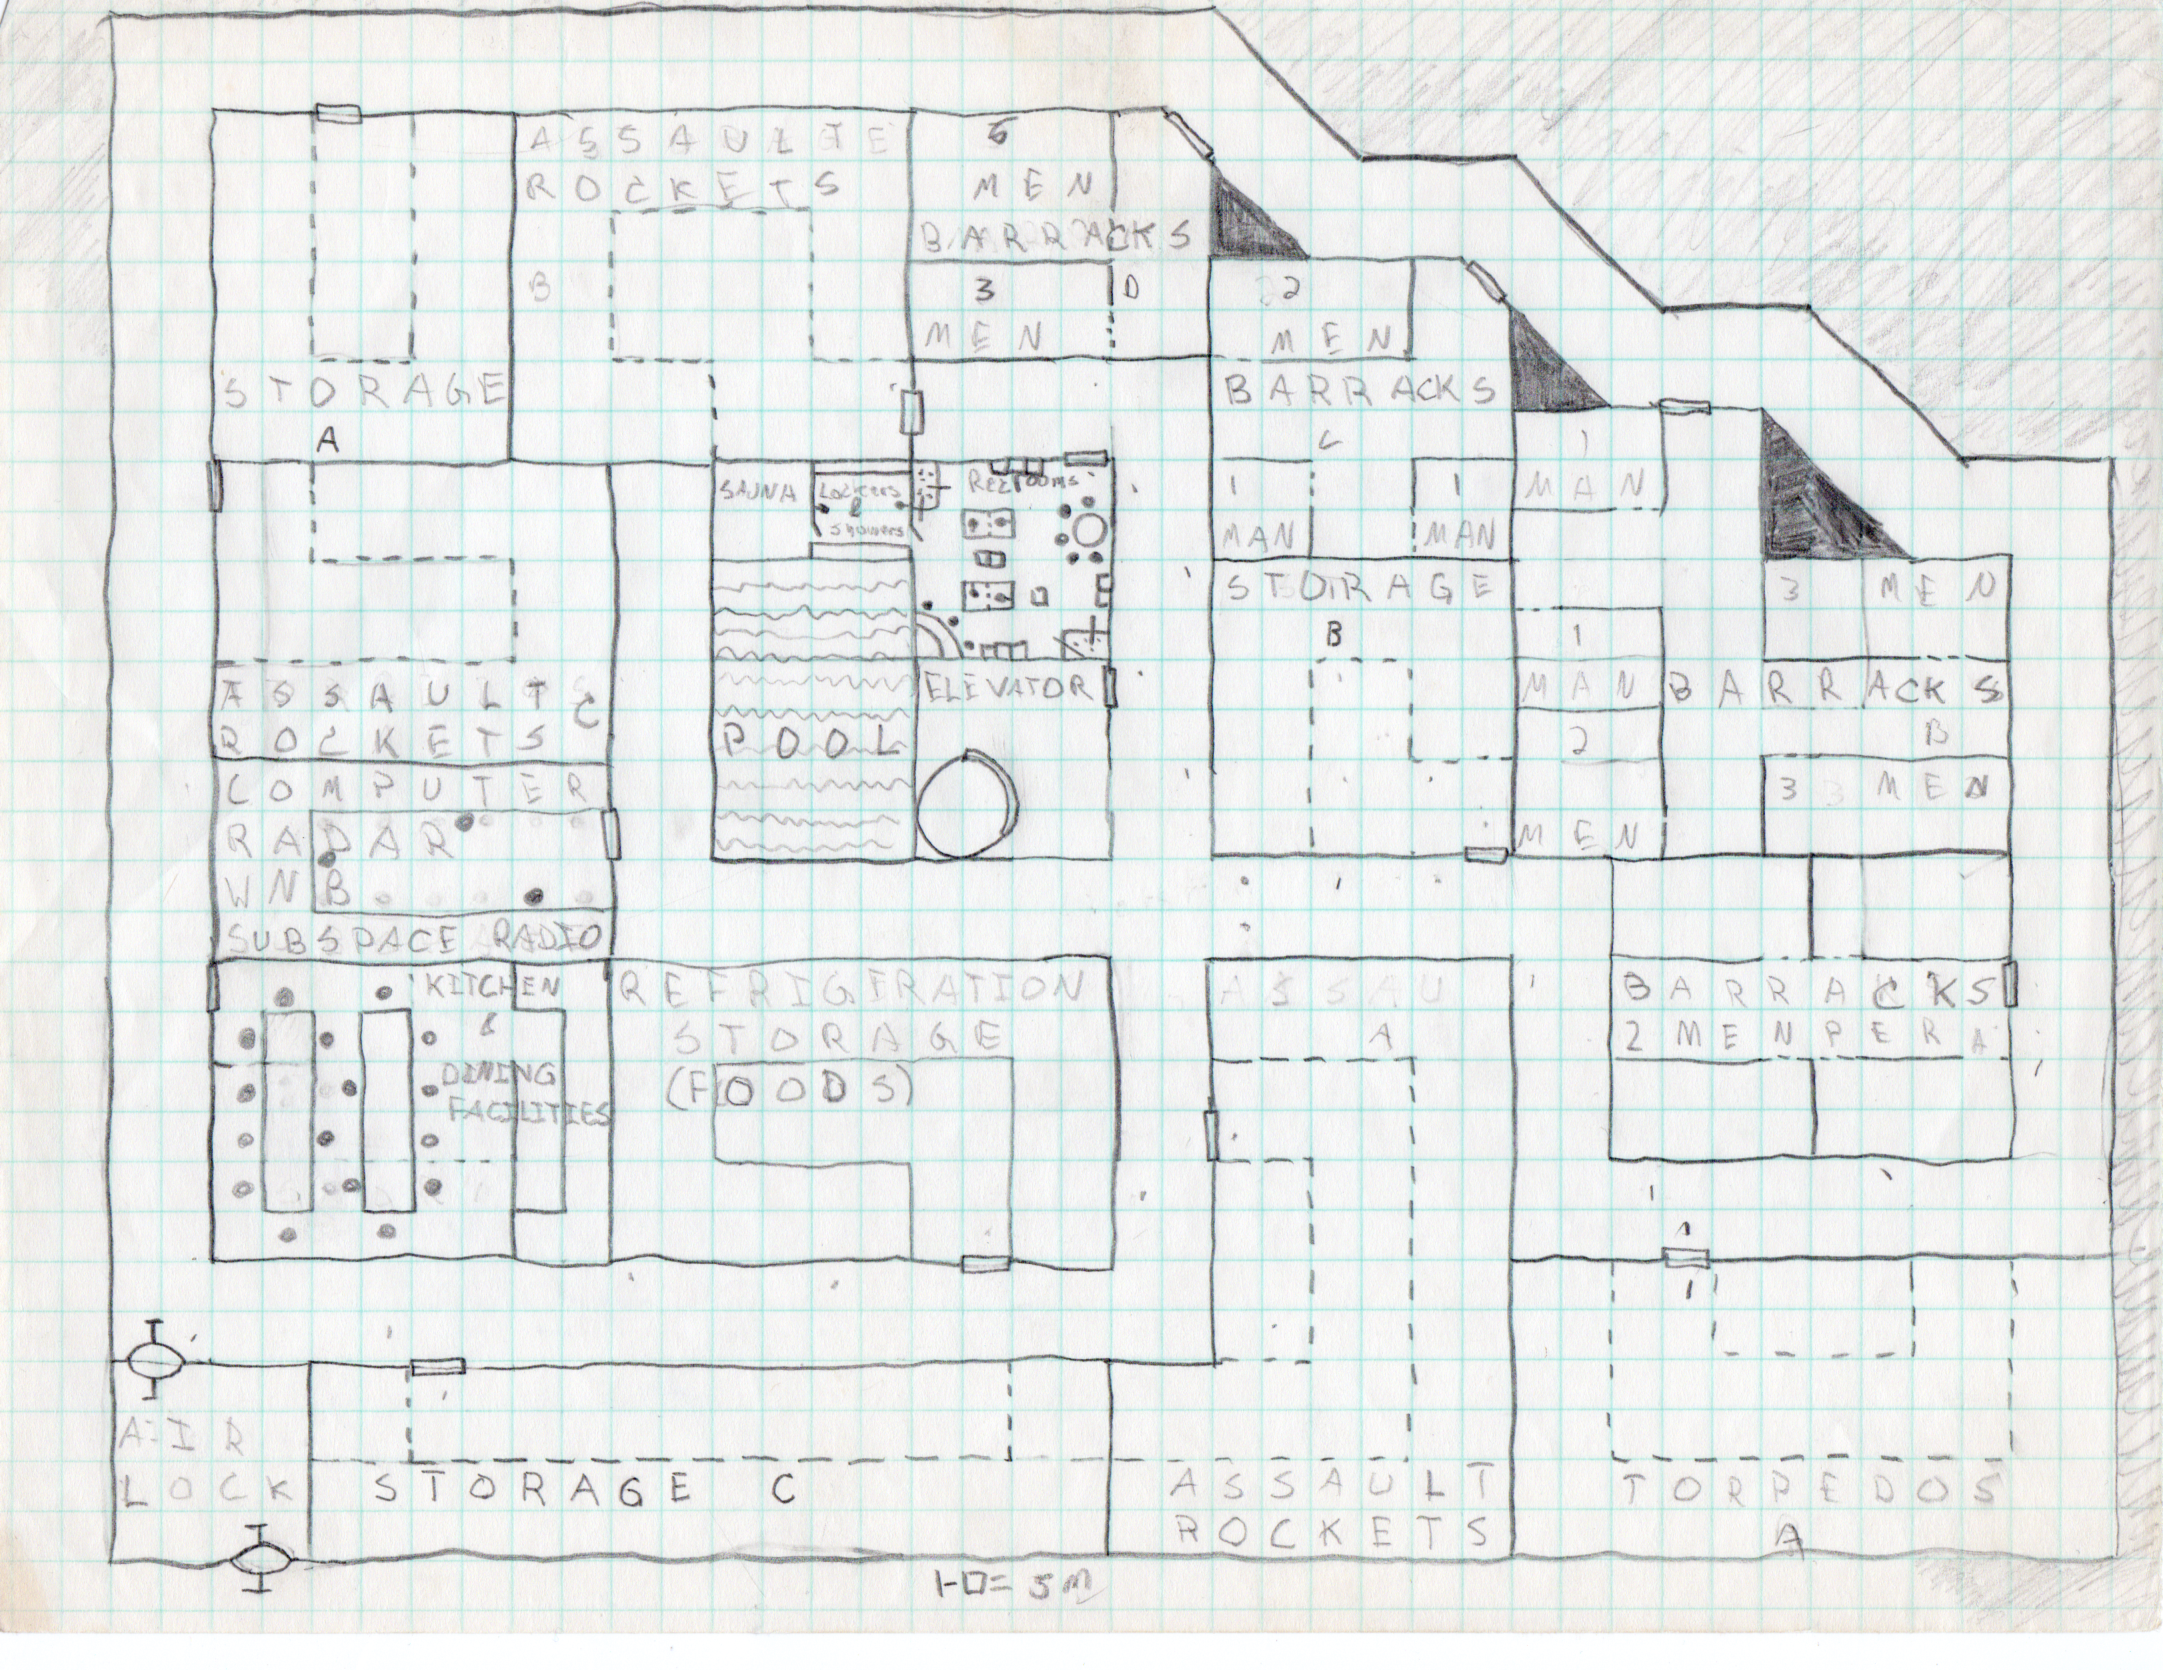
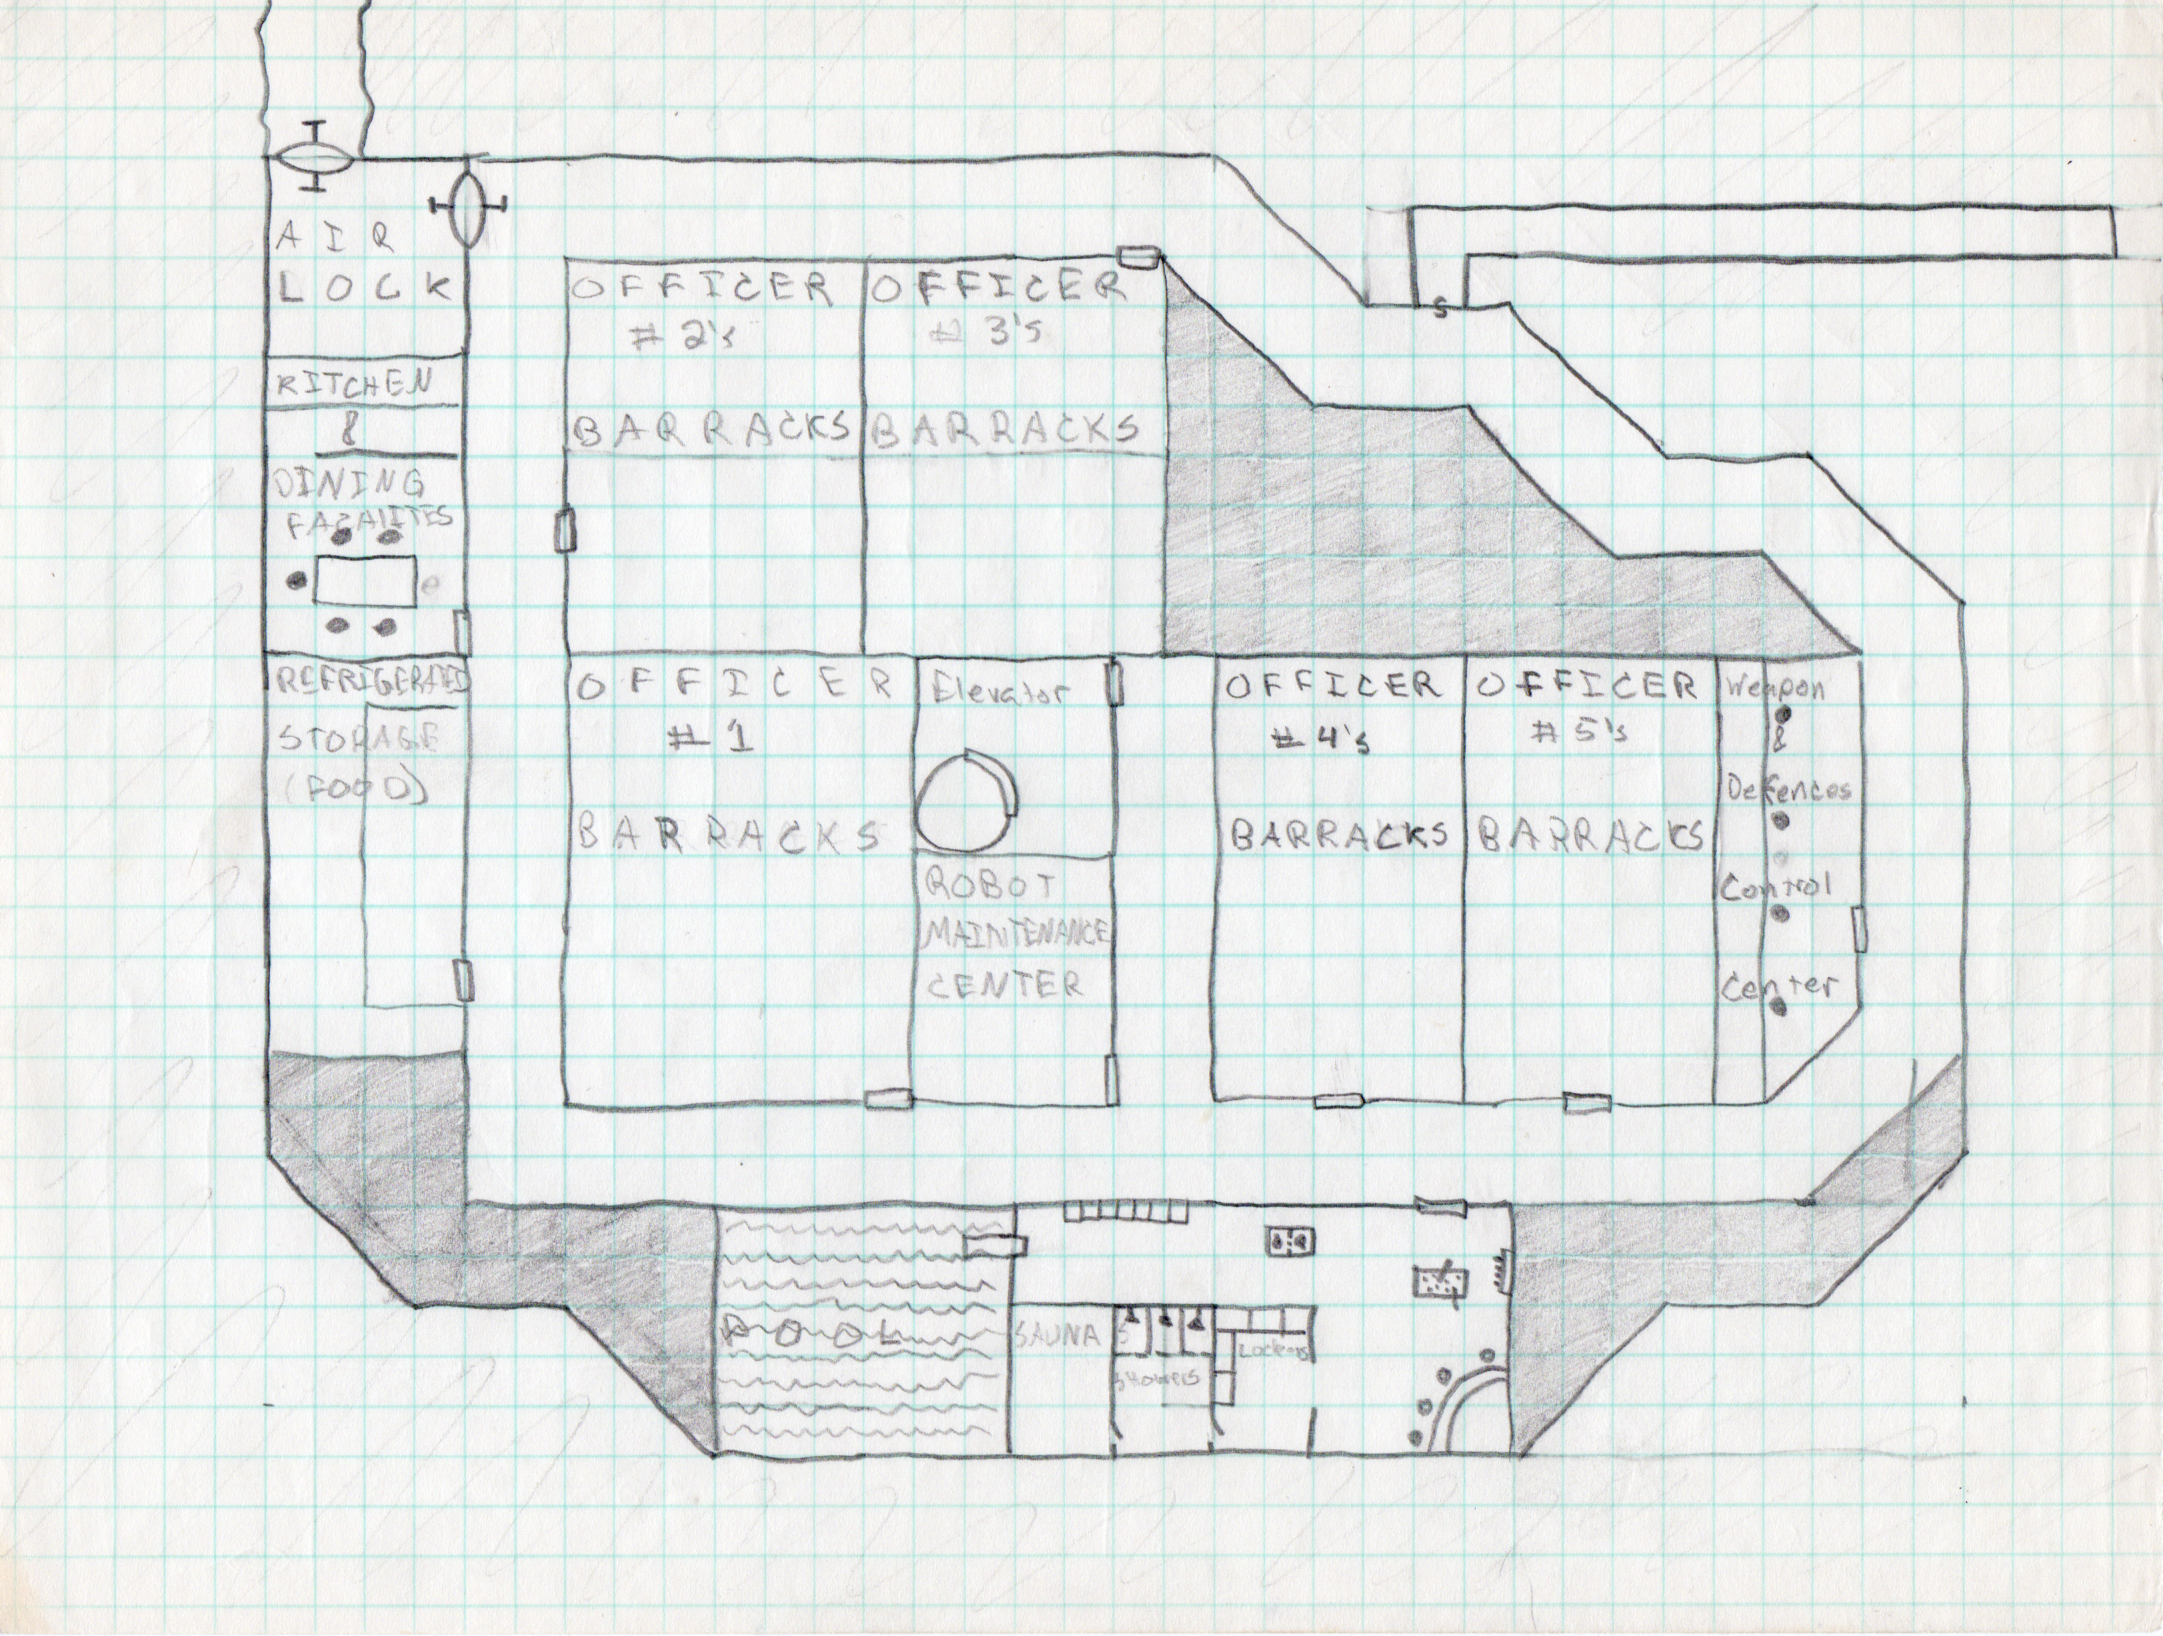
  3. Getting into the bunker is somewhat of a railroad.  The text says that the only way in is through the elevator and specifically tries to shut down alternate ways in.
  4. There are some inconsistencies in the times specified for the various self-destruct sequences in the bunker.  But there is also a lot of flexibility depending on what you want to do with the approaching sathar ship (if anything) so you can really do whatever seems best as you’re playing

Not using the Tank

I’ve already talked a bit about the issues with uncovering and taking the tank from the village.  That said, it’s not really needed to finish the adventure.  The PC’s already have an explorer that they can use to follow the sathar robots.  And approaching the sathar base on foot actually gives them a better chance of getting in undetected.  So in the end, the tank is cool, but doesn’t seem to be as necessary as the module writers seem to be implying by pushing the PCs toward it.  If they don’t want to take it, they can still successfully complete the adventure.  Especially since they will probably be at a bit higher levels than the pre-gens for the adventure.

Experience Points

Interestingly, this module gives no guidance on awarding experience points.  They don’t seem to be mentioned anywhere, even in the introduction.  I’d award XP at the following points:

  • Making it to the village on friendly terms – 3 XP
  • Rescuing Maximillian with minimal loss of Heliope life – 3 XP
  • Driving off both waves of sathar robots with minimal loss of Heliope life – 3 XP
  • Clearing the bunker – 3 XP
  • If they make it to the bunker without losing a vehicle (war tank or explorer) – 1 bonus XP
  • Not taking the War Tank – 1 bonus XP

Beyond the Module

Extra adventures

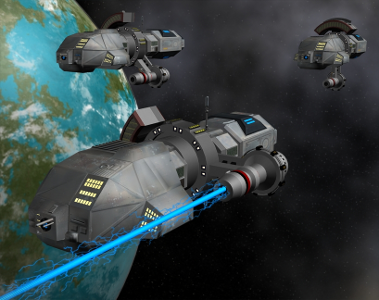
The module gives the option of the PCs dealing with the incoming sathar heavy cruiser and using the rocket launcher at the base to damage or destroy it.  It also gives the suggestion of the ship sending down landing parties that the PCs have to deal with.  Personally, I’d probably omit this aspect, especially since I have a different view of the construct of the sathar ships.  At most, I’d make it a destroyer.  That still gives over 500 sathar ground troops that they’d have to deal with and that’s a bit much for a single PC party.

However, if you do want to use those optional adventures, I’d award 3-6 more XP for the subsequent adventures.

There are few other things you could do on Starmist but they would require convincing Maximillian that they should stay on the planet longer.

The background says that Heliopes are spread out in 200 tribes over 5 different rifts.  If you wanted to extend the adventure further, you could develop these other tribes, and allow the PCs to seek them out and interact with them.  Remember that the village Heliopes are the most culturally developed.

Another option is to collect sathar bio-constructs.  These would be of great interest to the UPF and to various private corporations.  There are a lot of them here on Starmist and the PCs could go on a hunt to try to collect various live specimens.  This should definitely be worth a financial reward (shared with Maximillian) and possibly an XP reward as well.

Aftermath

Depending on the way they handled themselves, the PCs may or may not be on friendly terms with the Heliopes.  If the village was seriously destroyed and the war tank stolen, they might not be welcome at all and be run off by a mob and have to flee to their ship.  Or they might be welcomed warmly if they helped to save the village and didn’t disturb the tank.

There might also be repercussions back in the Frontier.  The UPF will eventually send a delegation to the planet and will discover how the PCs interacted with the natives.  This could either enhance or detract from their reputation and if they treated the Heliopes poorly, they might be called before a UPF tribunal for their conduct. 

Moving on

Next up is SFAD5: Bugs in the System.  We’ll look at that and the following modules in the next installment.  What are your thoughts on Sundown on Starmist?

May 21, 2019 Tom 2 Comments

Expanded Frontier Map – update 1

I had planned to to have the next part of the module campaign write-up as the post this week, but that’s taking me a bit longer than I had planned and I spent more time than I should have on updates to the Expanded Frontier Map so I’m writing about that instead.

As I said in my last State of the Frontier post, one of the things I want to work on this year is a full color version of the Expanded Frontier map. So while I was on vacation, I fired up my laptop and started on that. This post will detail some of the things I’m working on and what to look for in the future.

Corrections

The first thing I had to do was fix some errors I noticed in my original expanded map. Mainly, I had left off some labels on a few of the star systems. I haven’t posted a version of the map with those labels yet but will in the future. So I added those in.

The other omission I had to correct was one I noticed in creating entries for the Detailed Frontier Timeline. I was missing a necessary jump route for the sathar. So I added that in as well. Again, I haven’t posted that version of the map so the correction just appears on my “Referee’s Copy” at the moment.

Next, I decided to shift the system I was labeling as Belnafaer (from the SFAD5: Bugs in the the System module) to the same one that the TSR folks did in the Frontier map in Zeb’s Guide. The choice was arbitrary and both my selection and theirs matched the description given in the module. I figured it was better to disagree as little as possible with the “canon” material. (I’m still not moving Starmist or Rhianna though).

Finally, I discovered that the labeled distance from Madderly’s Star to White Light was wrong. The map labels it as 6 but it is actually 8. (The map in Zeb’s Guide has it correct but the one in the Dramune Run is wrong as well.) This was actually discovered in making the color map as described below. So I fixed that. It’s funny, but I’ve been playing Star Frontiers for 35 years now and never noticed that typo.

Those were the corrections I made. While you can’t see two of them, this is the resulting map:

The inner blue box is the original Frontier map area from Alpha Dawn while the larger blue box is the area covered by the map in Zebulon’s Guide to Frontier Space

I also fixed up some internal errors, mostly labels on the wrong layers, but that has no impact on the map itself. I had planned to post the version with all the star designations, but in looking at them, I realized they need some cleaning up on their positioning so it wasn’t quite ready to go for this post. I need to spend about an hour tweaking things.

Moving on to Color

Star symbols from the map generation program

As I mentioned before, I had written a program to randomly generate sector maps. The stars were represented using the symbols in the chart to the right. The second column showing how multiple star systems are represented.

As written, the program only generated random systems and wrote basic map data out to a file. What I needed was the ability to read in that output file and build the map from the data instead of randomly.

So that’s where I started. I had an output format, I just needed code to read that and convert it back into data that could be used for drawing the map. Along the way, I realized that I needed to change some things about the way the data was represented and stored in the program and output file as we well as needing to add storage for things like the name of the system.

Another thing I had to change was the printing of the Z-coordinate. The random map generation process creates star systems in 3 dimensions and labels each system with its Z-coordinate above or below the plane of the map. Since for the Frontier Map (at least initially) everything is on the same plane, there was no need to print little zeros by each star system. So I added a flag to turn off printing that coordinate on the map.

Generating the Data for the Frontier Map

With the code now ready to read data from a file and draw the map. I needed to generate the data for the Frontier map. As I’m building and testing the software, I figured I’d work with a smaller map so I’m just using the original Frontier Map from the Alpha Dawn rules.

There are 51 systems on that map. I determined the coordinates on the map (as the software sees them, currently measured from the upper right corner – that may change), and wrote those into a data file. That was the easy part.

The next step was to get spectral classifications for each of the systems. The inhabited systems were relatively easy. In the listing for each of the systems in the rule book, it gives a color for the star. At this point the program isn’t refined enough to break down the spectral types so a G0 star is represented the same as a G2 or G8 star. So I only had to approximate. Yellow stars got a G0 designation, orange stars got a K0 designation, white stars got an F0 designation, and red stars got a M0 designation. I used those since those are the spectral types that the program currently understands.

Next I went through and added in the spectral types for the stars that host the various planets of the modules and added in designations for them. Then, I had to go in and add in the designations for star systems in the Rim that were labeled in Zebulon’s Guide. Zeb’s Guide give full spectral types (F7, G3, K2, etc.) but for now, I just used the spectral type letter and not the number since the program can’t process those yet. (Note: if you compare the spectral types from Zeb’s Guide for the original Frontier worlds to the colors given in the Alpha Dawn rules, they don’t always agree. That’s something I’ll have to resolve later. For now, AD takes precedence.)

That covers all the “explored” systems. Note that I didn’t use the Zeb’s Guide data for the megacorp systems. I can always go back and add that but I don’t use those systems in my game. Finally for all the other systems, I had to randomly generate spectral types. To do that, I just generated a map with random values and copied the appropriate values over for the binary and single systems, only selecting single systems that were M stars or brown dwarfs. There are already way too many F, G, & K type stars in the region so I wanted a sprinkling of the other types. I also added the neutron star designation by hand for that system on the map.

Then it was time to actually run the program and make the map. It worked fine but looking at it I noticed a few problems with the jump distances. Several were too small by one and one was too large. Looking closer, I realized that while I was calculating the distances correctly, it was rounding wrong on display so I fixed that which corrected the distances displaying too small. That just left me with the one jump distance that was too large, now by two instead of one. This is where I discovered the typo on the original map for the distance between White Light and Madderly’s Star. The program was giving the correct distance but the original map was wrong.

I also decided that the symbols were a bit too small. The size I was using worked fine in the random map when there was the possibility of two systems in the same grid box with different Z-coordinates but for this map, where that couldn’t happen, I wanted the symbols larger. So I built in a scaling parameter in to the program allowing me to control the scale.

With those changes, we have the following initial color map of the Frontier.

The grid is there, you just can’t see it at this size. Click for the full size image.

You’ll notice a few things right away. First, there are no names on the map. Second, there are no nebulae. Right now the program doesn’t do those things.

Names will be relatively easy. I have the data, I just need to have the program add them to the image file. I need to research how to set fonts but otherwise, it’s straightforward.

Nebula are a whole different story. And may have to be added in by hand after the fact. Either way, that is going to be a complicated process and require some learning and work (and artistic ability) on my part.

If you look closer, you’ll notice that the positioning of the numbers along the jump routes are not optimal. It works for most of the jumps but for connections that are at an approximately 45 degree angle running from upper left to lower right, the number comes out too close (and sometimes overlapping) the line. I’ll need to fix that. That cleanup will probably be done by hand.

The program generates SVG files where each item is an object that can be manipulated allowing me to tweak things by hand. That was done intentionally as I knew the program wouldn’t be able to get everything perfect. That will be even more apparent once the names are added. I suspect that many of them will have to be moved to not overlap the jump routes.

The other minor thing is that the scaling factor I added wasn’t able to affect the size of the jets coming out of the neutron star. I need to either figure that out or, more likely, reduce the size back down for that spectral type and ignore the scaling. We’ll see how that goes.

Next Steps

The easy next steps are adding in the names of the systems and fixing the scaling on the neutron star.

After that, what I want to do is add in a way to handle all the various spectral types. The colors I picked don’t exactly represent the colors of the stars. They are close, but were chose for aesthetics rather than complete accuracy. Almost everything would be white with just some color tinting if we went for accuracy. I did that originally but didn’t like the result. I want to add code that will extrapolate between the given colors for the various spectral types’ number values to give various shades to the stars.

After that, I plan on tackling the nebula. I want to see if I can programmatically come up with something passable to start and then refine it.

The Code

If you want to play with the code, you can find it on my GitHub repository. It’s written in Python and right now isn’t the most user friendly. I need to add some in-line documentation as well as add features that will make it more usable directly from a command line instead of having to modify parameters in the code itself before running. That is another future project. But if you want to dive in and play with it as is, feel free.

May 14, 2019 Tom Leave a comment

Detailed Frontier Timeline – FY60.084 to FY60.114

Here’s the next installment of the detailed Frontier timeline. I realized that I left off the last day of the previous post so it is included here. The events of the Sundown on Starmist module reach their conclusion and the Council of Worlds start to take the sathar threat seriously.

Date (FY)Event
60.084 After several days of probing, the saurian Battle Rays begin their return to the Sauria system.
60.085 Initial repairs begun on the Pale (Truane’s Star) starship construction center.  Capacity is increased to 60% of its original value. 
60.086 After nearly a month of meetings on Volturnus (Zebulon), the Council of Worlds declares the planet to hold protectorate status but not full membership.  It is deemed that the Eorna population is too small while the other races are not advanced enough for full membership.
60.087 The VSS Last Legs arrives at Starmist.  Maximillian and the scouting party make contact with the planet’s natives. (SF3)
60.088 Patrol Group Wisdom arrives in the Gruna Garu system and begins investigating the sighting of the unidentified vessel with Spacefleet markings.
60.089 Maximillian Malligigg is captured and taken prisoner by the priests of the Heliope village. (SF3)
60.090 – Sathar robots, shaped like Heliopes, attack the Heliope village causing destruction of many of the buildings.  The village temple is partially burned, revealing an alien war tank concealed inside. (SF3)

– SF Nova arrives in the K’sta-Kar system and will remain in system for 12 days.
60.091 – While Maximillian and the scouting party are examining the war tank, sathar robots attack the village again.  Driving the robots off, they follow them in the tank. (SF3)

– The sathar starship construction center in the Liberty system completes another destroyer.
60.092 The retreating robots lead the scouting party to a sathar base.  Infiltrating the base, they discover it is mostly abandoned and defeat the remaining sathar and agents in place.  However, the base is destroyed by an automated self-destruct system. (SF3)
60.093 Saurian Battle Rays arrive back in the Sauria system from scouting the Tischen and Dayzer systems.
60.094 The alien war tank on Sundown (Starmist) begins behaving erratically and alarms and lights begin to flash. 30 minutes later it self-destructs in a small nuclear explosion. (SF3)
60.095 Maximillian and survivors of the scouting party leave Sundown (Starmist) to return to K’sta-Kar on the VSS Last Legs. (SF3)
60.096 The TTSS Destiny arrives back in Prenglar after touring the western half of the Frontier, visiting Truane’s Star, Dixon’s Star, and all the yazirian systems (Gruna Garu, Araks, Scree Fron, & Athor).  Replenishing supplies, it prepares to continue its Grand Tour.
60.097 CDCSS Nightwind turns up in the White Light system under the name TSS Star’s Gift.  CDC immediately dispatches a team to recover the ship. (AR)
60.098 Having completed its shakedown cruise, the UPFS Nexus begins a high speed run to join up with Strike Force Nova.
60.099 Fortress Kdikitt (Madderly’s Star) reaches the 80% completion mark.  Behind schedule and due to the increased sathar activity in the Frontier, the UPF places a priority on operational security and getting the fortress completed.
60.100 After months of work, a petition with over 100,000 names is submitted to the Council of Worlds demanding investigation of signals detected from Hargurt in a system just beyond the Frontier in the direction of the Vast Expanse.  In the intervening months, signals have been detected multiple times from the system.
60.101 Second Volturnus Expedition members testify before the Council of Worlds about events on Volturnus (Zebulon) leading to the Battle of Volkos.
60.102 – The first of a new class of sathar vessels, the cutter, functionally modeled on the assault scout, is completed at the sathar starship construction center near Zebulon.

– SF Nova departs K’sta-Kar for the White Light System
60.103 After months of deliberation, the Council of Worlds votes to increase Spacefleet spending by 10% allowing for the commissioning of several new vessels.
60.104 After many days of debate, the decision is made to abandon the Tischen and Dayzer systems in face of the sathar forces there and focus all efforts on defending Sauria and completing the Ark program (FE004).
60.105 The TTSS Destiny departs Gran Quivera (Prenglar) for the Timeon system to continue its Grand Tour of the Frontier.  Over 100 passengers have been on the ship for the entire tour and intend to visit every system.
60.106 CDC team arrives in the White Light System from the Theseus system to attempt to reclaim the CDCSS Nightwind (AR).
60.107 Assault scout completed at the Gran Quivera (Prenglar) starship construction center to replace the UPF vessel lost at the Battle of Zebulon
60.108 After over a month of struggle through the jungles, the Spire Dragons reach the foothills of Mount Spire and establish a base camp.  Several members of the expedition have perished along the way and people question the wisdom of their approach.
60.109 A new assault scout is completed at the Pale starship construction center to replace the militia vessel lost at the Battle of Zebulon
60.110 UPFS Nexus arrives at Clarion (White Light) to await the arrival of SF Nova and spends the day training with the White Light Militia.
60.111 SF Nova arrives at Clarion in the White Light system and is joined by UPFS Nexus.  It will remain in system for 19 days.
60.112 After sneaking onboard just before the ship departs, the CDCSS Nightwind is recaptured by the CDC operatives and the former employees responsible for assisting in its disappearance are captured.  The ship begins its way back to corporate headquarters.
60.113 After a long and detailed search of the Gruna Garu system by Patrol Group Wisdom, no evidence is found of the mysterious vessel.  The patrol group departs the system to return to Prenglar.
60.114 Attempt is made (but fails) to sabotage Gollwin Academy.

Here’s the full timeline document:

DetailedFrontierTimelineDownload
May 7, 2019 Tom Leave a comment

A Module Based Campaign – part 1

As I’ve been creating and tweeting the #SFTimeline on the @StarFrontiers Twitter account, I’ve been thinking more and more about how to string all of the published Star Frontiers modules into a comprehensive campaign. 

As I was writing up this post, I was reminded that the topic for the RPG Blog Carnival this month was “The Art of Customization”. This series of articles falls directly into that topic as I’m customizing the published modules to form a comprehensive campaign and story from the disjointed publications. So this will be an entry in the Blog Carnival. I don’t often do Blog Carnival posts as the topics don’t ever seem to mesh up with what I’m working on (or I don’t want to try to shoehorn them together). This one just happened to line up.

The timeline I’ve been tweeting doesn’t work as I’ve been interspersing the modules into the timeline out of order.  That’s mainly because I’m a bit impatient and wanted to incorporate the modules early to give me some ideas of things to include in the timeline.  I have enough threads running now that I can safely drop the rest of the modules in in their “appropriate” order for set of PCs to be the protagonists in all the events.  Maybe at some point I’ll go back and tweak the timeline to match the one I’m presenting here.

The modules don’t provide enough XP by themselves to move directly between them, so in addition to providing my preferred order to the modules, I’ll be providing some suggestions of additional adventures, either from the fanzines or that the Referee will need to create for their group.  Depending on how much I end up writing, this may end up as a series of posts. 

I’ve posted bits and pieces of this campaign idea over the years on various social media and forums but in this series of posts I’m going to try to collate all of that into a comprehensive document. Let’s get started.

Ground Rules

In the timeline that follows, I’m going to assume that the PC’s start as fresh, new adventurers newly minted with the Alpha Dawn Expanded rules:  a PSA and two level 1 skills. 

I’m also going to be a generous Referee and assume that in the published modules, the PCs earn the maximum (or nearly the maximum) XP possible in each of the sessions.  As we launch into each of the modules in the timeline, I’m going to present what I expect the approximate amount of XP the characters should have earned at that point.  If you are running this campaign and your characters aren’t quite there yet, run a few more side adventures for them to get them up to speed.

I’m also going to assume the module are run as written, warts and all.  You’re free to tweak them as you see fit but I’ll assume the events described occur.

TL;DR Version

In case you don’t want to read all the details, here’s the overall order I’d run the modules in sans, any intermediary adventures to get the XP progression correct.  It’s mostly the order they were published, but bumping Mission to Alcazzar after Dark Side of the Moon.

  1. SF0: Crash on Volturnus
  2. SF1: Volturnus, Planet of Mystery
  3. SF2: Starspawn of Volturnus
  4. SF3: Sundown on Starmist
  5. SFAD5: Bugs in the System
  6. SFAD6: Dark Side of the Moon
  7. SF4: Mission to Alcazzar
  8. SFKH0: Warriors of White Light
  9. SFKH1: Drammune Run
  10. SFKH2: Mutiny on the Elanor Moraes
  11. SFKH3: Face of the Enemy
  12. SFKH4: The War Machine

TSR did a good job in publishing the modules in order of increasing power level.  The exception being the two modules developed by the UK group (SFAD5 & 6) that only require PCs with a power level a little less than Mission to Alcazzar.  I’m sure if more modules had been published, they would have bounced around more but their initial offerings were spot on.

The Grand Campaign

The Great Sathar War

You may or may not have noticed in my other writing, but I will typically refer to the First Sathar War as the Great Sathar War in my writing and “in world” documents that discuss events occurring before the Second Sathar War (SWII) starts. You can’t have a “first” without a “second” so until the SWII starts, and is recognized as such, there would be another term for the first conflict. And while I typically use “The Great Sathar War” as the name, due to its localized extent – only affecting four star systems – using the term “great” is probably a misnomer and I should be referring to it as the “Sathar War”, “The Sathar Incursion”, or “The Sathar Incident”. Although since it affected the two most populated systems (Cassidine and Prenglar) it might be considered a “war”, even if mostly just a naval one.

In my mind, all these adventures take place, and in some cases, trigger, events in the Second Sathar War.  In any case, they have to occur after the First Sathar War as the PCs know of the existence of the sathar even in the first Volturnus adventure which they wouldn’t if it occurred before the first sathar invasion.

I also see the SWII as a much longer and more protracted affair than the First Sathar War with the sathar trying to undermine the UPF and Rim systems and infrastructure before the actual invasion.  This can be seen in the Detailed Frontier Timeline I’m working on and will be reflected in some of the side adventures here.  While the PCs may not be involved in any of the major military conflicts of the war (especially at the beginning of the campaign), those events will be happening in the background and the PCs may find themselves in the aftermath.

Volturnus

We begin the campaign by running though the three published Volturnus adventures.

SF0: Crash on Volturnus

Since the original boxed set included the Crash on Volturnus module, that is where we will start.  This module assumes brand new PCs with 0 XP.  I always tell the players to not spend any of their initial funds on weapons and that they will be issued weapons as part of the start of the adventure.  And then in the introduction I let them choose a weapon and tell them that it is placed in the weapons locker on the Serena Dawn.  That way they aren’t really penalized for the game fiat that their weapons are destroyed. 

In my game, there are quickdeath on Pale from the sathar invasion during the Great Sathar War.  While the PCs may know of their existence and have seen pictures, they probably haven’t seen one in real life as they have been mostly hunted and controlled.  Thus the presence of the quickdeath in the Ul-mor ceremony should be the first clue to the PCs that sathar have been on the planet in the past and may be still here.

SF1: Volturnus, Planet of Mystery

This module follows directly from the events in Crash on Volturnus and so the characters continue in their struggle to survive and escape Volturnus.  If all went well, the PCs will have picked up 18 XP in the previous module and added a couple level of skills.

In this adventure they deal with the pirate threat on the planet and discover the larger sathar history and current presence on the planet in the form of the artifact.  In my universe, the Star Devil pirates are partially supported by the Pan Galactic Corporation.  If you want to provide that level of detail, the PCs can notice that most of the equipment the pirates have are PGC models and not Streel ones, even through Streel headquarters are on Pale in Truane’s Star, the nearest star system to Volturnus.

Another change I make to this adventure is in ending 1.  If you want (as we do) the PCs to play through the next module in the series, I don’t feel that 2 weeks is enough time.  Some of the tasks in the next module can take two weeks all by themselves.  I tend to leave the time frame vague, i.e. “Attack on planet eminent”, or give it a month or so.  Additionally, I want the UPF ships to show up right after the fighting starts and I don’t feel that two weeks is enough time to get any ships assembled beyond the Truane’s Star militia and get them to the Zebulon system.

The PCs can pick up another 18 XP in this adventure.

SF2: Starspawn of Volturnus

At this point the PCs have collected 36 XP and are probably level 3 or 4 in their primary skill and have a smattering of others.  This adventure consists of a series of mini-quests to do something of benefit to each of the sentient species on Volturnus to convince them to join in the fight against the incoming sathar attack.

My players always like the Great Game of the Ul-mor and have a fun time trying to win.  My last group, which happened to be my kids, managed to no only win the game, but do so without a single of the PCs being knocked off their mount.

The retrieval of the Sacred Idol of the Kurabanda is the part of the adventure that could potentially take the most time as part of the travel is through the wilderness on foot or by vehicle.  If they drive all the way there it’s a several day journey each way.  If they fly, they have to make the last part of the trek on foot which can take a few days, and if they happen to get caught in one of the blasts while flying and crash, they have a several week trek back without their vehicle.

The module ends with the massive Battle of Volkos, where the PCs pit themselves and the various species of Volturnus against the invading sathar hordes.  Regardless of whether the PCs win or lose the battle, I have the UPF fleet arrive as the land battle is winding down and drive off the Sathar fleet.  If the PCs win the ground battle, shuttles from the UPF fleet can safely land and possibly take the PCs back to Truane’s Star.  If they lose, the UPF fleet is a naval force only and doesn’t have ground troops to fight off the surviving sathar army.  They will radio back to the Frontier, but it will be some time before ground forces can be assembled and brought to the surface.  The PCs will have to hold out until then.

I described the composition of both the UPF and Sathar fleets in last week’s Battle of Zebulon post.  If you have players already familiar with the Knight Hawks rules, you could run this battle as an evening’s session.  There are a lot of ships, so it takes a while if you use the advanced rules as I did.

The PC’s can earn up to 15 more XP from this module bringing their total up to 51 XP.

After the Modules

As the last module suggests, there are a number of other things the PCs could do on Volturnus before leaving.  I have the UPF sticking around for a while after driving off the sathar so they can get transported home at any time if they do decide to have a few more adventures on planet.   Possible endeavors include:

The Devil’s Lair

In Frontier Explorer issue 7, I detailed a small complex that is the personal hideout of the Star Devil when visiting Volturnus.  I leave clues about the existence of this hideout in the computers of Slave City one for the PCs to discover.  The Star Devil isn’t in the system at the moment, but the PC’s can clear out the hideout and learn more about the Star Devil’s operations.  This small adventure is worth another 3 XP.

Eorna Defense Installation

In Frontier Explorer issue 2, Jim Young detailed a ruined Eorna Defense Installation.  The PCs could have noticed it while flying back and forth recruiting the species for the war or maybe found mention of it in the Mound of the Mechanons or the Eorna Archives.  The article provides two different scenarios for the location’s use depending on the background you want to use.  This would worth another 3 XP if successfully explored.

Eorna Lunar Defense Battery

Jim provided another location, this time on Volturnus’s moon, in issue 3 of the Frontier Explorer.  If you plan on having a Knight Hawks component to the game, you could have the PCs find a way here before the sathar arrive and use the fighters in the base in the battle (which is a bit of bending of the standard rules) or you could have the UPF forces discover the base and send the PCs in to investigate.  The fighters discovered could form the basis of the Zebulon system’s initial militia forces.  This could generate the PCs another 3 XP.

Lizard Head Rock

A long time ago, I did an entire complex under Lizard Head Rock, a location suggested as a possible adventure at the end of the module.  In my teenage years, this complex housed another species, even older than the Eorna, in a large, active, and hidden society.  If I were to use it today, I’d redesign it (I was obsessed with the confines of a single sheet of graph paper) and make it ruins instead of an active area, but it still would make a fun little exploration dungeon crawl.  The Yernoids in the area are a primitive version of the ancient race.  Depending on how big you make this, it could be 3-6 more XP.

Sathar Survivors

Finally, they could track down sathar survivors, another adventure hook suggested by the module.  Spacefleet doesn’t have the personnel and the native species are drifting back to their homelands.  It’s up to the PCs to clean up the pockets of sathar still sticking around.  If the PCs really are in to this, it could go on for a while but assuming they only do a small number of these roundups, they could earn 3-9 XP depending on the number, the complexity, and how generous you are with XP.

Returning to the Frontier

There are a number of events that could happen once the PCs return to the Frontier from Volturnus.  At this point, assuming you’ve done some of the additional adventures on Volturnus, the PCs should have between 60 and 70 XP.

Tracking down the Star Devil

Information collected on Volturnus provided clues to the Star Devil’s operations in the Pale system.  By the time the PCs return, the Pale government has identified the location of a small Star Devil Operation on New Pale.  The PCs are sent to investigate and shut down the operation, capturing the staff if possible.  This should be worth another 3 XP.

Council of Worlds

If your players want to get involved in some political wrangling, you could have them summoned to Gran Quivera in Prenglar to testify before the Council of Worlds as to the events on Volturnus and the state of the species there. Because of the Sathar, the Council of Worlds is interested in the events in the system.

In my game, the Battle of Zebulon (the space battle) and the Battle of Volkos (the ground battle) are the opening shots of the Second Sathar War.  It takes a while for everything to get going but the loss at Zebulon jolt the sathar out of their complacency towards the Frontier and cause them to step up their activities.

The PCs are the Frontier experts on Volturnus at the moment and their words could have far reaching impacts for the future of the planet and the species living there, as well as the Frontier’s response to the sathar.  This should be worth another 3-9 XP depending on how involved you make it.  It also gets them part way across the Frontier where they could be recruited for the next module SF3: Sundown on Starmist.

Up Next

That gets us through the first three modules with the PCs earning around 70 XP (possibly a bit more) from the modules and side adventures.  In the next installment, we’ll look at the rest of the Alpha Dawn modules and supplementary adventures that will get them to the spaceship skills and ready for the Knight Hawks adventures.

How have you strung the modules together?  Have you added in additional adventures on Volturnus? Share your experiences in the comments below.

April 30, 2019 Tom 3 Comments

Frontier Explorer Issue 24 Available

I’m going to assume that those reading this blog have heard this already from another source but just in case you haven’t, Issue 24 of the Frontier Explorer is now available for download from DriveThruRPG or on the magazine’s website. Here’s the announcement text:

Hello Explorers!

Welcome to issue 24 of the Frontier Explorer.  Now that Spacefleet has cleared out the recent sathar incursion, we can start publishing again.

This issue picks up right where we left off including some articles that were ready to go but didn’t make it into issue 23.  All of the usual articles (Jurak Hangna, comics, etc) are here along with articles about derlict spaceships, and some not so derelict ones along with an small mini adventure in our Warriors of White Light 2 series.

The biggest change is that we’ve moved to a new layout and design for the magazine’s cover, logo, and interior.  Let us know what you think about the changes and any suggestions or ideas you might have to make it even better.

This issue continues and strengthens our support for the FrontierSpace RPG in addition to Star Frontiers. Issue 23 had a conversion of the Star Frontier races to FrontierSpace. This issue contains the details of a star system from the FrontierSpace frontier sector as well as stats in the Jurak Hangna creature article for use in that system.

The full article list for this issue is:

  • Frontier News
  • Dark Shadow’s Revenge
  • Duergan’s Star System
  • Of Lost Ships and Derelicts
  • Exploring a Deserted Spaceship
  • Meet the Crew of the SS Knight Owl
  • Titan Rising: 2299 #17
  • Kdikit Blue Biters
  • Ghostship of the Terran Queen
  • Escape Run #3

Grab your copy today and as always, keep exploring!


April 24, 2019 Tom Leave a comment

Battle of Zebulon

I finally got the Pursale ship deck sketches up last week but then got completely distracted by a number of other things.  One of those was the decision to write up my concept for a complete “zero-to-hero” style Star Frontiers campaign that takes the characters from starting PCs to major players in the Frontier with high level spaceship skills that uses all the published modules.  The first of those posts will be next week. 

While working on that, I talk about the space battle around Volturnus at the end of the first 3 modules.  The modules hand wave it away as, at the time, the spaceship rules weren’t published so there was no way to run it.  In this post, we’ll look at my concept for that battle.  What sathar ships are there, and what the UPF sends to the fight.  If you read my Detailed Frontier Timeline posts, you know the answers as this has already been covered in the posts there, but I thought I’d lay out some of the rationale behind the decisions and set the game up for an epic Knight Hawks board game battle.  And I’ll tell you how it played out when I ran through the scenario to generate the timeline posts.

Sathar Ship Design

In my universe, all the sathar ships of destroyer size or larger are also troop transports.  While the UPF tend to have small crews and lots of allocated space, the sathar pack in lots of ground troops on to each ship. 

You can see an example (and more detailed explanation) of this in my Sathar Destroyer Technical Manual (link goes to product page on DriveThruRPG – it’s a free product) that details the interior of a sathar destroyer.  That ship carries over 500 ground troops packed into its bowels. 

Based on the ship sizes, I’ve extrapolated that the light cruisers carry about 4,500 troops, the heavy cruisers carry over 15,000 and the assault carriers transport around 10,000 troops in addition to up to 12 fighters.  While I haven’t completely fleshed out those larger vessels, this is a close enough estimate for this article.

How Many Sathar Ships Are Involved

Now that we know how many troops each ship transports, we can come up with a reasonable composition for the invasion fleet that is attacking Volturnus.

The boxed text from the adventure gives us the following clues:

All that can be done has been done to prepare the planet for defense against the hideous worms.  The initial reports arriving at the Eorna complex beneath the ruins of Volkos are good; the Eorna planetary defense batteries have kept the Sathar fleet at bay, and many of the Sathar shuttles have been destroyed attempting to land ground troops on the planet

The successful landing of a large Sathar army has been detected.  After scanning the planet, the Sathar advanced in the direction of Volkos.  They should arrive in full battle array sometime tomorrow morning.  They number at least 30,000 plus robots and other weapons!”

This tells us that there are at least 30,000 troops on the ground and that there were more to begin with as many were destroyed in the landing attempt.

So, we want a mix of ships that can transport something over 30,000 troops.  Based on the mix of ships given in the Knight Hawks campaign book, I settled on the following mix of ships for the fleet:

  • 2 frigates
  • 6 Destroyers
  • 2 Light Cruisers
  • 2 Heavy Cruisers
  • 1 Assault Carrier with 8 fighters

This gives me a total troop compliment of about 52,000 troops plus robots, attack creatures, and heavy weapons.  We can assume that about 40% of the troops were killed by the planetary defense system leaving about 30,000 for the assault on Volkos.

The UPF Contingent

We have to remember that this is not a planned engagement in an on-going war.  Rather it is a sudden call to arms that has to be filled in at short notice with no idea of what the opposing force will be.  In fact, given the overwhelming number of ships that were seen at Pale 50-60 years earlier (in my history), the UPF might be loathe to commit any ships fearing that they are sending them into a deathtrap.  Regardless, the ships are sent, but they are assembled on short notice.

The most obviously available ships are the Pale militia ships, consisting of a frigate and three assault scouts.  They would almost certainly be pressed into service by Spacefleet as they are only one jump away.  If Laco (in Dixon’s Star) had a militia, they too would probably have been involved but Laco is only an outpost.

Streel Corporate logo

Streel is headquartered on Pale, and it is almost certain that they have a number of military or paramilitary vessels at their disposal.  They might be conscripted by Spacefleet or possibly even volunteered as Streel has a definite interest in opening (and exploiting) Volturnus.  Keeping the sathar out of the system and off the planet is just good business practice.  So Streel will probably send some ships along.

That leaves Spacefleet.  Strike Force Nova might be around.  It patrols around the Frontier constantly so there is a chance it is nearby.  The nearest large group of ships with a known location is Task Force Prenglar, stationed in its namesake system.  The problem is that it’s three systems away from Zebulon.  Which means it’s going to take some time to get there and may not arrive in time. 

If you just use the distances between the stars as travel time, it’s only 15 days.  That’s they way the Alpha Dawn rules described interstellar travel.  However, the Knight Hawks rules say you have to accelerate up to 1% the speed of light to make the jump and then slow down at your destination.  That acceleration, at 1g takes a little over 83 hours or just over 4 days.  And then 4 days to slow down.  Assuming some maneuvering at the beginning and ending of the trip and checking vectors and such just before Void entry, a single interstellar hop really takes about 9 days, regardless of distance. Maybe a bit longer on long jumps due to extra astrogation calculation time.

Now we can speed this up a bit by accelerating faster but for a long transit, that has detrimental effects on crew.  If you expect to be coming out of the Void into a firefight, you don’t want to have spent the last two weeks strapped into an acceleration chair at 2-3 gees.

We can also speed up the transit by not slowing down in the intermediate systems.  Then we only have the astrogation time to worry about.  That might work for the Dixon’s Star system, but they will have to slow down in Truane’s Star to rendezvous with the ships from that system and coordinate their jump.  So assuming ships from Prenglar blow through Dixon’s Star without stopping it will take them 4.5 days to get to Void speed in Prenglar, 2.5 days in Dixon’s Star to do the astrogation calculations, 4.5 days to slow down at Pale in the Truane’s Star system. Then they need to accelerate and jump to Zebulon which will take another 9 days.  All told, that’s 20.5 days of travel.  Add to that any time it takes to assemble the Task Force and get the ships ready to leave.

What other options are there?  In the description of Spacefleet, it describes the two Task Forces and Strike Force Nova and then says that there are other smaller units as well.  I decided to take advantage of this.

image by Scott Mulder

At the same time as the events are unfolding on Volturnus, Streel and Pan Galactic are locked into what will be known as Laco’s War, the first corporate war.  In my games, this war is just starting to heat up.  Because of that, Spacefleet had recently dispatched a medium sized Patrol Group to the system to attempt put a damper on the rising hostilities.  Patrol Group Virgo, consisting of 2 light cruisers, 2 destroyers, 2 assault scouts, and an assault carrier with 8 fighters, has just recently arrived in Dixon’s Star.  That puts them marginally closer only requiring 18 days to get to Volturnus with the advantage that since they are already out on patrol, they can depart immediately.

So once the call comes in from the PCs, Spacefleet takes a day or two to make the decision and then dispatches Patrol Group Virgo from Dixon’s Star.  In Truane’s Star they pick up the Pale militia as well as a frigate, 4 corvettes, and 3 assault scouts that Streel sends along on the expedition.  With that, the ships arriving at Volturnus from the UPF are:

  • 8 Assault Scouts
  • 4 Corvettes
  • 2 Frigates
  • 2 Destroyers
  • 2 Light cruisers
  • 1 Assault Carrier with 8 fighters

From a campaign perspective, I have the UPF fleet arrive just as the battle on the ground is ending, driving off the sathar ships.

The Knight Hawks Scenario

We now have the order of battle.  The sides are fairly evenly matched.  The UPF fleet has more ships, but the sathar have slightly more hull points.  The UPF’s forces are concentrated into its smaller vessels, lots of little assault scouts and corvettes that can potentially be picked off fairly easily.

This scenario can be played by any number of people.  Simply divide into teams and each team takes a side.  The UPF forces divide fairly easily into three groups, one playing the UPF ships, one the Pale militia, and one the Streel ships.  Although the number of ships and their strength isn’t evenly distributed between those groups.  The sathar ships can be divided up any way that team sees fit.

Setup

A planet counter representing Volturnus is placed in the center of the map.

The sathar are the defenders in this scenario.  Sathar ships, with the exception of the frigates, are all placed in orbit around Volturnus with a speed of zero.  They have just recently finished dropping off all their troops.  Since the frigates are not troop carriers, they can start in any hex within 5 hexes of the planet with a speed of up to 5 hexes/turn.

The UPF are the attackers.  They all start along one of the short sides of the map.  The individual ships can be anywhere on that side, but all the ships have to be on the same side.  They must start within 3 hexes of the map edge and be moving at any speed up to 15 hexes/turn.  All the UPF ships have to start at the same speed.

Special Rules

Escaping the Battle

A ship is considered to have escaped from battle if it moves off any edge of the map with a) no ships in pursuit, or b) is out of weapon range and has a higher ADF of any pursuing ships.

Preserve the Fleet

Heavy cruisers and assault carriers are important vessels in the sathar navy.  If the tide of battle seems to be going against the sathar, they will try to pull back to preserve these larger vessels, sacrificing the smaller ones if necessary (even if it means ramming) to delay the UPF ships and allow the larger vessels to escape.

Victory Conditions

Sathar Victory

The sathar claim victory if they can destroy all the UPF vessels.

UPF Victory

The UPF claim a complete victory if all the sathar vessels are destroyed.  If any of the sathar vessels escape, it is only a partial victory.

When I Played

image by Scott Mulder

I played this out once using the full Advanced Combat rules of the Knight Hawks boardgame.  I wanted to test the plausibility of this mix of ships in the scenario.  Basically I was playing to make sure it was possible for the UPF to win.  I definitely thought the sathar would have the advantage.  It turned into quite the slugfest.  However, the UPF got in some lucky early blows with the assault scouts living up to their hype and taking out nearly half of the sathar fleet by round 3 of the game after losing only a single assault scout.

In the end, the sathar fleet was routed, escaping with only 1 frigate, 2 destroyers, and a heavy cruiser. The other heavy cruiser and assault carrier were lost on that fateful round 3.  The UPF only lost a Pale militia assault scout, and a light cruiser and assault scout from the Spacefleet contingent, but almost no ship escaped unscathed.  The die rolls favored the UPF and it ended up being a very lopsided game.  I suspect if played through several more times, it could go either way.

Last Thoughts

Do you like these Knight Hawks game scenarios?  Would you like to see more of them?  Should I include the statistics for the ships?  If you play this scenario out, let me know which rule set you used (Basic or Advanced) and how it turned out.

April 23, 2019 Tom 6 Comments

Maps from the Past

This post is going up a day late. Partially because I didn’t finish what I had wanted to post yesterday in time, and partially because time got away from me working on issue 24 of the Frontier Explorer (which is almost done). So I didn’t have a post ready yesterday

My original plan was to post my sketches of the Pursale ship entombed in the center of the Outpost Osiris asteroid. But in looking at those I realized a couple of things:

  1. I had used the wrong scale grid when building the original sketches. Interestingly enough when I applied the correct grid to the maps, all the corridors I had free-handed in that were off the original, wrong grid, matched up almost perfectly with the correct grid. I guess subconsciously I knew there was something wrong.
  2. I forgot a few fairly important parts of the ship, for example airlocks.

That means I need to rework the sketches before they are ready to present. That’s this week’s project.

In the mean time, I rooted around in my old folders and found some old location maps that I drew way back in the late 80’s as a teenager when I was actively playing Star Frontiers in high school. I’d probably draw them differently now, but they definitely hold a bit of nostalgia.

I’m presenting them in this post as-is. These are simply scans of the original hand-drawn maps that were created on 8.5×11 quad-ruled graph paper. (I even think I still have some of the original pads as I bought a big box of them back in the day.) I’ll be providing a little bit of commentary but not much. I actually have write-ups for some of them but I’ll hold that for a later post when I have a chance to review them and update them to remove any glaring errors I made as a teenager when I first concocted them. For all of the images, you can click on them to get the full 200dpi resolution version (each one is about 5 MB in size).

Conference Center

This one is a portion of a large area map. It is inside a clear, domed area which I think was supposed to be on an asteroid or moon but given the layout, needs some significant gravity. This location is the basis of a murder mystery adventure. I’ll definitely be updating and writing this one up at some point in the future.

Pirate Base

This location consists of three maps, and as far as I can tell, I don’t have any sort of write-up for this one. Although it is supposed to be in an asteroid. Probably inspired by the idea of the Planaron pirate base from Warrior of White Light. Do with it as you will.

Upper Level

This is the main level with the main entrance via the airlock in the lower left. I think this one has some serious scale issues. According to the scale at the bottom, one square is 10 meters. Which makes those passages large enough to drive trucks down. It probably should be 2m per square.

Lower Level

This is the officer level with private facilities, also two different escape routes, one via the airlock in the upper left to a tunnel through the asteroid and the secret exit in the upper right

Secret Escape Bay

The pirate officers have an assault scout stashed away in a hidden bunker. That ship is 21.5 squares long which gives more credence to the 1 square is 2m scale hypothesis. I vaguely remember painstakingly drawing that assault scout based on the image on the little Knight Hawks chit.

Sathar Training Base

Our last location is a set of two maps detailing a sathar training base. I’m pretty sure this one was inspired by the sathar training base in the Sundown on Starmist module. I have a write-up for this one as well that I will post in the future once I’ve had a chance to review it.

Surface Level

This is nestled in a forested area and has a number of features that stick up through the trees. I was also inspired to draw a profile view (lower right) that is looking from the bottom of the map towards the top.

Lower Level

This is the actual base and built completely underground. The defense turret is automated and has a magazine that feeds the rocket launcher and recoilless rifles mounted on the defense dome.

Other Locations

I have several other maps of other locations I developed back in the day, and even more recently. There are only one or two of the older ones that I would consider useful. Most of them were way too far fetched and fantastical for any game I’d run today but I guess made sense to my teen-aged self.

I hope you enjoyed this little walk down memory lane with me. Let me know what you think of these maps and which if any you’d like to see detailed out first. Feel free to use these maps in your own games if you want.

In the mean time, I need to get back to working on the alien ship for the Ghost Ship Osiris module. See you next week.

April 10, 2019 Tom Leave a comment

Detailed Frontier Timeline – FY60.054 to FY60.084

Here is the next set of entries in the detailed Frontier timeline. This month includes the beginning of the events in the Sundown on Starmist module, the beginning of the final campaign of the sathar against the saurians in the their corner of space, as well as the commencement of hostilities by sathar agents against military targets throughout the Frontier.

Date (FY)Event
60.054 Waiting for decisions from the Council of Worlds and Spacefleet, PGC dispatches several vessels from Gran Quivera (Prenglar) to Dixon’s Star to serve as a corporate militia in the system.
60.055 Sathar SCC#3, near Kizk-Kar, completes production of a frigate.
60.056 The small raid (1 LC, 2DD) launched by Clan Z arrives in Kizk-Kar system. With SF Nova in system, the UPF ships soundly defeat the sathar ships in the first official battle of what will come to be called the Second Sathar War.  SF Nova extends its stay in the system for an extra 7 days.
60.057 Council of Worlds envoys arrive at Volturnus (Zebulon) to meet with leaders of the various native races.
60.058 * In wake of the recent sathar attack and activity, the Zik-Kit (Kizk’-Kar) government joins the trade and defense alliance with Kawdl-Kit (K’tsa-Kar) and Ken’zah-Kit (K’aken-Kar)

* News of the failed raid on Kisk-Kar reaches sathar space.  The premature action and its failure curries disfavor and Clan Z falls out of favor, losing any chance to leading the attack on the Frontier.
60.059 Careful examination of the Eorna eggs has determined that they are, in fact, viable. Eorna on Volturnus (Zebulon) celebrate and declare the day of discovery to be known as the Day of Life to be remembered just as the Day of Doom.
60.060 Members of the Second Volturnus Expedition depart Volturnus to return to Pale.
60.061 Sathar SCC in the Liberty system completes construction of half a dozen fighters.
60.062 Rim Coalition delegation arrives at Gran Quivera (Prenglar).
60.063 Sathar vessels from the Liberty system arrive at the staging area to await assignments.
60.064 Rim delegation begins meeting with the Council of Worlds to discuss the sathar situation and the mutual defense of the Frontier and Rim.
60.065 * Supplies intended for Fortress Kdikit in Madderly’s Star are stolen/destroyed by pirates while in route to the construction site.

* SF Nova departs Kisk-Kar for the K’aken-Kar system.
60.066 After several space battles, sathar forces overcome the saurian defenses in the Dayzer system and bombard New Kischen (FE004) obliterating the saurian settlements on the planet.
60.067 The first of Spacefleet’s Talnor-D (FE004) communication ships, the UPFS Nexus, emerges from the shipyard at Gran Quivera (Prenglar).  It begins a 30-day shakedown cruise with Task Force Prenglar.
60.068 Sathar forces in the Tischen system finally overcome the saurian defense forces and launch a planetary bombardment of Kzz-ten (FE004) destroying the settlements on that planet.  The defense of both the Tischen and Dayzer systems have put a serious dent in the sathar resources for the campaign, buying the saurians some time to bolster Sauria’s (FE004) defenses and work to complete the Great Ark project.
60.069 Second Volturnus Expedition members arrive back at Pale to a hero’s welcome and receive recognition for their work in repelling the sathar attacks in that system.
60.070 * Sathar agents in the Frontier begin stepping up activities, especially focused on military and technological sabotage.

* An anti-Streel group, funded by sathar agents, strike at the Streel SCC around Pale, reducing capacity by 63% while repairs are made.  Several ships under construction are damaged but the militia Assault Scout miraculously escapes unscathed.
60.071 Two small flights of three Saurian Battle Rays (FE004) each are dispatched to investigate the state of the Tischen and Dayzer systems and determine the strength of sathar forces.
60.072 CEO of Streel, Hilo Headrow (ZG) signs deal with his friend from the Great Sathar War, Esper Henshaw (ZG), CEO of MerCo, for MerCo to supply several teams to increase the security at the Streel starship construction center orbiting Pale (Truane’s Star) while Streel investigates the source of the recent attack.
60.073 SF Nova arrives in the K’aken-Kar system and will remain in system for 8 days.
60.074 Initial damage assessment of the Pale (Truane’s Star) starship construction center reveals that the damage was not as extensive as originally thought. Materials and equipment shuttled up from the surface quickly bring production capacity back to 58%. Work begins to restore full capacity.
60.075 A mountaineering survival team, calling themselves the Spire Dragons, begin their attempt to traverse coast to summit and climb Mt. Spire (Lossend, Timeon) (ZG) completely on foot.  The team consists of members of all seven Frontier and Rim species with the goal that a member of each species will reach the top of the Frontier’s highest peak.
60.076 Medical Services Organization issues another alert about the drug Ixiol, stating that the use of the drug on Triad (Cassidine) has reached dangerous levels and is impacting work and economic activity on the planet.  They call for the Council of Worlds and Star Law to investigate the production and trade of the drug.
60.077 * An independent freighter in the Gruna Garu system claims sighting of an unknown vessel, roughly the size of a light cruiser bearing UPF markings but not matching any known UPF vessel type. 

* Spacefleet dismisses the sighting as inaccurate claiming no vessel of that type in its inventory and dispatch a small patrol group (a frigate and 2 assault scouts) from Prenglar to investigate.
60.078 * Maximillian Malligigg takes possession of the VSS Last Legs, a small freighter, and with a small crew and scouting party leaves for Starmist. (SF3)

* Sathar reinforcements arrive in the Tischen system.
60.079 Members of the Second Volturnus Expedition summoned to the Council of Worlds to testify of events on Volturnus (Zebulon) leading to the Battle of Volkos
60.080 * Sathar reinforcements arrive in the Dayzer system.

* Saurian scout ships arrive in the Tischen and Dayzer systems and begin to probe the systems while avoiding sathar forces.
60.081 SF Nova departs K’aken-Kar for the K’tsa-Kar system.
60.082 After months of fundraising, a new organization, The Yazira Heritage Foundation, purchases and begins refitting a small vessel to use as an exploration ship.  Their goal is to reach the star that rumors claim is Yazira.
60.083 Sathar launch a probing raid into the Sauria system to test saurian defenses.  The two-destroyer task force is quickly destroyed by a wing of saurian Battle Rays.

Here is the complete, cumulative timeline as a PDF:

DetailedFrontierTimelineDownload
April 2, 2019 Tom Leave a comment

A New Starship Construction System – part 5 – Engines Revisited

This post is a result of me thinking about the smaller ships: shuttles, fighters, even assault scouts. But especially the tiny hull size one and two ships. We’re going to look at an expansion of the engine size chart presented in part 2, adding in some new sizes and more data on the existing engines.

The first thing I was contemplating, and that I’ve know for a while, is that the Class A engines were way overpowered for the very small craft. If you took the stats for a fighter, it comes out to a total mass of about 263 tons. The thrust for a Class A Atomic or Chemical drive is 6250 and an Ion drive has a thrust of 3000. That mean the maximum potential ADF is 23.7 for the atomic and chemical drives and 11.4 for the ion drive. Well over the 6 ADF maximum and the 5 ADF specified for the ships. These smaller ships could easily get by with much smaller engines and still have the same performance. It had always been my intention to add in the smaller engine sizes.

The other issue that has been nagging at me lately is docking, specifically in bays inside a larger vessel. The system takes this into account and allocates bay sizes based on the size of the ship and includes the mass of the docked ships in the ADF calculation. Except the final sizes of the ships don’t include size or mass of the engines! I had originally hand-waved that away saying that the engines were rated to propel themselves plus provide X amount of thrust depending on the size and type of engine. For the larger ships, that’s fine. The engines are external to the ship and it’s really not going to dock inside anything else. But for the little ships, this is an issue and I need mass and volume values to make it all work out.

So that’s the task for today: Calculate the data for some smaller engines for the little ships, and come up with mass and volume values for all the engine types.

And then we can properly build and design assault carriers to hold our fighters (and maybe our assault scouts) and any ship that has one or more shuttles it houses internally. So let’s get started.

Smaller Engines


Gemini and Apollo rocket engines from Wikipedia

This is actually the easy part. I intended to make two additional sizes of engines, one about half the performance of the Class A engine, and a second one at half the performance of that.

The hardest bit for me was coming up with a nomenclature. Do I go with the engine size labels from model rocketry (1/2A, 1/4A) to match the A, B, and C sizes of model rockets? Or do I go the battery route and call them AA, and AAA engines. In the end, I decided to go the battery route. So the Class AA engine has about half the performance of the Class A engine, and the Class AAA engine about 1/4 the performance.

The only real constraint I had was that I wanted at Class AAA engine to still provide and ADF of 5 to the standard UPF fighter. Since that fighter has a mass of 274 tons (when configure, it has to provide a thrust of at least 1370.

The thrust ratios between the Class A, B, & C engines are on the order of 3-4. If I maintained that same ratio, then our AA engine at best would only have a thrust rating of 6250/9 = 694, about 700 which is too small. Of course 2 of them would give us the required thrust but all the depictions of the smaller ships are single-engined and I wanted to go with that.

So instead of going down by thirds, decided to go down by halves. Actually a little more in the case of the step from Class A to Class AA with the atomic and chemical drives. With that decision made, it was time to work out the values. That gives us the following table.

Engine Performance Table
Class AClass AAClass AAA
Engine TypeThrustCost (cr)ThrustCost (cr)ThrustCost (cr)
Chemical6,25050,0003,00028,0001,50015,000
Ion3,000100,0001,50055,00075030,000
Atomic6,250250,0003,000130,0001,50070,000

The values for the Class A engines are simply taken from the original post and provided for comparison. Additionally, we need the cost of fuel for each of these new engines types.

Fuel Cost Table
Engine TypeClass AClass AAClass AAA
Chemical30015075
Ion532
Atomic10,0006,0003,000

As with the larger engines, the atomic engines require the atomic fuel pellet at the prices listed plus a load of Chemical fuel as well.

Unlike the larger atomic engines, which can hold more than a single fuel load, the AA and AAA atomic engines can only hold a single load. Additionally, the smaller ion engines can only hold 5,000 fuel units instead of 10,000 like their full-sized siblings.

Volumes and Masses

Now for the harder part. Generating volumes and masses for these various engines.

Engine Volume

There really isn’t much go to on here. I could look at the miniatures, but they were created more for style than with any eye for consistency between the ships. There are also a few drawing in the game books that might be used as a reference. In the end, I did the following.

I started with my 3D model of the assault scout which is based on the drawings of the ship all through the books. I then assumed that this plus the wing of the assault scout represented the volume of the engine plus the fuel tanks needed to hold the three units of fuel for the engine. This gave me a volume, based on my models of 657 cubic meters. We’ll round that down to 600 cubic meters and call it good. That’s the volume of a Class A atomic engine and its associated fuel tanks.

Now, anyone who looks at real rockets will immediately realize that that isn’t a lot of volume for fuel. For example, the space shuttle’s external tank had a volume of just over 2000 cubic meters. And that’s enough to make one trip up, not one and back, let alone three trips. So we’re dealing with some amazing rocket propellant here (and really cheap too). But that’s okay, I’m willing to have handwavium as a fuel additive in our rockets.

The next thing we need is a scaling relation for the larger (and smaller) engines. It has to account for the larger fuel load in the larger engines, And remembering that for the atomic engines, we can hold additional loads over the three in the Class A engines. At the very least, it has to scale up as the thrust scales. But I want to add a little more on top of that.

At one point in the past, I had made 3D models of Class A, B, & C atomic engines. At some point when I created them, I had some rationale for why they were the size they were. I don’t remember that rationale now (and it may have been purely aesthetic), but I figured I could at least look at them and see what the relationships were.

In the end I decided that the scaling for the volumes would be 1.45 times the scaling in the thrust. That would provide a baseline and then I’d adjust the numbers slightly to get nice “round” numbers (i.e. 2800 instead of 2782.5). On the smaller engines, I adjusted things up bit making the engines slightly larger to account for “minimum” sizes for some of the components and fuel tanks. I also made some adjustments to the various types of engines to account for the type and amount of fuel they carry.

Engine Mass

This one was much easier as it was to be based off of the volume. In this case I just assumed an “average” density for each type of engine and its fuel. The question was what to pick.

Modern rocket fuels are actually very light, on the order of 0.7-1.0 tons per cubic meter, less dense than water. And liquid hydrogen, the primary fuel in ion engines, is amazing light at only 0.07 tons per cubic meter. On the other hand, the actual engine parts are going to be much more dense to withstand the forces and pressures being exerted.

So in the end I compromised. Chemical engines would have an average density of 2 tons/cubic meter, ion engines would be 1.5 to reflect their much lighter fuel, and atomic engines would be 2.5 to represent the additional components that give them their special properties.

Engine Data

With all of those items figured out we can now build the full data table on each of the engine types.

Chemical Engines

SizeThrustCost (cr)Fuel Cost (cr)Volume (m3)Mass (tons)
AAA1,50015,00075100200
AA3,00028,000150200400
A6,25050,000300400800
B20,000175,0001,0002,0004,000
C80,000770,0004,20012,00024,000

Ion Engines

SizeThrustCost (cr)Fuel Cost (cr)Volume (m3)Mass (tons)
AAA75030,0002100150
AA1,50055,0003200300
A3,000100,0005500750
B10,000400,000172,5003,750
C40,000200,0007015,00022,500

Atomic Engines

SizeThrustCost (cr)Fuel Cost (cr)Volume (m3)Mass (tons)
AAA1,50070,0003,000100250
AA3,000130,0006,000200500
A6,250250,00010,0006001500
B20,000400,00032,0002,8007,000
C80,0006,000,000125,00016,00040,000

Impacts

So how does this impact our smaller ships? Most importantly, I want to see what it does for fighters and digger shuttles, the two small ships that are explicitly included inside larger vessels.

Using this system before the changes to the engines, we had the following characteristics for the two ships:

  • Fighter – mass: 274 tons, volume: 136 m3, 1 Class A Atomic engine, Max loaded ADF: 22.8
  • Digger shuttle – mass: 1330 tons, volume: 641 m3, 1 Class A Chemical engine, Max loaded ADF: 4.7

If we were to just update these vessels with the data for the original engines, the volume of the fighter would jump to 736 m3 with a mass of 1774 tons, an increase of 441% and 547% respectively. The digger shuttle isn’t quite as bad as it was bigger to begin with but it would increase to 1041 m3 and 2130 tons, increases of 62% and 60%.

However, these ships don’t need this large of an engine. If its occupants could handle it, the Class A engines on the fighter give it a maximum possible ADF of 22.8. Since it is only supposed to have an ADF of 5, we can swap out the Class A engine for a Class AAA engine. It will still have a maximum ADF of 5.5. With that change, the the fighter now has a volume of 236 m3 (a 74% increase) and a mass of 524 tons (a 91% increase). Still larger, but much more reasonable and easier to pack into our assault carriers. It also reduces the cost of the fighter by 180,000 credits. Since the original cost was 528,151 cr., reducing that by 180,000 is a savings of 34%. And that makes the bean counters at Spacefleet happy.

The default Class A chemical engine on the digger shuttle gives it a maximum ADF of 4.7, well within the species limit of 5. However, it only really needs an ADF of at least 2 to get on and off planets, so here we can get away with a Class AA chemical engine. This still leaves the shuttle with a max ADF of 2.3, reduces the cost of the shuttle by 22,000 cr., and put the final volume and mass at 841 m3 and 1730 tons (increases of 32% and 30% over the original), making them easier to store in the mining ships. Since the digger shuttle was original 140,320 cr., the 22,000 cr. reduction saves nearly 16% off the cost of the shuttle.

And for the curious, the Assault Scout has a volume and mass of 3455 m3 and 2458 tons. Adding in its two Class A atomic engines brings its total volume up to 4655 m3 and total mass up to 5558 tons (increases of 35% and 126%). That makes it 20x larger and 11x more massive than a fighter. So it’s not unreasonable that special carriers might be designed to transport the larger ships.

Final Thoughts

I definitely like the direction of this change. The size of the fuel storage is probably unreasonably small, but that’s just going to be part of the fiction of our science fiction. The exact values might change as this sees a bit more play but I think it serves as a solid baseline to build on.

What are your thoughts and ideas on this update to the engines? Let me know in the comments below.

March 26, 2019 Tom 1 Comment

The Hum Calendar

With work on the next issue of the Frontier Explorer happening, it’s taking me a bit longer to get to these posts than I had hopped but progress is being made. And I haven’t yet fallen behind.

Today we build the calendar system for Hum, the humma homeworld in the Fochrik system, which we have been detailing in the previous posts (part 1, part 2) in this series.

The Data

image credit – JPL

In the first part of this series, we established the following facts about Hum:

  • From Zebulon’s Guide to Frontier Space
    • Rotational period: 30 hours (we’re going to refine this a bit later on)
    • Surface gravity: 0.9g (which we increased the precision on to 0.91g)
    • 3 moons: Kran, Gluk, & Clud
  • From our calculations:
    • Orbital Distance: 1.23 AU
    • Orbital Period: 11323.3 hours
    • Density: 5.43 gm/cm3
    • Mass: 0.8139 Earth masses
    • Radius: 5,991.93 km

Of those parameters, we won’t be using the surface gravity, radius, or orbital distance in this analysis but we will be using the rest.

The Moons

I ignored the moons in the early parts of this series but now they become important so we need to detail them out a little bit more. Just as the orbital period of the Earth’s moon defines the concept of a month for us, given that this is the humma homeworld, the orbital periods of Hum’s moons would probably play a roll in defining their calendar system as well. So lets figure out the data on Hum’s moons.

All we really have to start with is the fact that there are three moons and their order (assuming the first one listed is the closest). Beyond that, we can really do whatever we want. That said, we have a few considerations to keep in mind.

First, Hum is smaller than Earth (about the size of Venus) and so has a smaller gravitational pull. This just means that the larger the moon, the more it will cause the planet to “wobble” about their common center of gravity. So we may not want any moon to be too big. It also means that if the moons have to be too far away, they might have escaped the planet’s gravity well. This latter point shouldn’t be an issue but is something to keep in mind.

Second, the moons will all mutually interact gravitationally. Which means if we have strong orbital resonances (orbital periods in small integer ratios), or if they have very close passes (with “close” depending on their relative sizes) as they orbit, the moon system may be unstable and not have survived to the present day.

So while we can pick anything we want, we should keep those ideas in mind. Now ideally, after picking the parameters for the moons and their orbits, I would generate orbital data for them all and run them through several hundred thousand or several million years of orbits to confirm stability but I didn’t do that. So we’ll just hope what we come up with something that makes sense and works.

The other thing to consider is what role we want to attribute to the moons in regards to the calendar system. This will have an impact on the orbital periods we pick.

Kran

From here on out we’ll be calculating time in hours and using the Galactic Standard Hour (which equals one Earth hour) as the value. In truth, there is no real reason for the humma to have an hour (or minutes or seconds for that matter) that correspond to that but it as useful measure to discuss the topic. There’s only so much new information you can wrap your mind about.

Kran is the innermost moon of the system. It will have the shortest orbital period of the three. As such, I decided that this moon would also be the smallest and associated with the “week” concept on Hum.

Since I want the “week” to be something on the order of 5 to 10 local days, and as I have no real reason to prefer one value of another, I’ll just roll 1d6+4 to get the value. I rolled a 5 so a Hum week is 9 local days long. Since the local day is 30 hours (from Zeb’s Guide), the week is 270 hours long. I want the orbital period of Kran to be something near this value so I just rolled four d10s to refine the number. The first one, I subtracted 5 from to get a number to add or subtract from 270, and the next 3 were just read as digits to represent the first 3 digits after the decimal place.

I rolled a 5 for the first die which meant no offset and then I got a 6, a 10(0), and a 4 so the orbital period of Kran is 270.604 hours. I realized later in the process that I should have probably given a bit more range the the +/- die but it’s fine as it is.

We’re also going to want to have a mass for the moon as that will have a small impact on its orbital distance. Since I wanted this moon to be small but still basically spherical, I just arbitrarily picked a size that was near to the size of the asteroid Ceres. I rolled some dice to pick exact values (although now I don’t remember exactly the rationale behind what I rolled) and came up with a value of 0.0125 times the mass of the Moon.

To get the size of the moon given its mass, we need its density. Referring back to the possible densities of the planets from the original article, I wanted to pick something in the 2-6 gm/cm3 range. So I rolled a d4+1 for the integer part and some d10s to get two decimal places and came up with
a density of 2.71 gm/cm3 for the moon.

Okay, now we’re all set to calculate the final values. Determining the radius is straightforward, we’re just back to this equation:

Only we’re solving for that r in there instead of M. That gives us a radius of 432.51 km. Next we want the orbital distance which takes us back to this equation:

where we are solving for a. M1 is the mass of the planet, and M2 is the mass of the moon. Again I used this handy website but since you can’t actually solve for a, I had to try various distances until I got the period to match. So it might have actually been faster to do the math on my calculator but oh well. We end up with a result of 198,336.5 km as the orbital distance for Kran.

For reference the diameter of Earth’s moon is 3474.2 km, almost exactly 8 times bigger, and it’s orbital distance is on average 384,400 km, so Kran is nearly twice as close.

Gluk & Clud

I’m not going to go over every detail of the other two moons but suffice it to say I followed the same procedure for each of those. The only constraints I had was that I wanted Gluk to be the largest of the three moons and have it’s orbital period correspond to between 1/8 to 1/14 of a year to represent the month concept. Clud was going to be way out there and orbit only about 4 times a year to correspond to the seasons.

After working through all the math we get the following results for each of the moons:

NameOrbital Period (hrs)Orbital Distance (km)Mass (moon)Density (gm/cm3)Radius (km)
Kran270.604198,336.50.01252.71432.5
Gluk1,026.836483,757.20.52373.141,430.2
Clud2,826.842948,883.70.24133.461,069.5

This image shows the sizes of the moons relative to each other and to Earth’s Moon. The image on the left shows their actual physical sizes if they were all side by side. The image on the right shows their apparent sizes as seen from the surface of Hum (assuming the Moon was dropped in at the proper distance).

The moons are all physically smaller than the Earth’s moon by quite a bit and appear smaller in the sky. Also, notice that because Kran is so much closer than the other moons, although it is physically the smallest, it appears almost as big as Gluk and larger than Clud.

Hum’s Rotation Period

One more thing we need to establish is the actual rotation period of Hum. The information in Zeb’s Guide said it was 30 hours. However, I want to add a few more decimal places but still have it round to 30. So employing my usual method, I rolled d10-6 (to get a value between -5 and +4) and then two d10s for decimal places. I then added that to 30 to get the actual rotation period in hours. I ended up with 30.09 hours.

The Calendar

Now that we have all the physical data we need, we can get on to the actual purpose of this post, determining the calendar of the planet Hum.

Length of Year

The first thing to determine is the length of the year in local days. We have the orbital period of the planet (11,323.3 hours – about 30% longer than an earth year and 41.5% longer than the Frontiers’ Galactic Standard Year) and the rotation period of the planet (30.09 hours) so we just divide and find that the Hum year is 376.3144 local days long.

In local day terms, the year is only a bit longer than an Earth year, just 11 days more. It also tells us we’re going to need leap years, about every third year. We’ll come back to that.

In the previous sections, with the exception of the moon Kran, I sort of glossed over the relationship between the orbital periods of the moons as they relate to the length of the Hum year. Now let’s look at that in detail.

A Week on Hum

The inner moon Kran has an orbital period of 270.604 hours. Dividing this by the length of a day (30.09) hours, we get that Kran orbits every 8.993 days. That’s almost exactly 9 days. In fact, amazingly close to to exactly 9 days. Which is why I said above, I should have allowed for a bit more variation.

You might be suspicious of how well these orbital periods line up. The exact values selected were not completely arbitrary. I picked approximate values based on what I wanted to see and then let the dice tweak them slightly. And then I also manually tuned them a bit more. For example, I actually rolled 30.06 hours as the rotational period of the planet but when working out the leap years, liked the values I got for 30.09 hours better and went with that. So it’s no coincidence that the numbers come out so close. Maybe too close.

But that’s fine, sometimes you get lucky. So we’ll define a week on Hum to be 9 days long. At some point the start of first day of the week corresponds to the full Kran on the meridian but since the cycles slowly drift, that only occurs every once in a while and the phases slowly move through the week.

Comparing Kran’s orbital period to the year, we see that it makes 41.84 orbits each year so a typical year is almost 42 weeks long.

A Hum Month

If we compare the orbital period of the moon Gluk to the length of day we see that it’s orbital period corresponds to 34.125 days. And comparing it to the planet’s orbital period, it makes 11.02737 orbits in a single year.

Since I’m going to tie the concept of a month to the orbit of Gluck, a nominal month is 34 days long and there are 11 months in the year. There might be some variation like on Earth but this works as a base line.

With eleven 34-day months, that accounts for 374 of the 376.31 days of the year, leaving 2 extra days in the calendar. I’m going to assign one of those days to one of the months making it 35 days long (in the spring) and the other will be a holiday celebrating the passing/new year and will occur at the end of summer which will be when the Hum calendar year ends.

A Seasonal Moon

That leaves us with Clud. It’s orbit is 93.95 days long and it orbits 4.006 times each year, completing one orbit every season. Since the timing of its orbit doesn’t quite line up with the planet’s orbital period, the timing of the full phase of this moon slowly shifts (by just over half a day a year) over the centuries but the humma have tracked this for millennia and know the pattern.

Leap Years

All that’s left is to deal with that pesky 0.3144 days left over after each year. Multiplying by 3 gives us 0.943 days, which is just enough to be considered another day. Thus every third year, the end of year holiday is a two day event instead of a single day adding an extra day on that particular year but not part of any month.

It’s not quite a full day though and so every 51 years, the deviations add up enough that the extra day is not added to the calendar, just like on Earth when we don’t add in the leap day on years divisible by 100.

Finally, there is one more minor correction and that occurs every 1530 years. On that year, which would normally be a year the extra day is skipped, the extra day is included (just like including the leap day here on Earth in years that are divisible by 400 as occurred in the year 2000). This has only occurred once since this calendar was established and the next one won’t occur for another 172 years.

The Final Calendar

So the final Hum calendar looks like this:

  • One week is 9 days long – in modern times it is a 6 day work week with a 3 day weekend
  • Each year has 11 months plus one holiday at the end of the year to celebrate the harvest and ring in the new year. This feast day/beginning of the new year corresponds to the end of the Hum summer (what we would call fall)
  • One month consists of 34 days, or nearly 4 weeks. The exception to this is the 5th month which is 35 days long. This occurs during the planting season giving one more day in that month.
  • Every three years there is a leap day, extending the harvest holiday into a 2 day event instead of a single day.
  • Except that every 51 years, the leap day is skipped and every 1530 years the day that would be skipped is included.

One more thing we need is to anchor this calendar with the Frontier standard calendar. To do that I’m going to say that the start of Hum year 2898 will coincide with FY60.124 and that year is a leap year so the end of year celebration (that starts on FY61.290) will last two days.

Last Thoughts

I realized as I was typing this up, that I didn’t account for the difference between sidereal and synodic periods for the moons. The orbital periods listed are really the synodic periods (as seen from the surface of Hum) but I treated them like the sidereal periods for computing orbital distances. Which means the distances are a bit off. The differences would be relatively small but that’s something I should revisit in the future. The rotation period for Hum is definitely the solar period (noon to noon) and not the sidereal period.

Otherwise, this is a pretty good description of Hum and its moons and a reasonable calendar for the system. I didn’t touch on Forge or Larg, the two other inhabited worlds in the Fochrik system. I’m assuming this calendar predates the humma’s space age and so is the foundation of any other calendar system on the other worlds. How it was adapted might be another article in the future but for now is left as an exercise for the reader.

What do you think of the calendar system presented? What would you have done differently? What do you like? Let me know in the comments below.

March 19, 2019 Tom Leave a comment

Posts navigation

← Previous 1 … 8 9 10 … 13 Next →
Become a Patron!

Recent Posts

  • State of the Frontier – January 2024
  • Detailed Frontier Timeline – FY62.069 to FY62.99
  • State of the Frontier – August 2022
  • Battle of Hargut (Gruna Garu) – FY62.098
  • Archived Arcane Game Lore Posts – May 2013 to Dec 2014
  • A Look at Yachts and Privateers
  • Homeworld Bound – A Campaign Concept
  • Second Battle of Fromeltar (Terledrom) – FY62.083
  • Sample Star System Data
  • Detailed Frontier Timeline – FY62.038 to FY62.068

Categories

  • 3D Models
  • Adventures
  • Background
  • Creatures/Races
  • Deck Plans
  • Equipment
  • Game Design
  • General
  • Locations
  • Maps
  • NPCs
  • Optional Rules
  • Patreon-only
  • Project Overviews
  • Reviews
  • Setting Material
  • Starships
  • System Brief
  • Vehicles
  • Writing

Recent Comments

  • Tom on State of the Frontier – January 2024
  • Tom on State of the Frontier – January 2024
  • Tom on Star Map Generator – GUI Edition
  • David on Star Map Generator – GUI Edition
  • DM_Shroud on Star Map Generator – GUI Edition
  • Tom on Fighter Miniatures
  • Rlaybeast on Fighter Miniatures
  • Loguar on Detailed Frontier Timeline – FY62.069 to FY62.99
  • Loguar on Detailed Frontier Timeline – FY62.069 to FY62.99
  • Tom on Detailed Frontier Timeline – FY62.069 to FY62.99

Archives

  • January 2024 (1)
  • September 2022 (1)
  • August 2022 (9)
  • July 2022 (3)
  • June 2022 (3)
  • May 2022 (3)
  • June 2021 (1)
  • April 2021 (1)
  • February 2021 (4)
  • January 2021 (6)
  • December 2020 (5)
  • November 2020 (11)
  • October 2020 (4)
  • September 2020 (5)
  • August 2020 (4)
  • July 2020 (6)
  • June 2020 (5)
  • May 2020 (8)
  • April 2020 (5)
  • March 2020 (5)
  • February 2020 (5)
  • January 2020 (5)
  • December 2019 (7)
  • November 2019 (4)
  • October 2019 (6)
  • September 2019 (5)
  • August 2019 (6)
  • July 2019 (7)
  • June 2019 (5)
  • May 2019 (6)
  • April 2019 (7)
  • March 2019 (4)
  • February 2019 (5)
  • January 2019 (7)
  • December 2018 (5)
  • November 2018 (10)
  • October 2018 (4)
  • September 2018 (4)
  • August 2018 (5)
  • July 2018 (4)
  • June 2018 (4)
  • May 2018 (12)
  • December 2015 (1)
  • November 2015 (2)
  • December 2014 (4)
  • November 2014 (3)
  • June 2014 (1)
  • January 2014 (1)
  • July 2013 (1)
  • June 2013 (2)
  • May 2013 (3)

Meta

  • Log in
  • Entries feed
  • Comments feed
  • WordPress.org

Recent Posts

  • State of the Frontier – January 2024
  • Detailed Frontier Timeline – FY62.069 to FY62.99
  • State of the Frontier – August 2022
  • Battle of Hargut (Gruna Garu) – FY62.098
  • Archived Arcane Game Lore Posts – May 2013 to Dec 2014

Recent Comments

  • Tom on State of the Frontier – January 2024
  • Tom on State of the Frontier – January 2024
  • Tom on Star Map Generator – GUI Edition
  • David on Star Map Generator – GUI Edition
  • DM_Shroud on Star Map Generator – GUI Edition

Archives

  • January 2024 (1)
  • September 2022 (1)
  • August 2022 (9)
  • July 2022 (3)
  • June 2022 (3)
  • May 2022 (3)
  • June 2021 (1)
  • April 2021 (1)
  • February 2021 (4)
  • January 2021 (6)
  • December 2020 (5)
  • November 2020 (11)
  • October 2020 (4)
  • September 2020 (5)
  • August 2020 (4)
  • July 2020 (6)
  • June 2020 (5)
  • May 2020 (8)
  • April 2020 (5)
  • March 2020 (5)
  • February 2020 (5)
  • January 2020 (5)
  • December 2019 (7)
  • November 2019 (4)
  • October 2019 (6)
  • September 2019 (5)
  • August 2019 (6)
  • July 2019 (7)
  • June 2019 (5)
  • May 2019 (6)
  • April 2019 (7)
  • March 2019 (4)
  • February 2019 (5)
  • January 2019 (7)
  • December 2018 (5)
  • November 2018 (10)
  • October 2018 (4)
  • September 2018 (4)
  • August 2018 (5)
  • July 2018 (4)
  • June 2018 (4)
  • May 2018 (12)
  • December 2015 (1)
  • November 2015 (2)
  • December 2014 (4)
  • November 2014 (3)
  • June 2014 (1)
  • January 2014 (1)
  • July 2013 (1)
  • June 2013 (2)
  • May 2013 (3)

Categories

  • 3D Models
  • Adventures
  • Background
  • Creatures/Races
  • Deck Plans
  • Equipment
  • Game Design
  • General
  • Locations
  • Maps
  • NPCs
  • Optional Rules
  • Patreon-only
  • Project Overviews
  • Reviews
  • Setting Material
  • Starships
  • System Brief
  • Vehicles
  • Writing

Meta

  • Log in
  • Entries feed
  • Comments feed
  • WordPress.org
Powered by WordPress | theme Layout Builder