This is only a week later than I had planned. I’ve gotten behind on updating the timeline entries and am still trying to catch up. I’ve had some big battles to play through and I just haven’t had the time to do so. There will be another battle coming in a few days as soon as I get it played out.
The timeline this month, like last, focuses almost exclusively on the maneuvering, battles, and logistics of the Second Sathar War. There are a few entries on the HSS History’s Hope but that is really the only not war related thread I’m tracking right now. This month saw a couple of battles. There was originally going to be one more but the UPF withdrew seeing as they faced almost certain destruction.
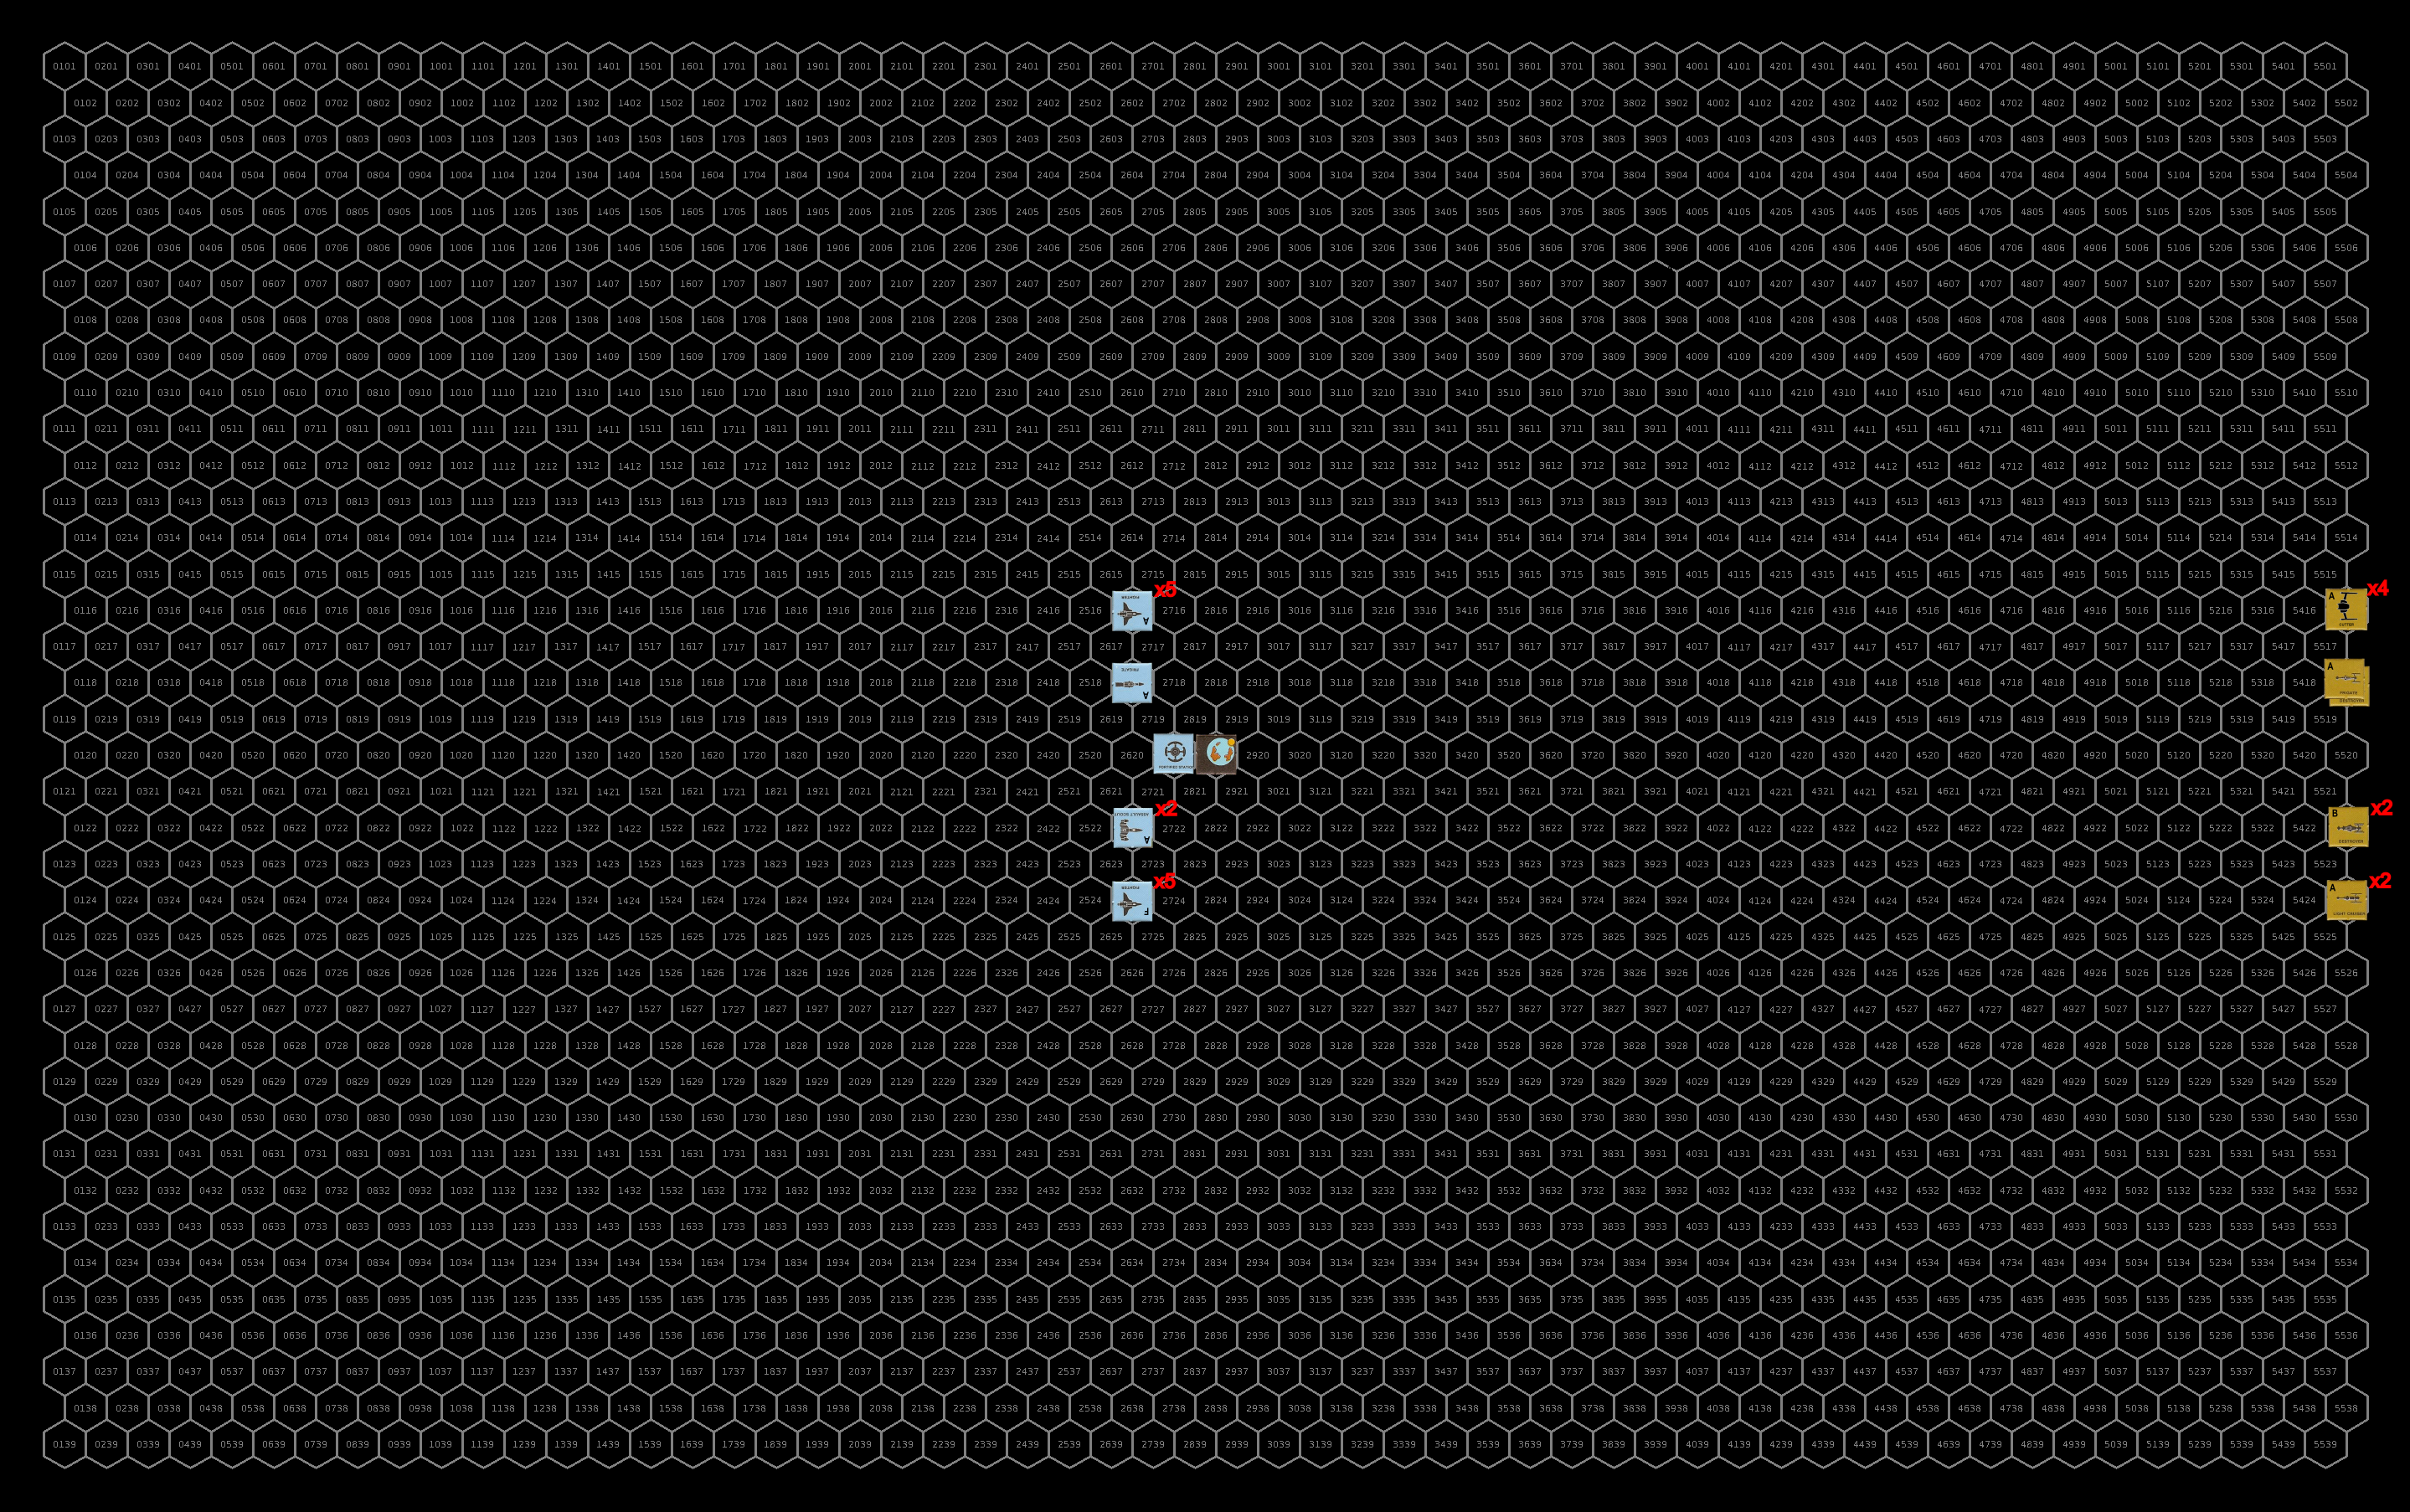
This month also sees the fast-track completion of pilots in the current class in the Gollwin Academy to service as pilots for all the new fighters coming out of the starship construction centers for the newly formed Frontier Fighter Corps. This is a process that will continue of the next several months until all the pilots are graduated or the class completes their current training.
There might be a bit of other, non-war stuff next month but not much. The next two posts after this one will be battle reports that I’ll get up as soon as I can. Depending on how those play out, there might not be much in the way of ships left to fight for a while so things will probably quiet down.
| Date (FY) | Events |
|---|---|
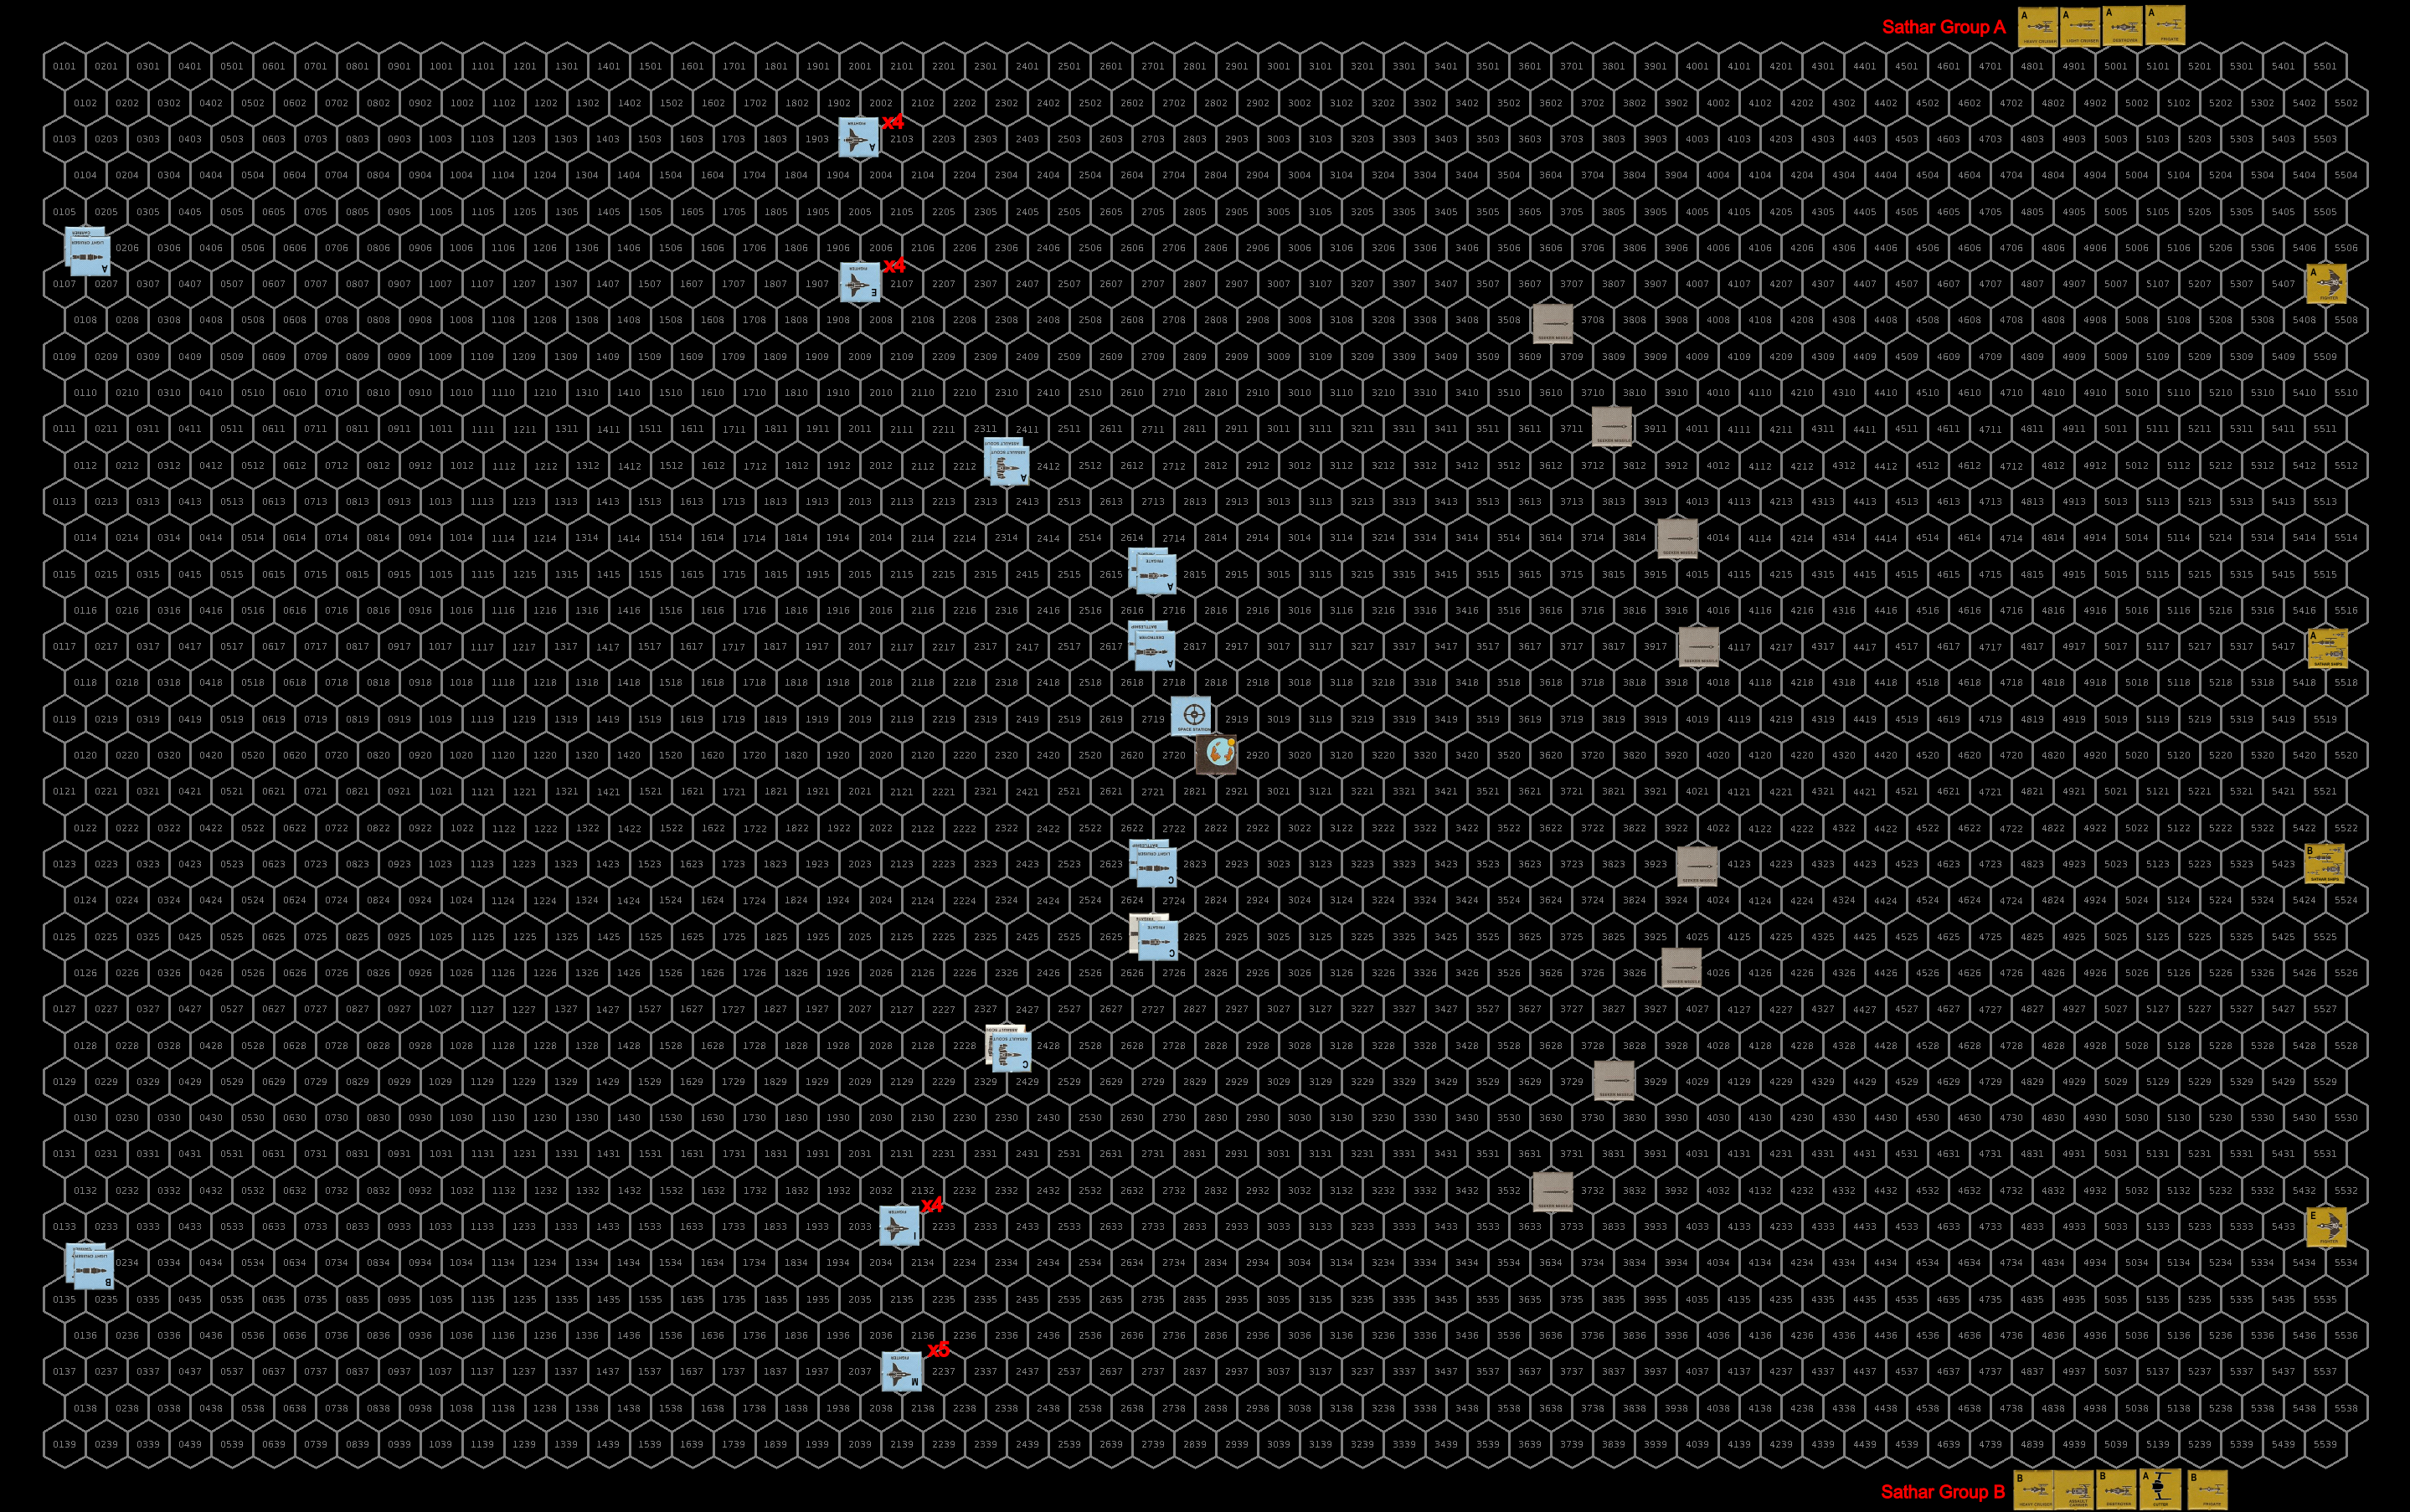
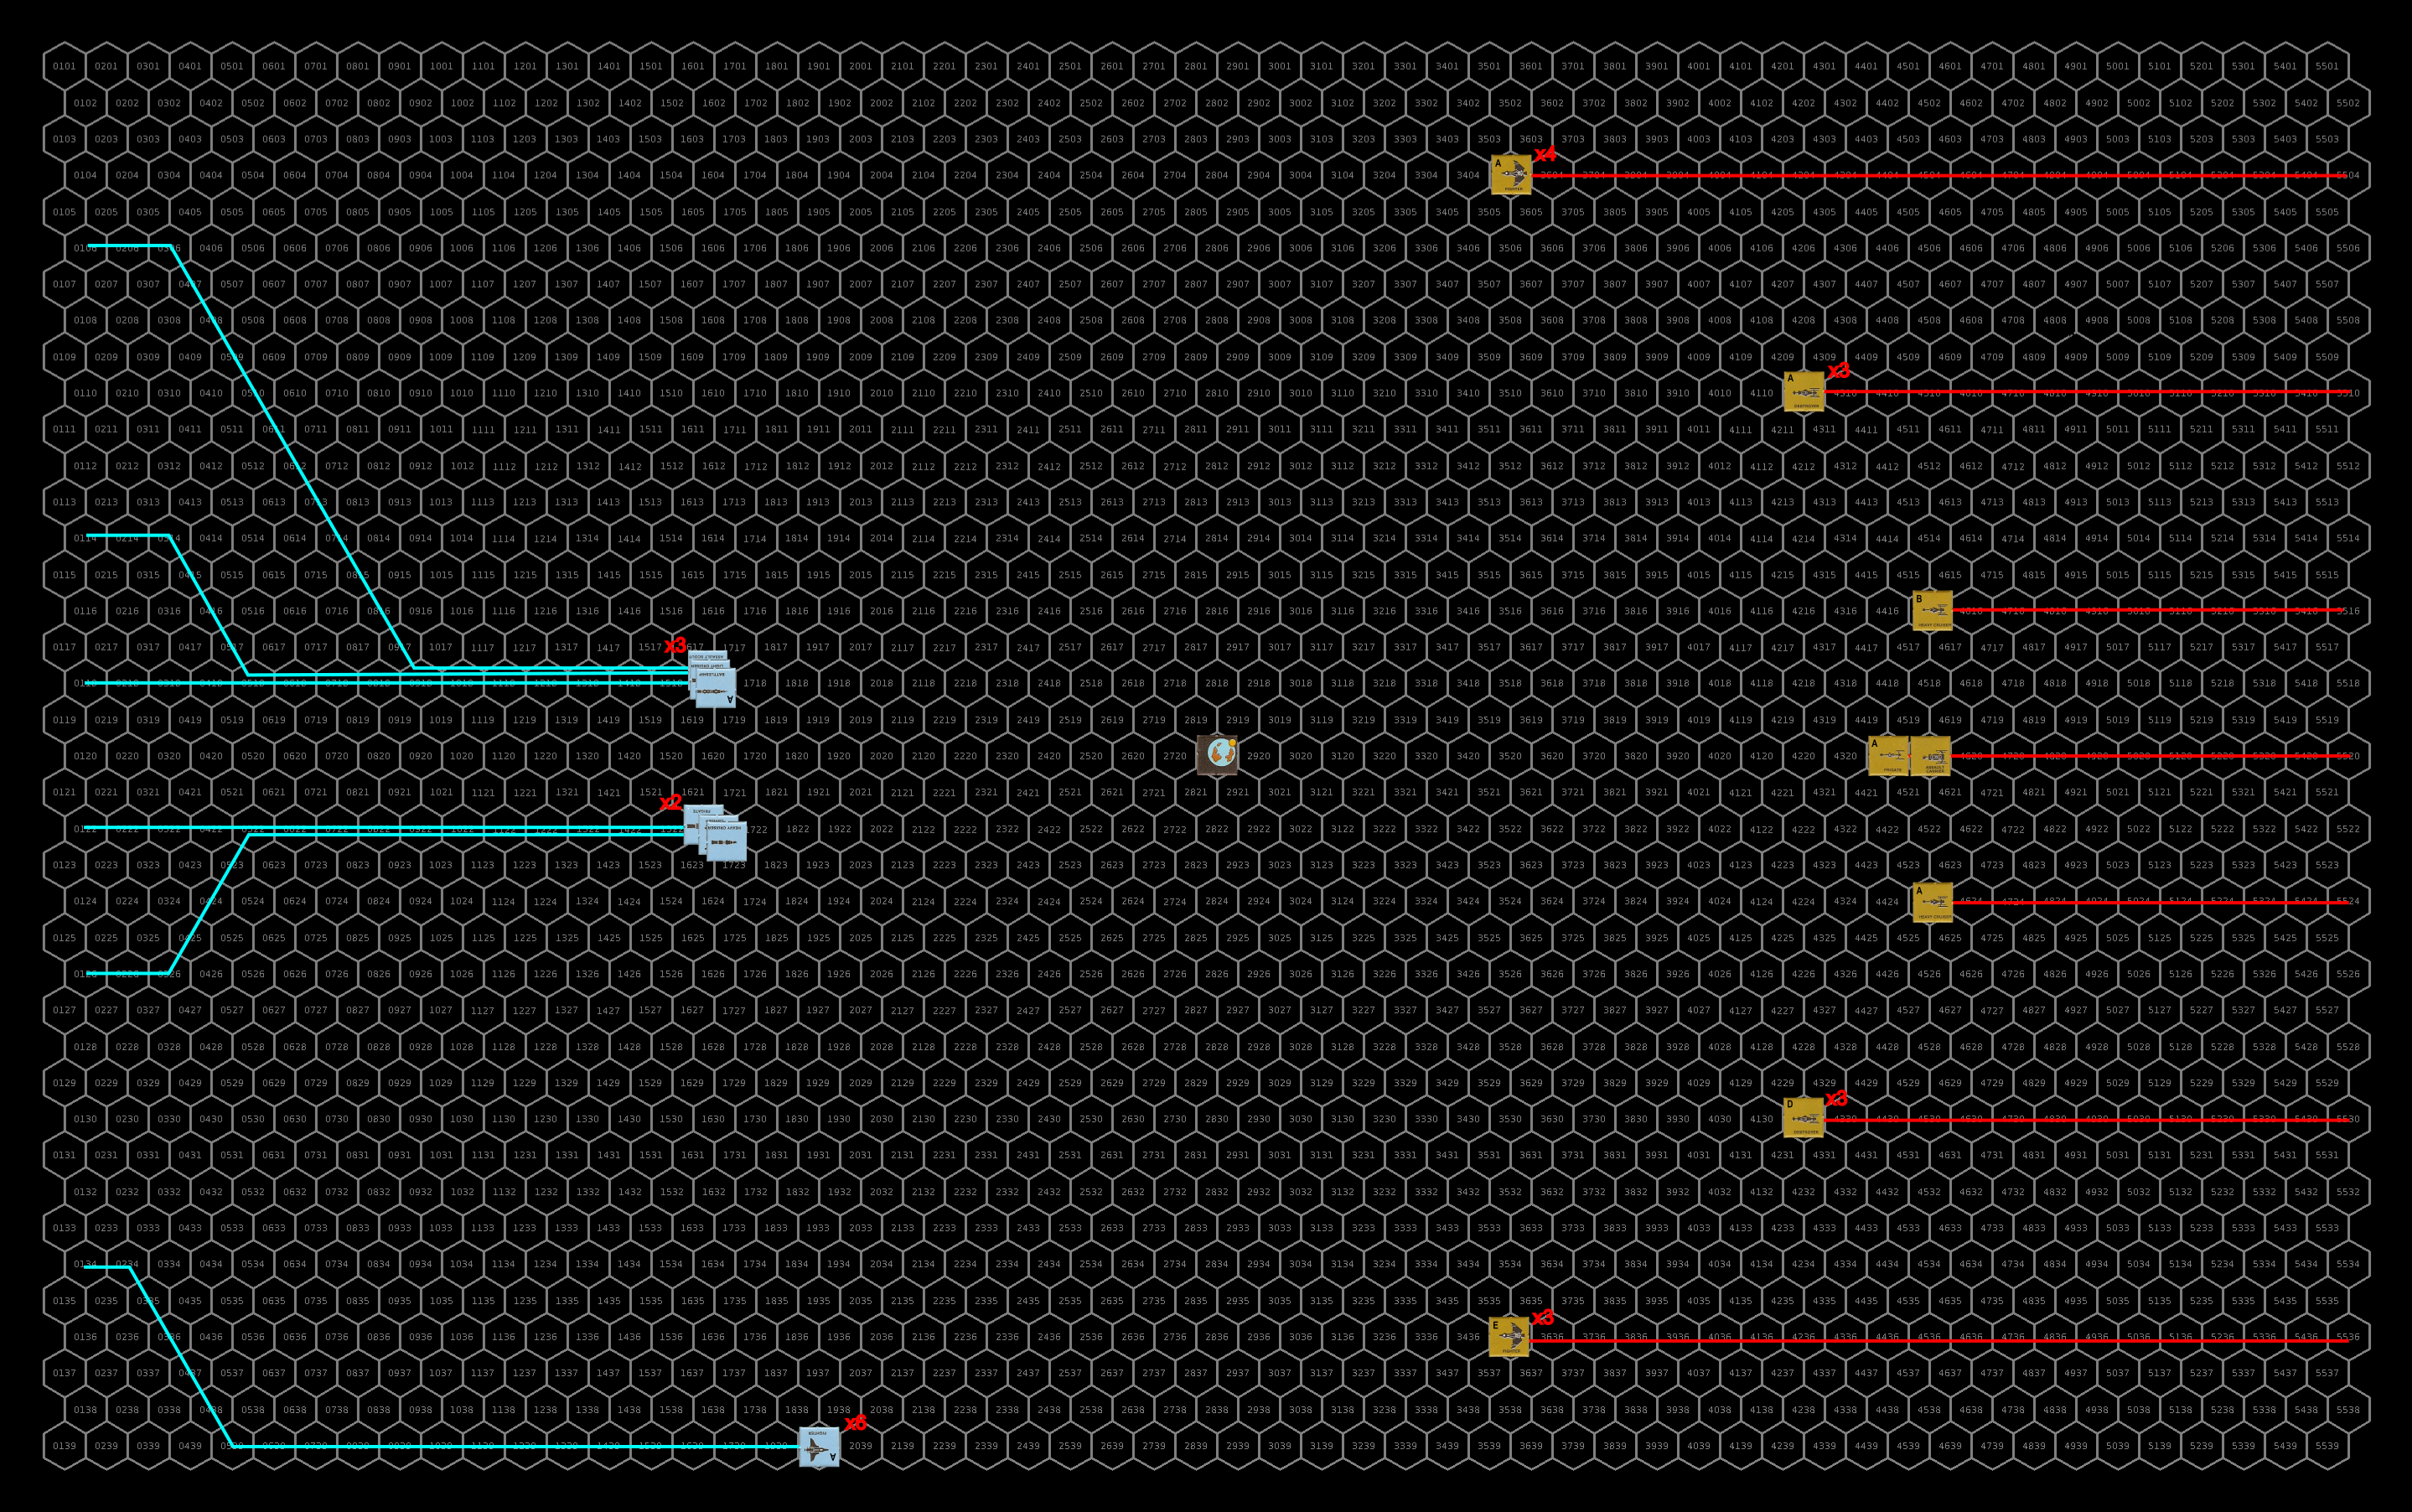
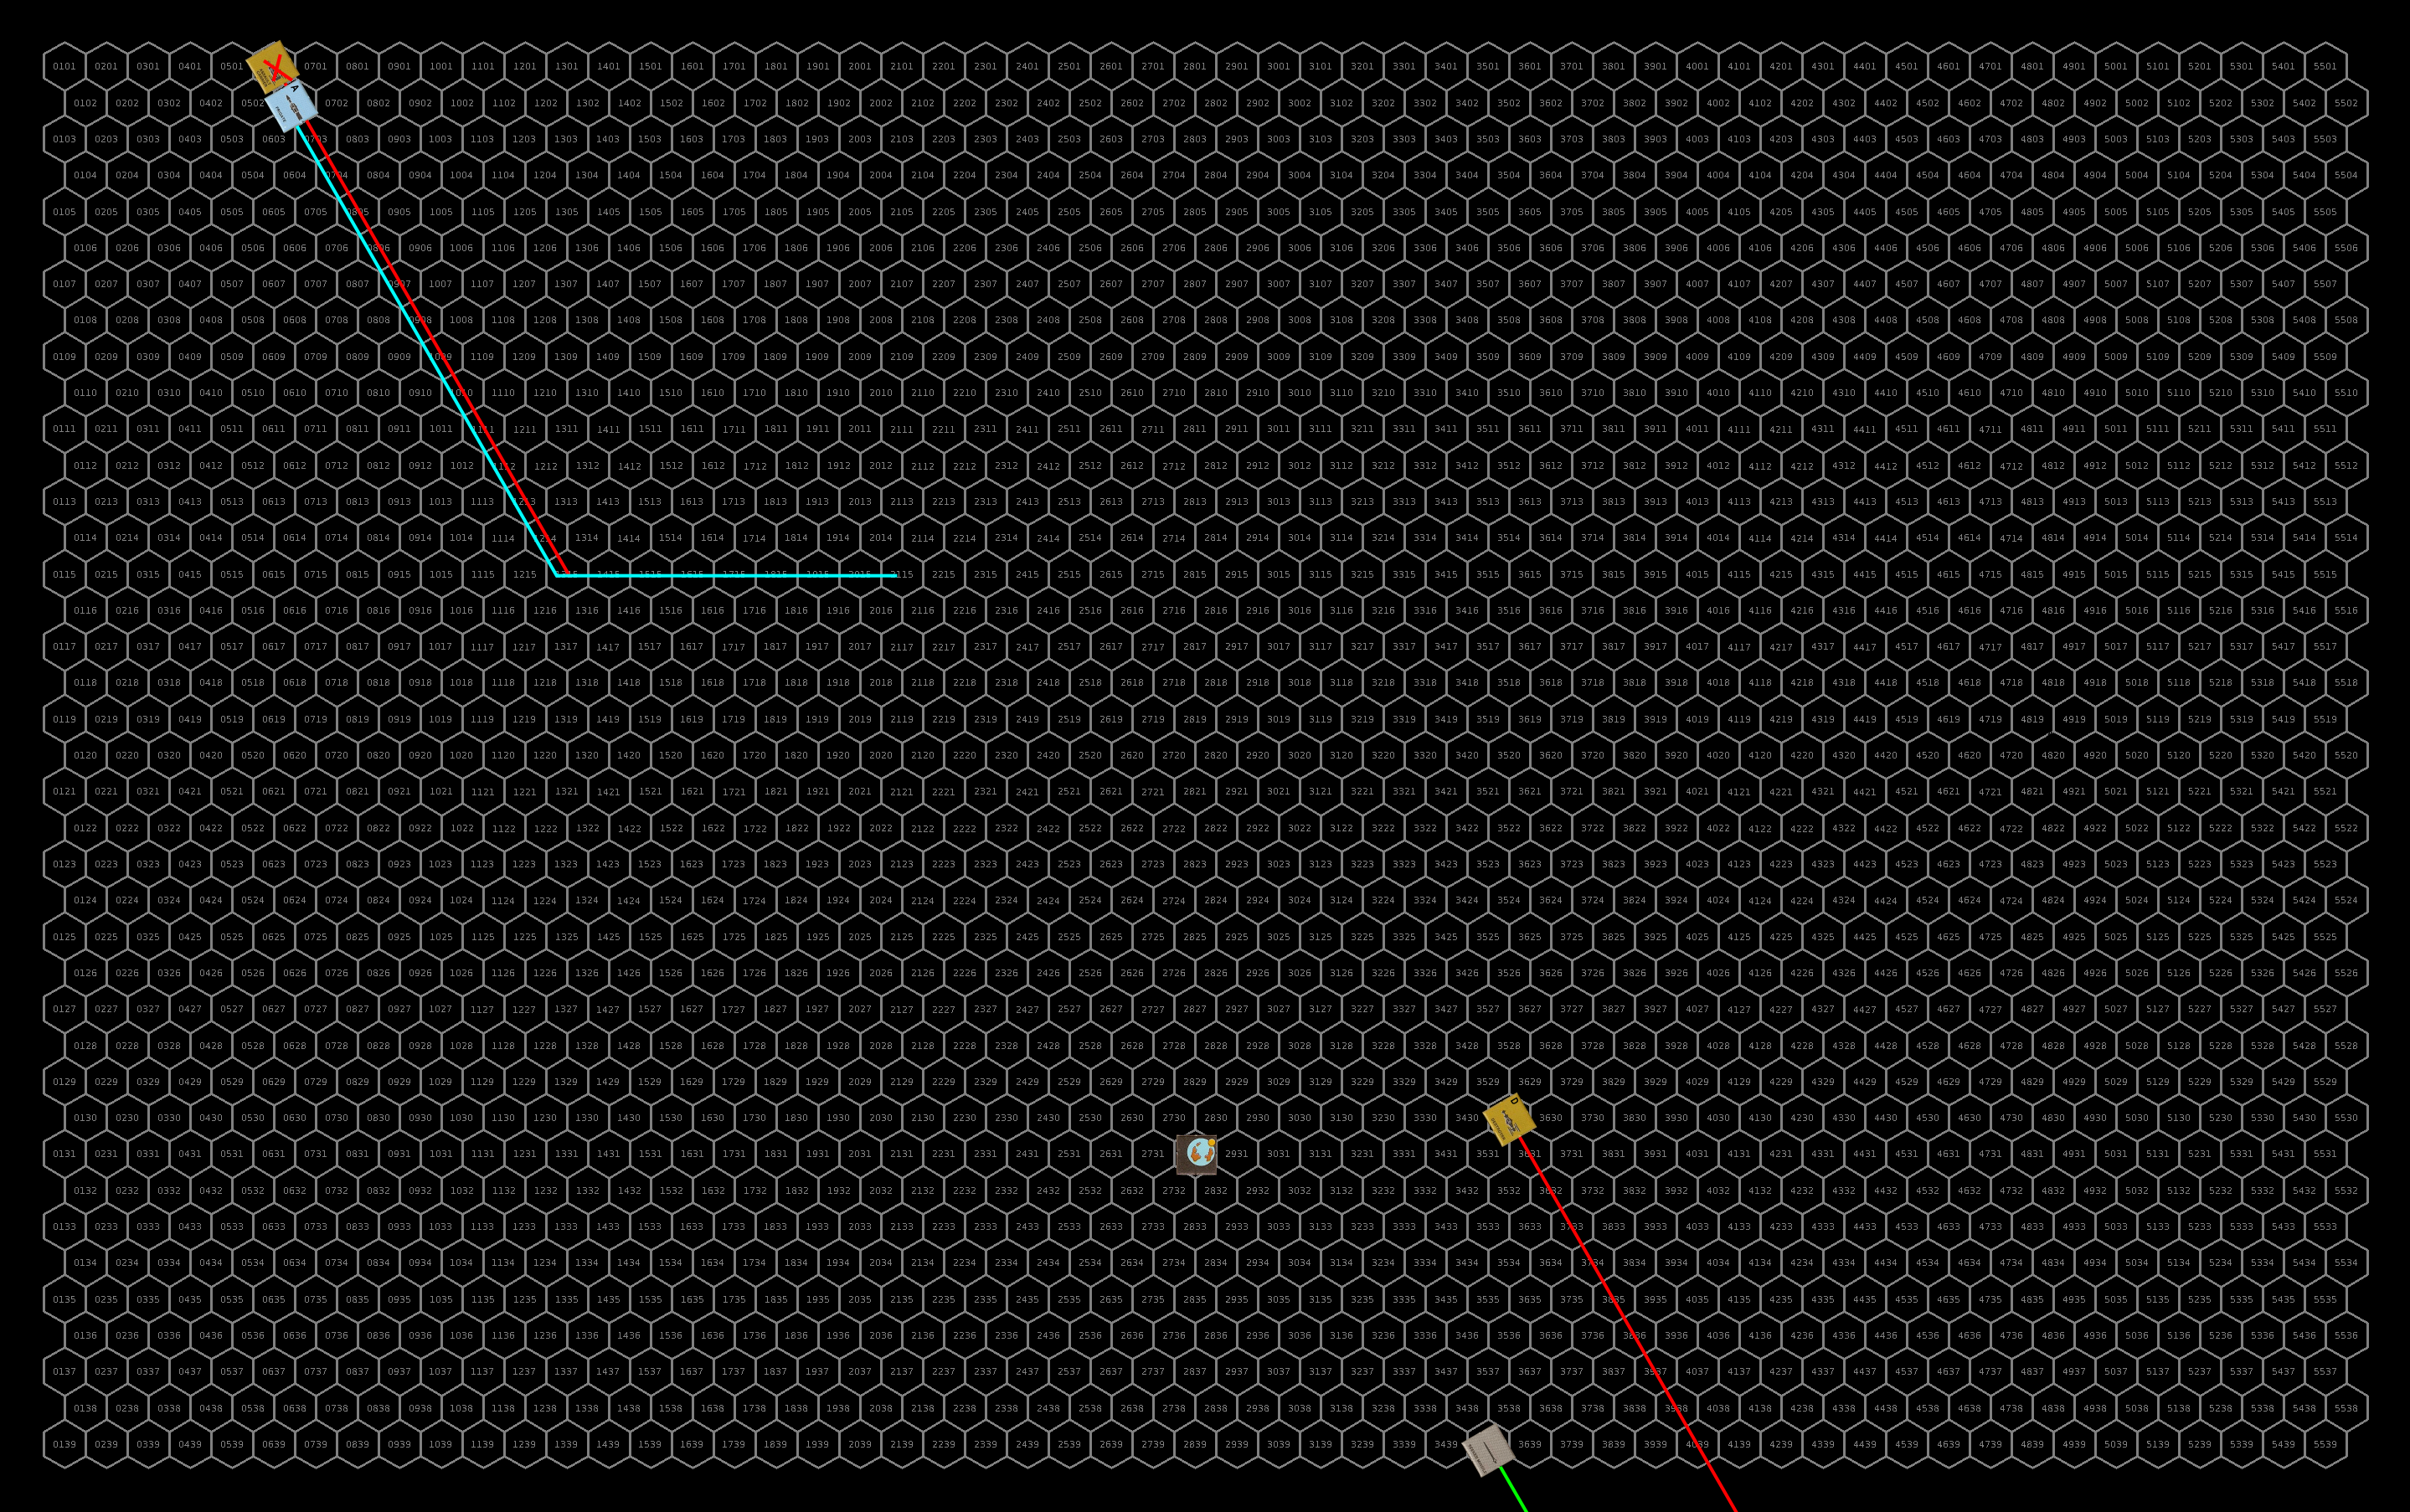
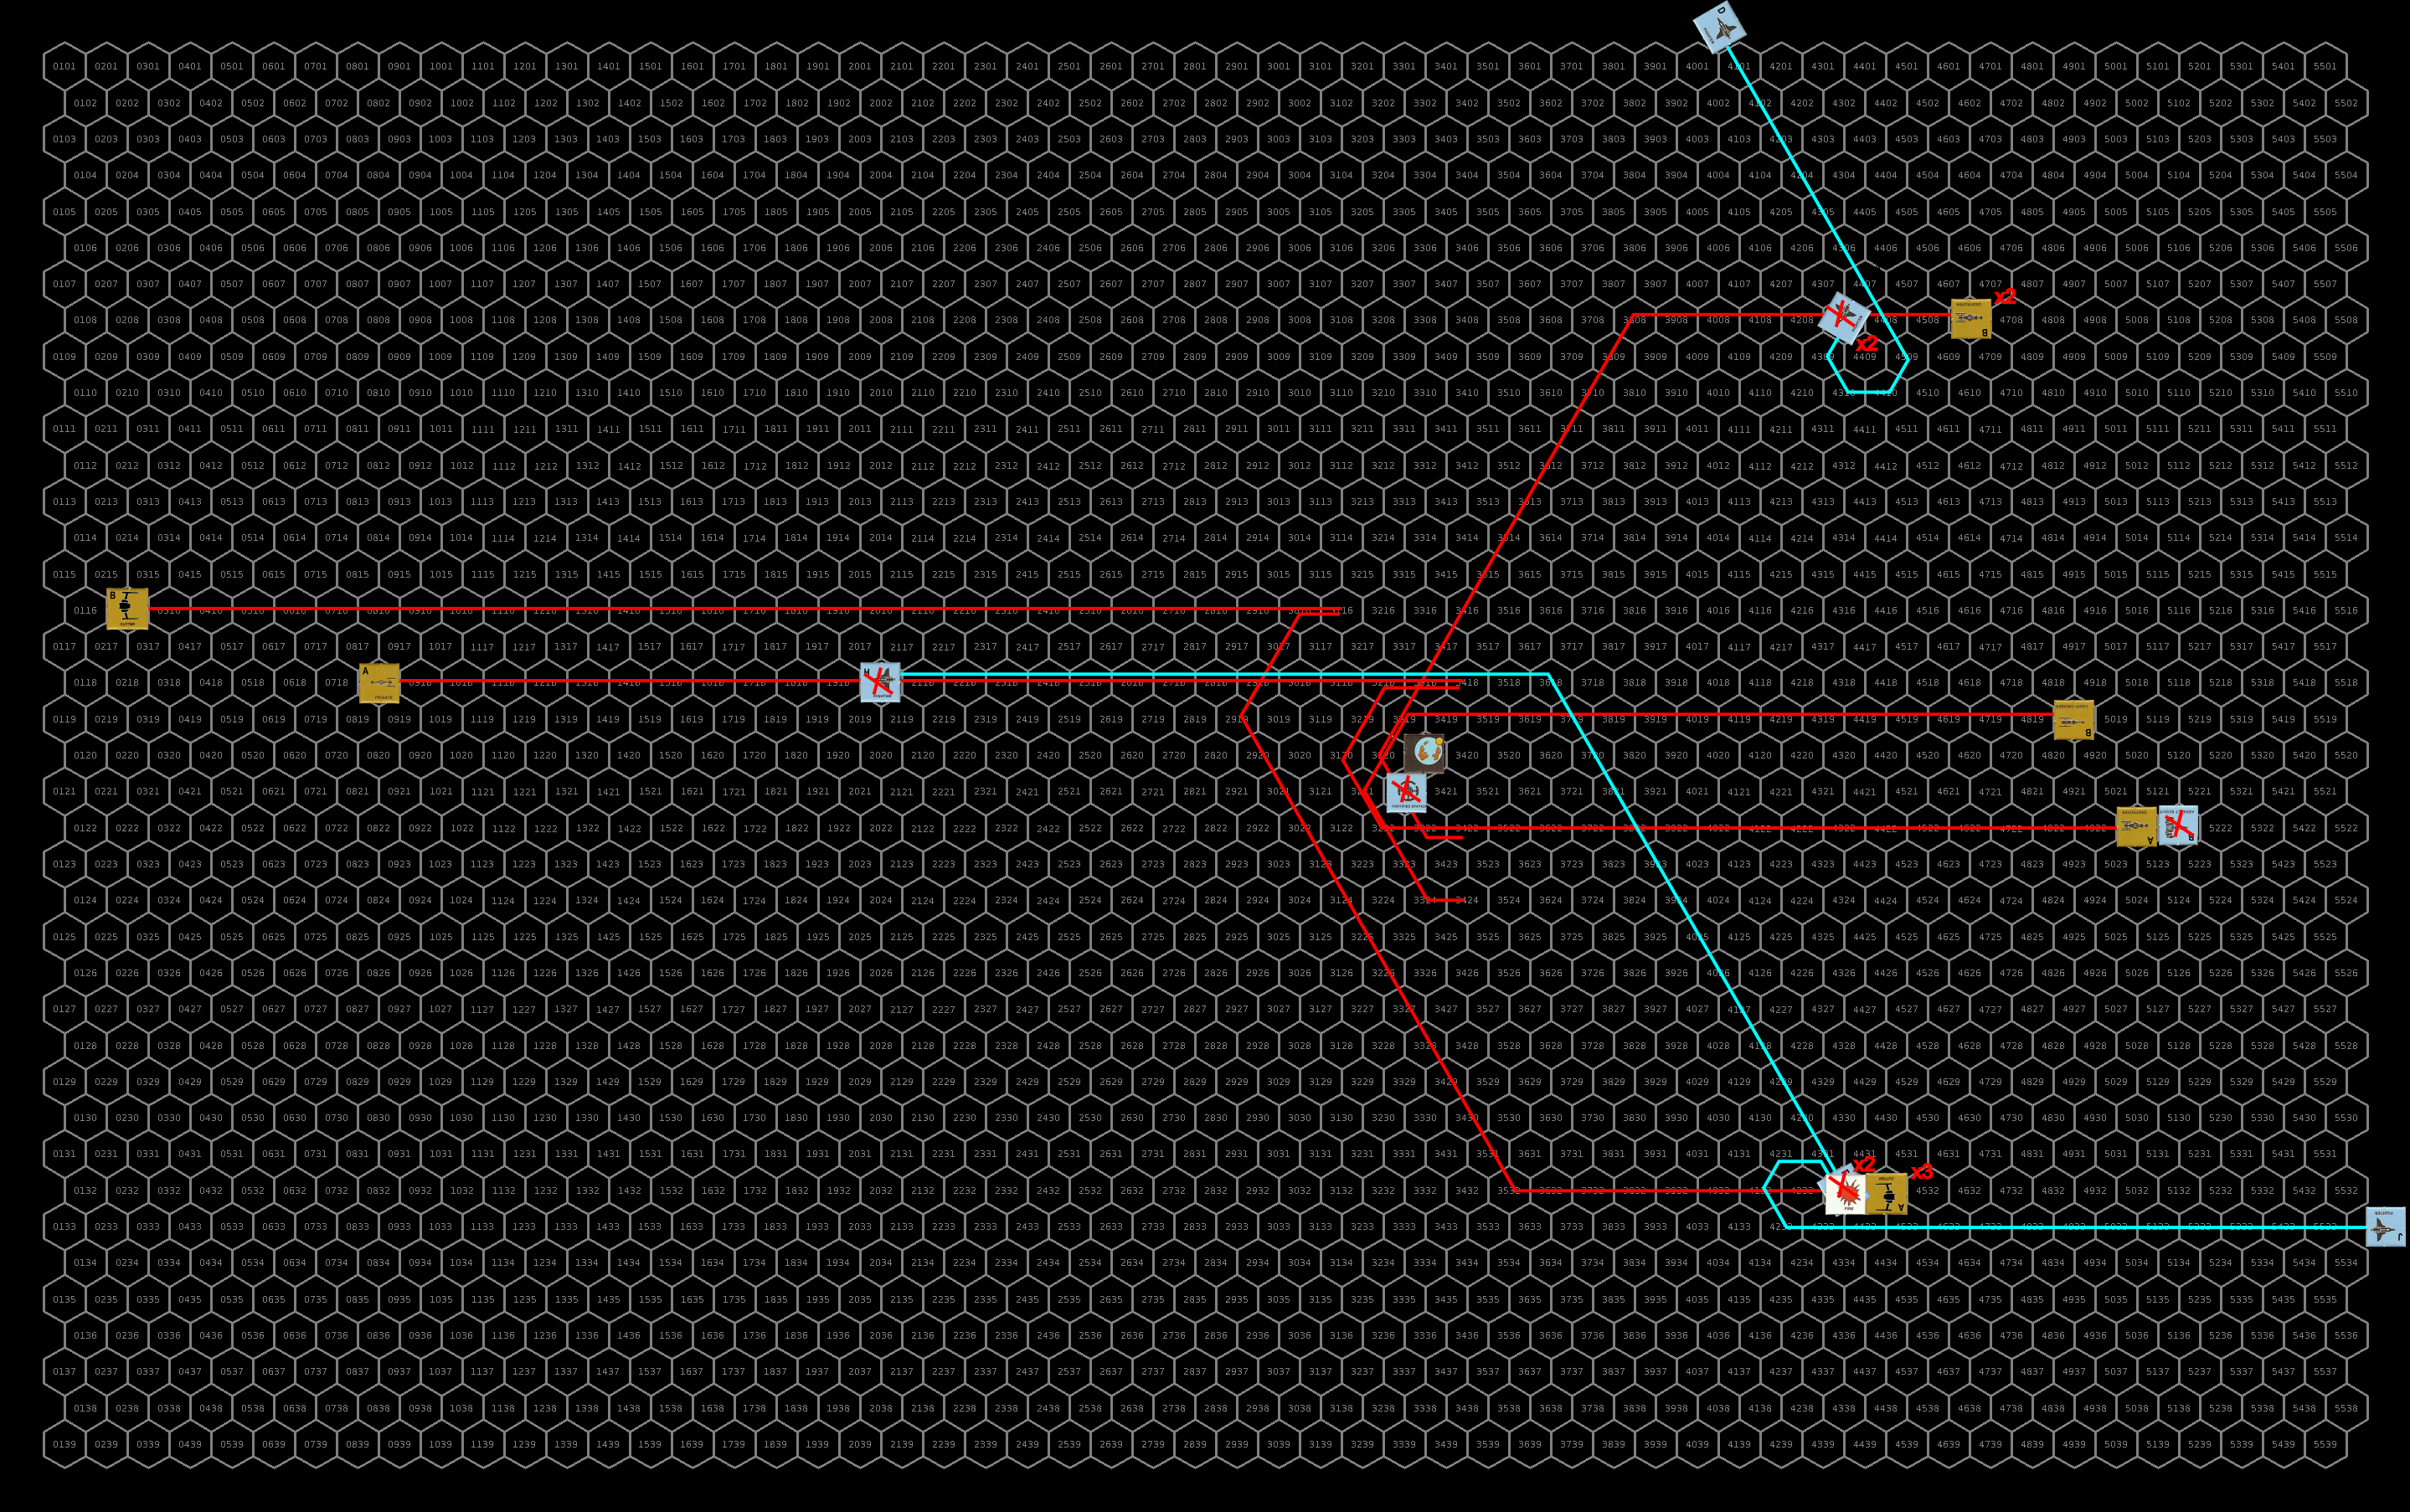
| 61.326 | – Sathar SCC#4 (OFS111) completes 5 fighters. – The K’aken-Kar assault scout jumps into its home system and begins decelerating toward Ken’zah-Kit. – RG One settles into orbit around Zik-kit and joins up with the rest of PG Meteor already in orbit. |
| 61.327 | SG Alpha jumps into the Fromeltar system and begins calculations for the jump to the Kizk-Kar system. The pilot of the recently completed fighter takes on extra life support and begins boosting to join SG Alpha as it transits the system. |
| 61.328 | – SBF-J1 arrives at SCC#3 (OFS138). After a rapid reprovisioning, during which orders are issued to all existing sathar vessels, SBF-J1 departs the SCC and begins accelerating for a jump to the OFS137 system. – Sathar EG-1 jumps out of the Liberty system but does not end up in the Waller Nexus system as expected. Rather it overshoots and arrives in the Padda (FS11) system instead. The astrogators begin working out where they are at. |
| 61.329 | – SBF-J3 jumps into the OFS168 system and begins calculations for a jump to the OFS167 system. – SBF-E3 arrives at Stenmar (Kazak) and merges with SBF-E2. – The fighter in the Fromeltar system joins up with RG Alpha as it crosses the system for its jump to Kizk-Kar. |
| 61.330 | – The HSS History’s Hope makes the jump and ends up in a binary system but it is not the two stars of YS07. While the engineers start to work on the engine overhauls, the astrogators try to figure out where they are. – The lone K’aken-Kar militia assault scout arrives back in its home system and the crew stands down for some leave but remain on alert for rapid recall if needed. |
| 61.331 | – SG Alpha jumps into the Kizk-Kar system and begins deceleration toward Zik-Kit and PG Meteor. – SBF-J3 jumps into the OFS167 system and begins calculations for a jump to OFS166. – 2 UPF fighters are completed at both the Minotaur (Theseus) and Hentz (Arak) SCC and 2 more go into production in each location. The fighters are temporarily manned by the local militias until UPF pilots and be dispatched to the system. |
| 61.332 | Realizing that they need pilots for all the new fighters being produced, the current cadets at Gollwin academy are polled for volunteers for the Frontier Fighter Corps. Those that volunteer are put on a fast completion track to get their Pilot and Rocket Weapons certifications. |
| 61.333 | – SBF-J1 jumps into the OFS137 system and begins calculations for a jump to the OFS136 system. – SBF-J3 jumps into the OFS166 system and begins calculations for the jump to FS33 to join up with SBF-B2. – 11 UPF fighters are completed at the CDC shipyards (Triad, Cassidine). With no pilots ready, they are put into storage and Spacefleet temporarily gives the space over for commercial ship maintenance. |
| 61.334 | – A fighter and assault carrier are completed at SCC#10 (OFS174). Instead of starting another AC and fighter, construction begins on 2 destroyers and a frigate. – The new sathar assault carrier at SCC#10 (OFS174) collects the 3 fighters in the system and begins a transit to SCC#4 (OFS111). The ships are designated Transit Group (TG) 1. – Astrogators aboard the HSS History’s Hope work out their position and discover that they went nearly twice as far as they intended. The system is designated YS09 and they decide to take two smaller jumps to get back to YS07 to reduce the chance of error. They begin working on jump calculations for an 8 ly jump to the next system. – 3 more fighters are completed at the Hentz (Araks) SCC for the Frontier Fighter Corps, 2 more go into production, the other slot being given over to commercial ship maintenance for now. |
| 61.335 | Initial calculations complete, the HSS History’s Hope begins accelerating for a jump to the first system on their way back to YS07, another binary system 8 lightyears away. |
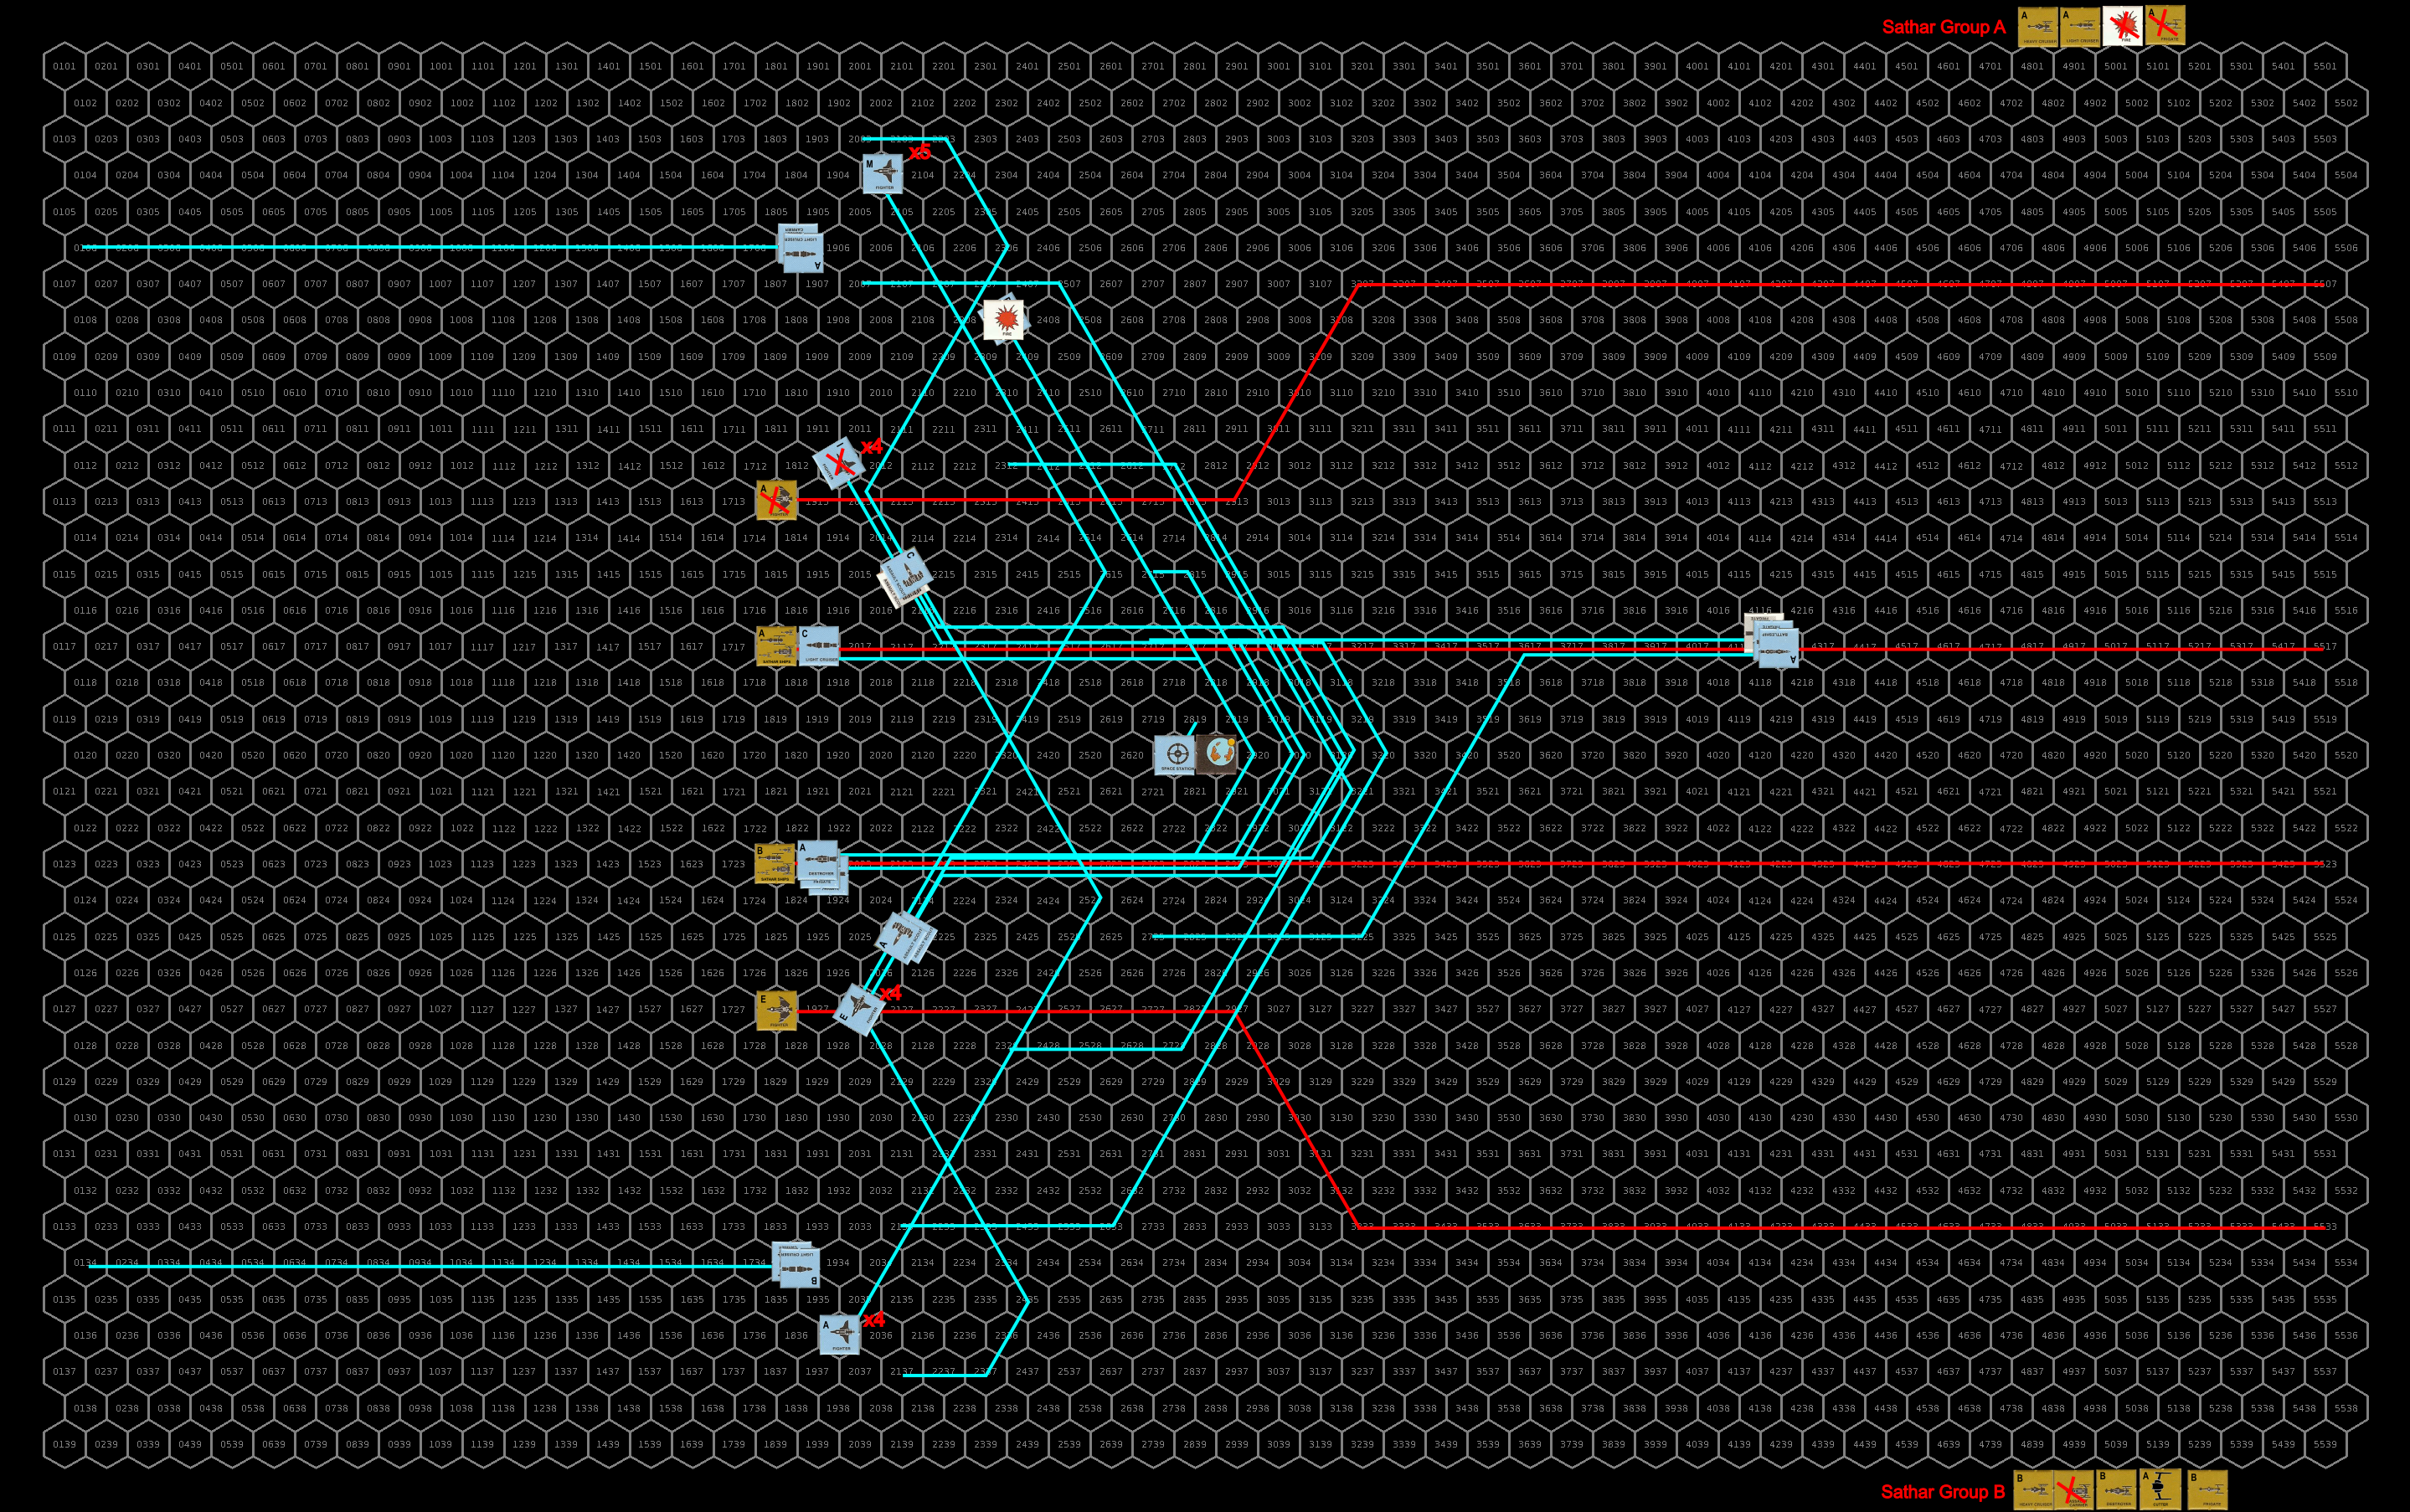
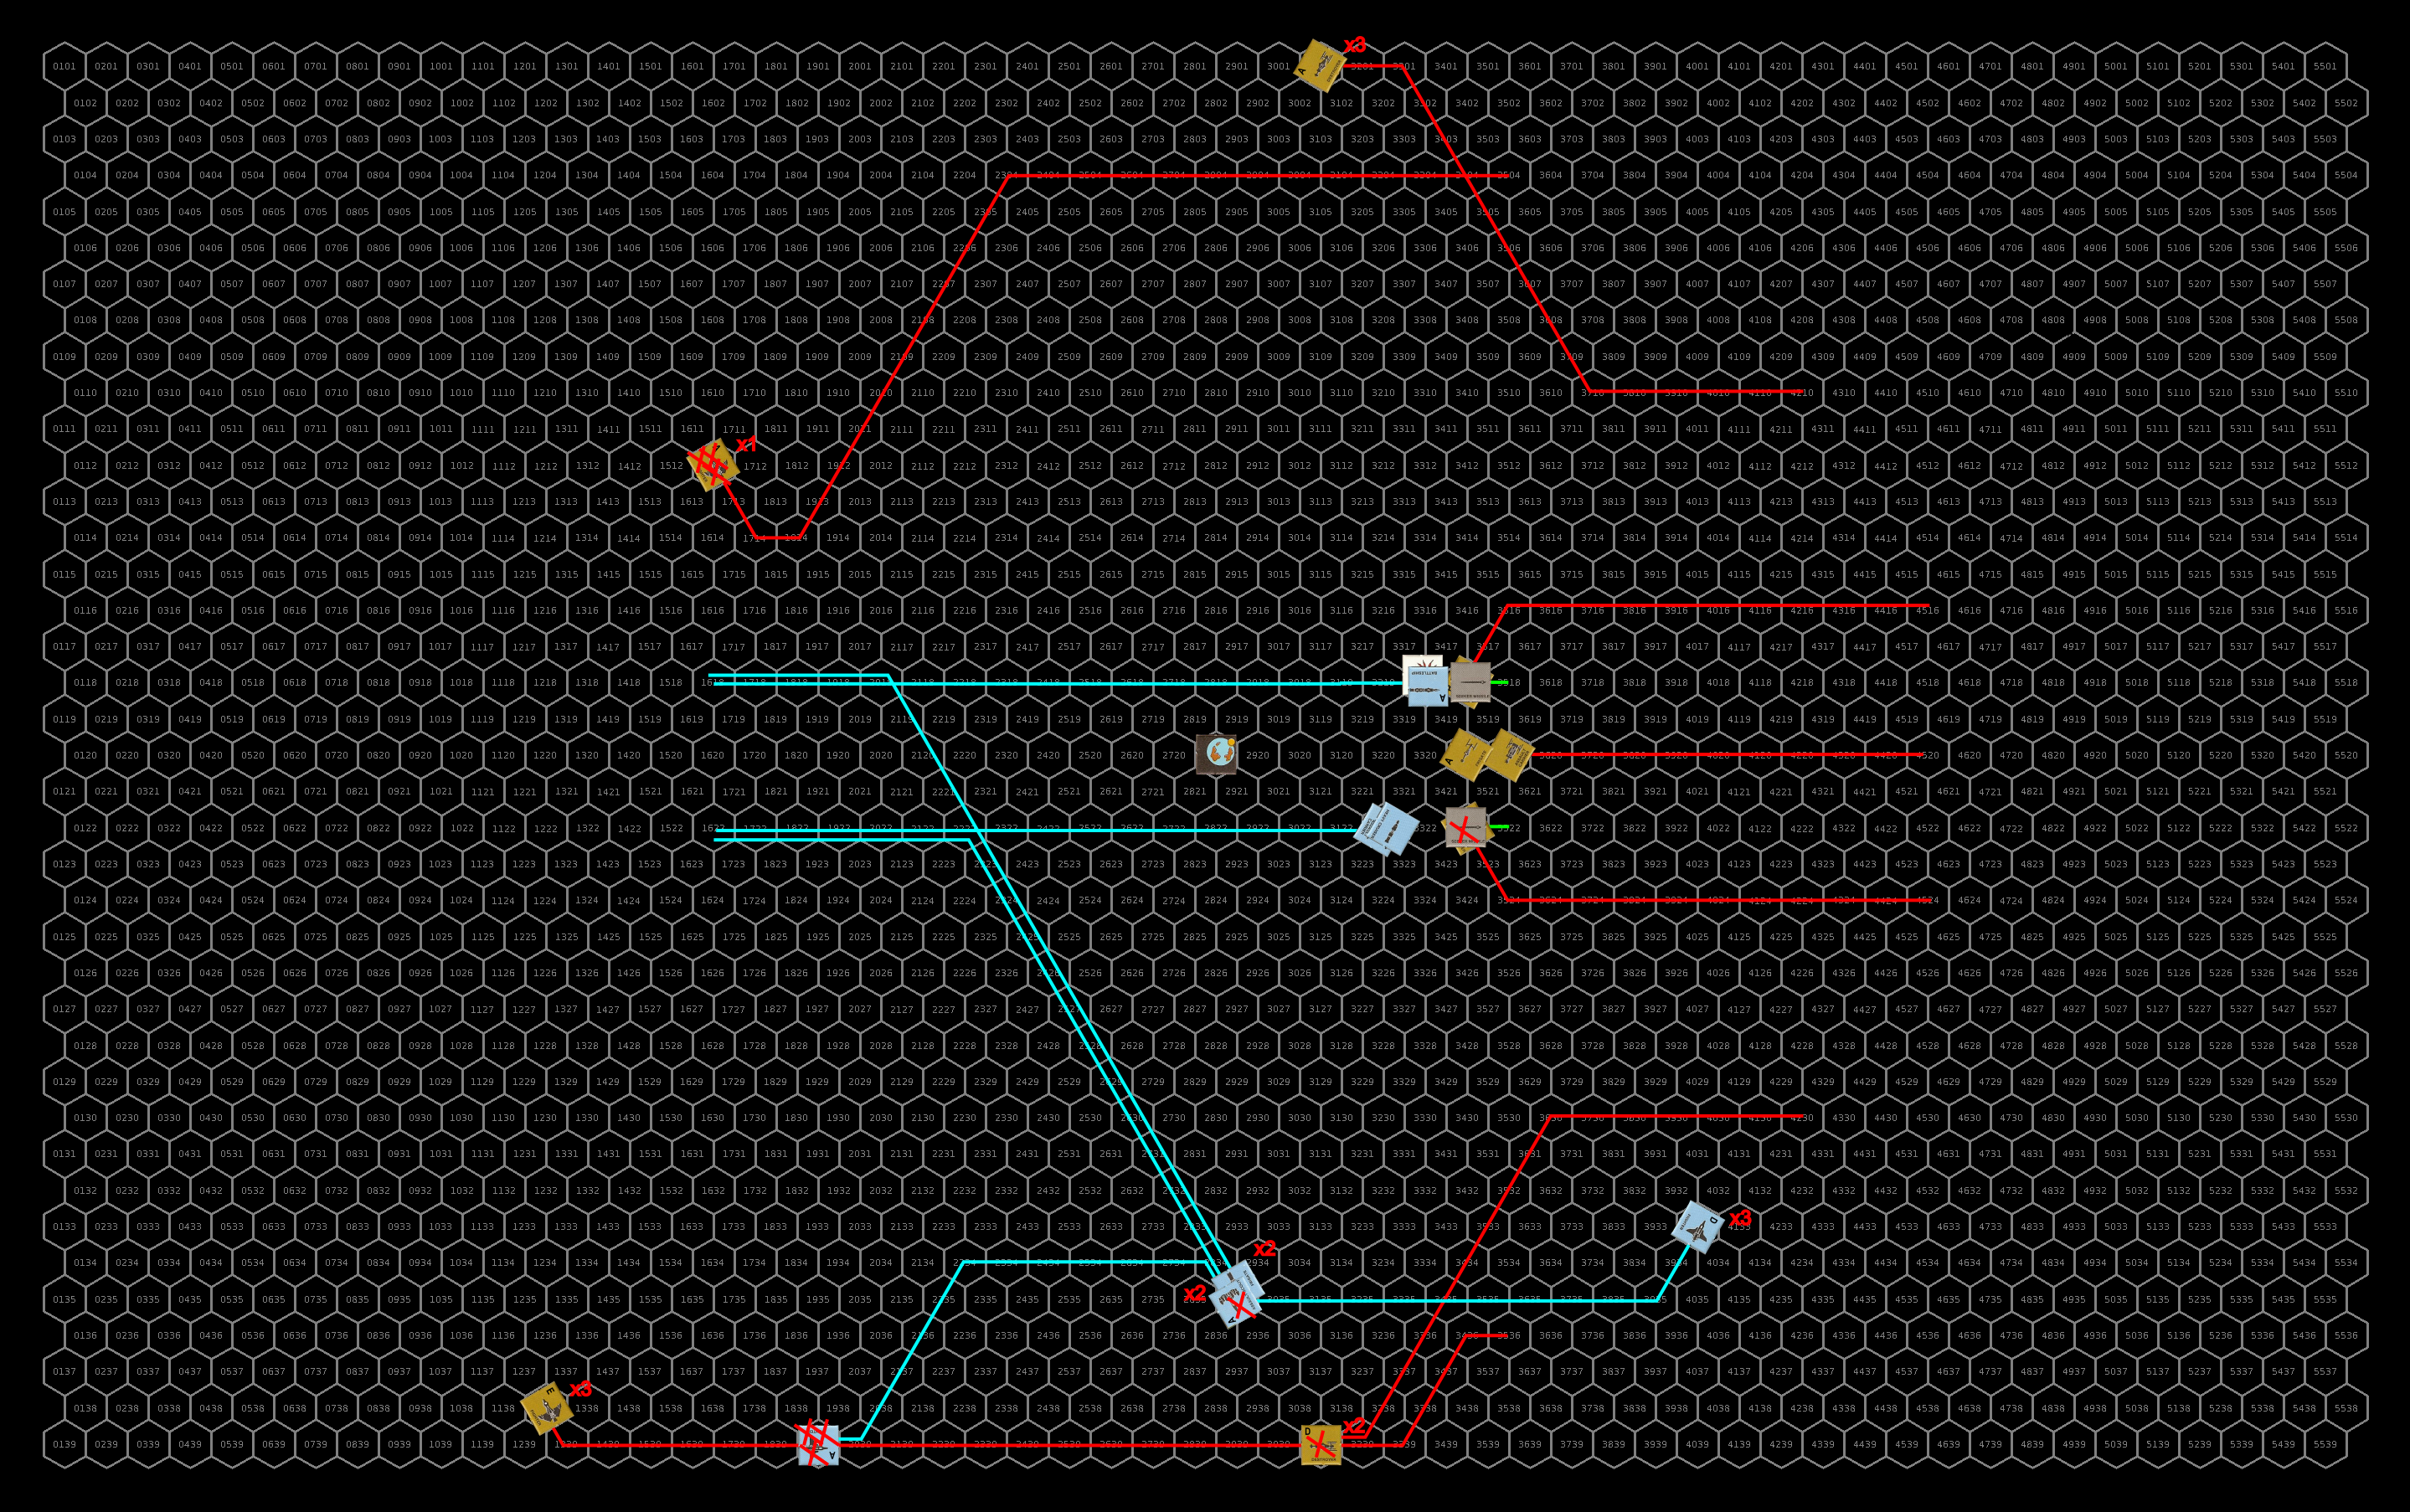
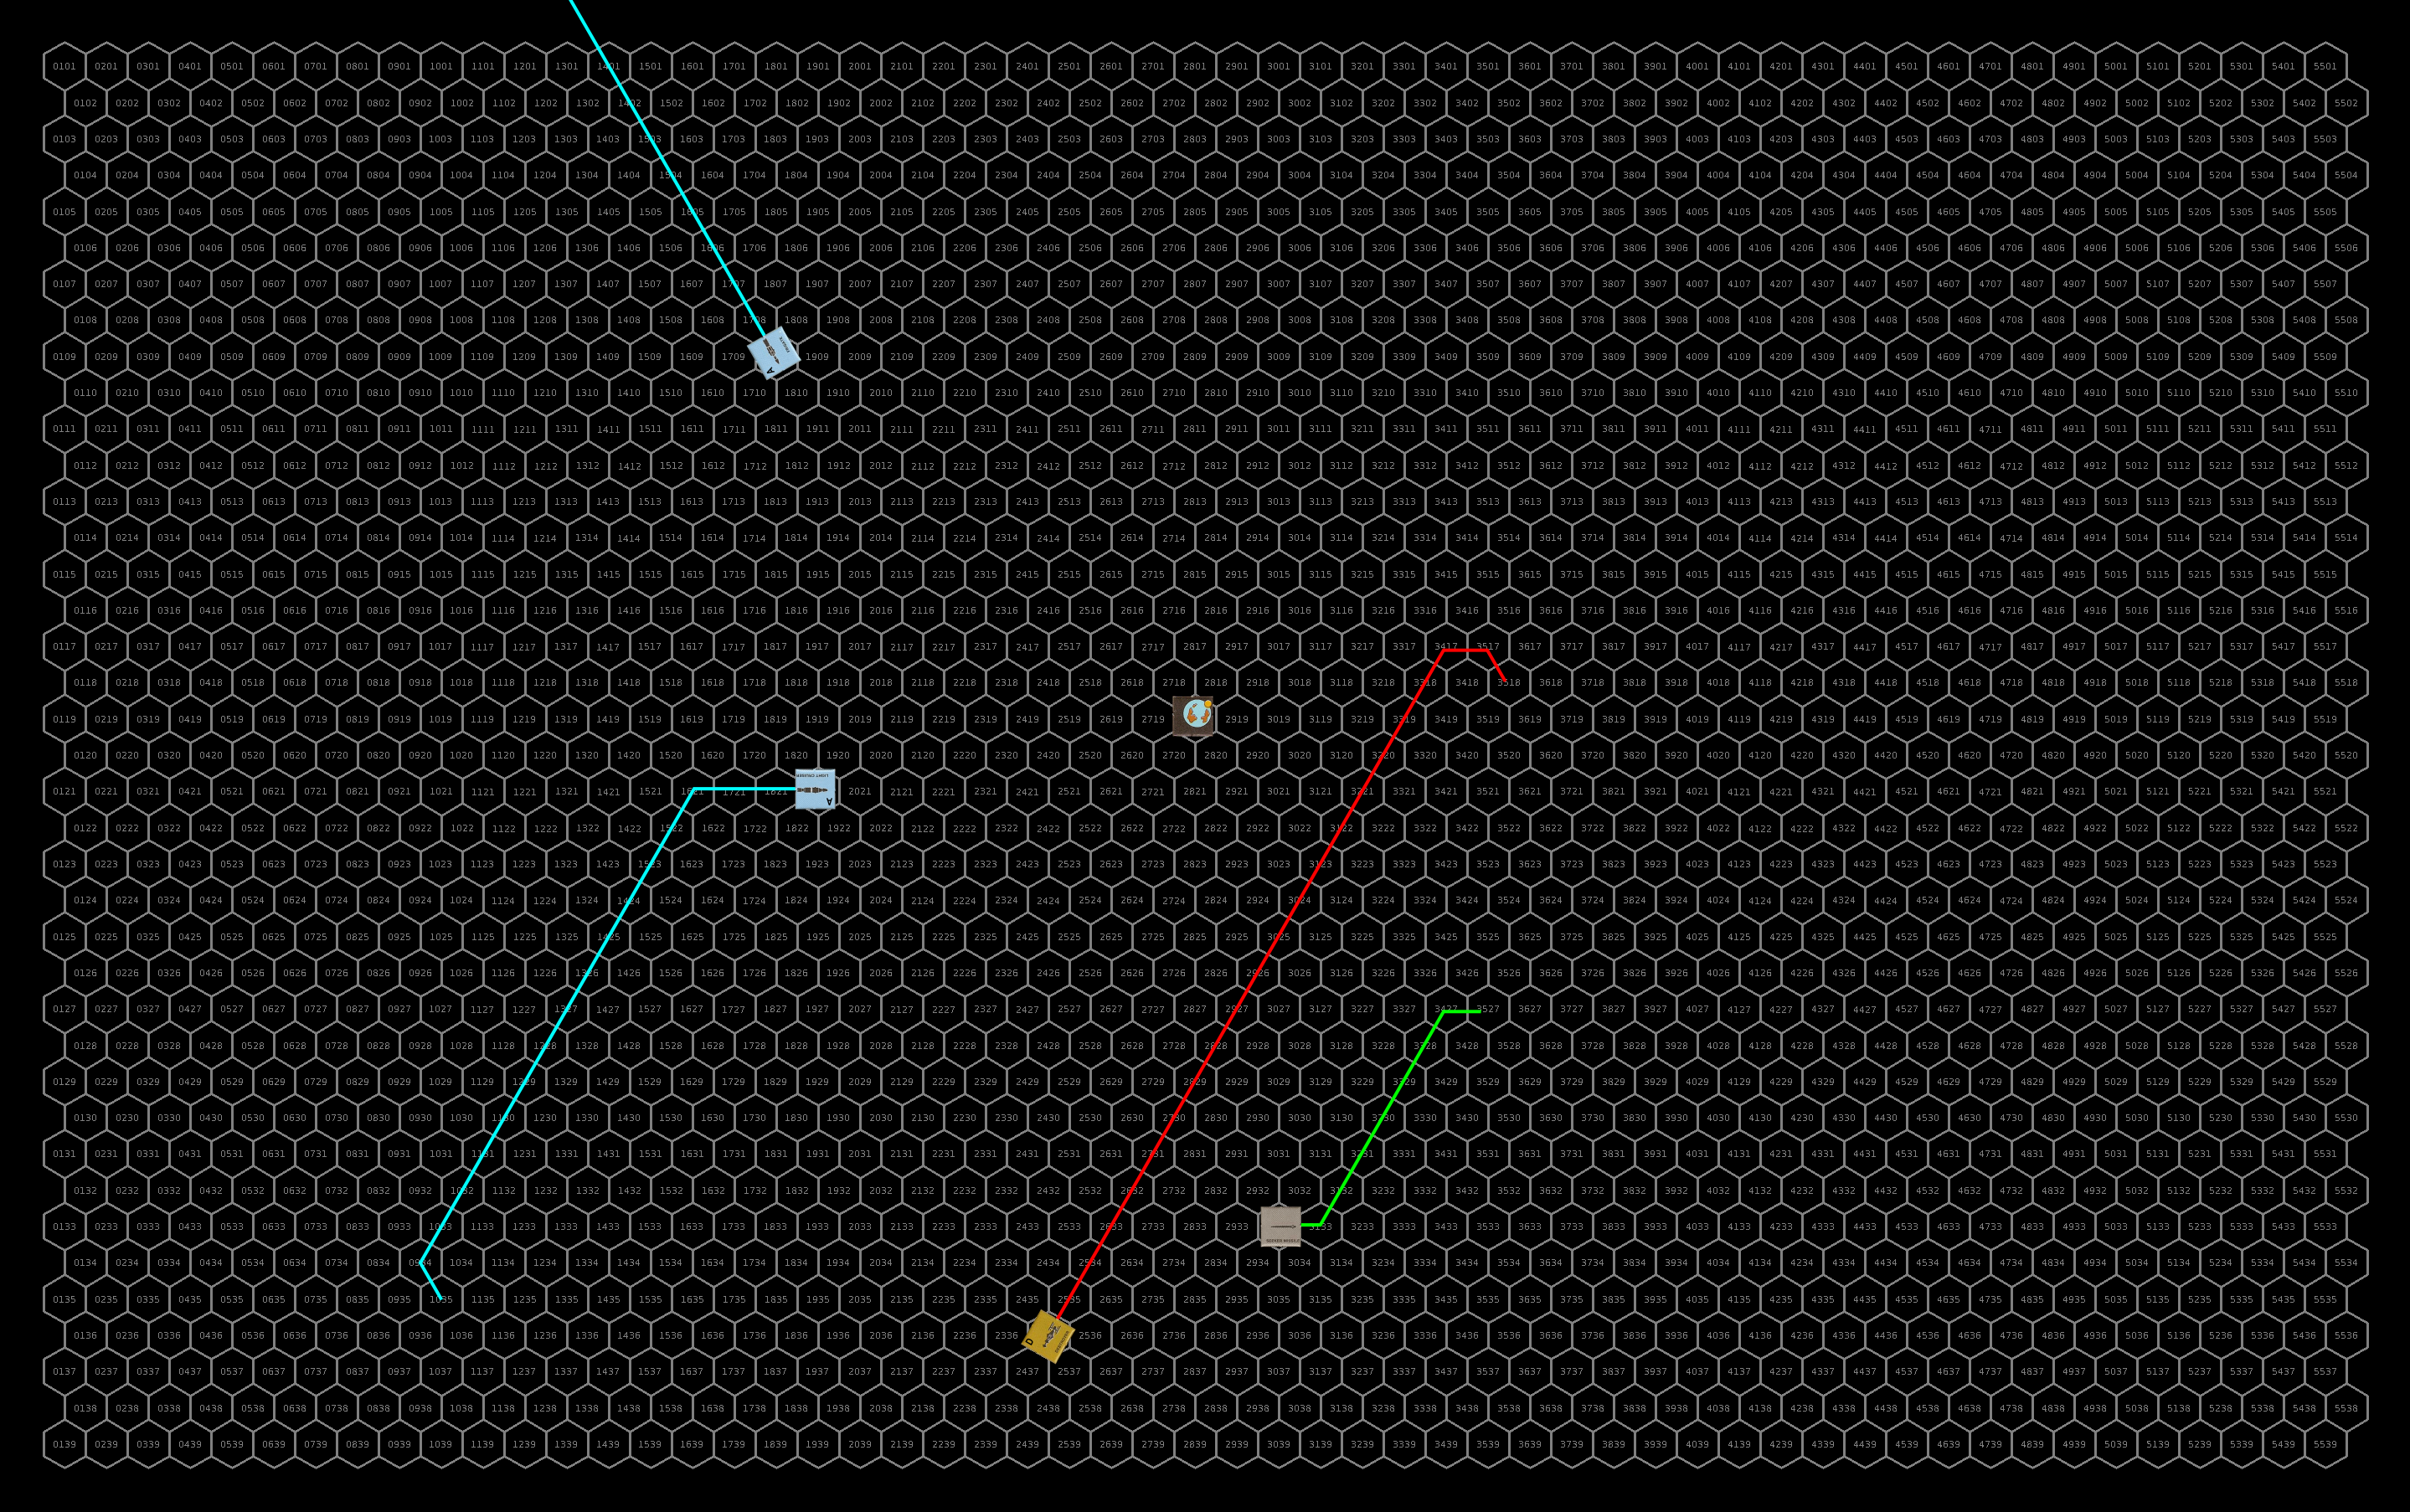
| 61.336 | – SBF-J1 jumps into the OFS136 system and begins calculations for a jump to the FS56 system. – SG Alpha arrives at Zit-Kit (Kizk-Kar). The fighters are stationed on the planet’s surface while the assault carrier begins preparations for a trip back to Prenglar to pick up more fighters. – SBF-J3 jumps into the FS33 system and begins decelerating to join up with SBF-B2. – 8 fighters are complete for the Frontier Fighter Corps at the PGC shipyard (Gran Quivera, Prenglar). They are shuttled over to Gollwin academy to serve as trainers for the accelerated pilot classes. Construction begins on 8 more. |
| 61.337 | – The astrogators in sathar EG-1 are able to localize their position. Being only a single jump from Theseus, they begin calculating a jump to that system first. – SBF-E2 leaves orbit around Stenmar (Kazak) and begins accelerating for a jump to the Zebulon system and Strike Force Nova. – SBF-B2 leaves orbit in the inner FS33 system and begins accelerating for a jump to the K’sta-Kar and Task Force Cassidine. SBF-J3 changes course to meet them enroute. |
| 61.338 | – After another 100 days of exploiting their secret jump route between Truane’s Star and Cassidine, Obar Enterprises has grossed another 1.47 million credits. In the year since charting the route they have grossed over 6.8 million and paid off the loan on their new freighter. Given the current crisis, they turn over the details of the jump route to Spacefleet. – Initial jump calculations complete, sathar EG-1 starts accelerating for a jump to the Theseus system. |
| 61.339 | – SBF-J1 jumps into the FS56 system and begins calculations for a jump to the Kizk-Kar system. – SBF-J3 meets up with SBF-B2 enroute to K’sta-Kar and merges into that battle group. – Another UPF fighter is completed at the Hentz (Araks) shipyard. The extra capacity in the shipyard will be used for the next six days to accelerate construction on two of the other fighters to get all four fighters on the same schedule. |
| 61.340 | – The HSS History’s Hope successfully jumps into their target system which they designate YS10. They immediately begin working on engine overhauls and calculations for the 6 ly jump to return to YS07. – The initial group of more advanced students at the Gollwin Academy (Morgaine’s World, Prenglar) complete their fast-track certification for the Frontier Fighter Corps. The ten of them are dispatched to Triad to take command of some of the fighters there. |
| 61.341 | SG Alpha jumps back into the Fromeltar system and begins calculations for a jump to Dramune. |
| 61.342 | – SBF-J1 jumps into the Kisk-Kar system and begins decelerating to engage PG Meteor. – SBF-E2 jumps into the Zebulon system and begins decelerating to engage Strike Force Nova. – SBF-B2 jumps into the K’sta-Kar system and begins decelerating to engage Task Force Cassidine. – The sathar battle fleets are detected within hours of their arrival in their respective systems and alerts go out across the Frontier. Spacefleet is out gunned in nearly every case but is determined to stop the worms. – Sathar EG-1 jumps into the Theseus system. They immediately begin decelerating to stay in the outer system and begin working on calculations for a jump back to the Padda system. |
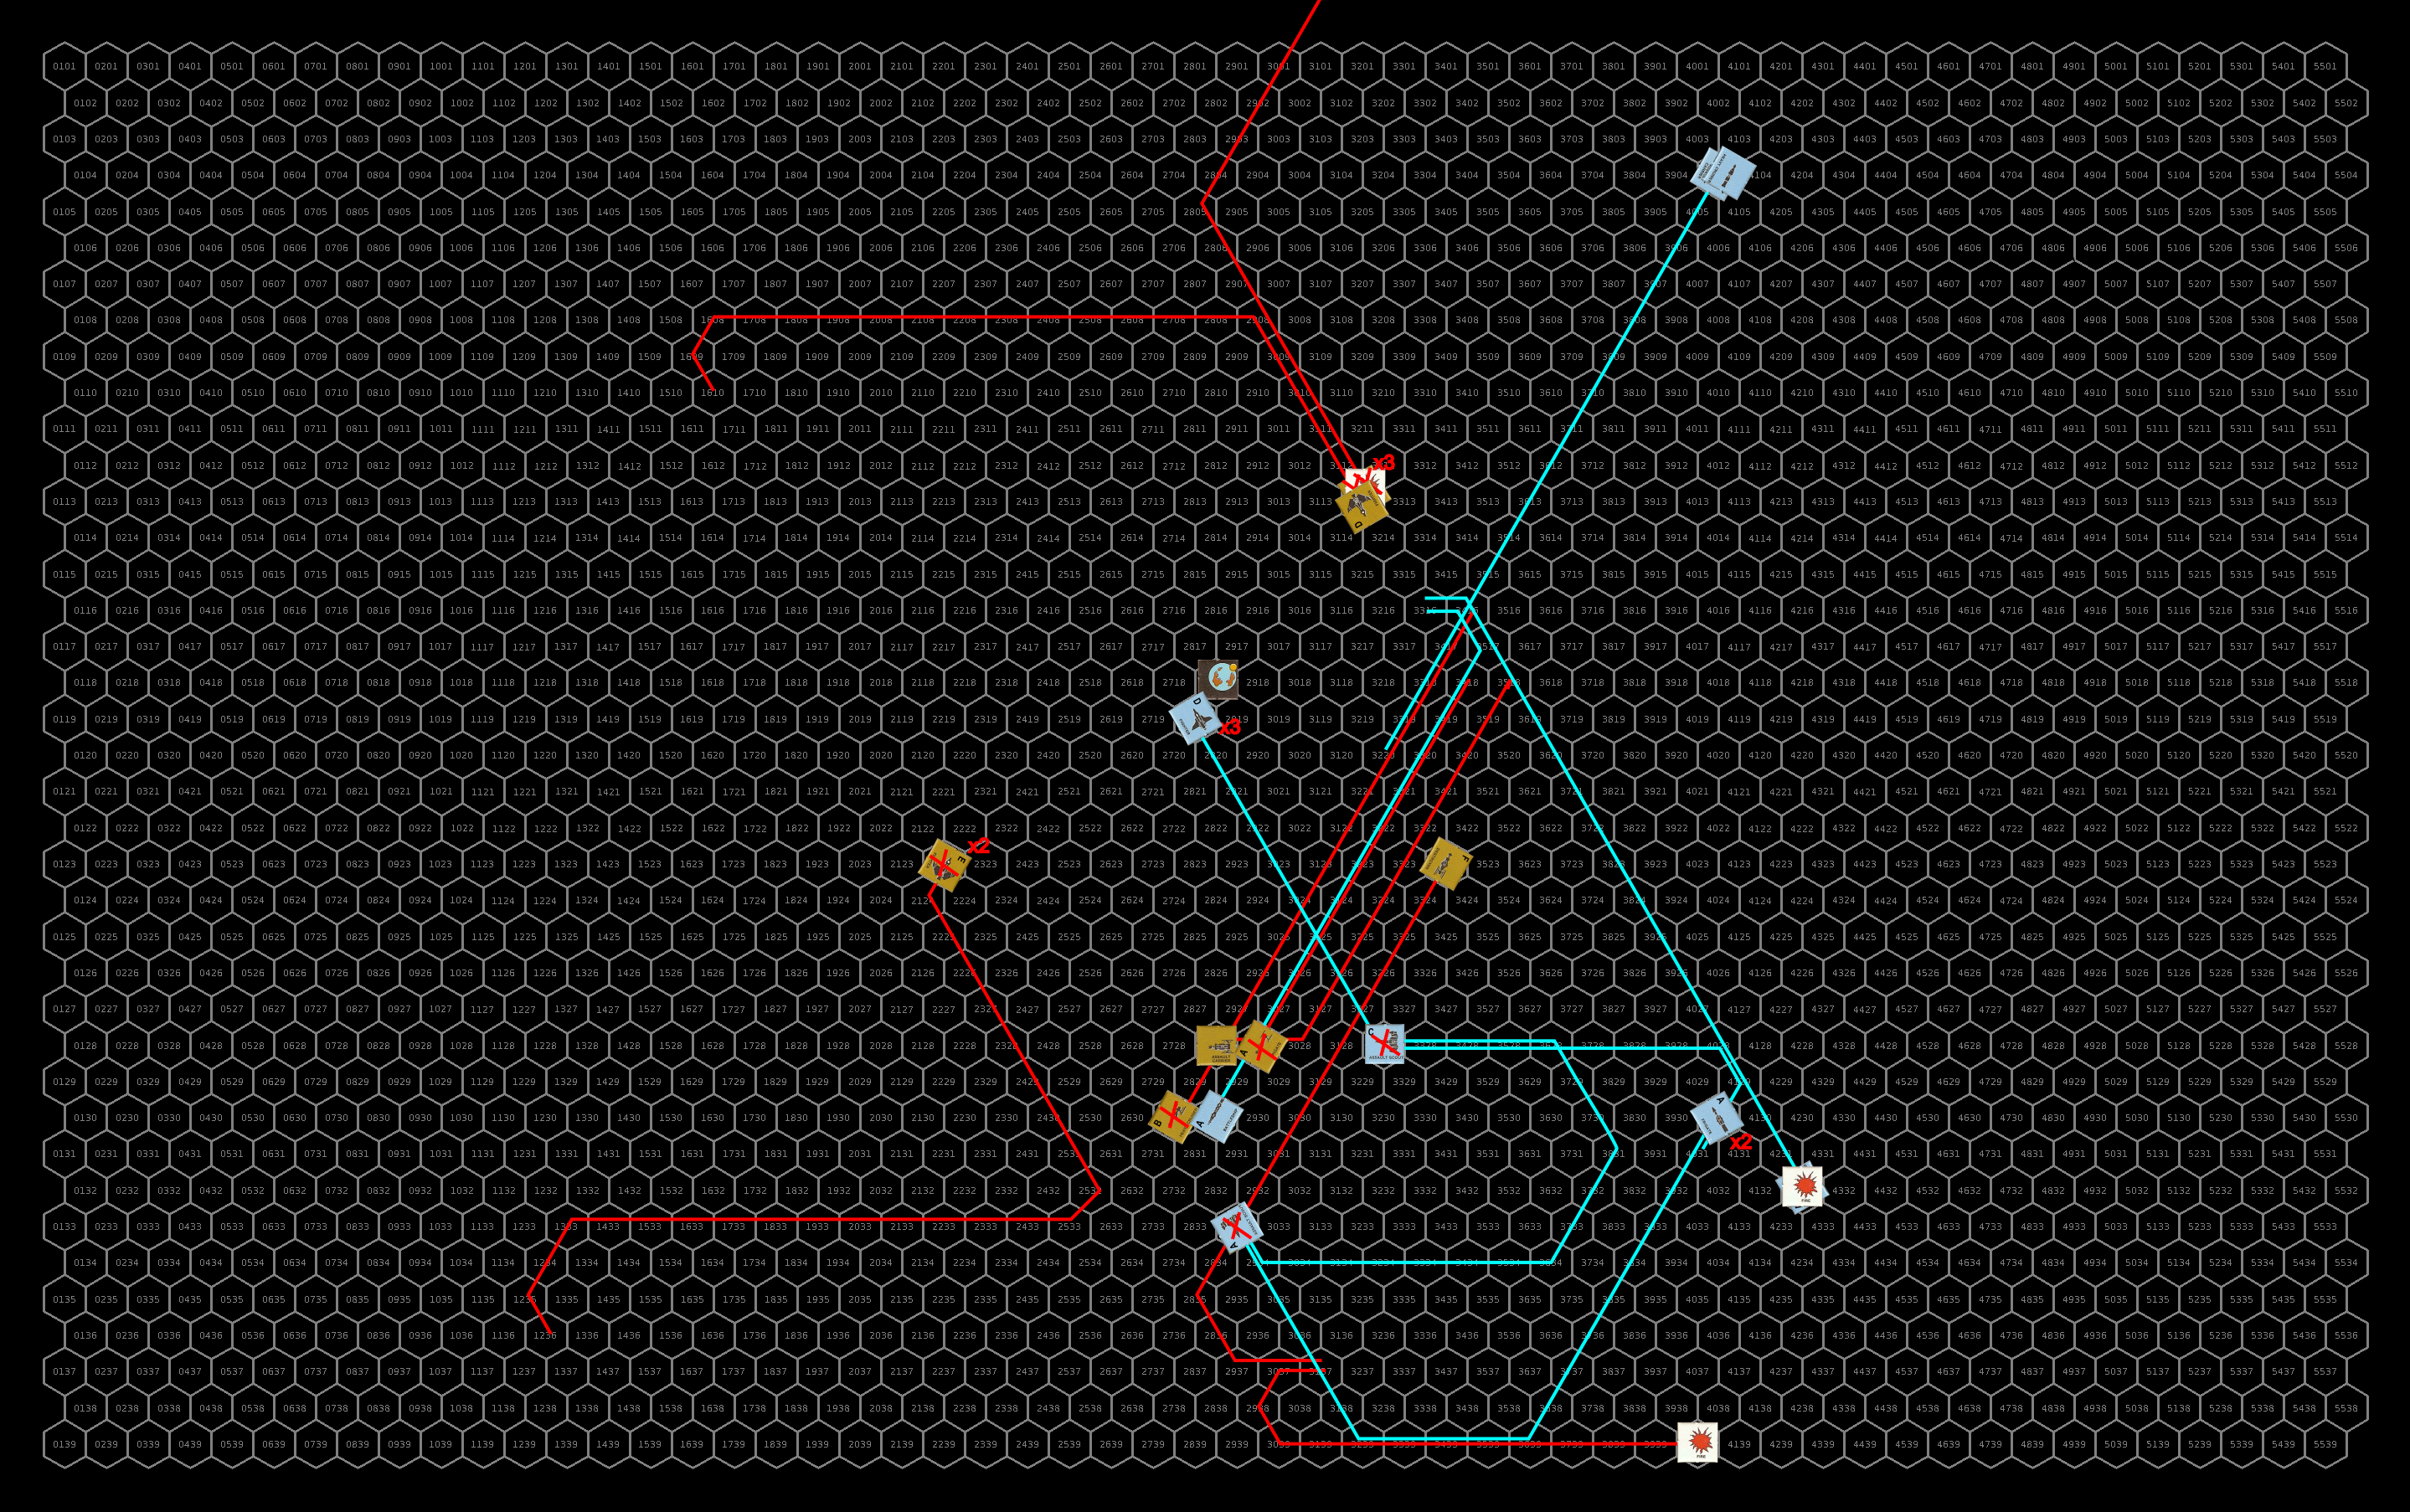
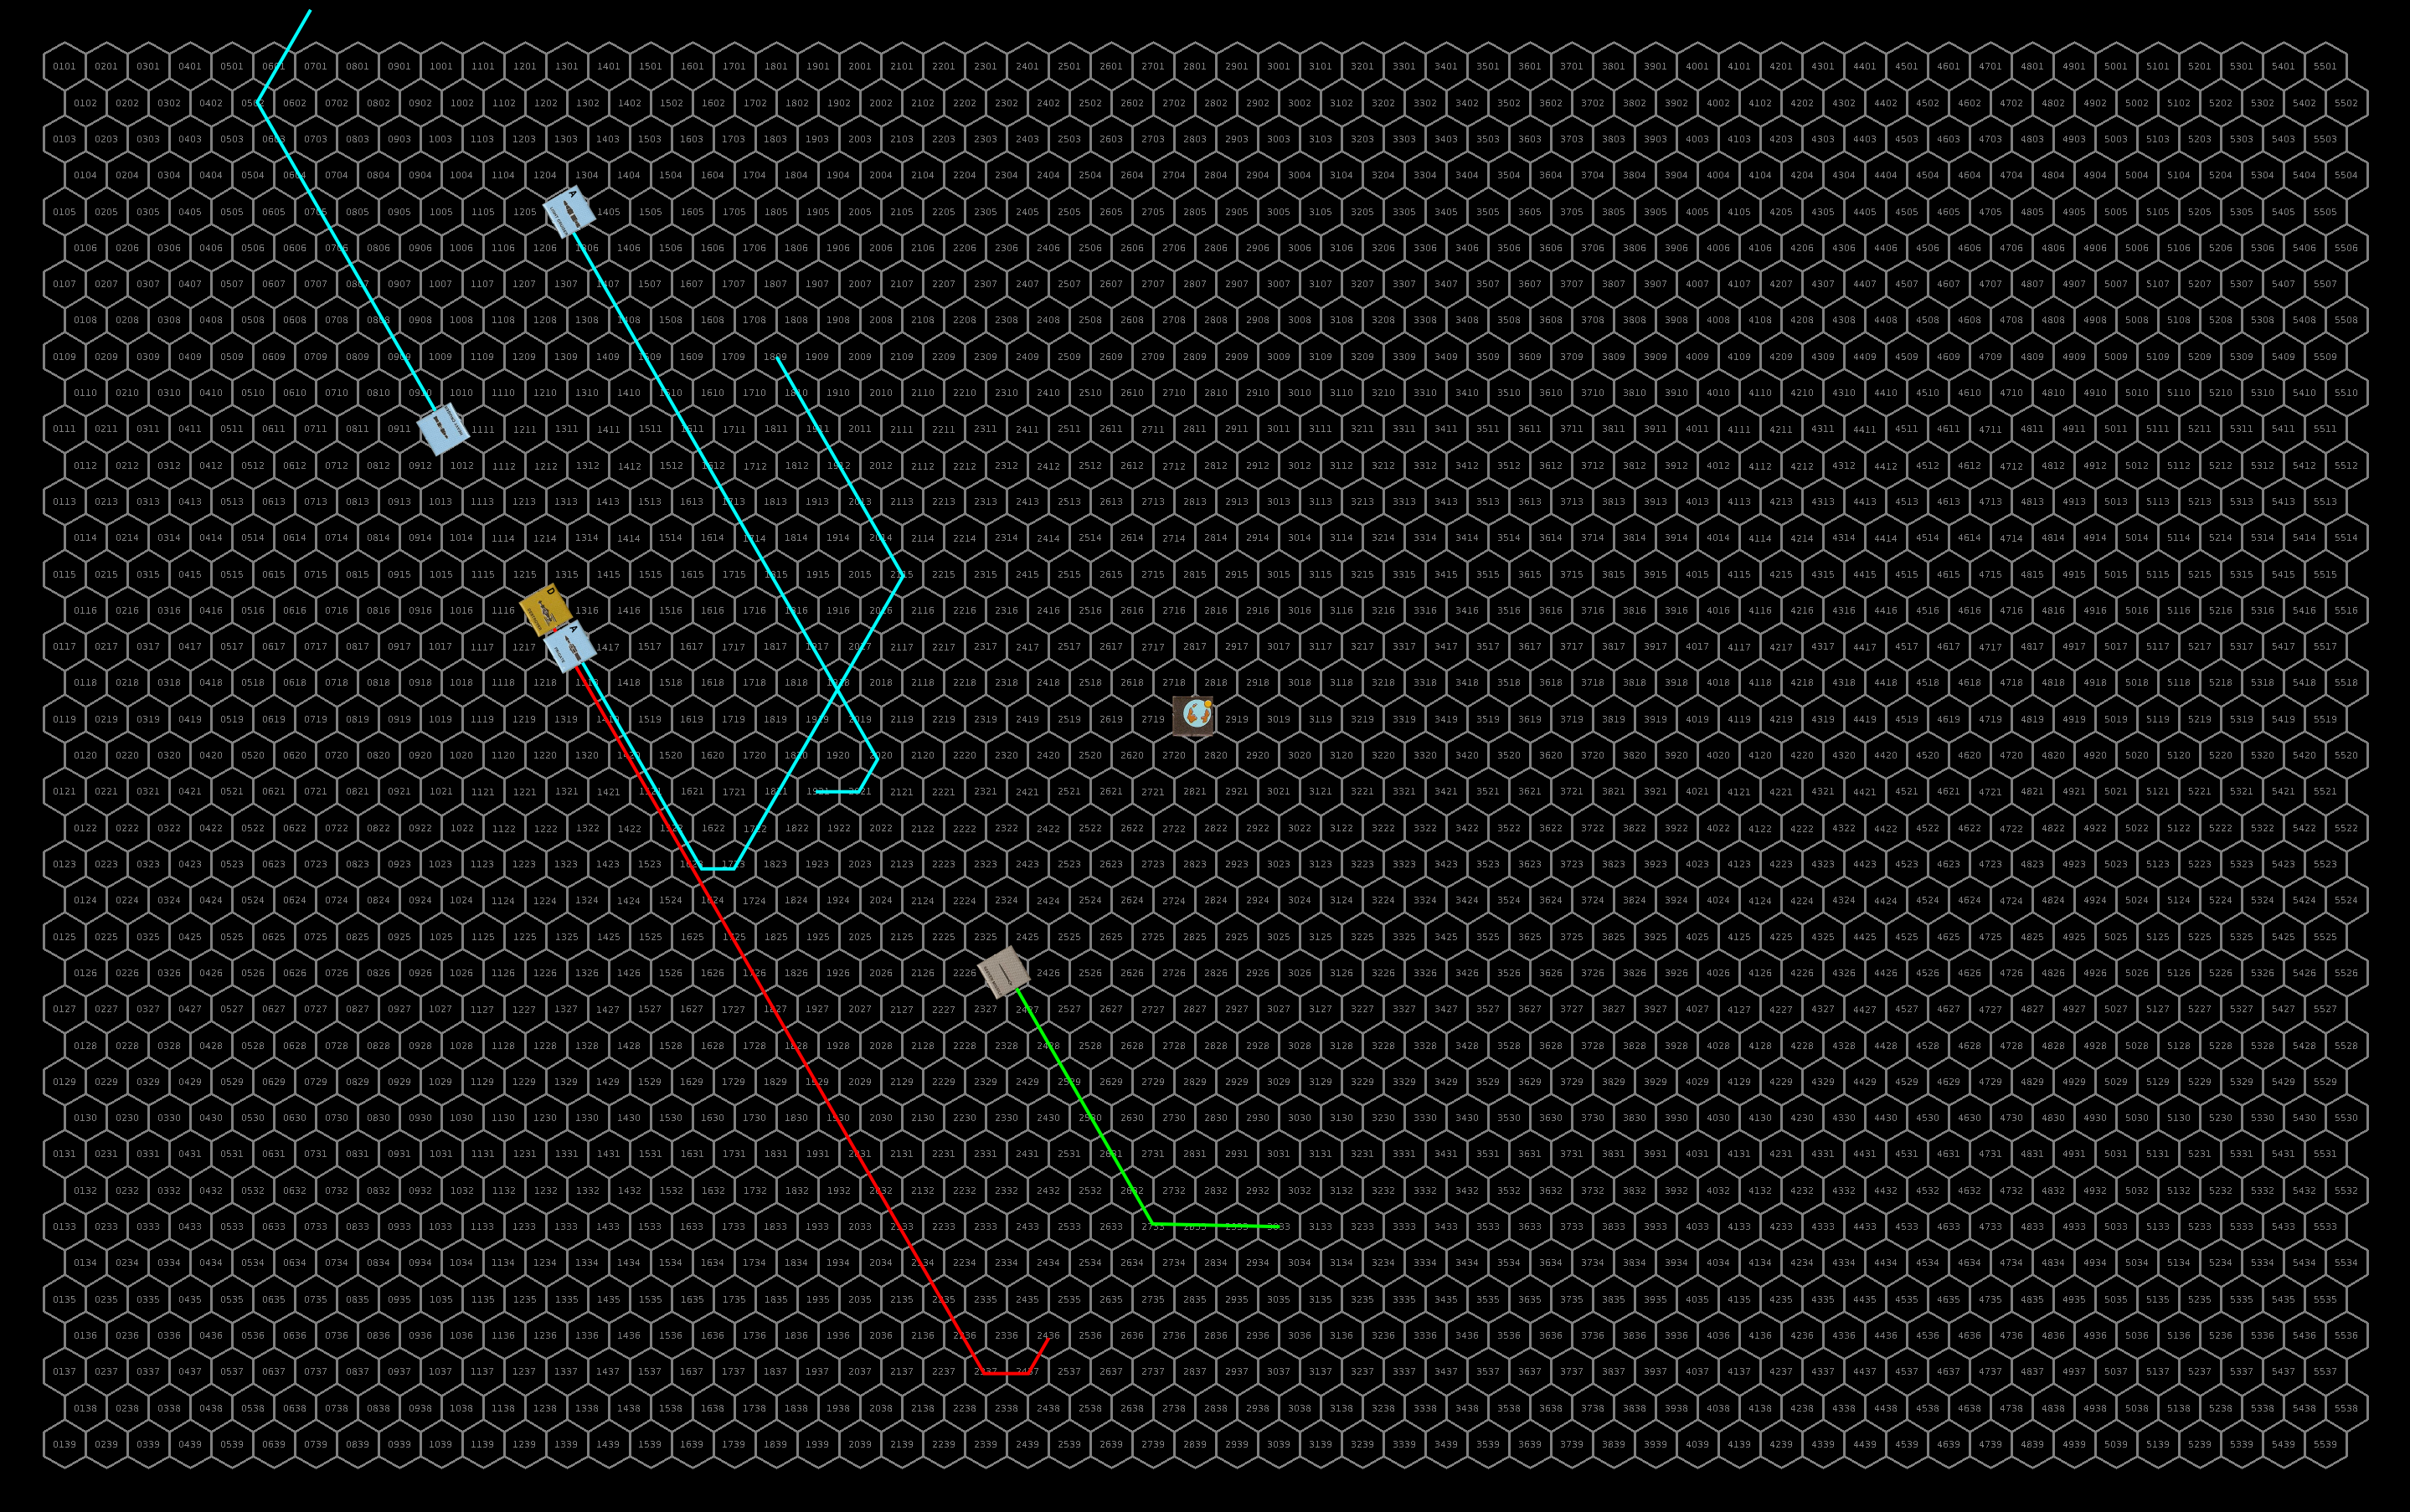
| 61.343 | – Construction of the Spacefleet battleship, Admiral Dooltan, at the Pan Galactic starship construction center orbiting Gran Quivera (Prenglar) complete. With the new sathar offensive, Spacefleet starts construction of a light cruiser, frigate, and assault scout. – 2 assault scouts of the Theseus militia detect the sathar frigate of EG-1 and immediately begin boosting to intercept the ship. An alert goes out and the other ships of the militia boost to intercept as well although they will be two days behind. – Suspecting FS33 to be the origin of the sathar fleets jumping into the K’sta-Kar system, the K’aken-Kar militia assault scout starts working on calculations to chart a jump route to that system. |
| 61.344 | – Construction of the Spacefleet battleship, the Admiral R’kazk’tar, at the Cassidine Development Corporation starship construction center orbiting Triad (Cassidine) completed. The crew takes command of the ship and begins a short shakedown cruise in the system as they await the arrival of the fighter pilots and SG Alpha. – With the completion of the Admiral R’kazk’tar, Spacefleet uses the space in the shipyard to begin construction of two destroyers and two assault scouts. – With plans to send the Admiral R’kazk’tar to Truane’s Star, the Admiral Dooltan is ordered to the Fromeltar system and then on to Kisk-Kar to take command of Task Force Meteor if the patrol group survives the coming attack. – Detecting the incoming militia assault scouts, sathar EG-1 change their deceleration profile to try to avoid the ships while they change direction for the return jump to Padda. – Realizing that they have an opportunity to exploit the new jump route provided by Obar Enterprises, Spacefleet HQ orders Strike Force Nova and supporting militia ships to fall back to the Truane’s Star system and expect reinforcements. |
| 61.345 | – The HSS History’s Hope successfully jumps back into the YS07 system. They begin working on engine overhauls and calculations for a jump to return to YS08. – SG Alpha jumps into the Dramune system and begins calculations for a jump to the Cassidine system. – SBF-E2, detecting the departure of SF Nova, vector to follow them to the Truane’s Star system. |
| 61.346 | – Unable to avoid intercept by the 2 Theseus assault scouts, the sathar frigate turns to engage them. They transmit all their jump data back to SBF-J2 before engaging. – Battle of Theseus – In a short, 20-minute battle, the sathar frigate managed to damage one of the assault scouts before being destroyed by a single volley of assault rockets and laser batteries from the 2 militia ships. The damaged assault scout heads to Minotaur for repairs. – Calculations complete, the K’aken-Kar assault scout begins accelerating for a jump to FS33. – Three more fighters for the Frontier Fighter Corp are completed in Theseus. Construction begins on 3 more. |
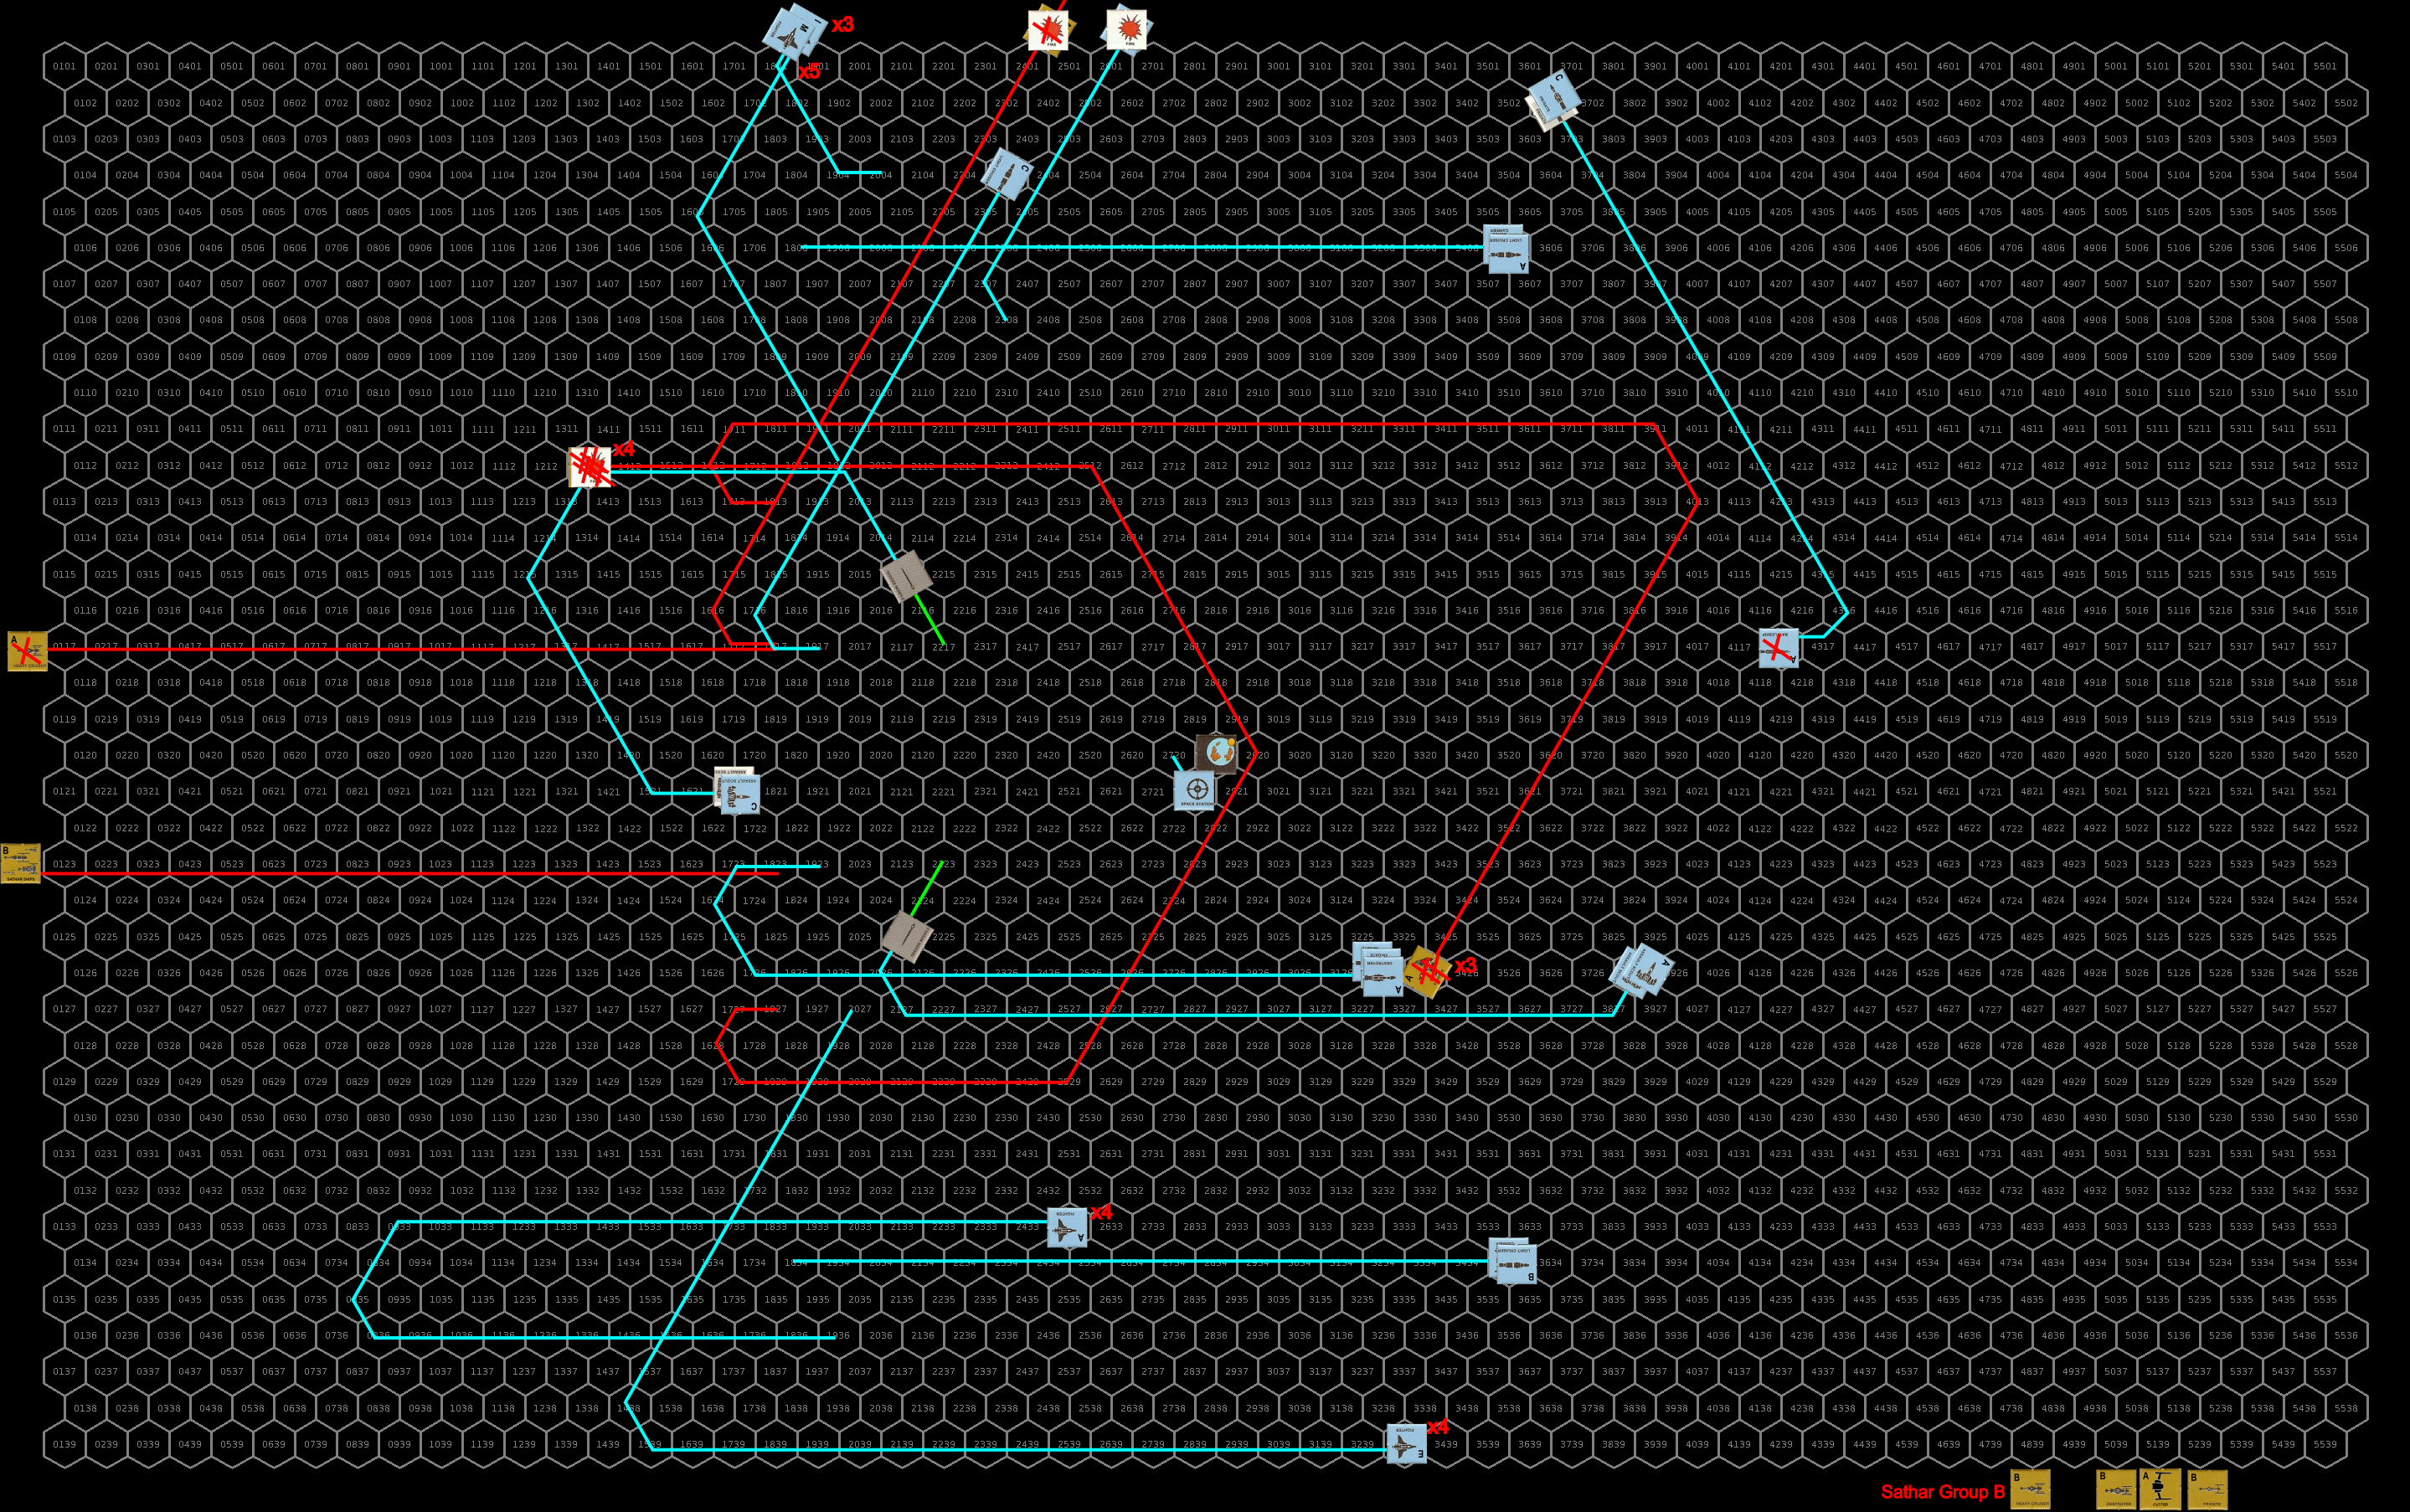
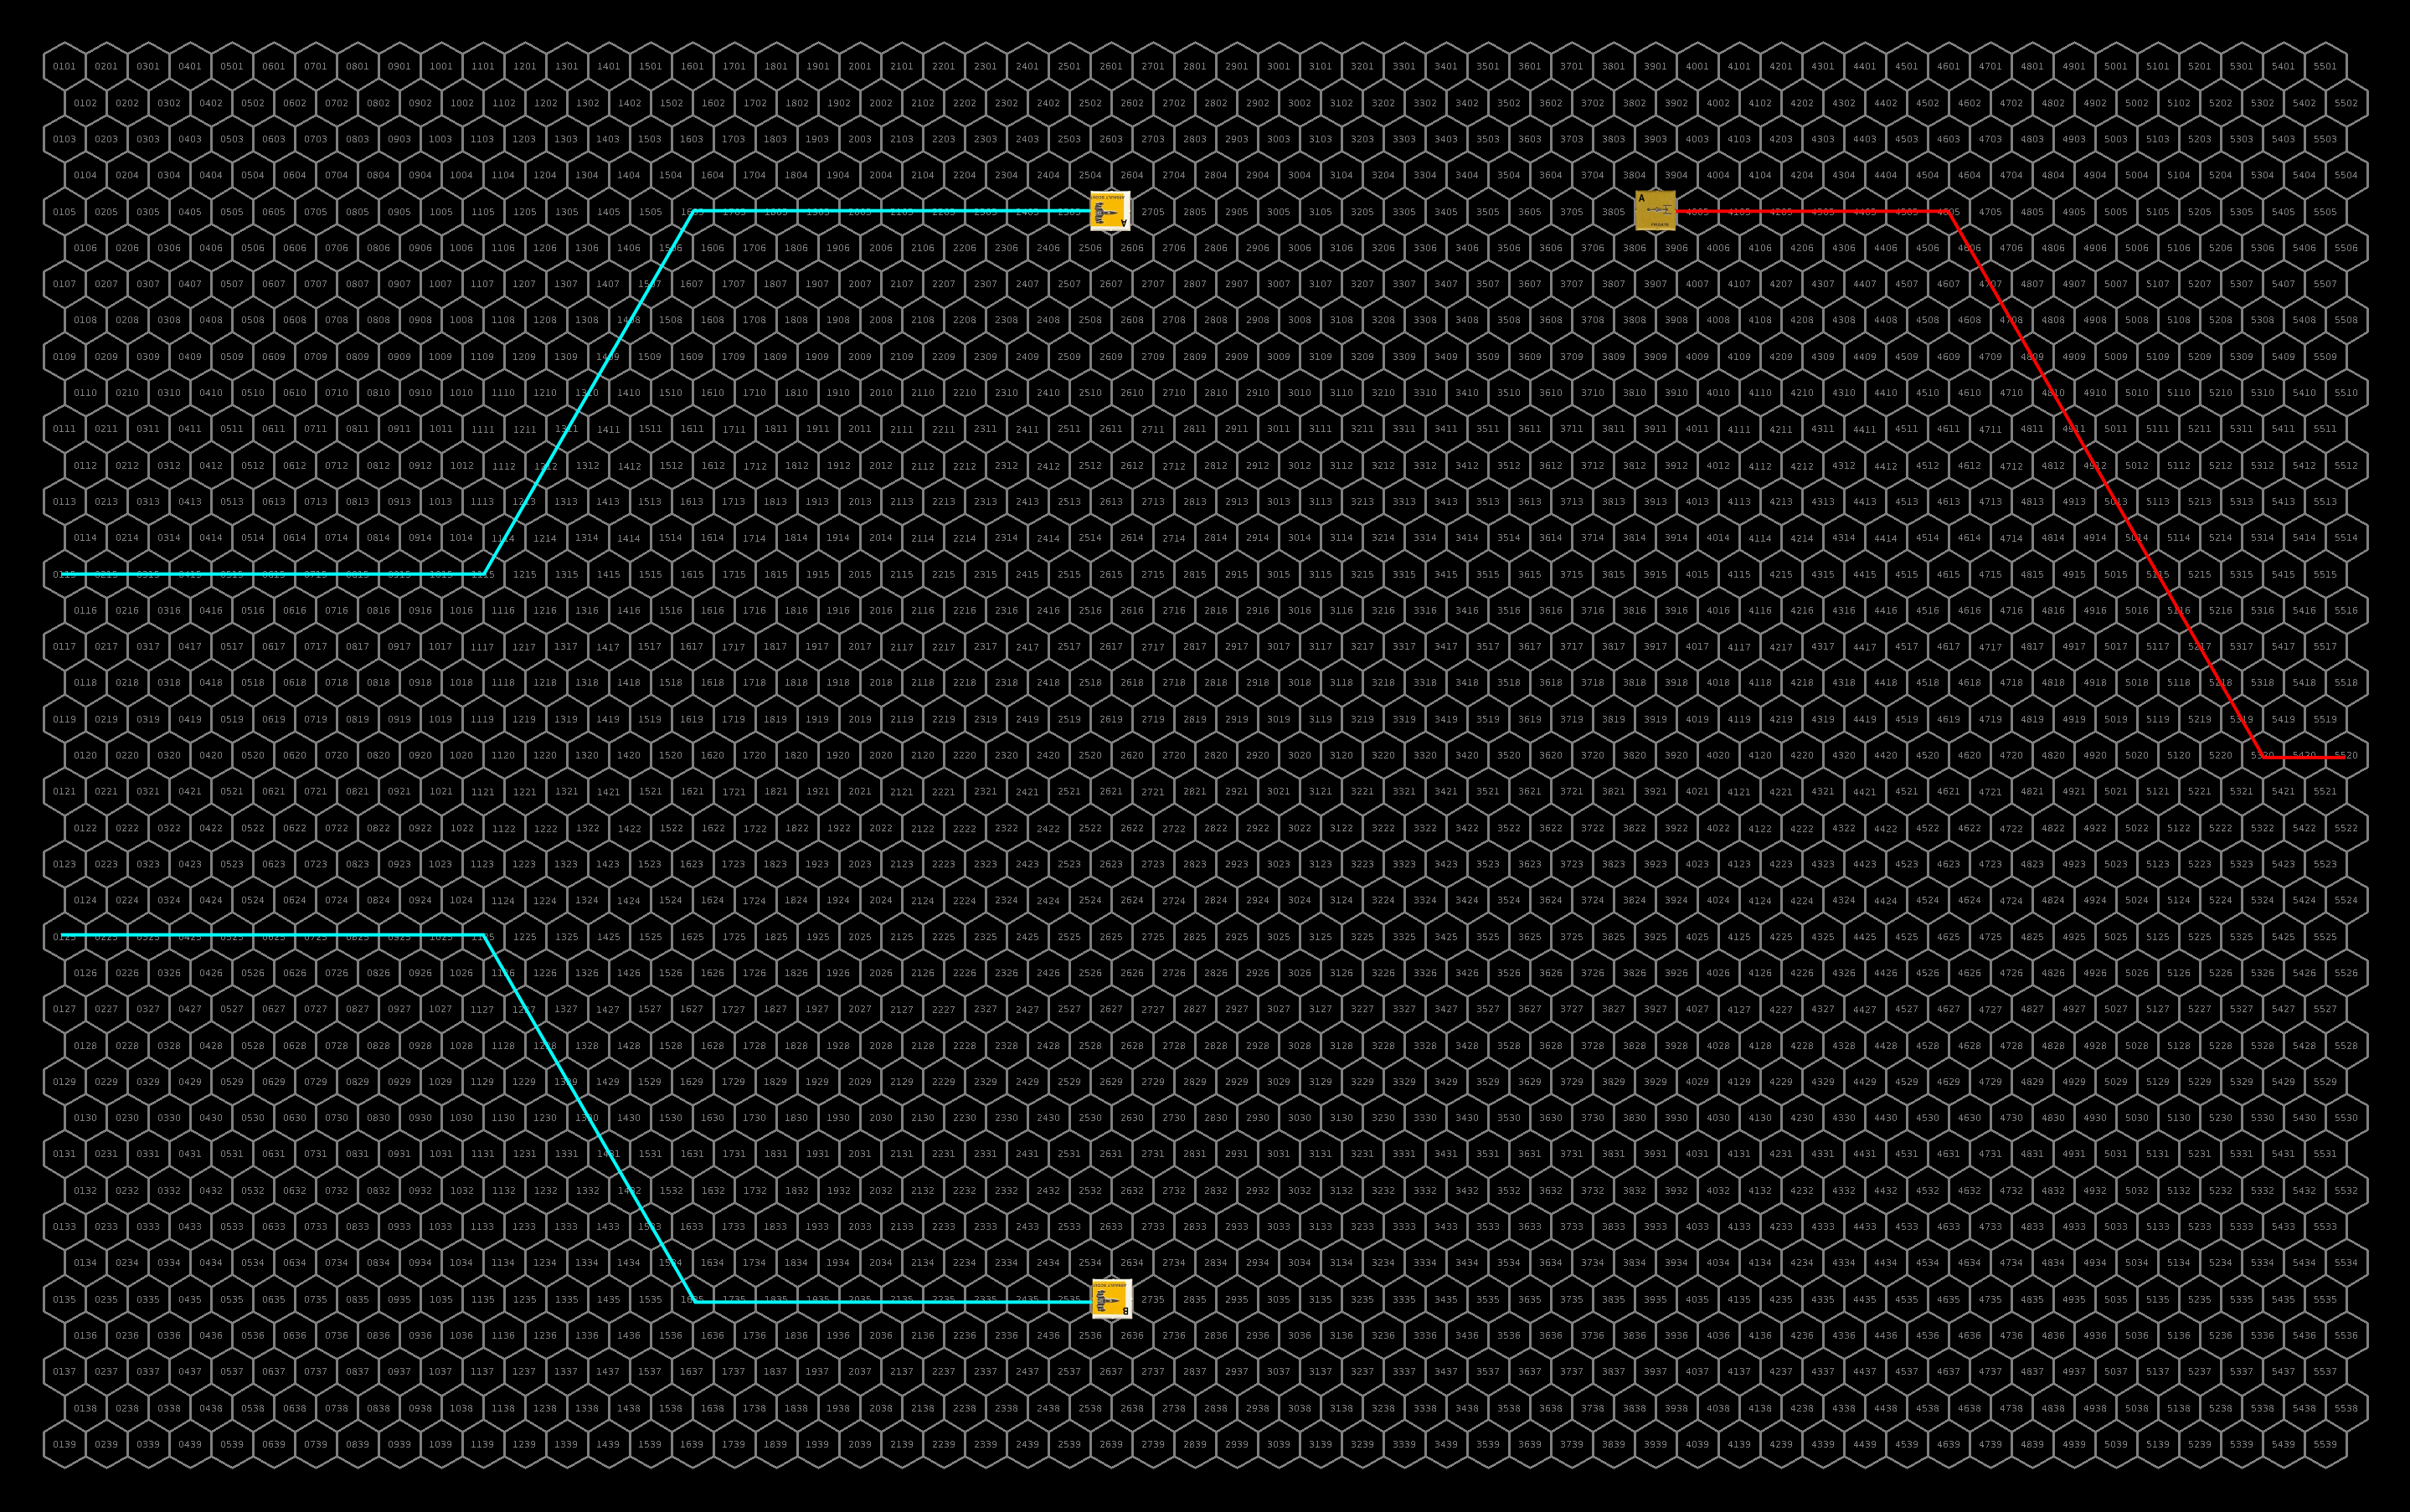
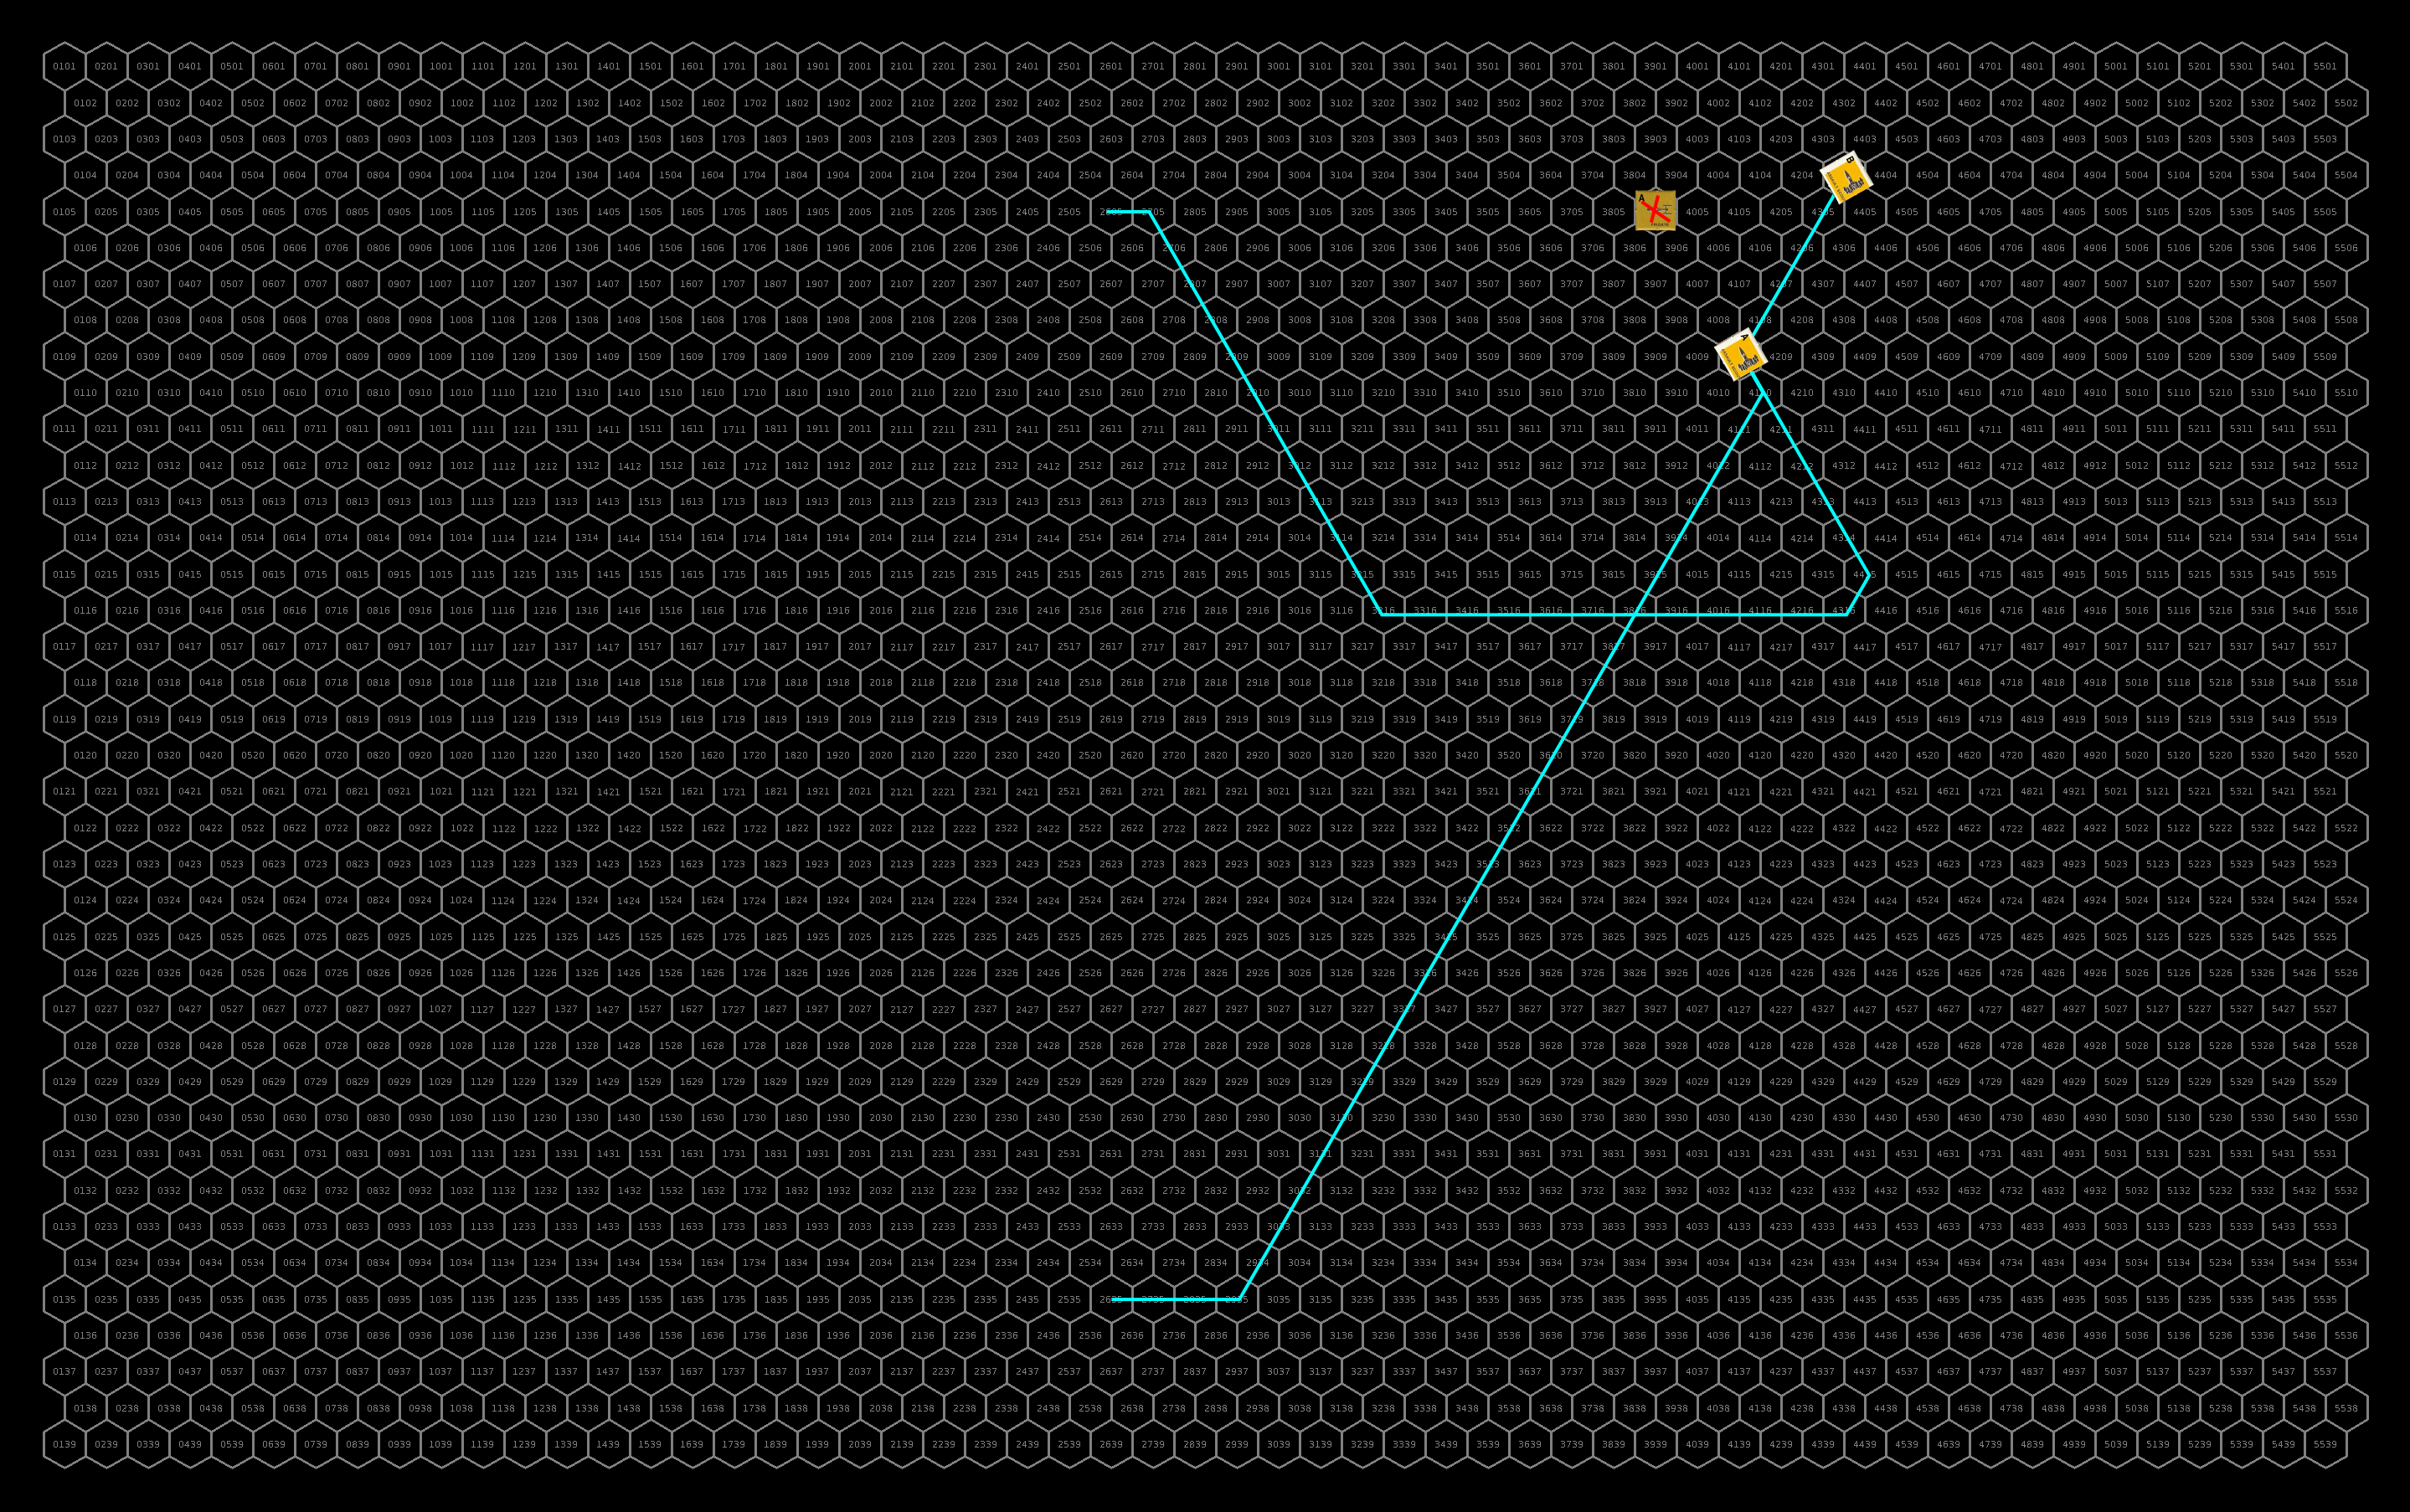
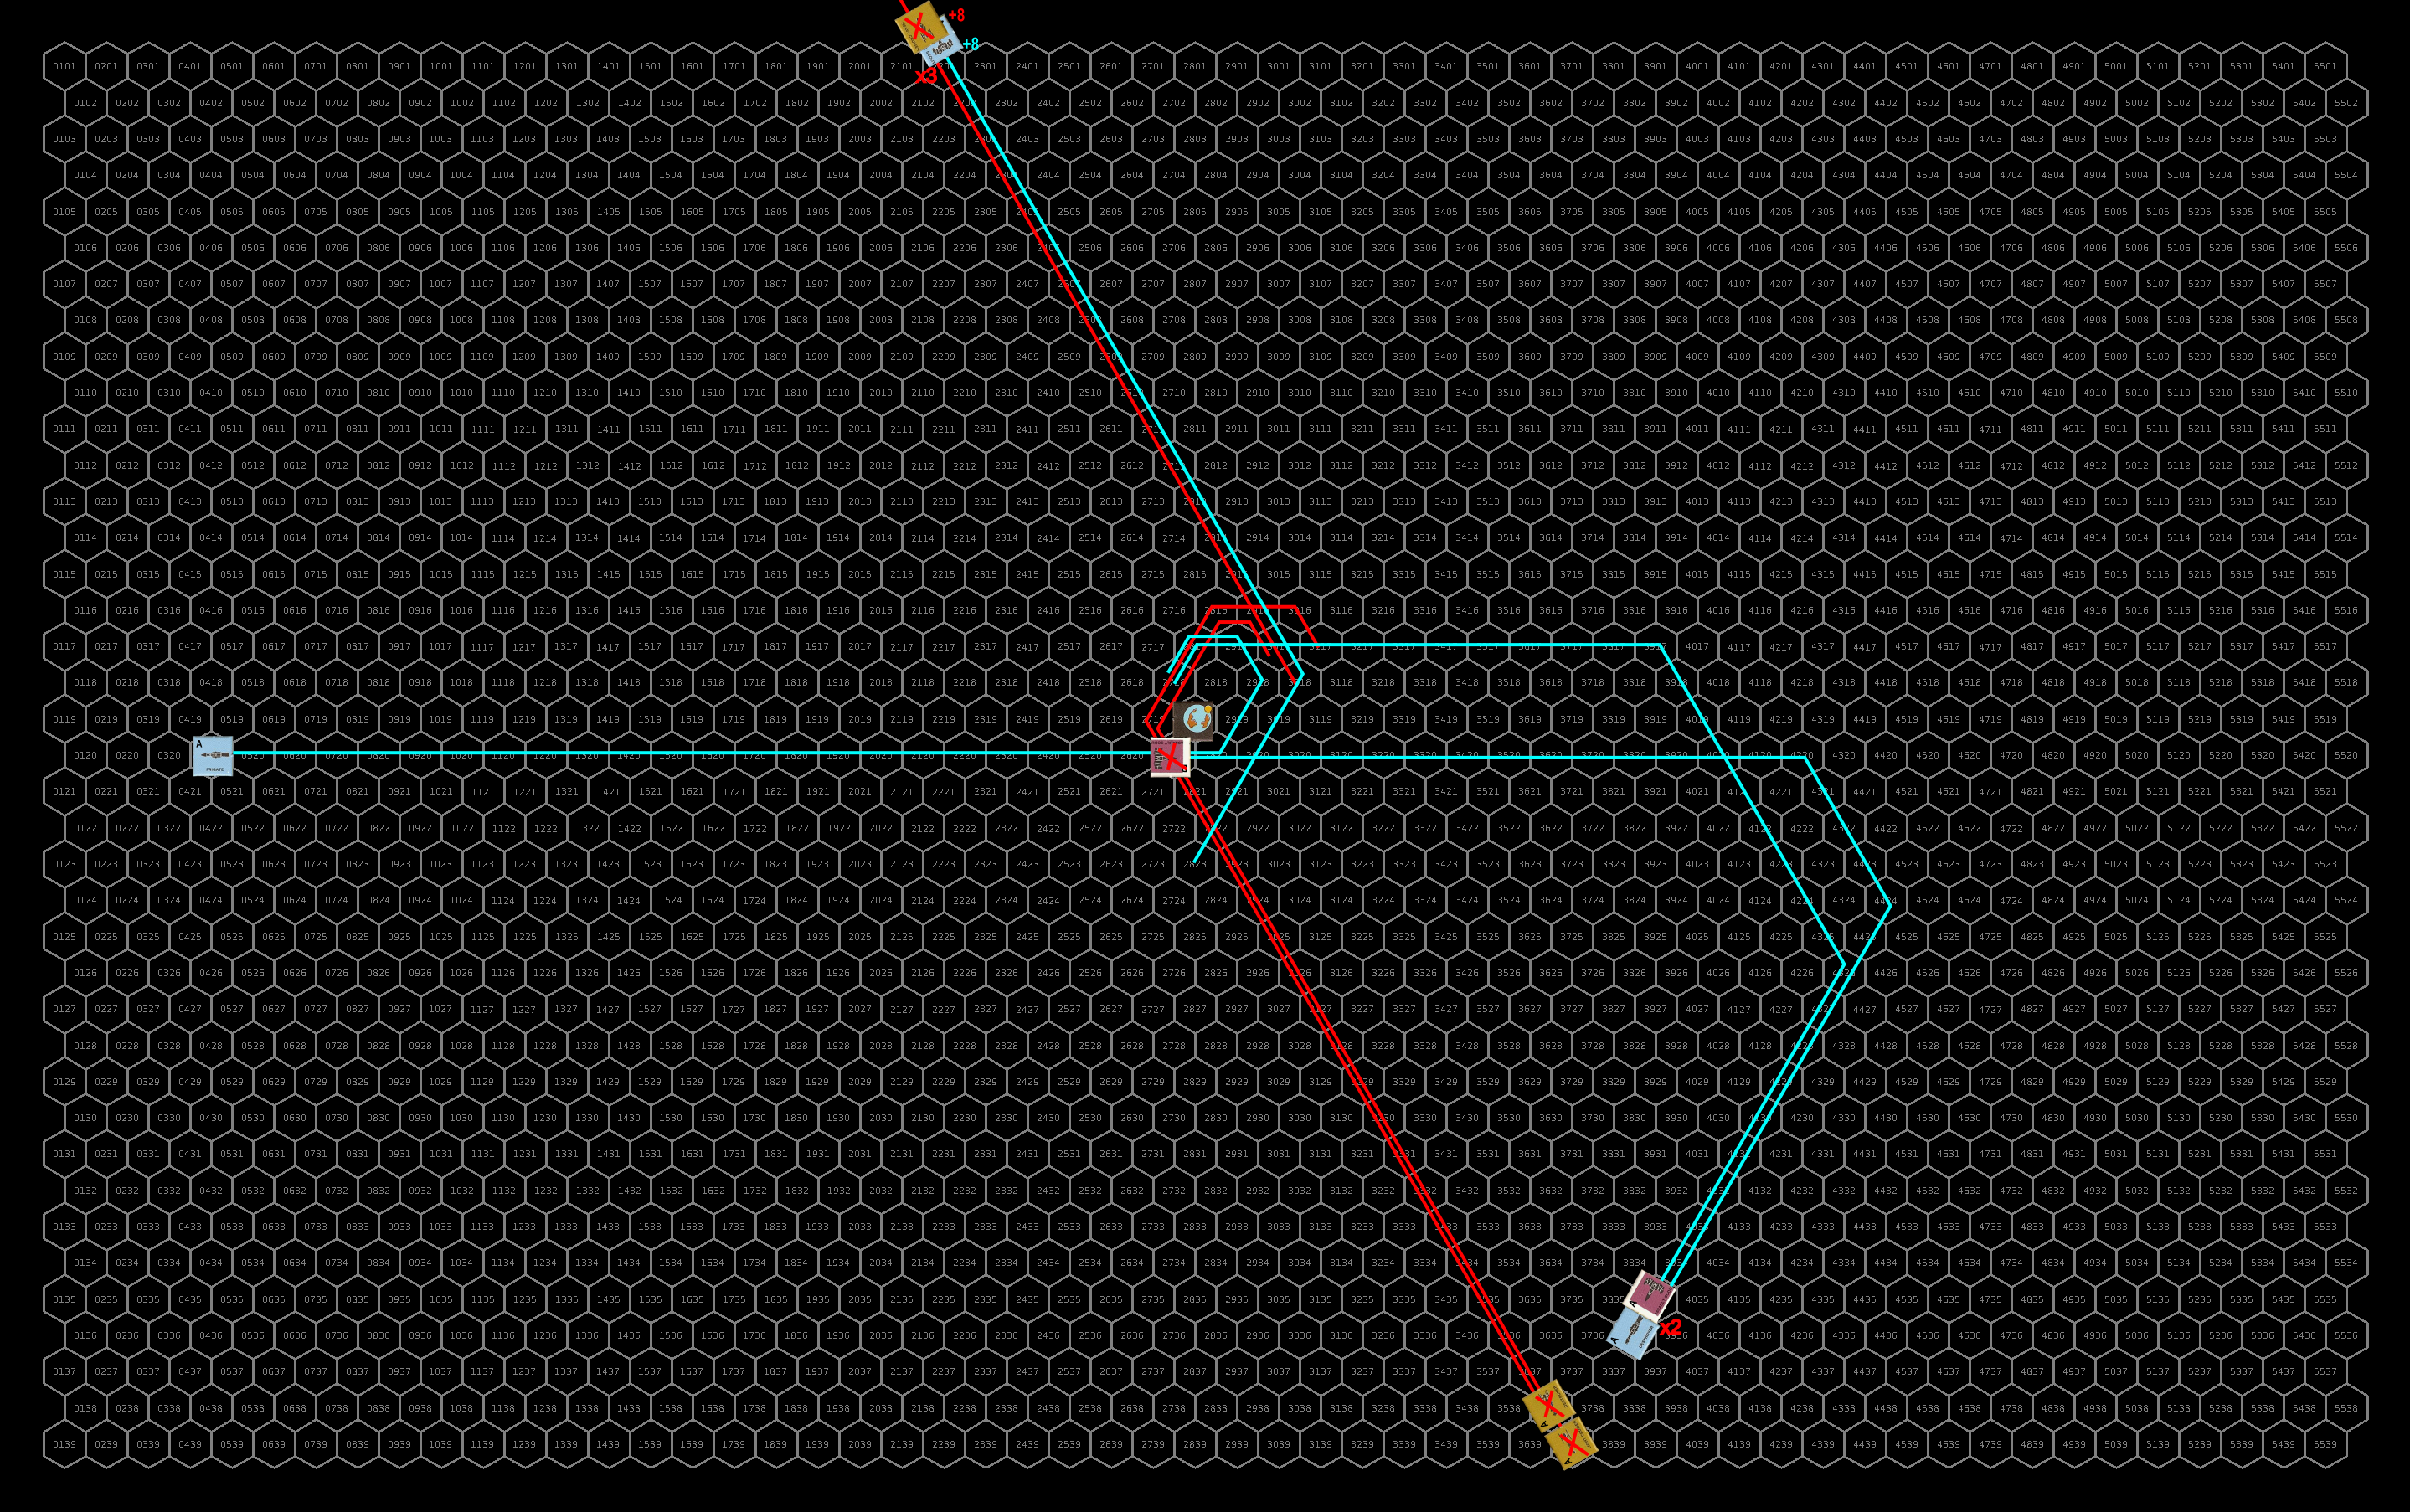
| 61.347 | – Second Battle of Kwadl-Kit – Though outgunned by the sathar, Task Force Cassidine put up an amazing defense and over the course of 1.5 hours completely destroys the sathar fleet. While almost no ship goes unscathed, they only lose 3 fighters and 3 assault scouts. – SG Alpha jumps into the Cassidine system and begins vectoring for a jump to the Truane’s Star system using coordinates provided by battleship Admiral R’kazk’tar. – After a detailed assessment of the strength of SFB-J1, PG Meteor and Spacefleet command decided that they cannot hold the Kizk-Kar system and the jump capable ships start accelerating for a jump to the Fromeltar system. The fighters go into hiding on the planet’s surface. – Seeing PG Meteor departing, the sathar forces vector to intercept but the acceleration of the UPF ships is such that only the smaller sathar vessels could intercept which would give the advantage to Spacefleet. After a few hours of pursuit, they reverse course and settle into orbit once again around Zit-Kit. |
| 61.348 | – Sathar SCC#1 (OFS203) completes construction of a light cruiser. – Arriving back at Minotaur (Theseus), the damaged militia assault scout is immediately put into the shipyard. A HS:7 ship under construction is moved out to make room. – 5 fighters are completed at the CDC shipyards (Triad, Cassidine). Work begins on five more. These fighters are put in storage until crews can be obtained for them. |
| 61.349 | – SF Nova and its supporting militia ships jump into the Truane’s Star system and begin decelerating toward Pale. – The group of 10 FFC pilots arrive at Triad (Cassidine) and take command of their fighters. They immediately take on extra life support and begin a high-g boost, together with the battleship Admiral R’kazk’tar, to join SG Alpha. – After a day rearming, Task Force Cassidine begins acceleration for a jump to the K’aken-Kar system and then on to Kizk-Kar to engage the sathar forces there. – The Theseus militia assault scout completes its repairs and the HS:7 ship is moved back in to resume work. – The battleship Admiral Dooltan jumps into the Cassidine system, it remains at high speed to transit to Dramune. |
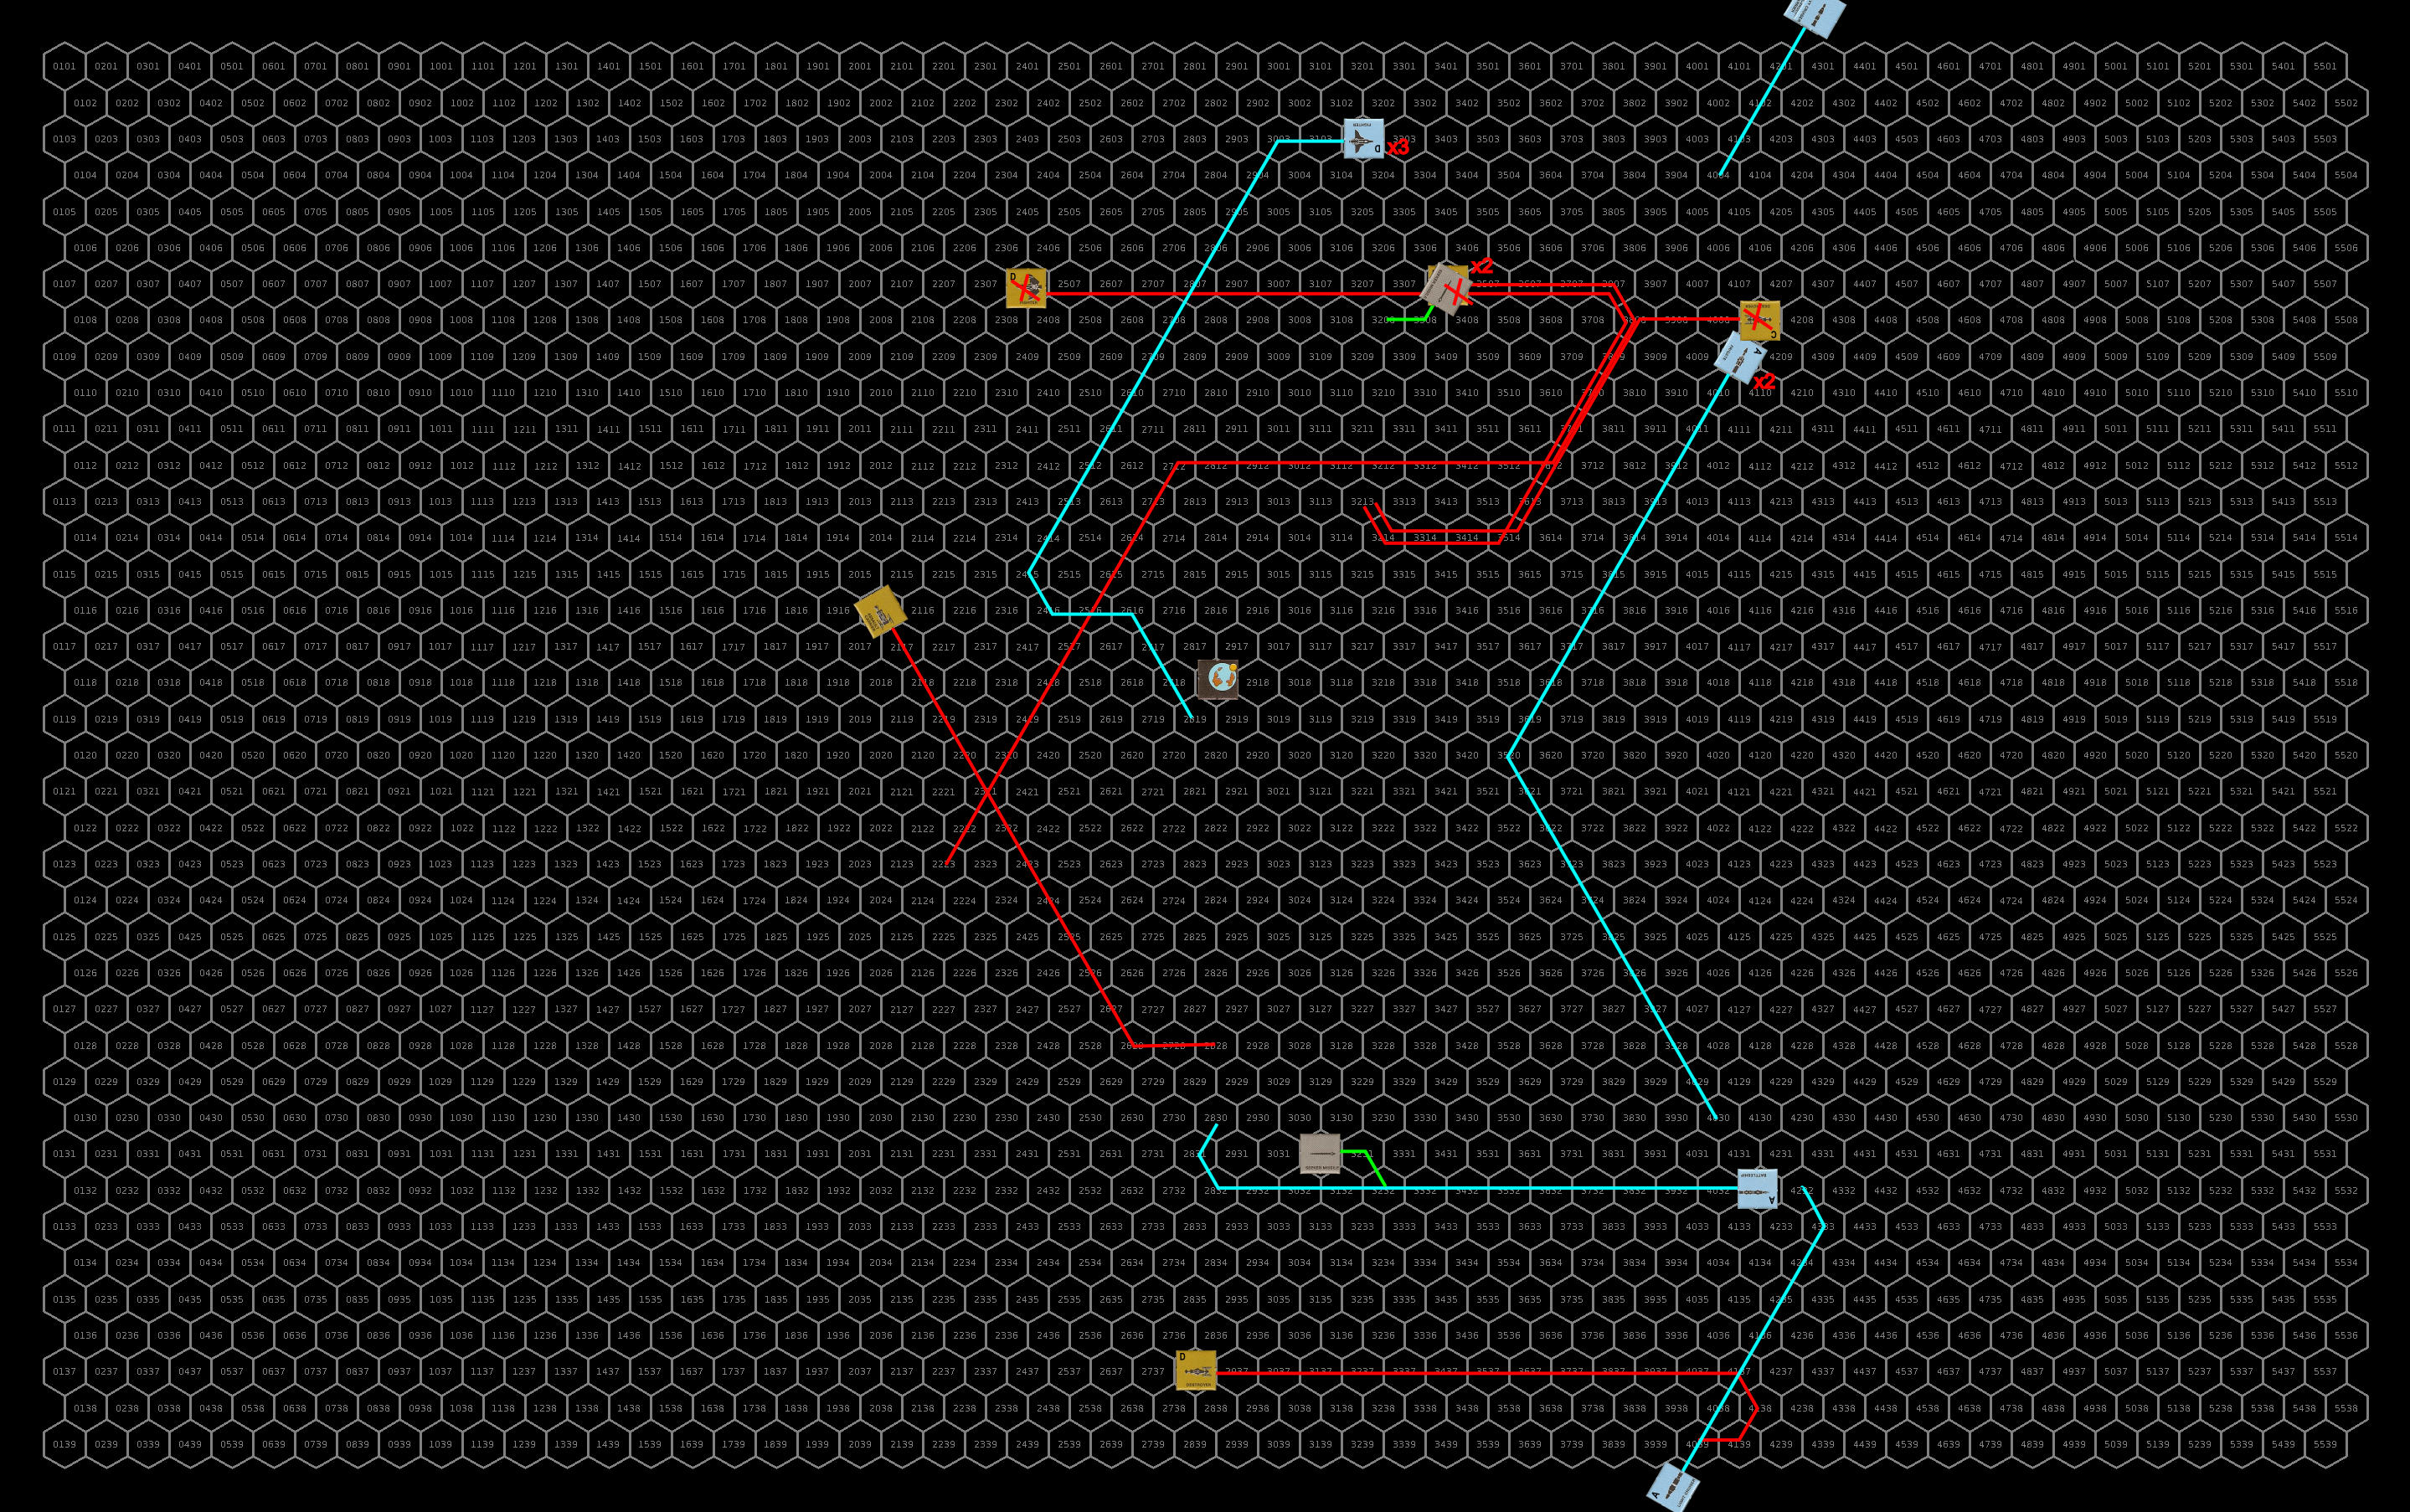
| 61.350 | – Joining up with SG Alpha, the fighters are quickly taken aboard the carrier and stowed for jump. The battleship, assault carrier, and fighters are designated Task Force Relief and prepare for level 2 risk jump to the Truane’s Star system. – SBF-E2 jumps into the Truane’s Star system and begins decelerating toward New Pale. SF Nova and the local militia begin maneuvering to intercept. – SBF-J1 departs orbit around Zit-Kit (Kisk-Kar) and begins accelerating for a jump to the K’aken-Kar system to intercept TF Cassidine. – Detecting the departure of SBF-J1, PG Meteor puts its jump on hold and drifts in the outer system to observe. – The UPF minelayer, currently in the Fromeltar system, begins accelerating for a jump to the Kisk-Kar system. It will join up with the Admiral Dooltan as it transits the Fromeltar system before making the jump. |
| 61.351 | – TF Relief jumps into the Truane’s Star system and begins a hard deceleration toward New Pale. – The K’aken-Kar militia assault scout misjumps and instead of reaching FS33 ends up in an unknown star system (OFS169). They begin working on determining their location. – With a HS:12 ship completing maintenance in the CDC (Triad, Cassidine) shipyards, Spacefleet starts work on 3 new assault scouts to replace those lost by Task Force Cassidine. The remaining space is used for civilian ship maintenance. – The battleship Admiral Dooltan jumps into the Fromeltar system. It begins vectoring and performing jump calculations to take it to Kisk-Kar. |
| 61.352 | – The HSS History’s Hope makes the return jump to YS08 and begin decelerating toward the inner system as they once again overhaul engines and try to plot the route back to YS07. – Seeing that SBF-J1 seems to be committed to jumping out of the Kisk-Kar system, PG Meteor changes course and starts to decelerate back toward Zit-Kit. – A fighter is completed at the PGC shipyards (Gran Quivera, Prenglar). It is transferred to Gollwin Academy (Morgaine’s World, Prenglar) for use in training the accelerated cadets. – Detecting TF Relief, the sathar reassess their position and despite being out gunned nearly two to one, press on toward New Pale and the UPF forces. |
| 61.353 | – Strike Force Nova and the Truane’s Star militia ships arrive back at the armed station orbiting New Pale (Truane’s Star). Just hours later, they are joined by TF Relief. The incoming sathar ships are only a day away. – The UPF minelayer in the Fromeltar system joins up with the Admiral Dooltan and then continue on their way to the Kisk-Kar system to join with PG Meteor. |
| 61.354 | – Second Battle of New Pale – The UPF destroy or drive off most of SBF-E2 but both battleships, including the newly constructed Admiral R’kazk’tar, are destroyed in the fighting. – The fleeing sathar ships accelerate for a jump back to the Zebulon system. – The UPF destroyer damaged in the Second Battle of New Pale heads to the starship construction center on Pale for repairs. – TF Cassidine jumps into the K’aken-Kar system. Alerted that SBF-J1 is headed their way, they begin decelerating toward the inner system instead of continuing on the Kisk-Kar. – Another UPF fighter is completed at the Terledrom (Fromeltar) shipyard. It is temporarily manned by militia forces until Spacefleet can get fighter pilots to the system. |
| 61.355 | – SBF-J1 jumps into the K’aken-Kar system and begins decelerating to intercept TF Cassidine. – The UPF battleship and minelayer jump into the Kisk-Kar system and start decelerating toward Zit-kit. – The damaged UPF destroyer arrives at the Streel shipyard (Pale, Truane’s Star). A HS:6 ship under construction but nearly complete is temporarily moved out to provide priority access for the Spacefleet vessel. |
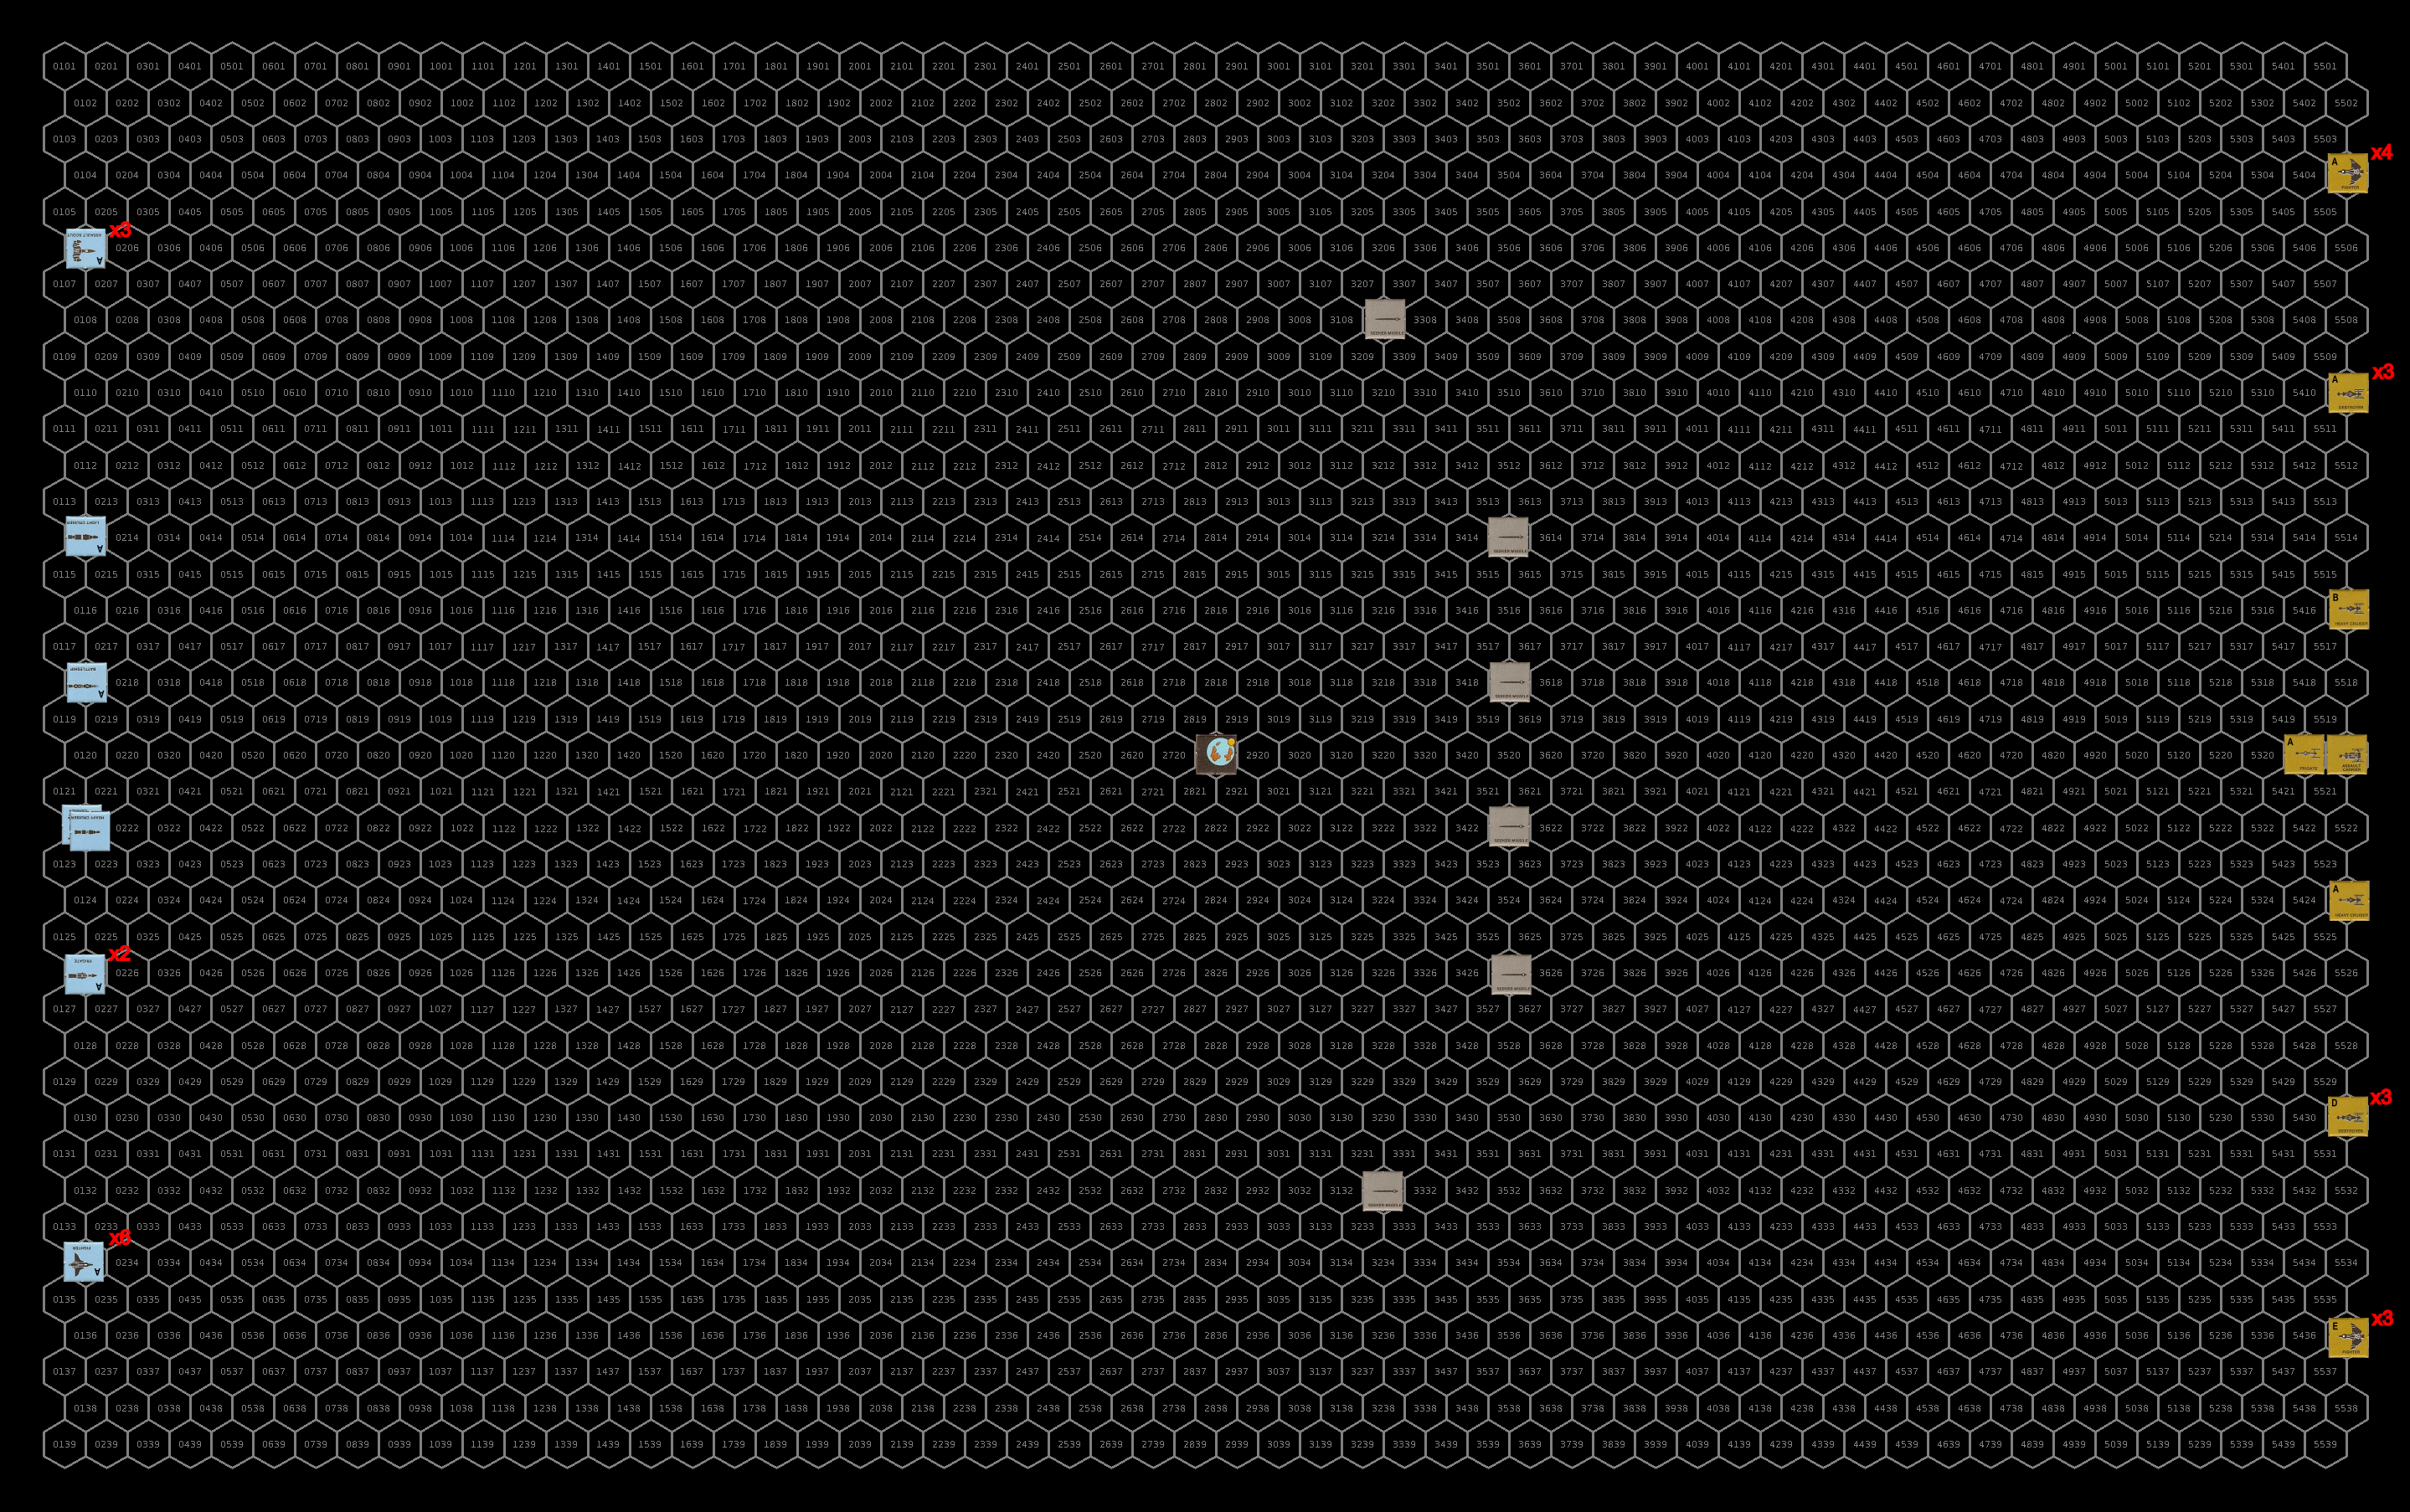
| 61.356 | – PG Meteor arrives back in orbit around Zit-Kit (Kisk-Kar). – A HS:5 ships complete maintenance in the CDC shipyard (Triad, Cassidine). Spacefleet holds the space in anticipation of more ships finishing and beginning construction on a new battleship. |
Full timeline file: